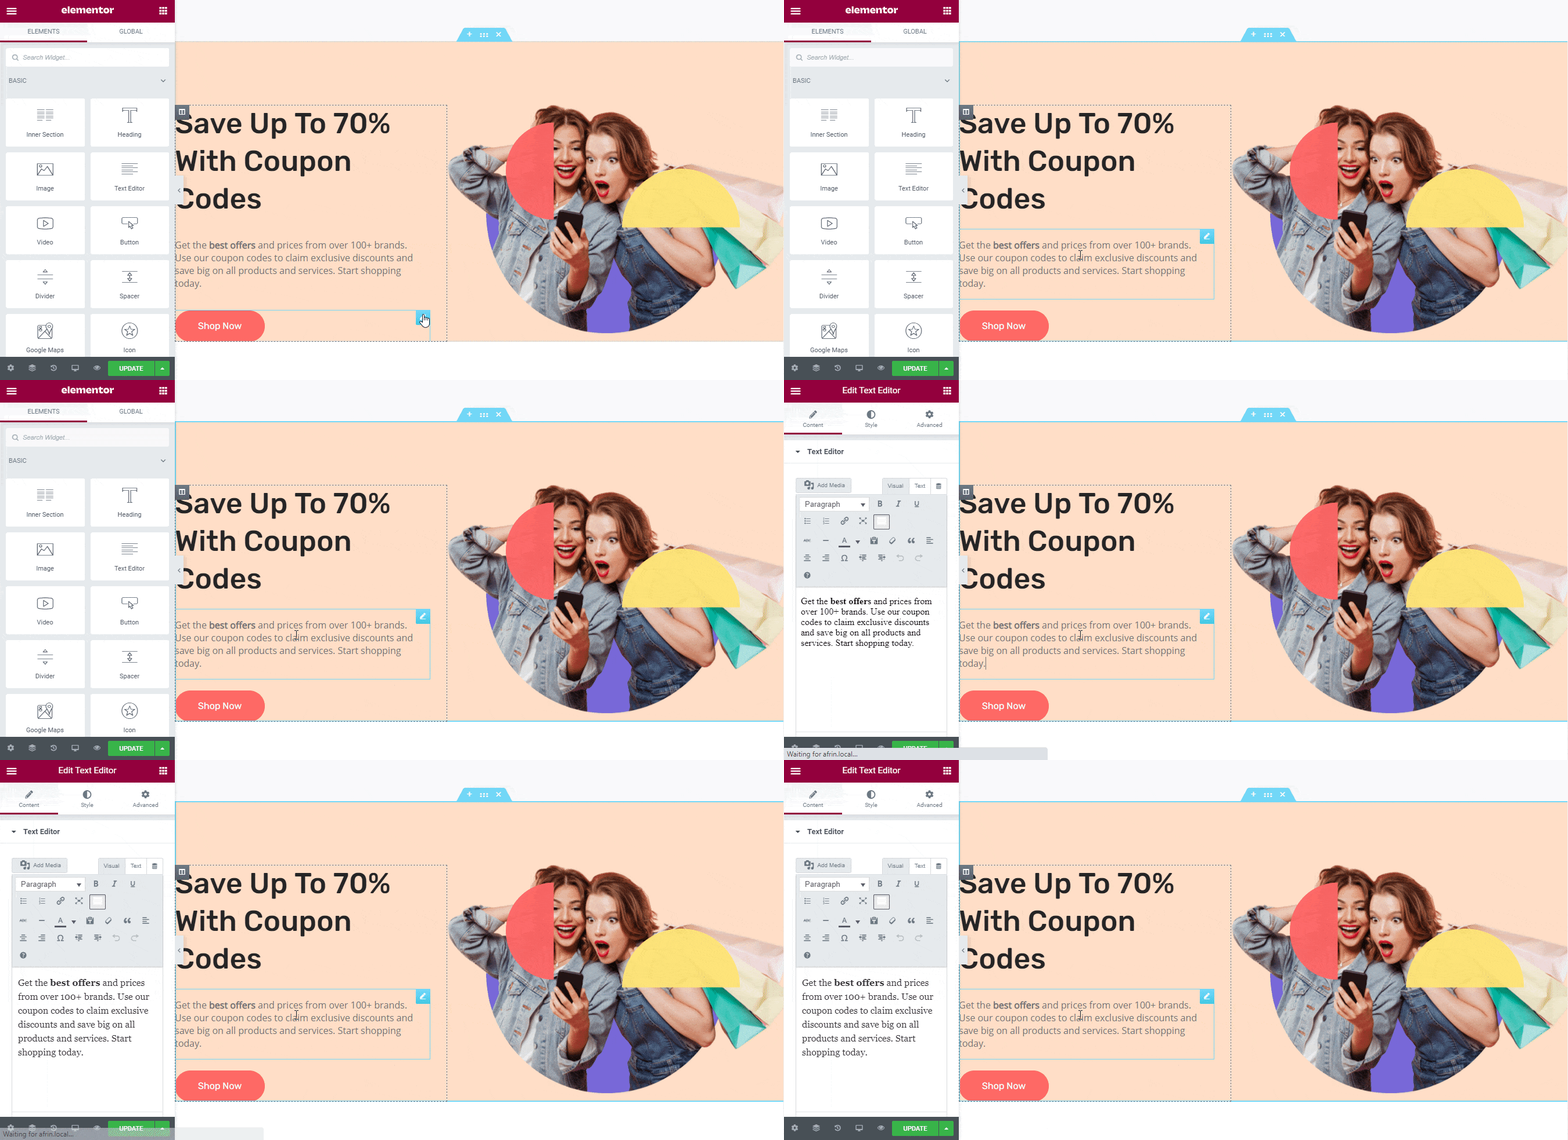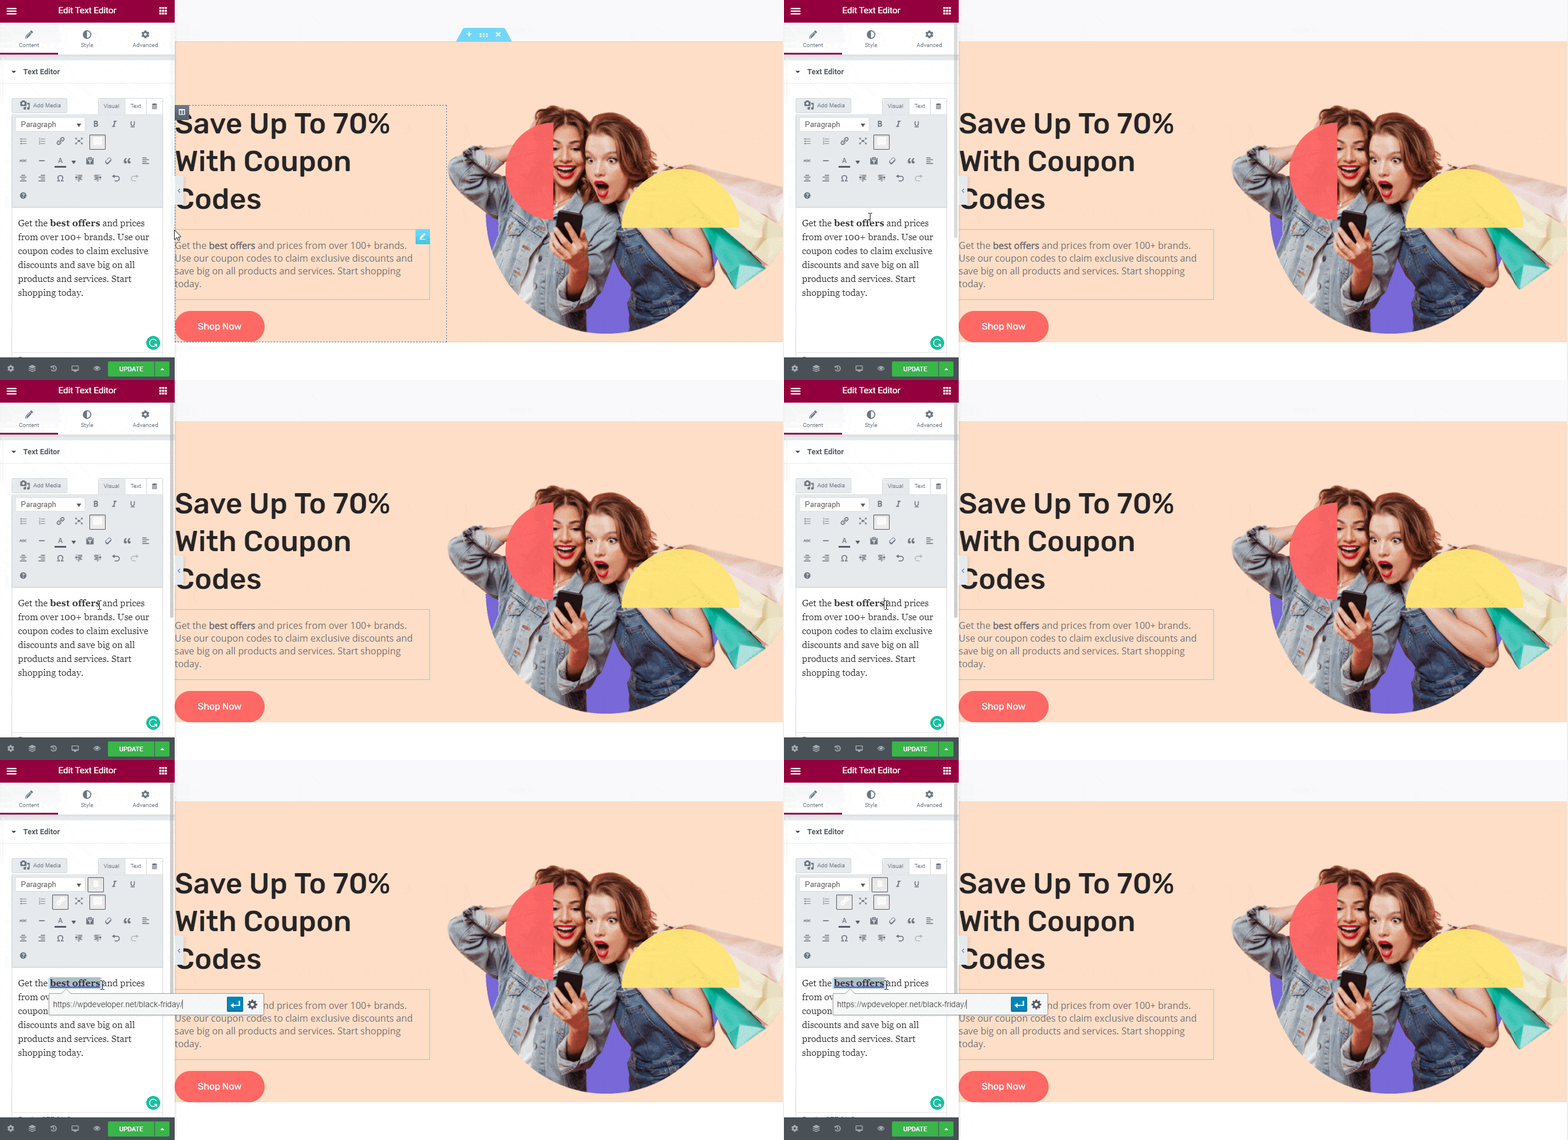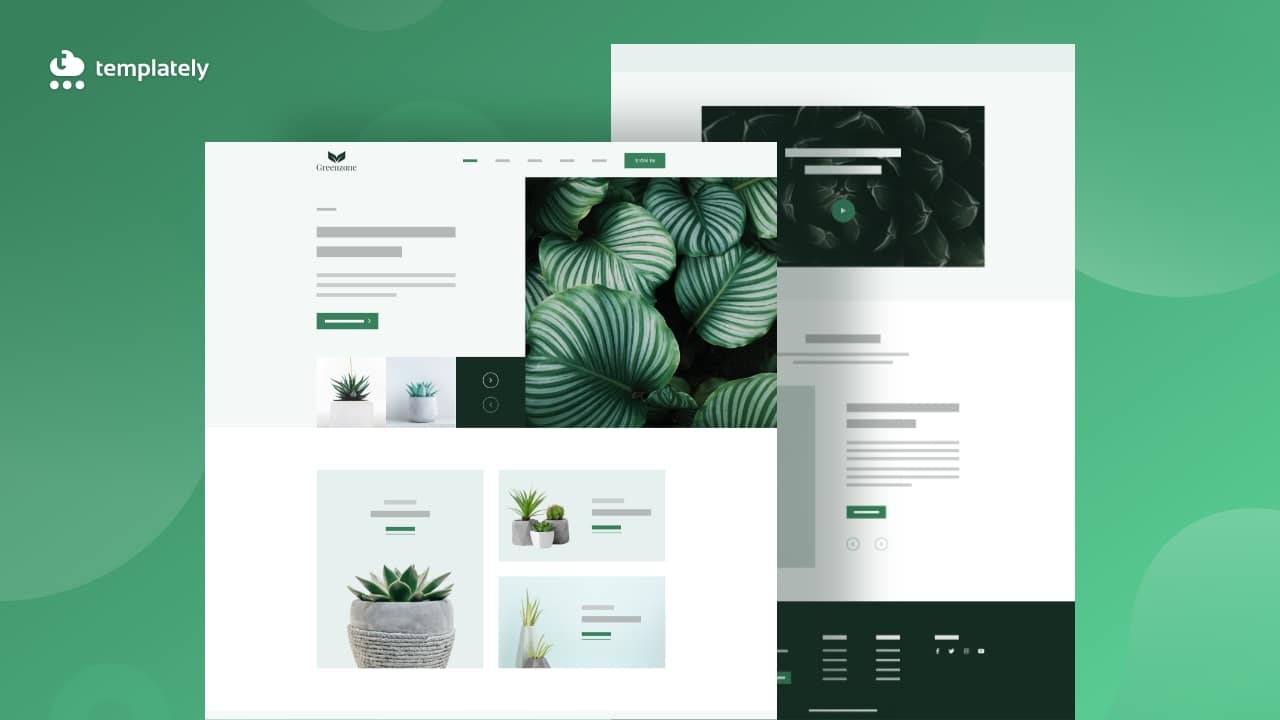
Garden Plant Store website Elementor

How To Easily Start Online Garden Plant Store Website With Elementor Ready Template

Garden Plant Store website Elementor

Do you want to take your garden plant store business beyond your competition? Well, by creating an online garden website, you can add extra spark to your traditional business. You will be able to make your foot strong quickly and grow your business.

You might be thinking of how to create a garden plant store website without starting from scratch? Don’t get tensed! In this blog you will get to know in detail about creating a complete garden plant store website without coding for free.  

Top Benefits Of Creating An Online Garden Plant Store 

Here you will get influenced faster by reading this top benefits of creating an online plant store website below. Enlight yourself fast!

Easy & Convenient To Reach Out Targeted Audiences 

Creating a fully-functional website will help you to reach out to targeted audiences easily by sharing the news to different social media channels or by doing online promotional activities.  

Influence Customers To Make The Immediate Purchase Decision 

You can showcase a variety of your plants beautifully to influence your buyers to make the immediate purchase decision.That will boost your sales instantly and generate long term revenue with ease.  

Know Details About Quality & Price

You can make your eCommerce business credible and trustworthy for your visitors to display every detail about your plants in one organized place and make them attached. 

Take A Top Place On Search Engines 

Getting a responsive, SEO friendly website can help you to make a top place on the search engines with ease. It will let your customers know about your business, increase site traffic and conversion simultaneously with credibility..

Directly Communicate With Buyers  

You can communicate with your customers directly through online chatbots or email without doing any oral communications.

Greenzone

Garden Plant Store Website Template Pack For Elementor

Get Access

How To Create An Online Garden Plant Store Website With Ready Elementor Template?

The most popular drag & drop page builder Elementor is user-friendly, flexible, and easy to use for creating any type of website without coding. You can make your website the way you want just with some few clicks. 

Now to facilitate your Elementor page building and designing experience, Templately the ultimate templates cloud for WordPress offers 1000+ ready exclusive template designs to build your website as per your preference without touching any single line of codes.   

🎍Introducing Greenzone Garden Plant Store Elementor Template Pack By Templately

Greenzone ready Elementor template pack by Templately comes with eight incredible, interactive pages and blocks to create your online garden plant store without coding for free. You have to choose and install your preferred template pack ready designs, customize a bit, and make it publish right away. Let’s check out its all exclusive ready collections below:  

👉Get a stunning responsive, appealing ready Homepage design to turn your visitors into customers 

👉Use a fully functional Greenzone Shop Page template to facilitate your customers to pick their desired products instantly. 

👉With this ready Cart Page template your customer can easily add their desired plant on their purchase list. 

👉Your online garden plant store customers can easily purchase their preferred product using this handy Checkout Page template.  

👉You can highlight any announcements, notices or blogs posts beautifully using this stunning Blog Page template.  

👉Describe the details of your posts using the Blog Single Page template of the Greenzone Elementor template pack.  

👉Make a direct communication with your potential customers to active ones using this Contact Us Page template

 👉You can inspire your customers by telling your business story, inspirations, achievements with About Page template

Click Here
Click Here
Click Here
Click Here
Click Here
Click Here
Click Here
Click Here
Click Here
Previous slide
Next slide

🔰Things You Must Get Before Creating An Online Garden Plant Store 

You must have to install and activate some necessary plugins before creating an online garden plant store using the ‘Greenzone’ Elementor template pack from Templately. Let’s check out all the plugins below to use this ready template pack: 

🚀Get Started With Templately To Create A Compelling Online Garden Plant Store 

Let’s assume that you have installed and activated all the mentioned plugins that are required above. Now you are all set to go using the Greenzone template pack in your Elementor editor. Follow these simple step-by-step guidelines below:

Watch The Video Title

Step 1: Insert The ‘Greenzone’ Template In Elementor

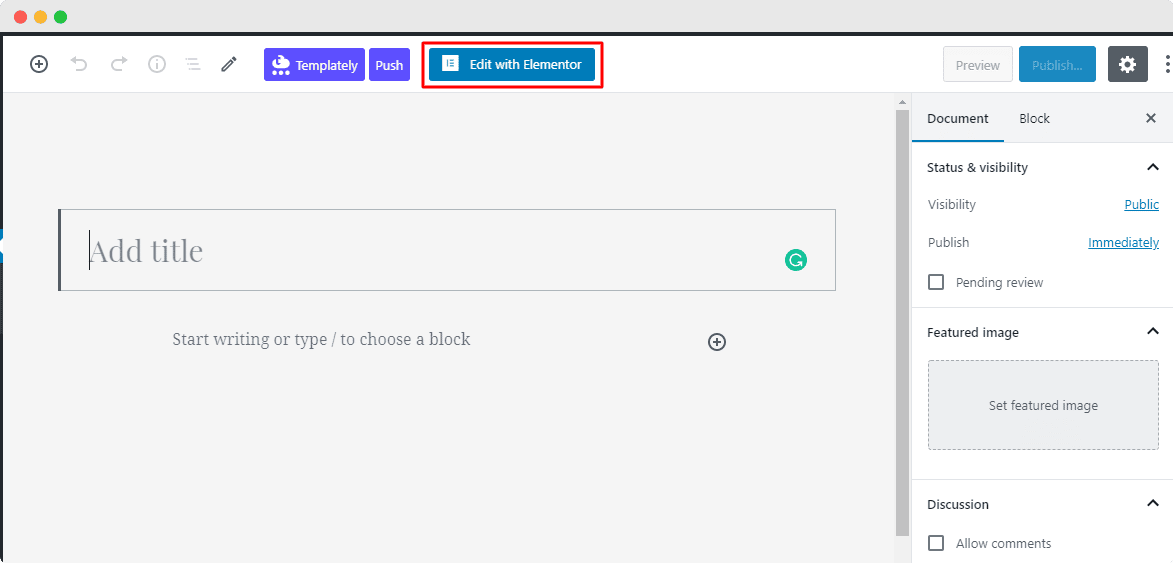
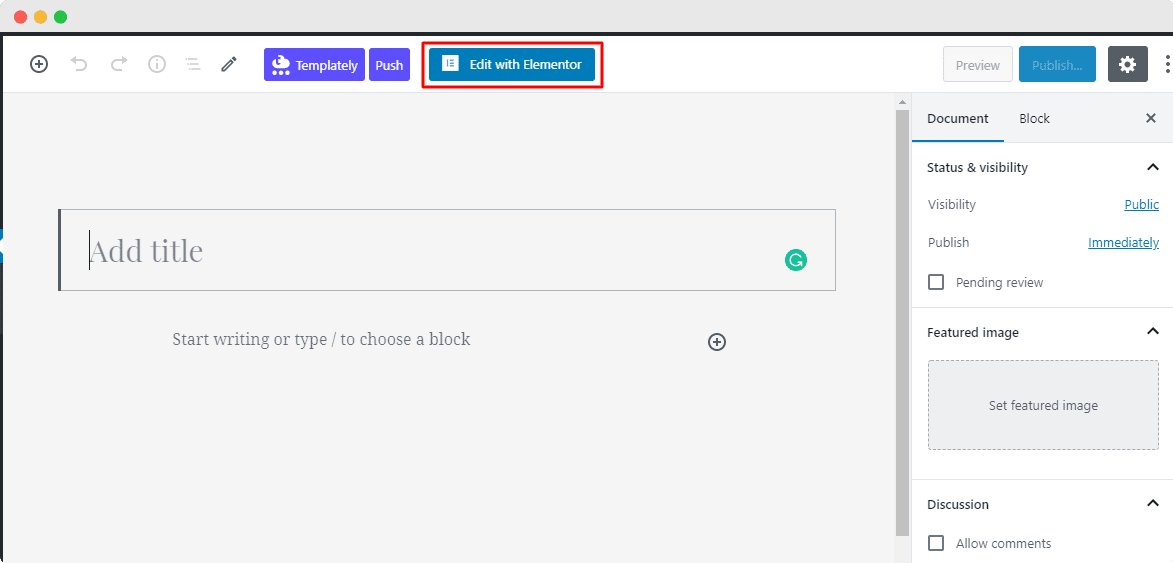
Let’s click on Edit with Elementor to create a new page on the WordPress dashboard. In a few moments, it will then come up with a new page in the Elementor editor. 
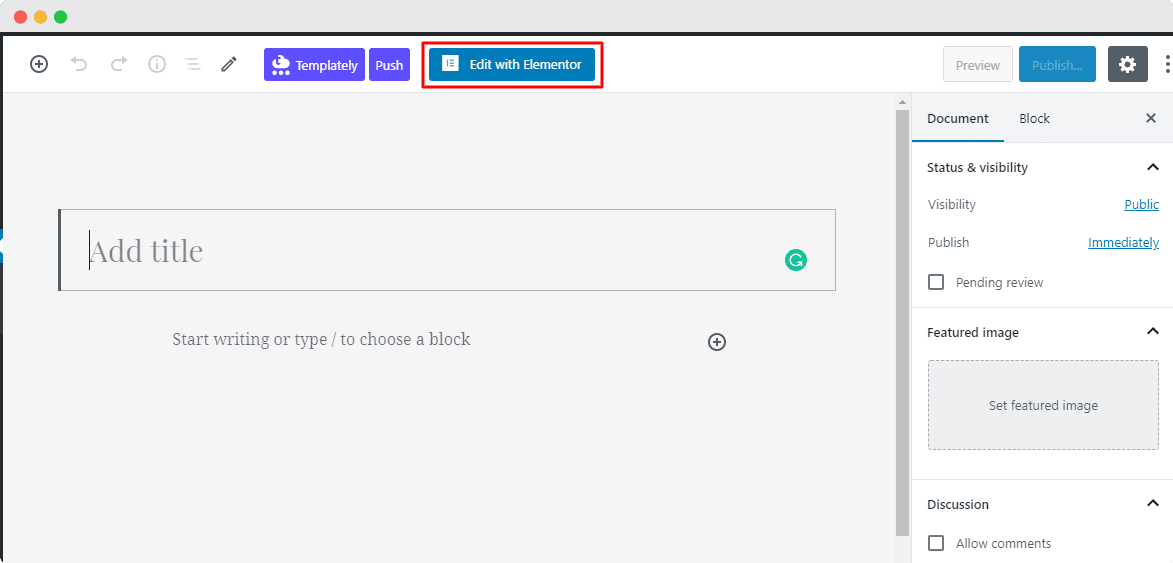
Garden Plant Store website Elementor

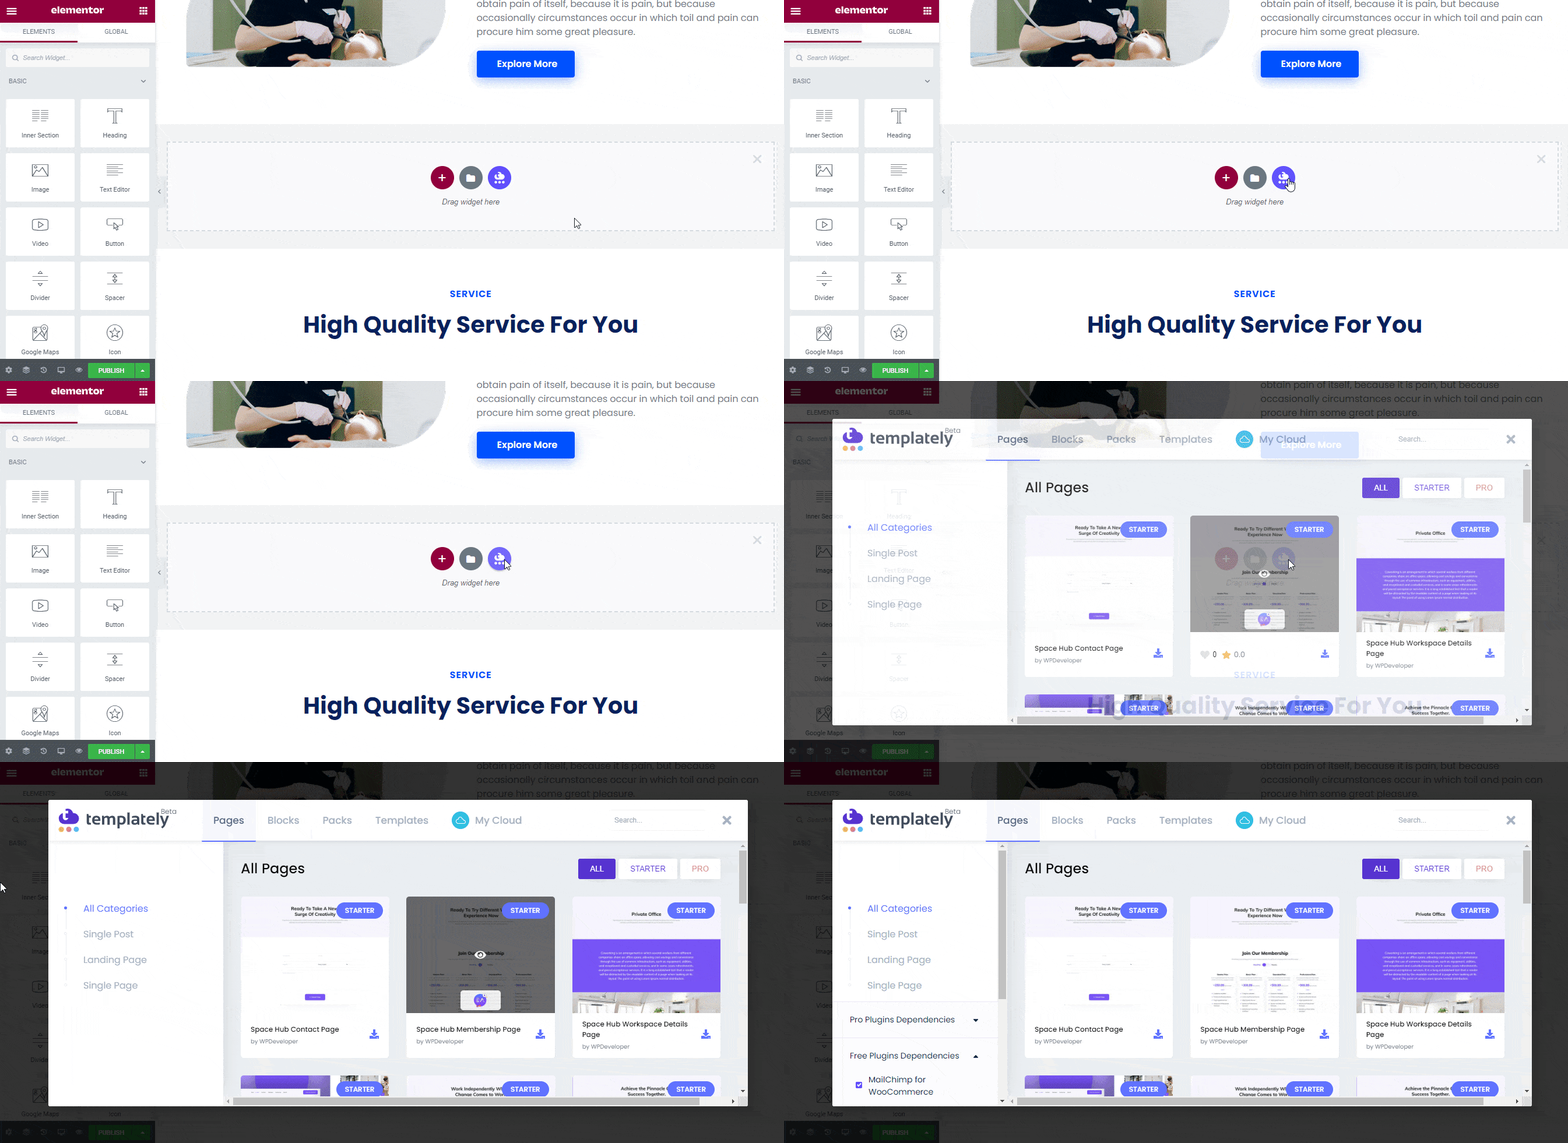
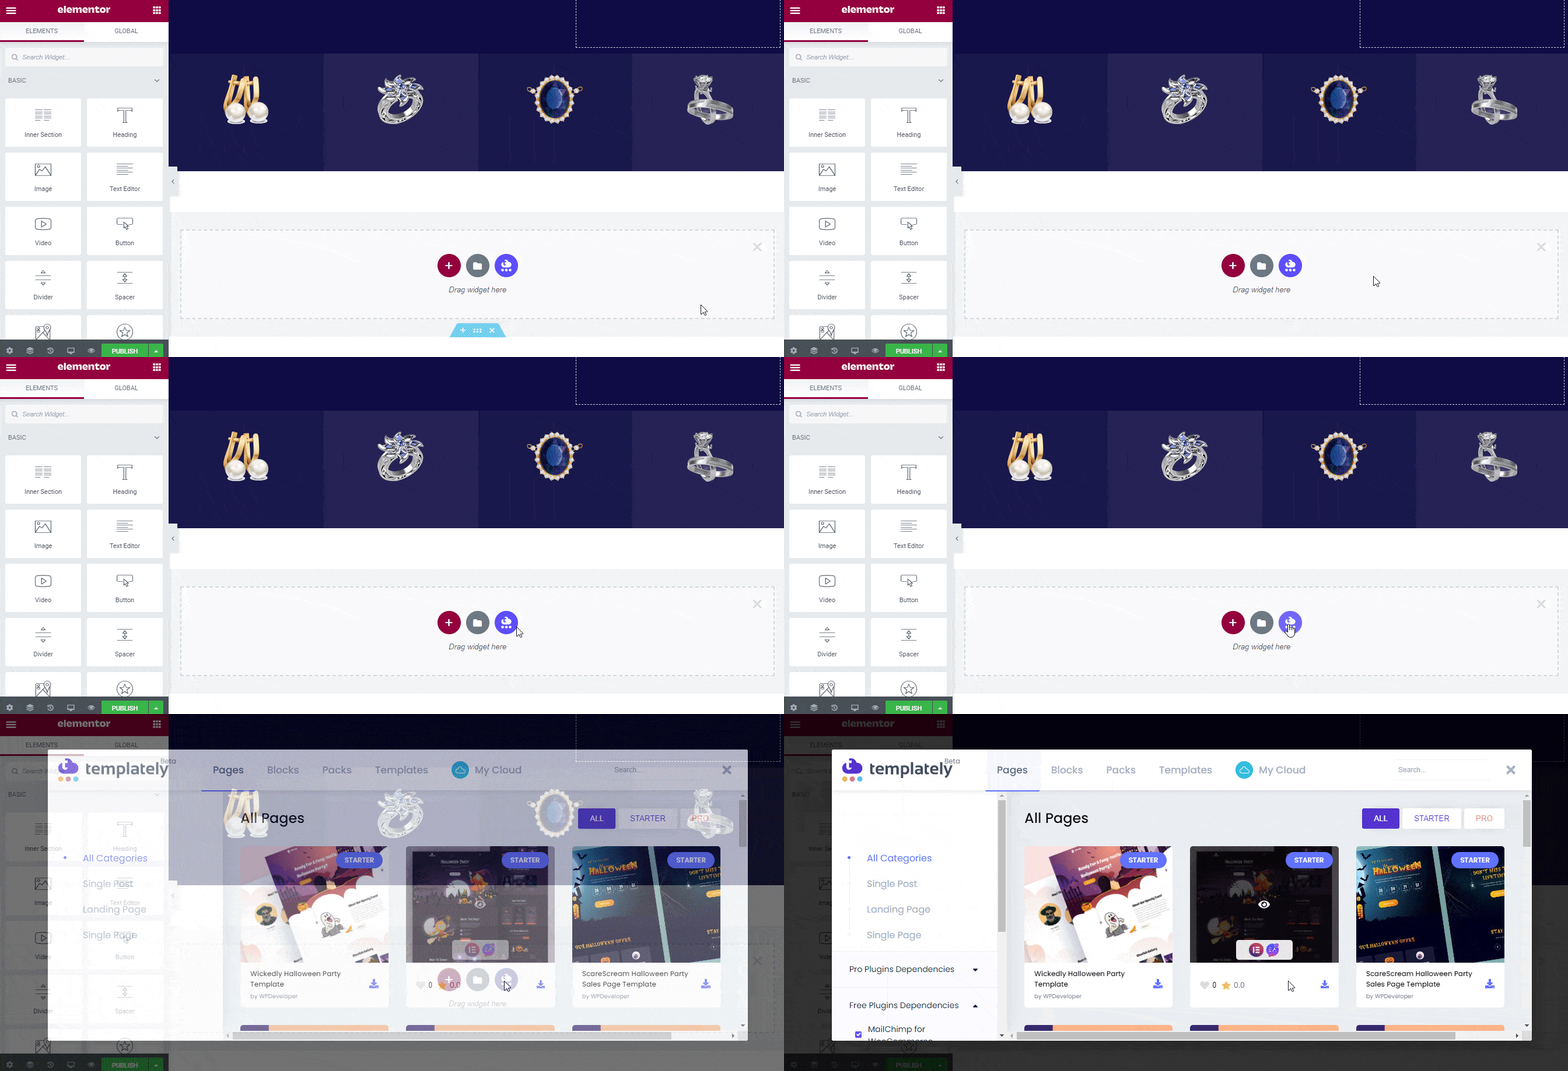
Afterward, you need to click on the middle icon of the page that comes with the Templately. It will provide a popup window that will beautifully showcase all the ready templates of Templately. You have to search for ‘Greenzone’ or ‘Garden Plant Store’ on the search panel. It will automatically then show all the ready pages & blocks related to it.
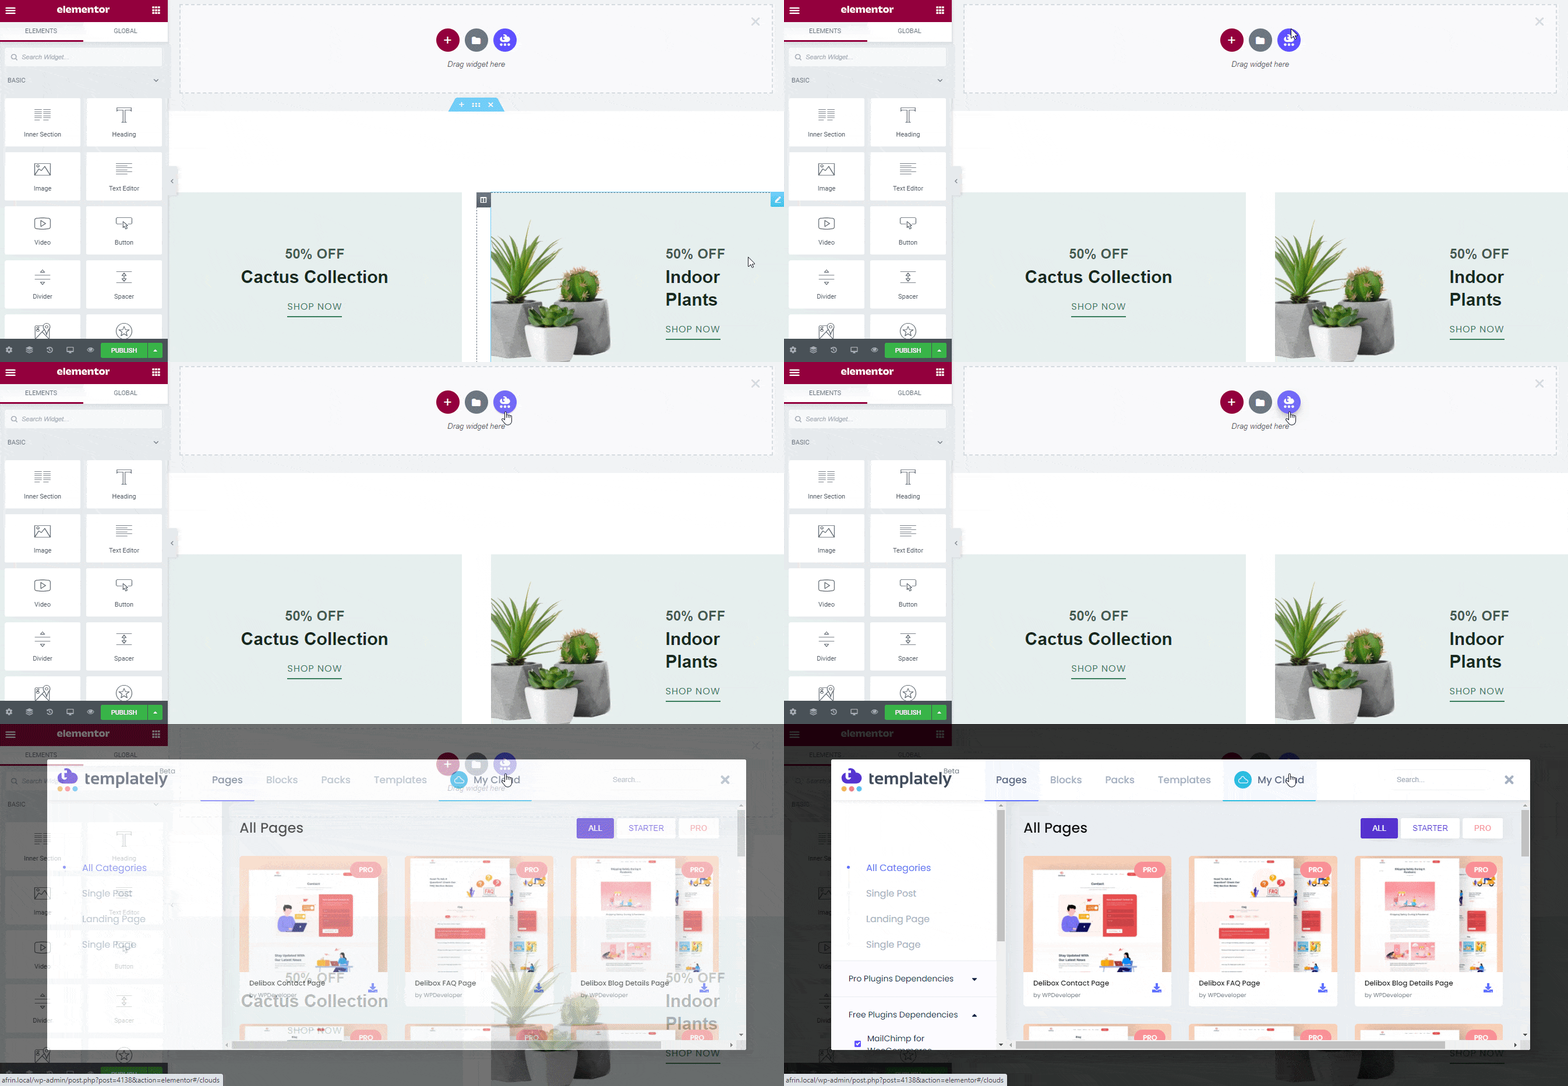
Garden Plant Store website Elementor

We will pick the ‘Greenzone’ homepage template. Hit the ‘Insert’ button to load the page template on your website. You can add more pages for your online garden plant store in the same way.
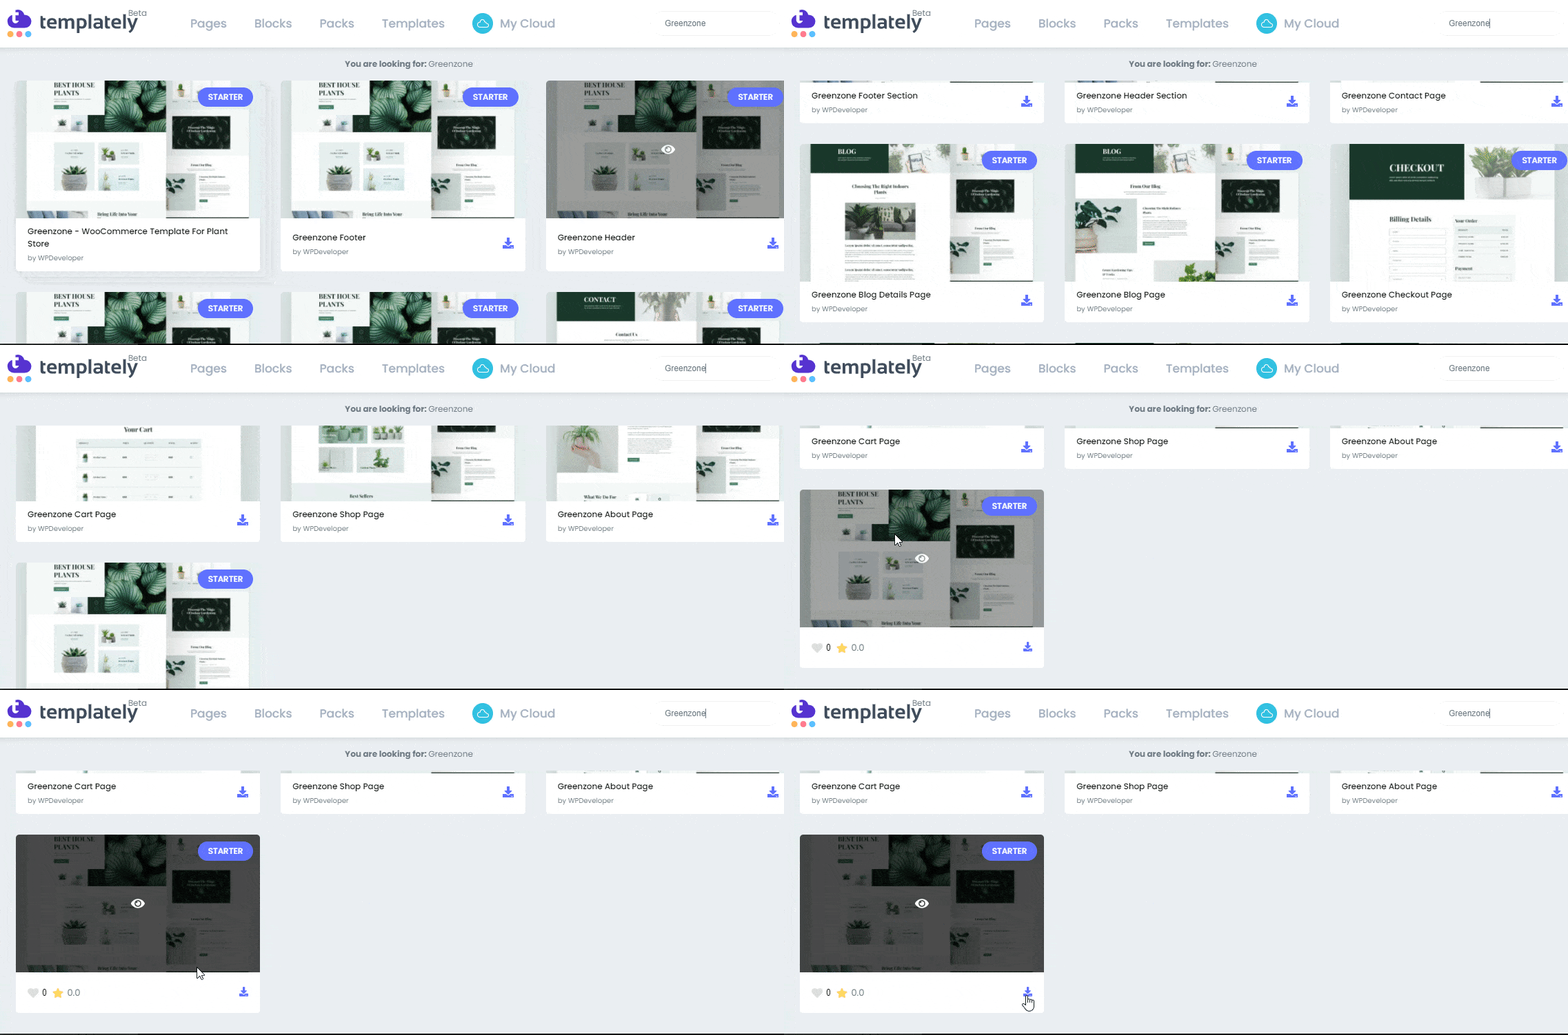
Garden Plant Store website Elementor

Step 2: Customize The Design Of Your Online Garden Plant Store

Use the responsive, ready template to publish your online garden plant store using Elementor without adding a single line of code. You can add your preferred content in each creative section, drag & drop one to another, do a bit of modification, and it’s fully ready to become live.
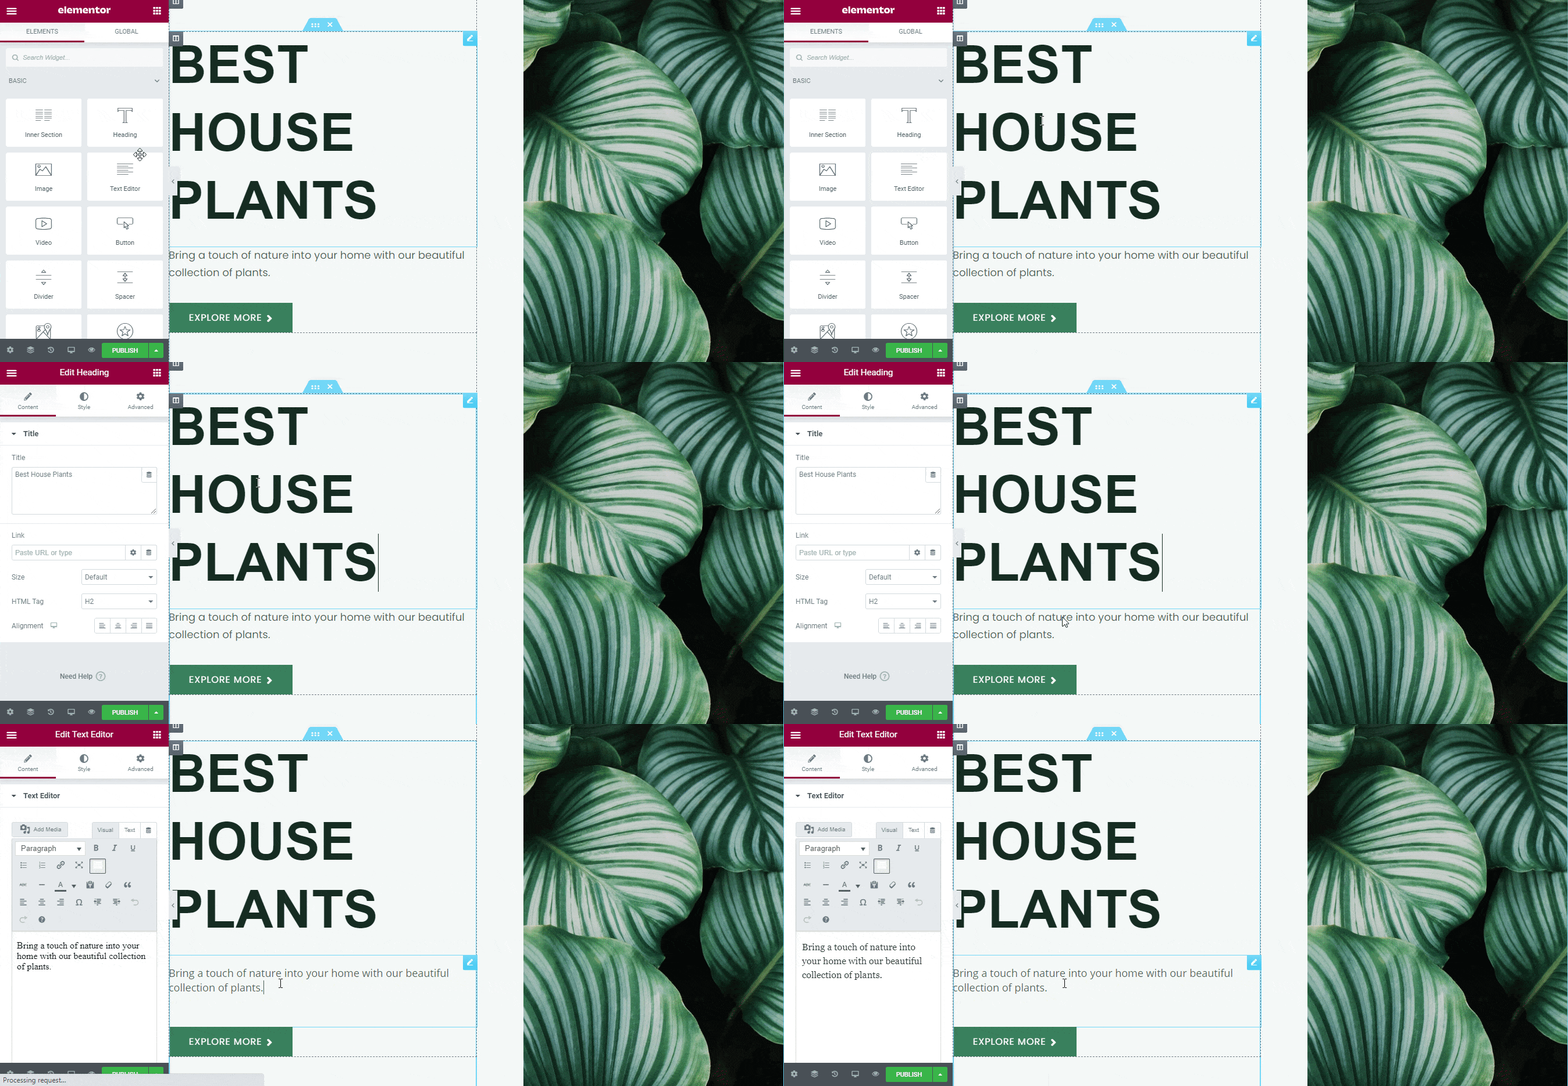
Garden Plant Store website Elementor

Step 3: Save Your Garden Plant Store Template Design On MyCloud

Now, save your template designs in ‘MyCloud’ storage of Templately. Just right-click on the design and press ‘Save Page to Templately’. It will then save it on cloud space and create a backup of your design without needing extra space.
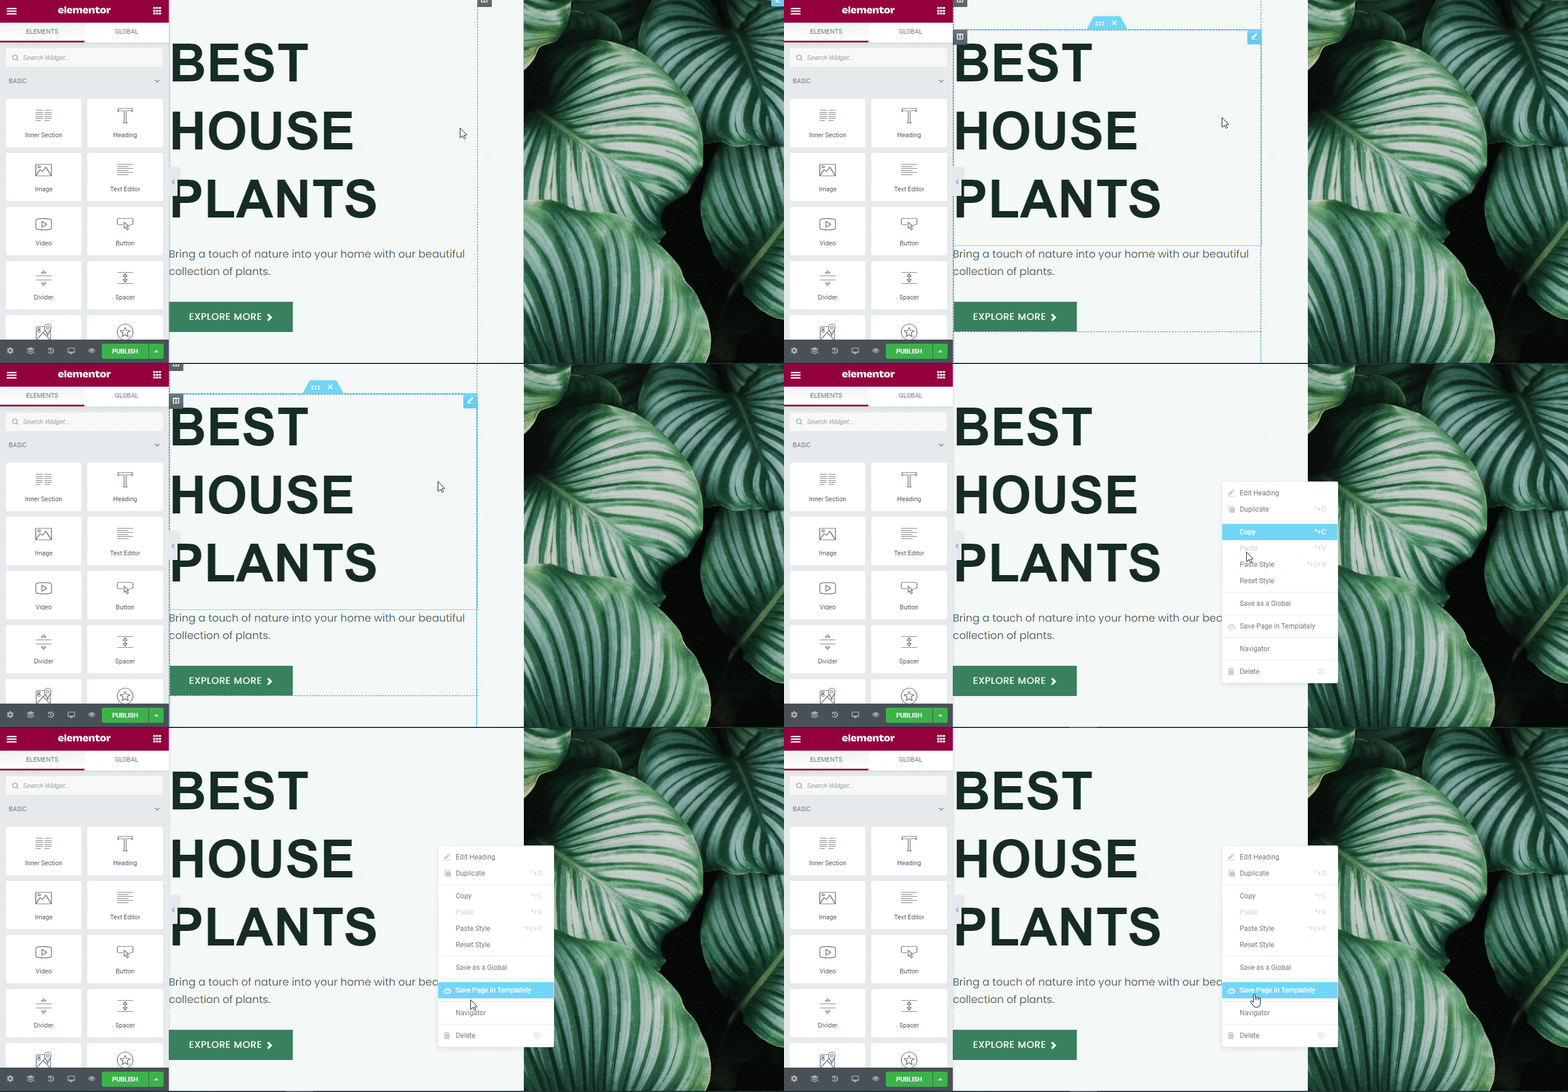
Garden Plant Store website Elementor

You can even reuse your saved template designs as many times you want. You can use using Templately WorkSpace to share your online garden plant store design anytime with your team.

Final Outcome

Congratulations! After completing all the steps successfully, your online garden plant store in Elementor will look like the one below. This is how you can create a beautiful online garden plant store website using the ‘Greenzone’ ready template by Templately without coding.

Garden Plant Store website Elementor

Sign up to Templately and get access to its stunning ready template collections and let us know your experience by commenting below. If you face any problem or need instant help, you can feel free to contact our support team anytime you want. 

Custom CSS Code Elementor

How To Add Custom CSS Code Snippets In Elementor

Want to extend your web design using custom CSS code snippets in Elementor? You are in right place, keep reading to learn how to easily use it.

Custom CSS Code Elementor

The same goes for the Elementor site design. You can make your Elementor site stand out just by adding custom CSS code snippets in the right place. You just have to know the right methods of adding it to your Elementor website.

Now it may also arise a question in someone’s mind who never uses custom CSS code snippets in Elementor. This blog is will enlight the user to add CSS code snippets in Elementor following the perfect methods and every detail to design an impressive site. Let’s get started.

What Is CSS?

CSS is defined very easily to change the web page layout structure and overall presentation during the time you design your website. You have the full control of adding any type of fonts, colors, position, and style to your site as per your preference. 

Custom CSS Code Elementor

Because in HTML you can style your website script the way you can do flexible adding the CSS code snippets to design your whole website with ease.

Usage & Importance Of Adding CSS Code Snippets

There are so many advantages of adding CSS code snippets to change your website outlook entirely that fits your taste. It’s because you have to go with the trend and have the ease of changing your CSS script as many times you want with your custom CSS code to make your website design stand out and enhance your user experience for sure. Let’s get an exact scenario of using custom CSS code snippets below: 

👉You can make any changes anytime you want and make your site design the way you want adding your own style to it. 

👉Web developers or designers use CSS code snippets to change the style and structure because it’s lightweight that makes your website faster and smoother for your site visitors. 

👉Easily change the position of your website element using CSS code snippets and make it more user friendly for your site visitors or customers. 

👉CSS code snippets represent content beautifully on the website, make the positioning of your design element correct which helps search engines to feature your website quicker.

👉CSS code snippets developed to design websites perfectly ensuring full control over your element positioning, coloring, and styling to make your design clean and clear for backends, customer perspective, and search engine performance. 

Custom CSS Code Elementor

Get Complete Step By Step Guideline To Add Custom CSS Code Snippets In Elementor

Elementor has come with drag & drop widgets to design your website as per your preference, and style it in advance to make your site exclusive instantly without coding. But sometimes you have to customize the look using custom CSS code in Elementor theme builder, specific element, or others to entirely change the outlook. Let’s apply all the methods step by step adding CSS code snippets in Elementor below: 

Method 1: Elementor Pro Comes With Custom CSS Code Snippets Option 

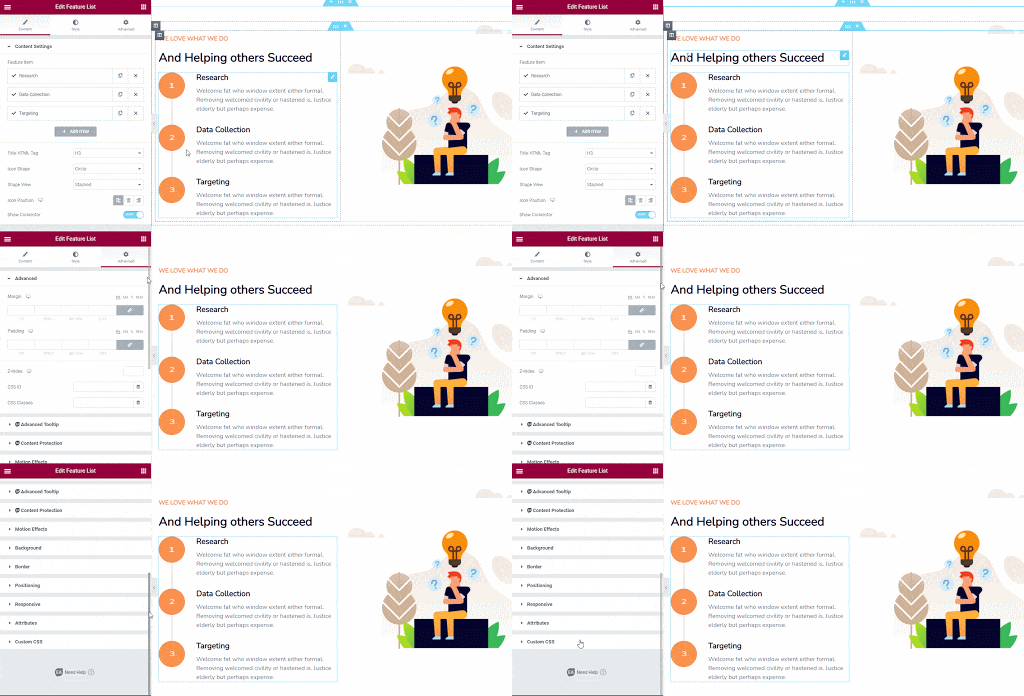
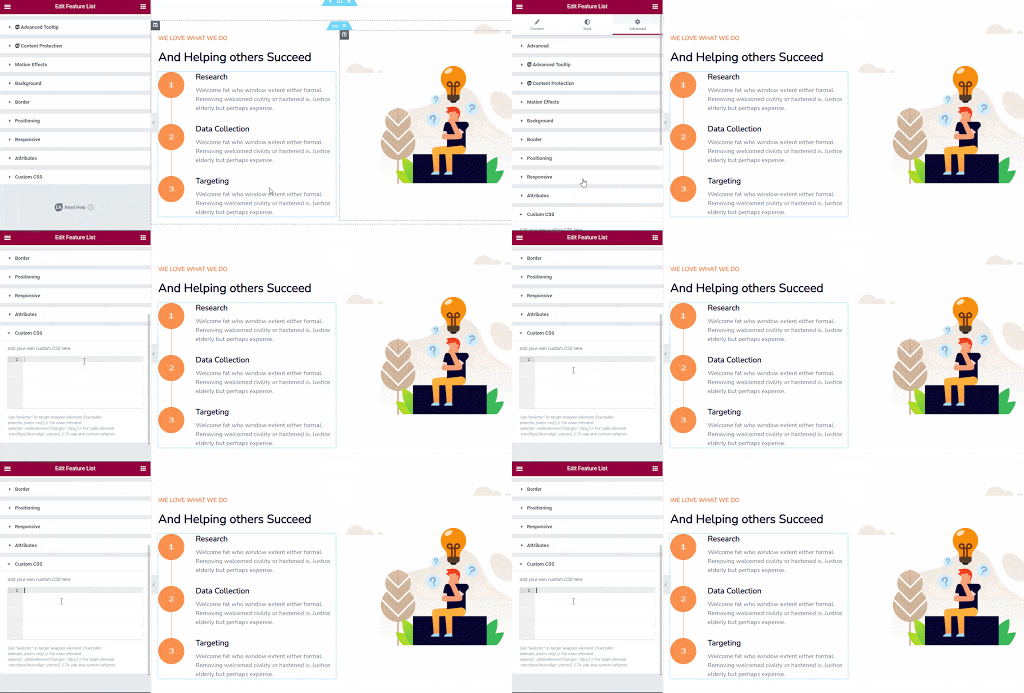
Elementor Pro comes with this facility to add your custom CSS code snippets to any elements. So first, you have to click on the element you want to add your custom CSS. You will see the ‘Advanced’ tab on the panel.

Custom CSS Code Elementor

Just click on it and you will find a ‘Custom CSS’ option on the bottom there. Open the section and add your custom CSS code snippets there.

Custom CSS Code Elementor

That’s it! Your Elementor particular element design can change easily by adding your custom CSS code.

Method 2: Add Custom CSS Code To Design Elementor Theme Builder

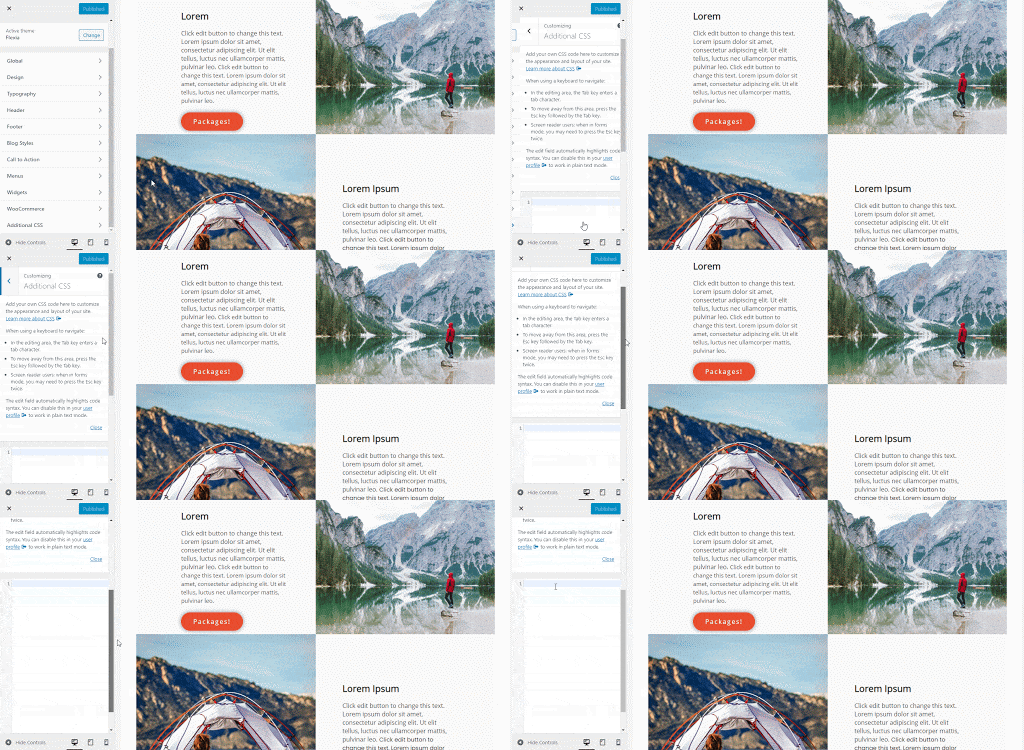
If you are not using Elementor Pro,  you can still insert custom CSS code snippets to your Elementor theme design from the built-in WordPress Customizer option. For that, you have to navigate to your WordPress Dashboard -> Appearance -> Customize.

Custom CSS Code Elementor

You will get to see the ‘Additional CSS’ option at the bottom of all options. Just click on that and add your preferred custom CSS code snippets there to change your Elementor theme builder design the way you want.

Custom CSS Code Elementor

Method 3: Add Custom CSS Code Snippets Using HTML Code Element 

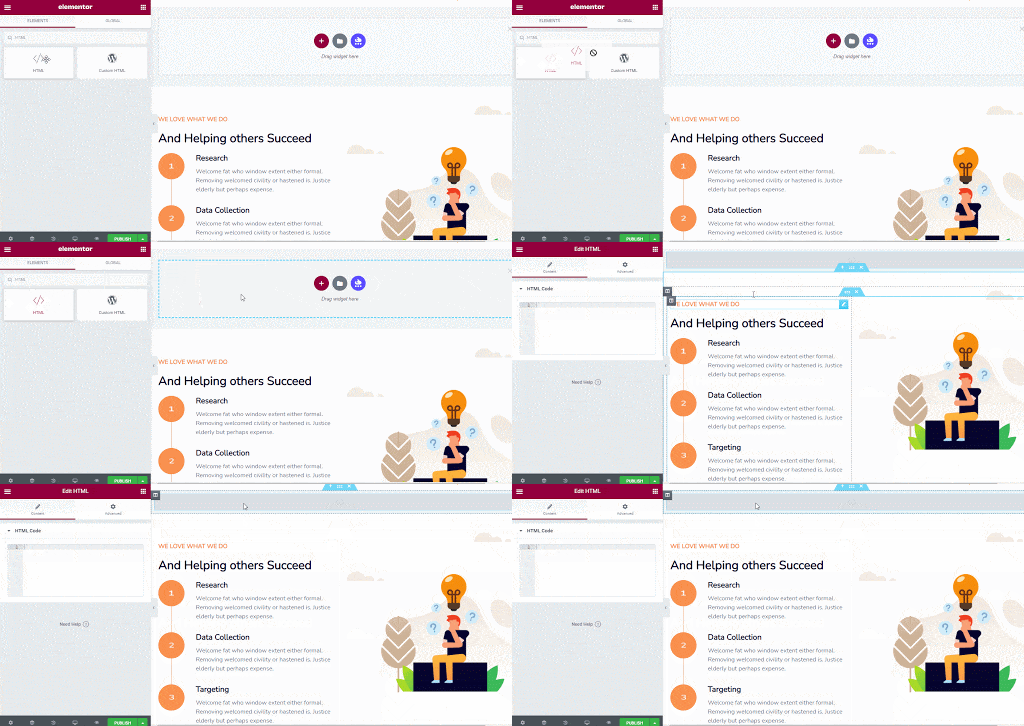
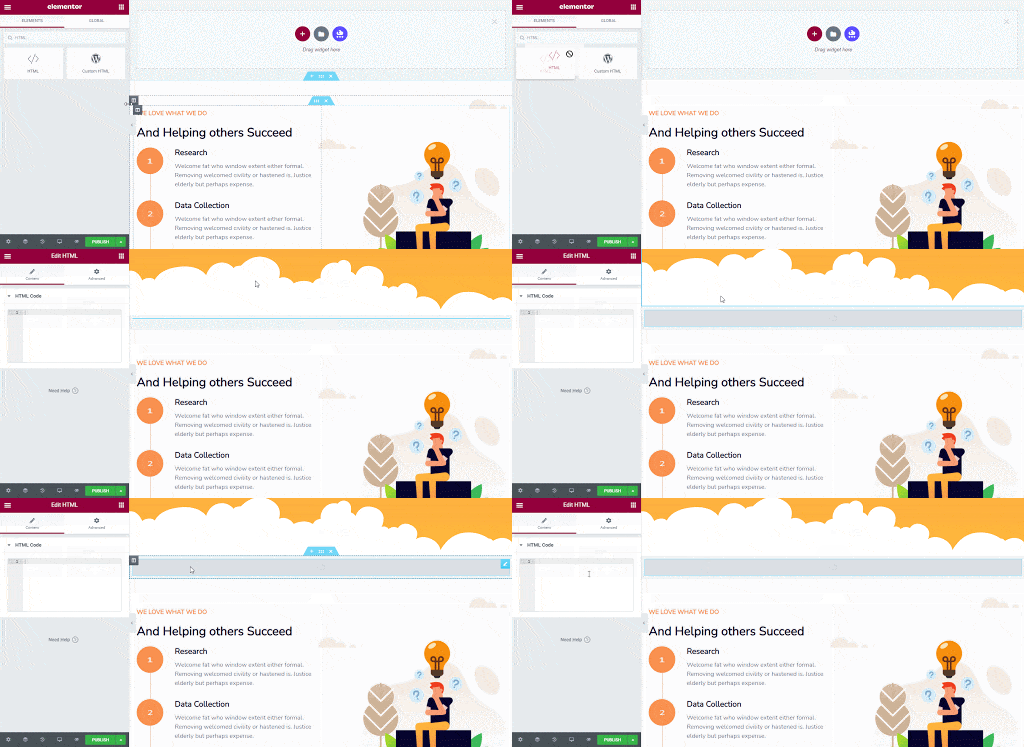
Another way is to add your custom CSS code snippets dragging the HTML element on your Elementor editor preferred section.

Custom CSS Code Elementor

Afterward, you have to just add your preferred custom CSS code snippets there to make the changes. You can drag & drop the element anywhere in your Elemenetor editor to make the changes. 

Custom CSS Code Elementor

That’s how simply using this easiest method you can add custom CSS code snippets to design your Elementor site design in advance as per your preference. But before knowing this, this will seem the most difficult task. So no worries now on if you want to add custom CSS code snippets to your Elementor site. 

Hope you will find this blog helpful, and let us know your experience by commenting below. You can read more blogs by visiting our blog page, also feel free to join our beautiful WordPress expert community on Facebook to build up a strong connection.

Dentist Website Elementor

How To Use Dentist Website Elementor Template & Create Your Website Instantly

Dentist Website Elementor

Dentists or dental service providers are now focusing on creating their own dentist website to make a great web presence for their hospital online. That will help them to reach out to every corner and get their targeted patients and be served the best services to them. It will surely increase its brand value as a dental service provider and to be on the priority for any dental patients. 

So to do that with perfection, ready template designs are the best solution anyone can get to create an interactive site on their own. That will help any dentist website to be on top of the search engines, and patients can easily make an appointment to get served in a hassle freeway. This is why this blog’s purpose is to give you a complete, versatile Elementor template pack that will create your dental website in just a few minutes. Let’s take a deep dive!

Table of Contents

⭐Benefits of Creating A Complete Dentist Website

As a dentist, now it is really important to have a dentist website that will help you to make a strong online presence and instantly get you a huge number of prospective patients. Let’s make it very clear by creating a real scenario below:

👉Nowadays, patients are searching for getting an online appointment. Because that saves a lot of time to visit the hospital for an appointment or having oral communication over the phone. 

👉You can add your present customers’ reviews on your dentist website testimonial and add an extra value to your service to make it credible.   

👉It will help you to grow trust among your potential patients by having a strong web presence, and immediately help them to make an appointment.

👉Also, it’s a quicker process to get a dental appointment online rather than others. You can easily fill up a form, or by doing a real-time chat, you will get your favorite dentist appointment instantly and be served by your dentist at the time. 

👉Besides, your satisfied patients will surely recommend you to others both online and offline. And it’s much easier to recommend by having a fully functional dentist website.

So that’s why, as a dentist, you must have to align your footsteps now with this first pace digital world service. That will help you to grow your reputation online and offline both by having a complete dentist website. Also, your patients can get an immediate appointment without facing any barrier and get served beautifully. 

D-Care

Dentist Website Template Pack for Elementor

Get Access

⚡How To Build A Dentist Website Using Elementor Templates?

Templetely offers you to use its beautifully designed ready templates packs for WordPress’s most popular page builder Elementor. You can now quickly create your dentist’s website without any investments and code. You have to get and insert the right template designs on your website and start adding your content in each of its creative sections. That’s all you have to do just a bit of modification, and you are there to make your site live within a few minutes. 

D-Care ready Elementor template pack by Templately comes to create your dentist website without coding for free. It’s a versatile one that will fit and use in any website environment and can customize easily as per your preferences. Now let’s get to what it actually comes with below:

Watch The Video Tutorial

What Does D-Care Offer You?

D-Care template by Templately comes with six ready pages and separate blocks to build your dentist website within a few minutes. Each of its pages and blocks comes with creative sections that consist of animated widgets, drag & drop facility, smooth scrolling effects, and more to make a standout website without coding. 

Click Here
Click Here
Click Here
Click Here
Click Here
Previous slide
Next slide

Home Page: D-Care comes with a compelling ready ‘Homepage’ design to make your dentist website Elementor template presence attractive for your patients.  

About Page: Showcase your dentist service details beautifully using this fully-functional About Page template by D-Care. 

Contact Page: You can enlighten your patients with your physical address or can use the fully-functional contact form layout to make an immediate appointment.   

Patients Page: You can show your present patients’ reviews about your dental services interactively using this ‘Patients Page’ ready template. That will help you to drag the interest of the potential ones immediately.   

Pricing Page: Your patients will get to know in detail about dentist service pricing using this ‘Pricing Page’ template by D-Care.    

Service Page: Display your dentist service information in an organized way with this ready ‘Service Page’ template.    

🔰Things You Must Have To Get Before Creating A Dentist Website

You must have to get a few things done before using this Dentist Website Elementor template with the help of the ready ‘D-Care’ free template pack of Templately,. Let’s check out the necessary plugins that will need below: 

🚀Get Started With Templately To Create A Stunning Dentist Website 

After activating all the above plugins, you are now fully ready to use the D-Care template pack in your Elementor site following some simple step guidelines below:

Dentist Website Elementor

Step 1: Insert ‘D-Care’ Homepage Ready Design By Templately

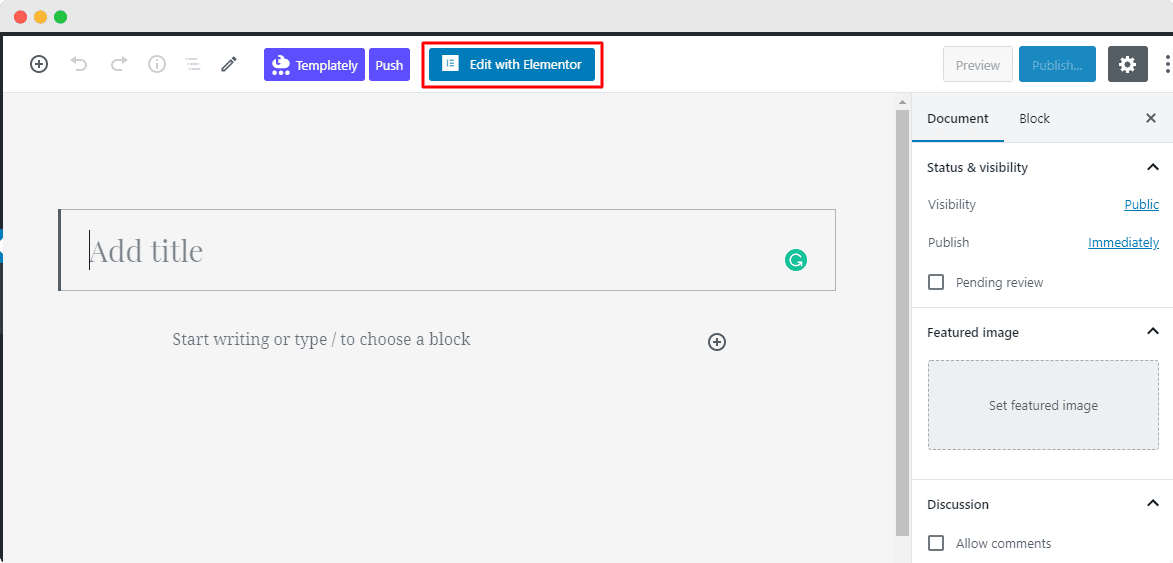
Let’s click on Edit with Elementor to create a new page on the WordPress dashboard. Within a few moments, it will then come up with a new page in the Elementor editor. 

Dentist Website Elementor

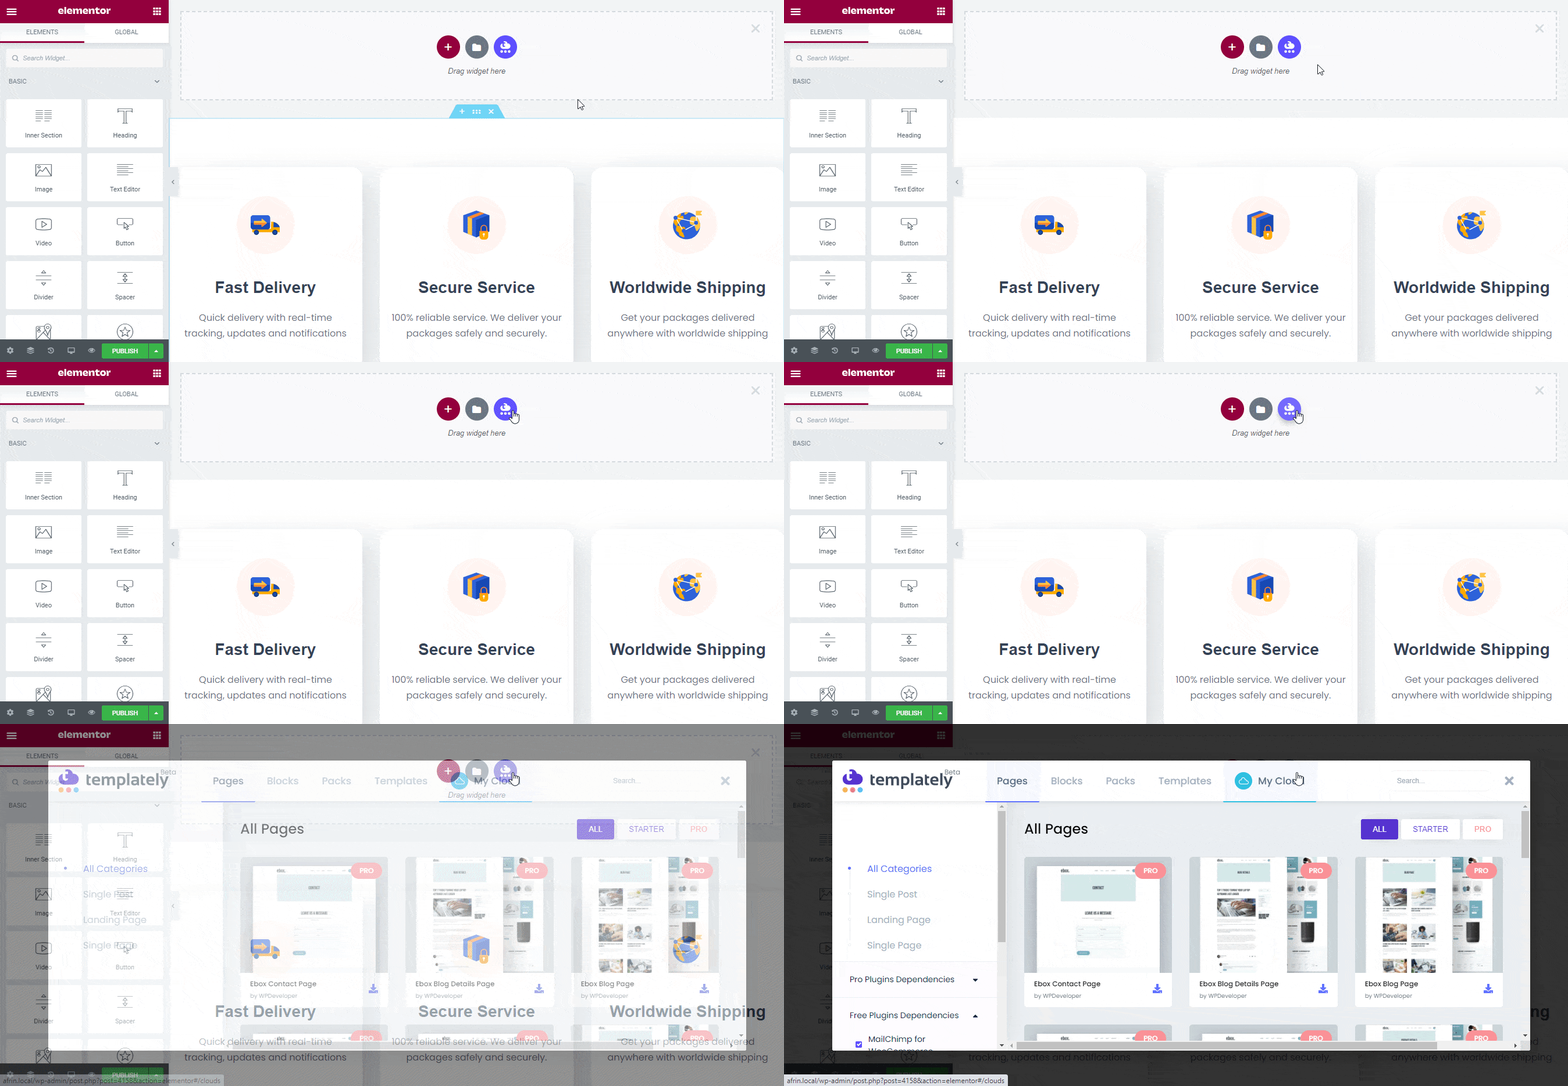
Afterward, you need to click in the blue icon of the page that comes with the ‘Templately’. It will beautifully come with all Templately ready collections in a popup window.

Dentist Website Elementor

There you have to search for ‘D-Care’ or ‘Dentist’. It will automatically then provide you all the ready pages & blocks related to that particular category you searched for.

Dentist Website Elementor

Later, pick the ‘D-Care’ ready homepage design, hit the ‘Insert’ button, and start modifying it as per your preference.

Step 2: Let’s Customize The Predesigned Template 

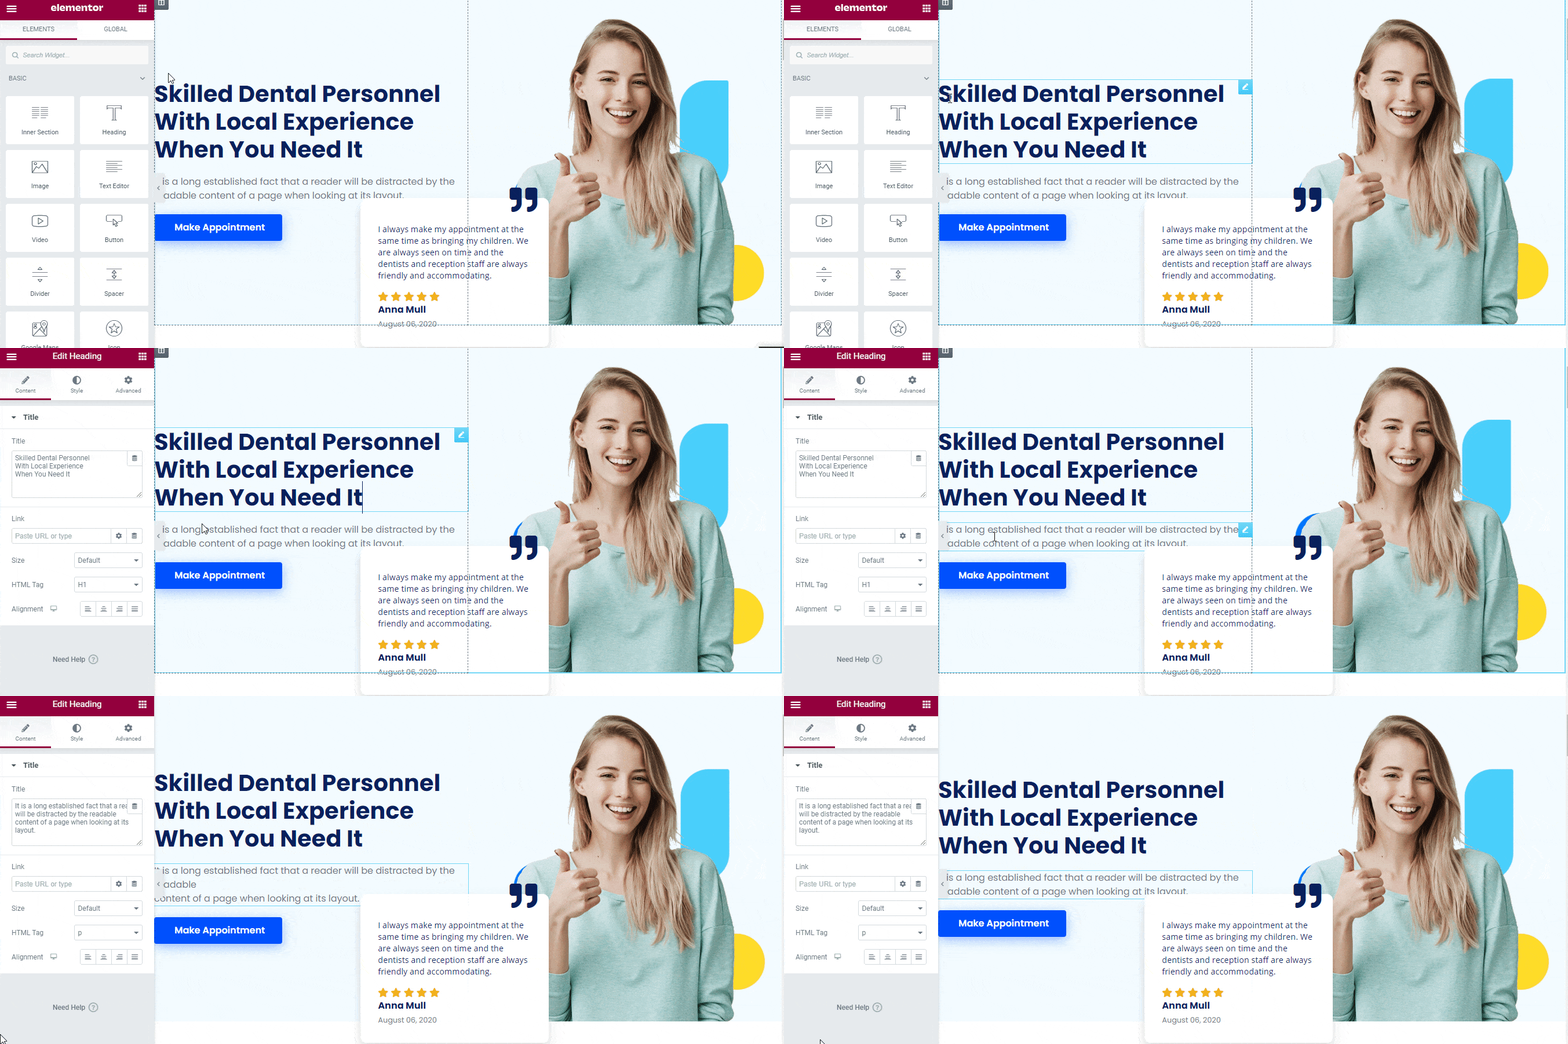
You can now customize this D-Care Dentist Website Elementor template without adding a single line of code. You have to insert your preferred content in each creative section, drag & drop sections if necessary, and do a bit of modification. That’s it, now it’s fully ready to become live.

Dentist Website Elementor

Step 3: Save & Secure Your ‘D-Care’ Ready Homepage Design On Cloud

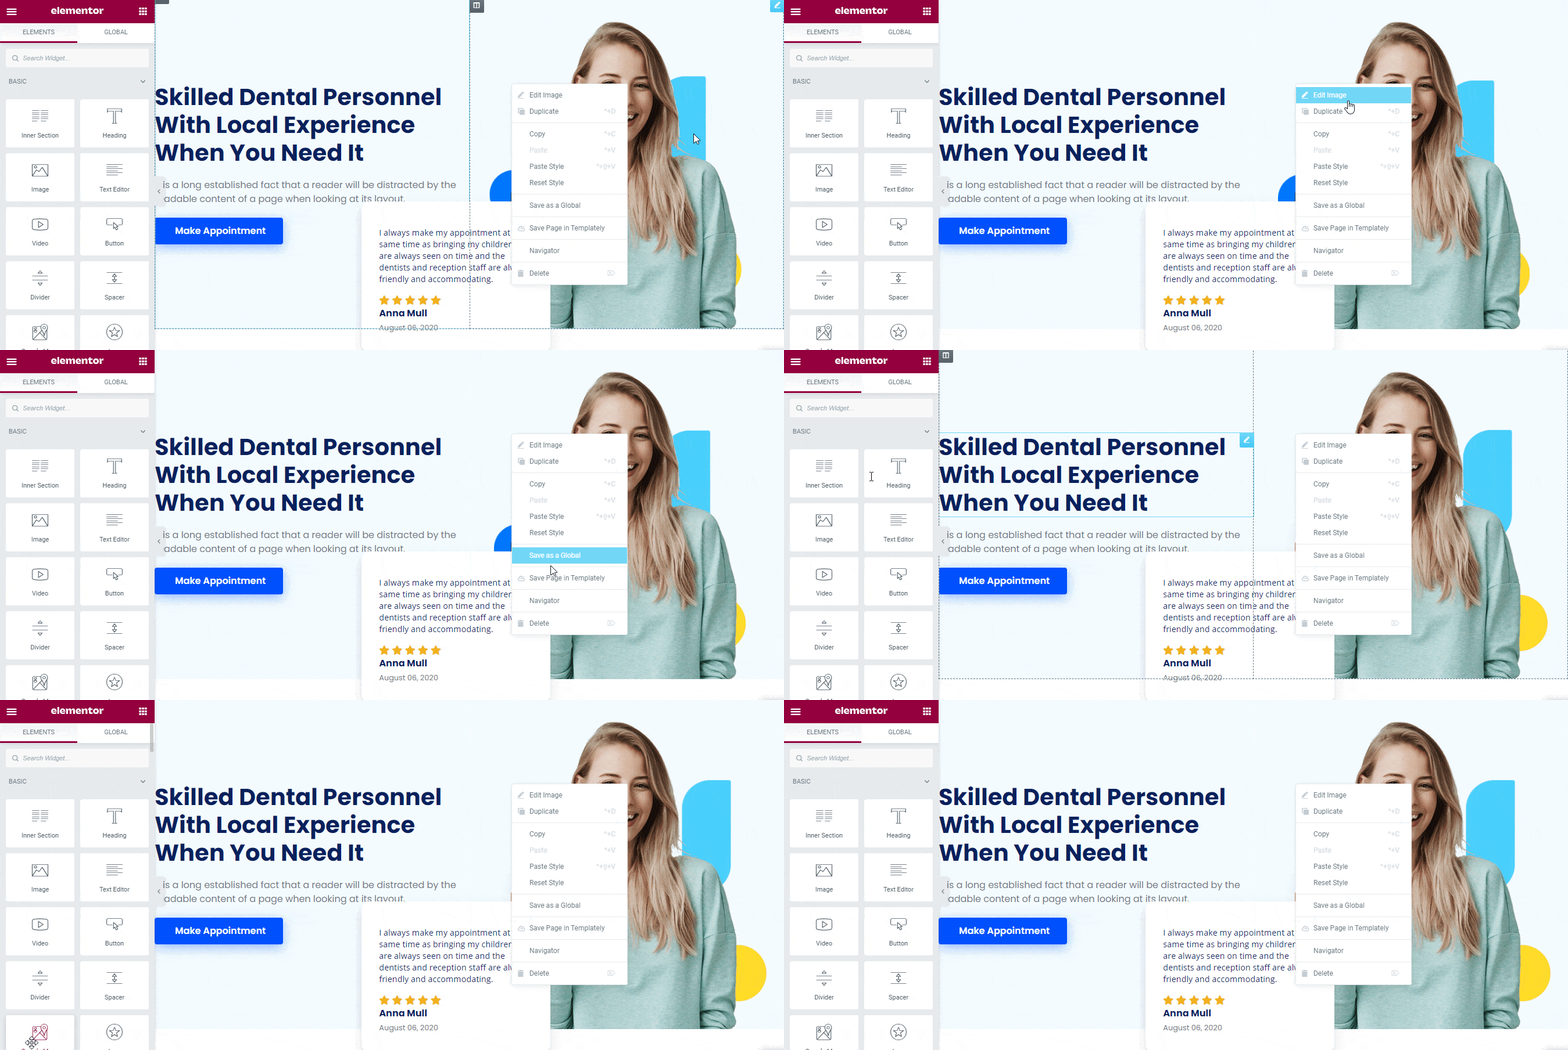
However, you can save these ready homepage template designs in ‘MyCloud’ storage of Templately. Just right-click on the design and press ‘Save Page to Templately’ to secure it on cloud space. That will help you to create a backup on the cloud and surely make your work smoother than before.

Dentist Website Elementor

If you want, you can even reuse your saved template designs on multiple sites as many times you want. Besides, it allows you to create a seamless collaboration on cloud sharing the ready designs of yours with other team members using Templately WorkSpace

Final Outcome: 

Congratulations to you! Finally, you have successfully used this interactive ‘D-Care’ ready homepage template by Templately to create your Dentist Website in Elementor without adding any single line of code.  

Dentist Website Elementor

Get ready to use Templately pre-designed template collections if you didn’t figure it out yet, and let us know your experience by commenting below. If you face any problem or need any help, you can freely contact our support team anytime you want. 

Delivery Service Website

How To Create A Delivery Service Website Without Any Coding

Creating a beautiful online presence with a delivery service website is now creating a great impact on the world of delivery service providers. It helps to reach out to your targeted audiences who could be an individual or a separate organization. You can easily get attached to all who are seeking a good online delivery service. 

Delivery Service Website

So to make a standout, fully-functional online delivery service website, now don’t have to roam around anywhere for a perfect solution. In this blog, you will know in detail about a complete, ready template pack to create a stunning delivery service website. 

Importance Of Creating An Online Delivery Service Website

Ecommerce businesses depend on the success of their delivery service system online. It will not be possible to run the business in a stable way without engaging with a good delivery service provider. As online businesses are at a growing pace in this digital era, so all eCommerce businesses are relying on these delivery service providers most. 

Besides this, individuals may also need to contact delivery service providers to send items from one place to another. In today’s era of digital connectivity, most people look online to find good delivery service providers. That’s why you should create a website for your delivery service business.

That can give you vast exposure online, also you can reach out to your targeted audiences by creating a responsive, SEO friendly website. You can even do your promotional activities through social media boosting, digital ad campaigns, and more with a beautiful looking website online. So to have a fully functional online delivery service website can spread and smoothen your business before anything. 

Delibox

Delivery Website Template Pack For Elementor

Get Access

🚚How To Create A Complete Delivery Service Website Without Coding? 

If you want to create an interactive, SEO friendly website, you can do that easily using Elementor page builder for WordPress. It’s handy and you can easily manage your online delivery service website from the editor. You can do any customization anytime you want.

To give a standout experience with the popular page builder Elementor, Templately the ultimate ready 1000+ template designs for WordPress being introduced. You can not only use ready designs of Templately but also save and make a seamless collaboration on the cloud securely. It offers you this unique and advanced facility to have a one on one tool to manage your website beautifully in Elementor. 

We are going to introduce you to the Delibox’ complete courier/delivery service Elementor template pack by Templately to make your online delivery service website standout without coding.

What Does Delibox Offer You?

You will get a ready beautifully designed seven template pages and blocks to create a responsive, easy-to-use online delivery service website. Let’s check out the predesigned templates below: 

Click Here
Click Here
Click Here
Click Here
Click Here
Click Here
Click Here
Previous slide
Next slide
  •  Home Page: Make a standout and engaging delivery service website landing page to attract targeted audiences’ and instantly boost site traffic.   
  • About Page: You can now share your business story, inspirations, achievements in one ready page using the ready About Page template. 
  • FAQ Page: You will get a separate FAQ page template to make your service more credible by providing your customers most asked questions, or queries. They can take help from this and feel confident about your service.  
  •  Service Page: What sort of services you provide, you can now claim and show it in an organized manner on your delivery service website.  
  •  Blog Page: Any important information, posts, or blogs can be highlighted now by using a ready blog page template of the Delibox Elementor template pack. 
  • Blog Details Page: You can drag your audience to the full view of your blog or posts using the Blog Details page template. 
  • Contact Page: A ready ‘Contact Page’ template can help you to make a        seamless communication with your actual and potential customers. 

🔰Things You Must Have To Get Before Creating An Online Delivery Service Website 

Before creating a fully functional delivery service website, you must have to get a few things done using the ready ‘Delibox’ delivery service website free Elementor template pack of Templately. Let’s check out the essential plugins that must need below: 

🚀Get Started With Templately To Create A Stunning Delivery Service Website 

Assume that you have activated all the above plugins. You are now fully ready to use the Delibox template pack in your Elementor site following some simple step guidelines below:

Delivery Service Website

Step 1: Insert ‘Delibox’ Homepage Design By Templately

Let’s click on Edit with Elementor to create a new page on the WordPress dashboard. Within a few moments, it will then come up with a new page in the Elementor editor. 

Delivery Service Website

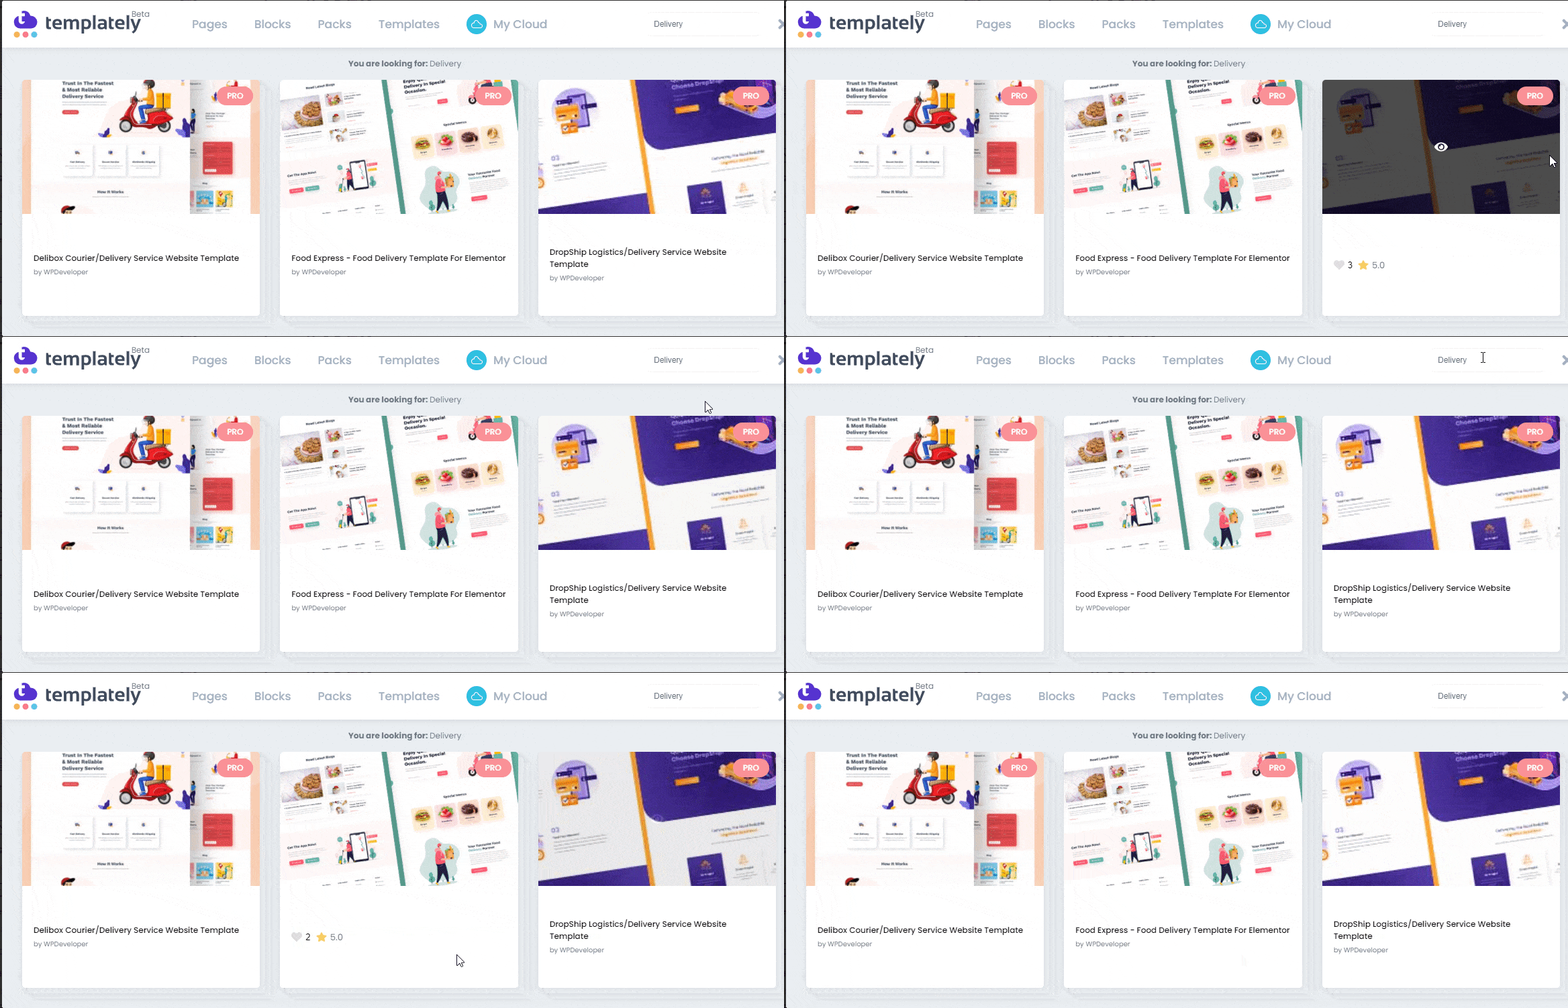
Afterward, you need to click on the middle icon of the page that comes with the ‘Templately’. It will beautifully showcase all Templately ready collections there. You have to search for ‘Delibox’ there. It will automatically then show all the ready pages & blocks related to it.

Delivery Service Website

Later, pick the ‘Delibox’ homepage design, hit the ‘Insert’ button, and start modifying it as per your preference.

Delivery Service Website

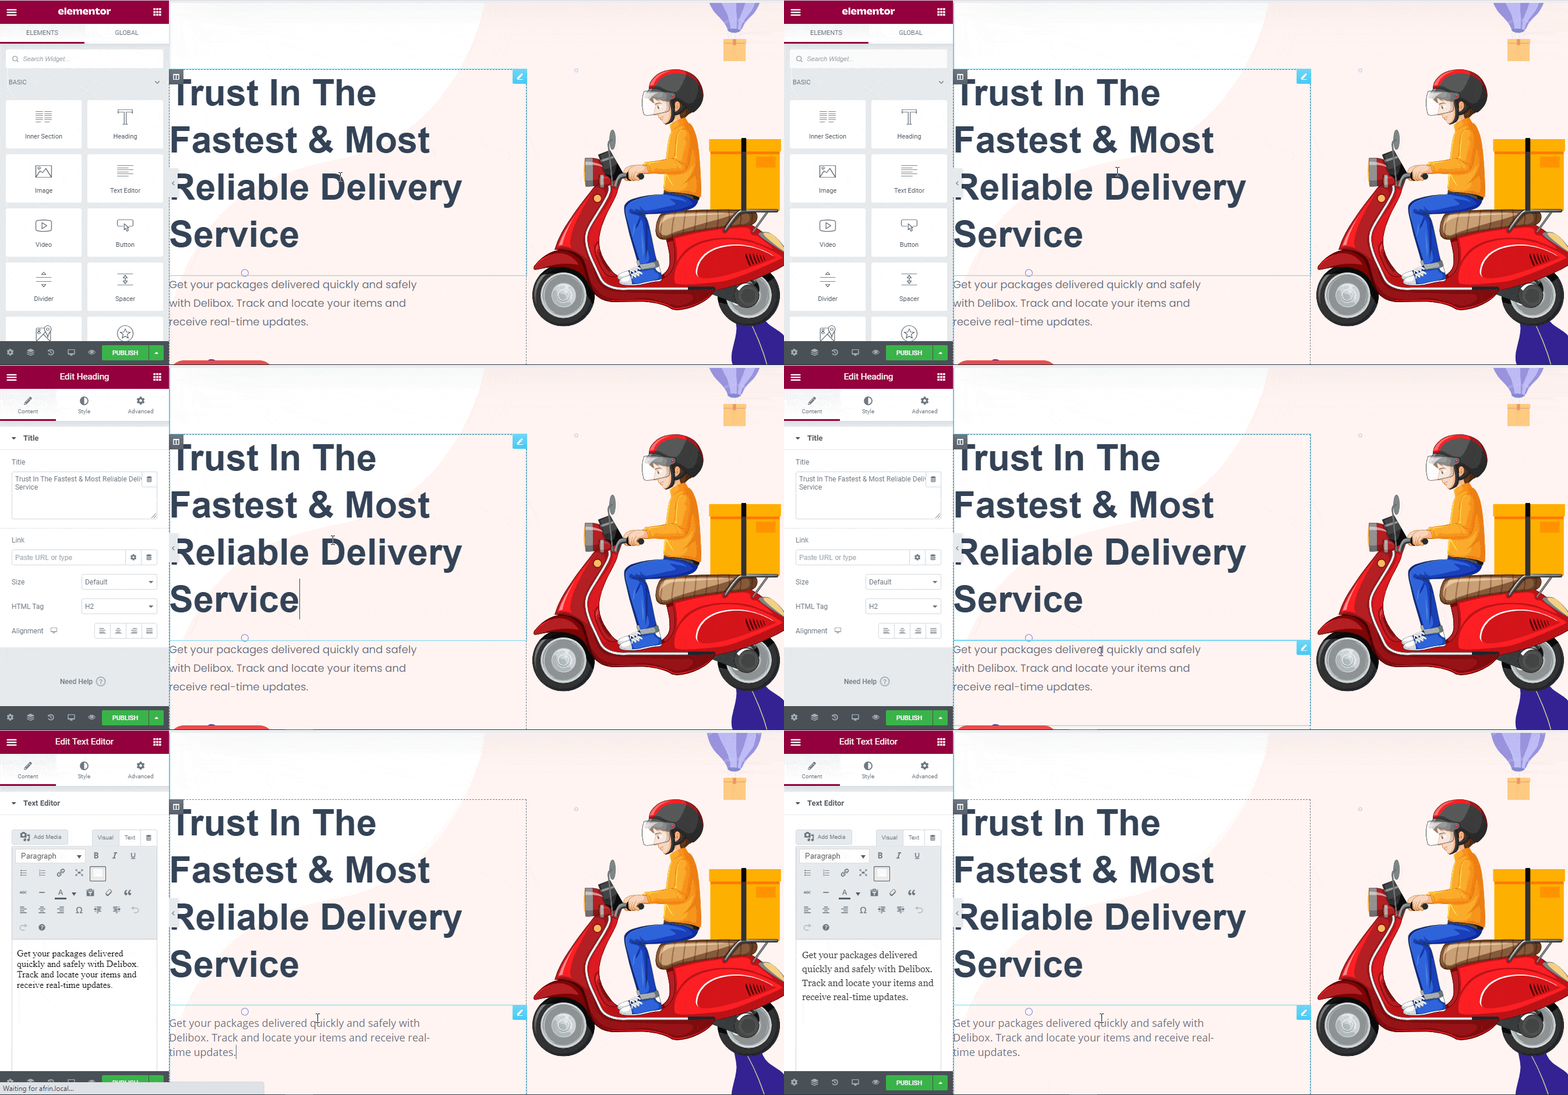
Step 2: Let’s Modify The Template Design

You can now use the responsive, ready template to publish your delivery service website using Elementor without adding a single line of code. You can add your preferred content in each creative section, drag & drop one to another, do a bit of modification, and now it’s fully ready to become live.

Delivery Service Website

Step 3: Make Your ‘Delibox’ Ready Template Design Secure On Cloud

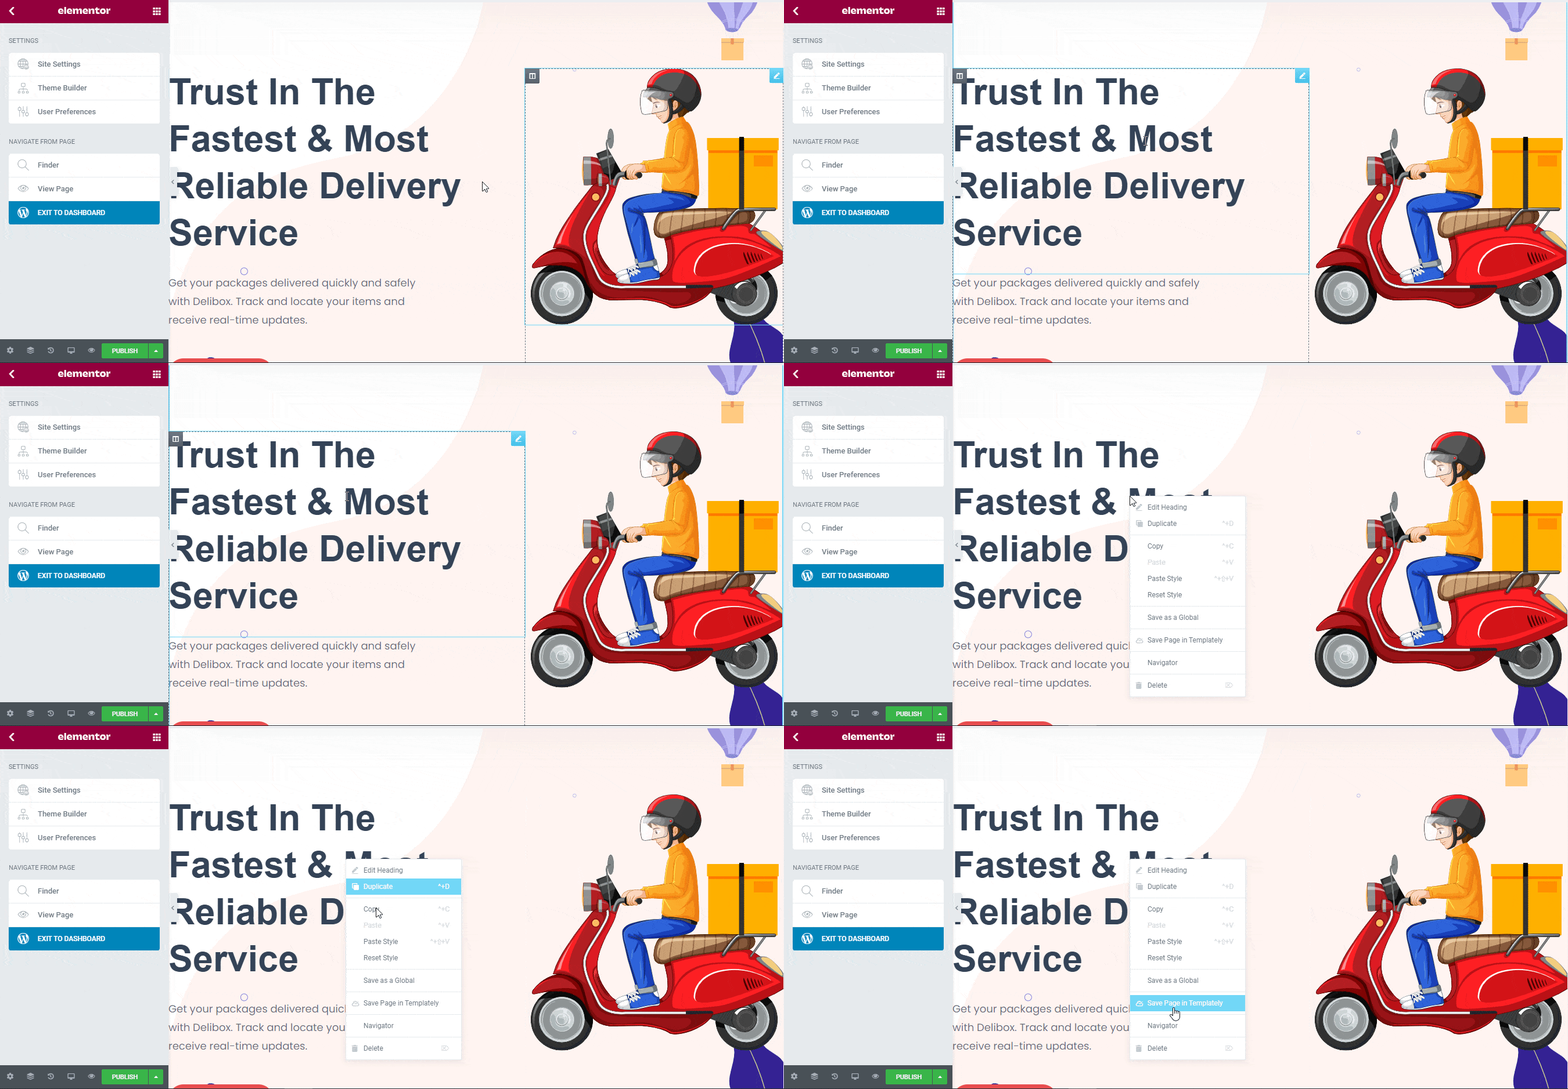
Now, save your template designs in ‘MyCloud’ storage of Templately. Just right-click on the design and press ‘Save Page to Templately’ to secure it on cloud space. It helps you to create a backup on the cloud and makes your work smoother than before. 

Delivery Service Website

You can even reuse your saved template designs on multiple sites as many times as you want. Besides, it allows you to create a seamless collaboration on the cloud by sharing the ready template designs of yours with other team members using Templately WorkSpace.

Bonus Tips: Get A Complete Food Delivery Service Website Template By Templately

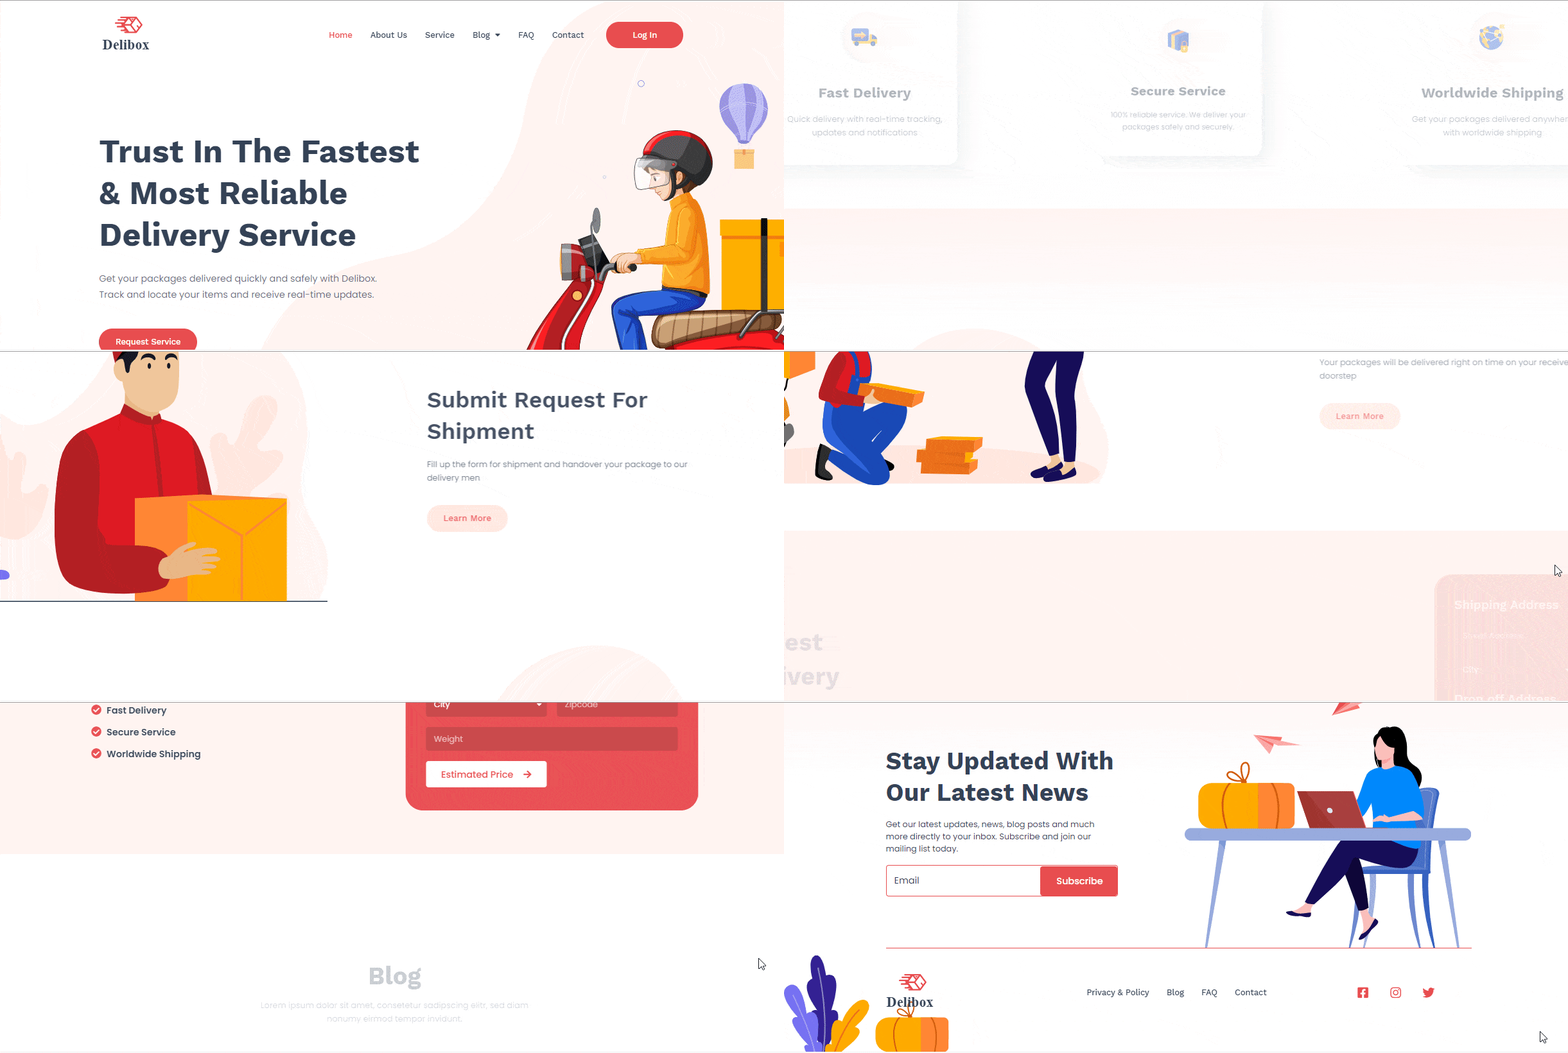
Congratulations to you! Finally, you have successfully used the interactive home page template designs of ‘Delibox’ by Templately to create your Delivery Service Website in Elementor in just a few minutes. 

Delivery Service Website

Get three separate ready premium Elementor pack template designs by Templately only to serve different purposes of your online delivery service website business perfectly without coding. 

Previous slide
Next slide

Didn’t use Templately ready template collections yet? Then give it a try now and let us know your experience by commenting below. If you face any problem or need any assistance, you can freely contact our support team anytime you want. 
WooCommerce Plugins

Must-Have 14 Best WooCommerce Plugins To Grow Your Online Business

If you want to accelerate your online eCommerce business growth, WooCommerce built websites using the best WooCommerce plugins that are performing the finest. All you have to do is to get essential WooCommerce plugins and improve your eCommerce site’s performance.

WooCommerce Plugins

But how to know which WooCommerce plugins you must-have to get? To completely enlighten you, and make your selection easier, here we have listed 14+ best WooCommerce plugins to grow your online business right away. Let’s get started. 

Table of Contents

How Can WooCommerce Flourish Your Online Business?

Online business websites are far more different than any normal business website. A typical online customer buyer’s journey is looking for a product, adding to cart, paying through gateways, tracking product delivery, and receiving the product. You have to build credibility unless you can’t influence customers to complete their buying journeys. When it comes to creating your online eCommerce business website using WordPress, the best option is using WooCommerce.

WooCommerce Plugins

WooCommerce is a flexible, open-source eCommerce platform. This plugin will help you launch your online business, increase your product selling, and upscale your business growth on an instance. Also, you will find several supportive WooCommerce plugins to manage online stores without facing any difficulties. 

Here we are mentioning the top reasons how WooCommerce will help to grow your online eCommerce business.

👉It’s very handy to create your online store with WooCommerce. If you are new to WordPress and have no experience in creating eCommerce websites, its quick setup wizard will guide you to build your online store instantly. 

👉If you are searching for a solution to create an interactive eCommerce site, without coding, then WooCommerce is there for you. Without adding a single line of code, you can complete creating your online store and start an online business right away. 

👉WooCommerce offers a wide range of flexibility and customization. You can twerk and turn all options to make your online eCommerce business captivating and skyrocket your growth. 

👉You can manage and maintain your online store from anywhere in the world with WooCommerce. There is a WooCommerce mobile app that will help you to execute your business from any device or any place. 

There is a great concern about security and backups in every online business website. WooCommerce will give full support, and there are so many powerful plugins available in the WordPress repository that can help you maintain your site security in advance.

5 Essentials To Check Before Choosing Best WooCommerce Plugins

If you have done activating WooCommerce, it’s now time to furnish and upscale your online eCommerce business website performance. Before getting the must-have 14+ best WooCommerce plugins from other 58,204 plugins,  check out these essentials that you have to check. It will help you to choose your must-have WooCommerce plugins wisely.

✅Whether you want to sell apparel, digital products, or do B2B business, determine the purpose of your online WooCommerce business. It will help you to select specific WooCommerce plugins. 

✅Set the mission and vision of your online business. Depending on that, you can get the best WooCommerce plugins to maintain your eCommerce site in advance and upscale your online business gradually. 

✅List down the features you want to make your eCommerce website fully-functional and flexible for your customers. As for this, you will need different WooCommerce plugins to include all those features. 

✅Check whether your website theme supports WooCommerce or not. You can go for Flexia– The best multi-purpose WooCommerce theme for your online eCommerce business. 

✅Now look for the WooCommerce plugins that can serve you in a multipurpose and unique way. That will save you money and make your website outstanding.

Get To Know Must-Have 14 Best WooCommerce Plugins For Your Online Business & Accelerate Sales

Wondering which WooCommerce plugins will be the best for your online business? Without any other intro, check out these 14+ must-have WooCommerce plugins below to grow your online WooCommerce business. 

ReviewX: Collect Multi-Criteria Reviews & Ratings For WooCommerce

Conversion rate increased 380% for displaying reviews with products, by the statistics of Spiegel Research Center. So you can guess what important role customer reviews play to run your online business successfully. 

WooCommerce Plugins

ReviewX is one of the popular WooCommerce plugins that will help you collect multi-criteria ratings and reviews from your customers. This plugin can help any WooCommerce store to increase social proof and sales.

ReviewX offers a variety of functionalities to run your eCommerce online business. You can add multiple rating criteria, give reviews anonymously, reply to reviews, highlight special reviews, and so on. You can share reviews directly to multiple social platforms to boost conversions and influence other customers to give reviews. 

Why Need ReviewX For Your Online Business 

In the online WooCommerce business, customers can’t see the product visually. So, building credibility is the biggest challenge here. If you can collect and display beautiful, honest reviews and ratings of your customers about your products, it will help to grow your business without any doubts. 

Checkout Field Editor For WooCommerce

Almost 69.57% of products get abandoned from checkout carts. Because of not providing any fully-functional checkout page that customers can easily complete their purchase. 

Checkout Field Editor is one of those complete solutions that will help you to manage carts effectively and decrease the abandonment rate. This plugin allows users to add, edit, delete, and change the display order of fields displayed on the WooCommerce checkout page. This is one of the popular WooCommerce plugins to manage the carts of your online business website.

Why Need Checkout Field Editor For Online Business 

Checkout Field Editor will revamp your checkout page and increase user experience. It will influence customers to complete product purchases and help your online WooCommerce business to grow. 

≈

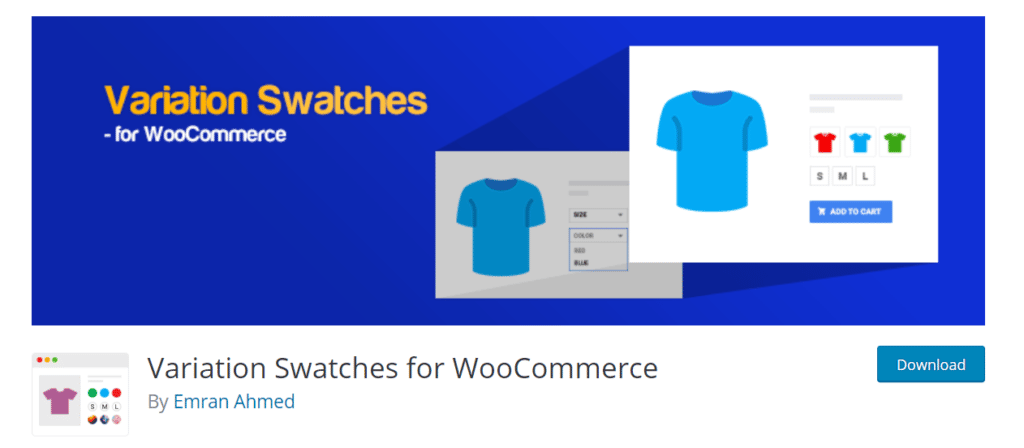
Variation Swatches For WooCommerce

WooCommerce comes with a simple and flat yet user-friendly product detail page. To add a bit of color and fun, Variation Swatches offer some amazing features. You can add a custom field, rearrange the outlook of the product details page, show product variation items in images, colors, and labels, etc. After activating this plugin, you can bye-bye dropdown product attribute fields.

Why Should You Consider Variation Swatches?

Variation Swatches plugin is there to improve your productivity. This plugin allows you to display product attributes more impressively, and interactively which will attract more customers in taking action. 

WooCommerce Plugins

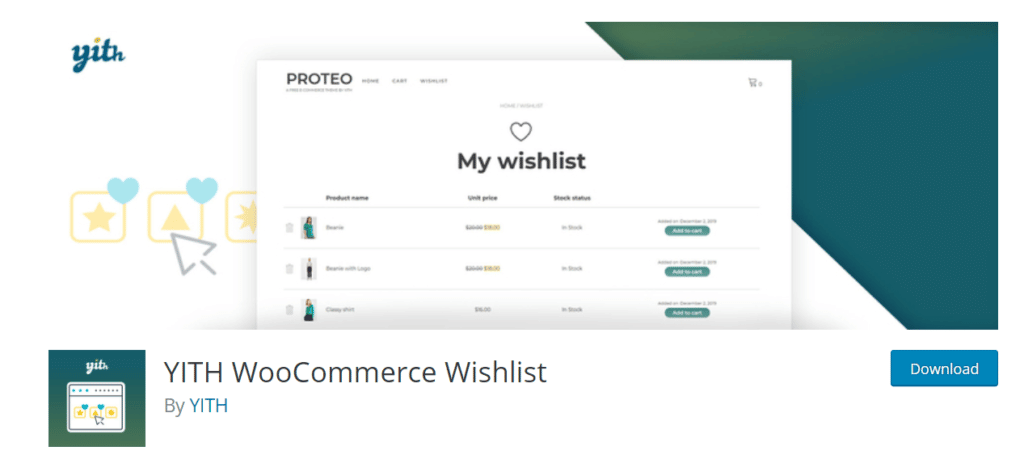
YITH WooCommerce Wishlist Plugins

YITH WooCommerce Wishlist is one of the popular WooCommerce plugins. This plugin can let your customers create a list of their favorite things that they will buy later or keep on top of their eyes. You can seamlessly integrate the YITH WooCommerce Wishlist with WooCommerce. Visitors can convert wishlists into checkout cards and eventually complete purchasing. 

The most exciting feature of this plugin is customers can create a wishlist and share that with their favorite ones. Customers can also share their wishlist on social media directly from your website. You can customize where you want to display the wishlist icon and how to handle it all from YITH WooCommerce Wishlist plugin. If any products are out of inventory, customers can keep that in the wishlist and get notified when available again. 

Why You Will Need YITH WooCommerce Wishlist?

Wishlists provide your customers with a reason to return to your website. When they will share it with other people it will increase your site engagement also. Customers can keep track of their favorite products also with a wishlist. You can call this plugin a keeper of your customers.

WooCommerce Plugins

WooCommerce Multilingual- Localize Your Online Business

WooCommerce Multilingual integrates WPML with WooCommerce to give online stores localization accessibility. This plugin allows you to translate the total website, make core level changes like translate checkout pages or emails in the language you want. WooCommerce Multilingual can display prices of your products in multiple currencies. When your customers are from all over the world, it will be easier for them to get an idea of product prices on an instance.

Why WooCommerce Multilingual Is Important?

If your niche customers are from multiple countries and regions, this plugin will help them read your website content in their own languages. It will improve the readability of your website and improve search engine ranking for sure. 

WooCommerce Plugins

NotificationX: Boost Your Conversions With Social Proof

Social proofs work in such a way that creates interest among your site visitors and influences them to purchase your products. NotificationX is one of the popular WooCommerce plugins to implement social proofs on your online eCommerce business website. You can easily showcase your products selling purchases, review teasers, etc. with interactive pop-ups to motivate new customers.

WooCommerce Plugins

You can create seamless integration with NotificationX and other different platforms. If you want, you can even create custom notifications to grab the attention of your customers. NotificationX is like an all-in-one user-friendly best marketing solution for running successful eCommerce marketing campaigns

Why NotificationX Is Essential For Your Online Business

To boost your sales, you will need to gain customers’ trust and influence them in making purchases. NotificationX’s eye-catching pop-ups will work like a magic wand to grow your online business. 

WooCommerce PDF Invoices & Packing Slips

Invoices help you keep accurate records of all transactions, and invoices play a vital part in that monitoring when, where, what, and to whom you sold an item or service. They can help you and your customers both to keep track of purchases, build credibility, and so on. WooCommerce plugin has no built-in way of generating invoices and sending them to customers, you will need additional WooCommerce plugins to do it. 

Here comes WooCommerce PDF Invoices & Packing Slips. After completing every product purchase, it will generate invoices and emails that automatically go to the customers’ inbox. You can send invoices to the previous customers before activating the plugin, bulk invoices, and invoices in different languages. The flexibility and simplicity of this plugin have made this popular among other WooCommerce plugins.

How This Plugin Will Help You To  Grow Your ECommerce Business

In an online WooCommerce business, an automated invoice creating tool will make your business way smoother. WooCommerce PDF Invoices & Packing slips can beautifully handle all your invoices and packing slips.

YITH WooCommerce Compare

YITH WooCommerce Compare plugin is one of the important WooCommerce plugins when you are selling the same type of product. After installing and activating the plugin, the compare button will be available on every product available on your online store. After clicking on the compare icon, it will open a pop-up and showcase the comparisons. So that your customers won’t have to leave the page as well. 

This plugin gives you full control over your online store. Without using a single line of code, you can set comparison attributes, add or remove them if needed. You can even set the place where you want to display the compare button, add a new logo, text, and so on. YITH WooCommerce Compare will make your customers purchasing experience or easier and enjoyable.

Why Should You Consider YITH WooCommerce Compare

Online WooCommerce business, customers can’t compare keeping the same products one beside another and picking the suitable one. A customer usually buys a product depending on many different parameters. This plugin will increase the accessibility of your website and make it more user-friendly. It will boost your product selling and give you a complete idea of what products are creating a buzz among your customers.

Best WordPress Page Builder Elementor & The Best Elementor Library Essential Addons For WooCommerce

If you don’t want to mess around with codes, but design a website that ensures user-friendliness, interactive outlook, and an environment that provides your customers a great user experience during the time of purchasing, then you can use the best WordPress drag & drop Elementor page builder. It will help you to make a beautiful, fully-functional product landing page, product detail page, add to cart, checkout page, and more. 

Elementor page builder offers 10+ WooCommerce elements, and exclusive ‘drag-n-drop’ features to help you to design amazing eCommerce site web pages, customize your WooCommerce product page, and influence your potential customers to be your permanent ones.

To make your Elementor site design experience more flexible, and functional, use Essential Addons For Elementor– the largest element library for Elementor. Among 70+ cool widgets for Elementor, you will get three handy elements that are only introduced for WooCommerce. Those are EA Woo Checkout, EA Woo Product Collections, and EA Woo Product Grid. You can now sketch an interactive single product page to include direct checkout options and so on. 

Exclusive Pro Tips Designing eCommerce Website In Elementor

If you want to apply cheat code in designing a website, then Templately– The ultimate template cloud for Elementor can help you out to the fullest. Here you will get 1000+ Elementor templates to give your website a stunning look. All you have to do is signup in Templately, select your online business’s best WooCommerce template packs, and insert that. You won’t need to use custom codes to make your website beautiful anymore.

Importance Of having Elementor, Essential Addons & Templately

When you are managing your online business all by yourself, Elementor, Essential Addons, and Templately will work as your ultimate design-assist for sure. They can make your website more attractive and user-friendly which will result in more to boost your sales.

WooCommerce Stripe Payment Gateway

While running an online WooCommerce business, you have to make sure your customers’ product purchasing journey is painless. To ensure that, you have to find out, add, & fix issues on your online payment process. Adding payment gateways with the help of the best online solutions can only help you with this. 

WooCommerce doesn’t provide built-in payment gateways with online stores, so you can go with WooCommerce Stripe which is one of the best WooCommerce plugins as far as making your eCommerce payment process smoother, trustworthy, and flexible from the buyer end. 

WooCommerce Stripe provides a wide range of facilities to your customers. For example, they can complete local transactions, make recurring payments, all major debit, and credit cards with a lot more.

Why It’s Mandatory To Have Stripe Payment Gateway

One of the main reasons customers shop online is because it’s flexible, you can order anytime from anywhere ignoring all the hassle of going to shop. You don’t have to carry any cash or bring any product by yourself at home. Just pick your desired one with clicks, do the online payment, and get the home delivery. So to make your online payment easier and seamless, you have to use fully functional WooCommerce plugins. 

WooCommerce Shipping & Tax

Running an online eCommerce site, you have to be transparent about your detailed product prices including all things like shipping, tax, ect. It’s completely your responsibility to enlighten your customers about everything. To do this work automatically, you can rely on WooCommerce Shipping & Tax the advanced WooCommerce plugins. This solution will help you display accurate shipping costs, tax on each product, outer country approximate delivery dates, and so on. WooCommerce Shipping & Tax will take care of your both digital and physical products.

Importance Of Adding WooCommerce Shipping & Tax

When you are delivering products all over the World, then shipping cost and tax need to be added. WooCommerce Shipping & Tax will reduce your pain to manage and maintain each product’s shipping cost, taxation, and so on. You can automate all these essentials and grow your online business effortlessly. 

WooCommerce Google Analytics Integration

If you can’t find out what is going well and what you need more for improvement in your online business, you can’t grow bigger and better. You can do these effortlessly only with advanced WooCommerce plugins. Among them, WooCommerce Google Analytics integration is the popular one and it’s free. All you have to do is install and activate this plugin on your dashboard.

WooCommerce Google Analytics integration will fetch data on all your transaction history, sales, and conversions, support tickets, and display them interactively on your WordPress dashboard. So that at a glance, you can see the overview of your online business. You can easily find out which product is selling well, which product’s demand is high, and so on. The analysis report of this plugin will also help you to manage your inventory wisely and smartly.

Why Should Integrate WooCommerce Google Analytics

Without any doubt, to accelerate your online business sales, you need to track present sales, conversion data, analyze them, predict future trends, and take necessary steps. Among all other analytics tools, Google Analytics is a renowned one. So Integration of WooCommerce Google Analytics will make your business analysis like bread and butter. 

Get WooCommerce Admin Plugin

WooCommerce Admin plugin is a member of the WooCommerce team. This plugin will create a frontend screen on your dashboard. So that you can manage and maintain a store with one click and drag & drop feature. You can preview revenue, order, variation, categorie, coupon directly from the admin screen. You won’t even visit activated WooCommerce plugins dashboards separately. This plugin will fetch all data and display them interactively.

Why WooCommerce Admin Is Important? 

If you are not a Tech-savvy person, handling all orders, responding to all customers from the admin end may puzzle you. WooCommerce Admin will help you customize your dashboard screens with only your essential information. 

HubSpot– CRM, Email Marketing, Live Chat, Forms & Analytics

When you are looking for a customer relationship management tool, there is no alternative to HubSpot, one of the powerful WooCommerce plugins. This plugin opens the door to immense possibilities of multiple marketing channels. You can run email marketing campaigns, form campaigns, including live chat, and so on. It will also help you to nurture your leads, track down marketing and sales performance, and so much more. t, consectetur adipiscing elit. Ut elit tellus, luctus nec ullamcorper mattis, pulvinar dapibus leo.

Benefits Of Having HubSpot To Make Online eCommerce Business

HubSpot helps WooCommerce site owners to create a communication bridge between customers and online store owners. This plugin allows you to Keep track of your leads and convert them into your regular customers. It will do the job of your professional market strategist, all you have to do is implement them and grow your online eCommerce business. 

Jetpack – Ensure Security, Backup, Speed, & Growth

All WooCommerce owners have concerns about how to protect their websites and prevent all types of attacks. If you are looking for WooCommerce plugins to take care of these, then Jetpack is the most popular and powerful one. Jetpack is made by WordPress experts to make WP sites safer and faster, and help you grow your traffic.

Importance Of Activating Jetpack On ECommerce Site 

Jetpack is an all-in-one plugin. It will take care of your website security, backup all your data, optimize your site speed, and help to grow your business. 

Nextend Social Login and Register

One of the biggest hassle customers face while doing online shopping is to register in every online store and memorize passwords. 23% of users abandon their shopping cart if they have to create a new user account. To resolve this solution you can activate WooCommerce plugins to provide direct login via social media accounts on your website. 

Nextend Social Login & Register will allow your customers to create accounts on your website in one click. Facebook, Twitter, Google, or any other social platforms you can include completing the registration process with ease.

How Nextend Social Login & Register Will Help Your Online business

You can ensure several social platform registration options for seamless your customers’ purchase journey with Nextend Social Login & Register. It will help you to increase customer registration, engagements, and boost your sales eventually. 

It’s Now All Your Turn

All these best WooCommerce plugins will help you manage your online business and upscale your business growth. Are you ready to skyrocket your online eCommerce business sales? Then give these best and essentials WooCommerce plugins a try and share your business growth transformation story with us. 

If you want this kind of more fun tutorials, news and updates, subscribe to our blog or join our Facebook Community..

music band website Zares

How To Create Website For Your Own Music Band Without Any Coding [FREE]

Having a beautifully designed music band website can help you step forward and get enough exposure worldwide. 

You can do any forms of promotional activities online easily and showcase amazing songs of yours as a band, musician, or composer. It will also help you to build your own value and reach out to your targeted audiences.

So to create a stunning music band website without any coding, you have to get a complete solution to get started. This blog’s purpose is to lead you towards an all-in-one template pack to create your music band website without coding for free. Let’s take a deep dive into this blog!

Table of Contents

5 Needs Of Creating A Music Band Website As A Musician

Popular musicians are nowadays creating their own music band website to promote their latest releases to all of their collections in one authentic place. This helps them to cope up with the latest trend of this digital music era and build direct communication with their listeners, fans, or anyone who wants to work with them with ease. 

Any music leads can reach out to them without going through the third parties or facing any hassles in a direct approach. Let’s discuss some other essential facts of creating a music band website in detail below:

Beautifully Highlight Your Entire Journey, Inspiring Story, Collections & More 

As a musician, singer, songwriter, or anything that is related to music has to be expressed. You have to find out a perfect way that can give you instant exposure, engagement, and you can reach out to your target audiences through your work. 

Having a fully functional music band website can help you to do that only. You can easily tell your entire journey as a musician, real story, your inspirations, all song collections outstandingly in one place. That your audience can make a direct connection with you. It’s effective for both newcomers and well-established musicians. 

Audience Can Easily Feel Your Passion About Music & Get Attached 

Since music is completely based on emotion, a passion that you will only be able to touch your audience through good music. They can feel each beat of your creations. So you have to find out all the latest ways of showing your obsession with music.  

Creating a music website as your own can help you to reach out to your targeted audiences very quickly as a new to the recognized musician. 

Works As A Great Tool For Creating Instant Engagement & Hype 

Fans and your listeners always look for a direct way to get connected with you, your creations. A complete music band website easily builds that bridge between you and your customers. So if you are having a music band website that is updated, your fans and listeners can quickly get engaged and create an instant hype by sharing your songs on different social media platforms. 

The Business of Apps statistics mentioned that Spotify earned $2 billion in the year 2020, and the rest of $1.84 billion out of this amount came from Spotify premium subscribers

Industry Professionals Can Easily Connect With You & Make A Deal 

Industry professionals who like your songs, and want to work with you in the future can directly contact you through an authentic music band website. This especially works great for new signers who are new to the industry, don’t know where to knock. 

Once they can spread their creations, having a fan base, the rest of the work can beautifully be done by having a website. Anyone who wants to work with you can easily go through your site, listen, and make a decision to communicate. It’s also effective for established singers, they prefer online communications because of having a track in this digital era.   

Increase Authenticity & Can Have Full Control Over Your Own Data

As we already mentioned about having a music band website effectiveness, one of the main functions is, you can have full control over your data. Who wants to communicate with you, fans database, total visitors of your site, every detail can be measured and monitored. You can take further promotional actions according to this to create hype about your new releases and gather more audiences. 

Let’s check out some popular musicians, singers who are maintaining their music band website instead of having enough exposure below:

Previous slide
Next slide

How To Create A Music Band Website Without Any Coding [FREE]? 

If you want to create a music band website without coding, it can only be done beautifully if you have chosen the most popular WordPress page builder Elementor. You will get a variety of ready template collections to build your website and publish it right away. 

To smoothen the experience of Elementor page design, Templately has introduced 1000+ ready template collections to build any kind of website without coding in WordPress. You have to insert its pre-designed collections, modify a bit with your own content, and make it live whenever you want.

For the music band website, they have launched a separate stunning, complete Elementor template pack ‘Zares’ ready template by Templately. Let’s check out below what it actually comes with:

What Does Zares Music Band Elementor Template By Templately Offer? 

Zares comes with seven stunning completely ready pages and two block designs to create your music band website without coding for free. Each of its designs is highly informative, comes with animated widgets, smooth scrolling effects in its creative sections, and more to make a standout website just within a few minutes.

Watch This Video

➨Highly decorative, interactive Zares Homepage design for your music band website. 

➨Showcase your music biography in one organized & separate Zares Biography Page design. 

➨Display your songs impressively on the ready Product Page & redirect visitors to the Product Details Page

➨Highlight your latest song release, achievements, success, and more in the ready Zares News Page template. 

➨Let your audience know the information about your upcoming events in detail using the pre-designed Zares Events Page template. 

➨Help your visitors, listeners, fans, industry professionals, etc, to communicate with your directly using Zares Contact Page design.

🔰Things You Must Get Before Creating Your Own Music Band Website In WordPress

Let’s get a few things done before creating a music band website using the ‘Zares’ Elementor template pack from Templately. Let’s check out the necessary plugins that you must have to get using this ready template pack: 

✅Elementor: Install the best page builder Elementor to use this Zares music band website templates by Templately. 

Essential Addons: Activate Essential Addons for Elementor. This is considered the best elements library for Elementor with almost 1 million happy users and 70+ amazing widgets.

Templately: Now, you have to sign up for an account and install ‘Templately on your WordPress website to use this ready template for Elementor.

🚀Get Started With Templately To Create An Engaging Music Band Website 

Now that you have installed all the mentioned plugins above, you are ready to use the Zares template pack in your Elementor editor. Follow these simple step-by-step guidelines below:

Step 1: Insert The ‘Zares’ Homepage Template Design In Elementor

Let’s click on Edit with Elementor to create a new page on the WordPress dashboard. In a few moments, it will then come up with a new page in the Elementor editor. 

Afterward, you need to click on the middle icon of the page that comes with the Templately. It will provide a popup window that will beautifully showcase all the ready templates of Templately. You have to search for ‘Zares’ or ‘Music Band’ on the search panel. It will automatically then show all the ready pages & blocks related to it.

We will pick the ‘Zares’ homepage template. Hit the ‘Insert’ button to load the page template on your website. You can add more pages for your Music Band Website in the same way.

Step 2: Customize The Homepage Design Of Your Music Band Website

You can now use the responsive, ready template to publish your Music Band Website using Elementor without adding a single line of code. You can add your preferred content in each creative section, drag & drop one to another, do a bit of modification, and it’s fully ready to become live.

Step 3: Save & Secure Your Music Band Template Design On MyCloud

Now, save your template designs in ‘MyCloud’ storage of Templately. Just right-click on the design and press ‘Save Page to Templately’ to save it in cloud space. It helps you to create a backup of your design without needing extra space.

You can even reuse your saved template designs as many times you want. Using Templately WorkSpace, you can also share your music band website design with your team anytime, seamlessly. 

Congratulations to you! After completing all the steps successfully, your music band website in Elementor will look like the one below. This is how you can create a beautiful music band website using the ‘Zares’ ready template pack by Templately without coding for free.

Sign up to Templately and get access to its stunning ready template collections and let us know your experience by commenting below. If you face any problem or need instant help, you can freely contact our support team anytime you want. 

Anchor Link Elementor

Beginner’s Guide: How to Add Anchor Link in Elementor

Anchor Link Elementor

Adding an anchor link in Elementor is the easiest task to do if you know how to do it. It helps your site to rank high on search engines like Google, Bing, and more.

But you have to know the exact way of adding it. Now you don’t need to worry about it anymore. Here in this blog, you will know each possible way, benefits, and more of adding an anchor link in Elementor. Let’s get started!

Table of Contents

How To Define Anchor Link & Its Different Types? 

A particular word or group of words that are linked up and redirects your visitors to another page of your website, external site pages, blogs, or other types of content is called the text ‘Anchor Text’, and the link that is added to it called Anchor Link

It usually makes the anchor text blue after adding the link to it. But you can style that section, make it bold, change the color, and more that will fit with the site environment. Anchor text selection should be short like one, two, or mostly three words. You have to use links according to the group of words you are selecting.

anchor link Elementor

There are several types of anchor text that you can use to add anchor links to it. Let’s check out the different types at a glance. 

👉Exact Match: If you select a specific word and add that exact keyword in your anchor text, and then link to relevant content on your site, then that anchor text is said to be an ‘exact match’. Like  “Social Media Site”, and you are exactly linking a page with this exact topic.  

👉Partial Match: If your anchor text uses a variation of your selected keyword, it is considered to be a ‘partial match’. Suppose you are anchoring the text ‘SEO tool’ with a page called “best SEO tool“, then it will be considered as a partial match.     

👉Brand Match: Brand names can also be linked, for example, the word ‘Elementor’ can be linked to Elementor’s official website. This is an example of a ‘brand match’.

👉Naked Link: You don’t use any text, just directly give the link like https://elementor.com/.

👉Generic: Generic anchors are phrases like ‘Click Here’, ‘Get Started’, ‘Press The Button’, and more. Like we are using this type of text and redirecting to related pages of your site. 

👉Images: If you upload any images, and give an alternative text to them, then search engines like Google will use the alt-text for crawling. For example, your blog focus keyword is “SEO tips & tricks”, and you are using this as your alternative text during the time of uploading the images, and the search engines will crawl with this alt-text.

Anchor Link Elementor

The Ultimate Benefits Of Using Anchor Link

As you already know the whole definition of anchor link, and how to use it, let’s find out the ultimate benefits of using anchor links on a website, blog, or any content below:   

  • Anchor link helps your website be ranked on search engines quickly. That’s why you have to care about the linking. 

  • If search engines find links to relevant content in your anchor text, your particular blog, page, or website, it will help you to rank higher very quickly.

  • If you add irrelevant anchor links, your site will be marked negatively, and may not appear on the results page.

  • So for to improve your SEO rankings, you have to make sure to use relevant anchor links to internal or external site links, blogs, or any other types of content links in it. 

  • It also leads your users to the desired section, where you want to grow your traffic.

  • For customers, if they click and get the exact solution they are looking for, it will enhance their user experience.

Rank Top On Search Engines

To make your website rank faster on Google or other search engines, you have to be very careful and must use relevant anchor links to your anchor text. It will provide you SEO benefits, and within a short time you will reach out to your targeted audiences with ease. 

Anchor Link Elementor

Beginner Step By Step Guide To Add Anchor Link In Elementor

You can easily add anchor links in Elementor by following two methods.  One is using a Menu Anchor element to separately add anchor links in Elementor and highlight it. Or, you can link the anchor text in any of your text elements and link it according to your needs. And you have to know how to do that correctly. Let’s go through the step by step guidelines below to know in details.

Method 1: Use Menu Anchor Element To Add Anchor Link In Elementor 

If you use the Elementor Menu Anchor element, it will be hidden from the user end, and you can add it anywhere you want, even in your WordPress menu too. Here’s how you can get started:

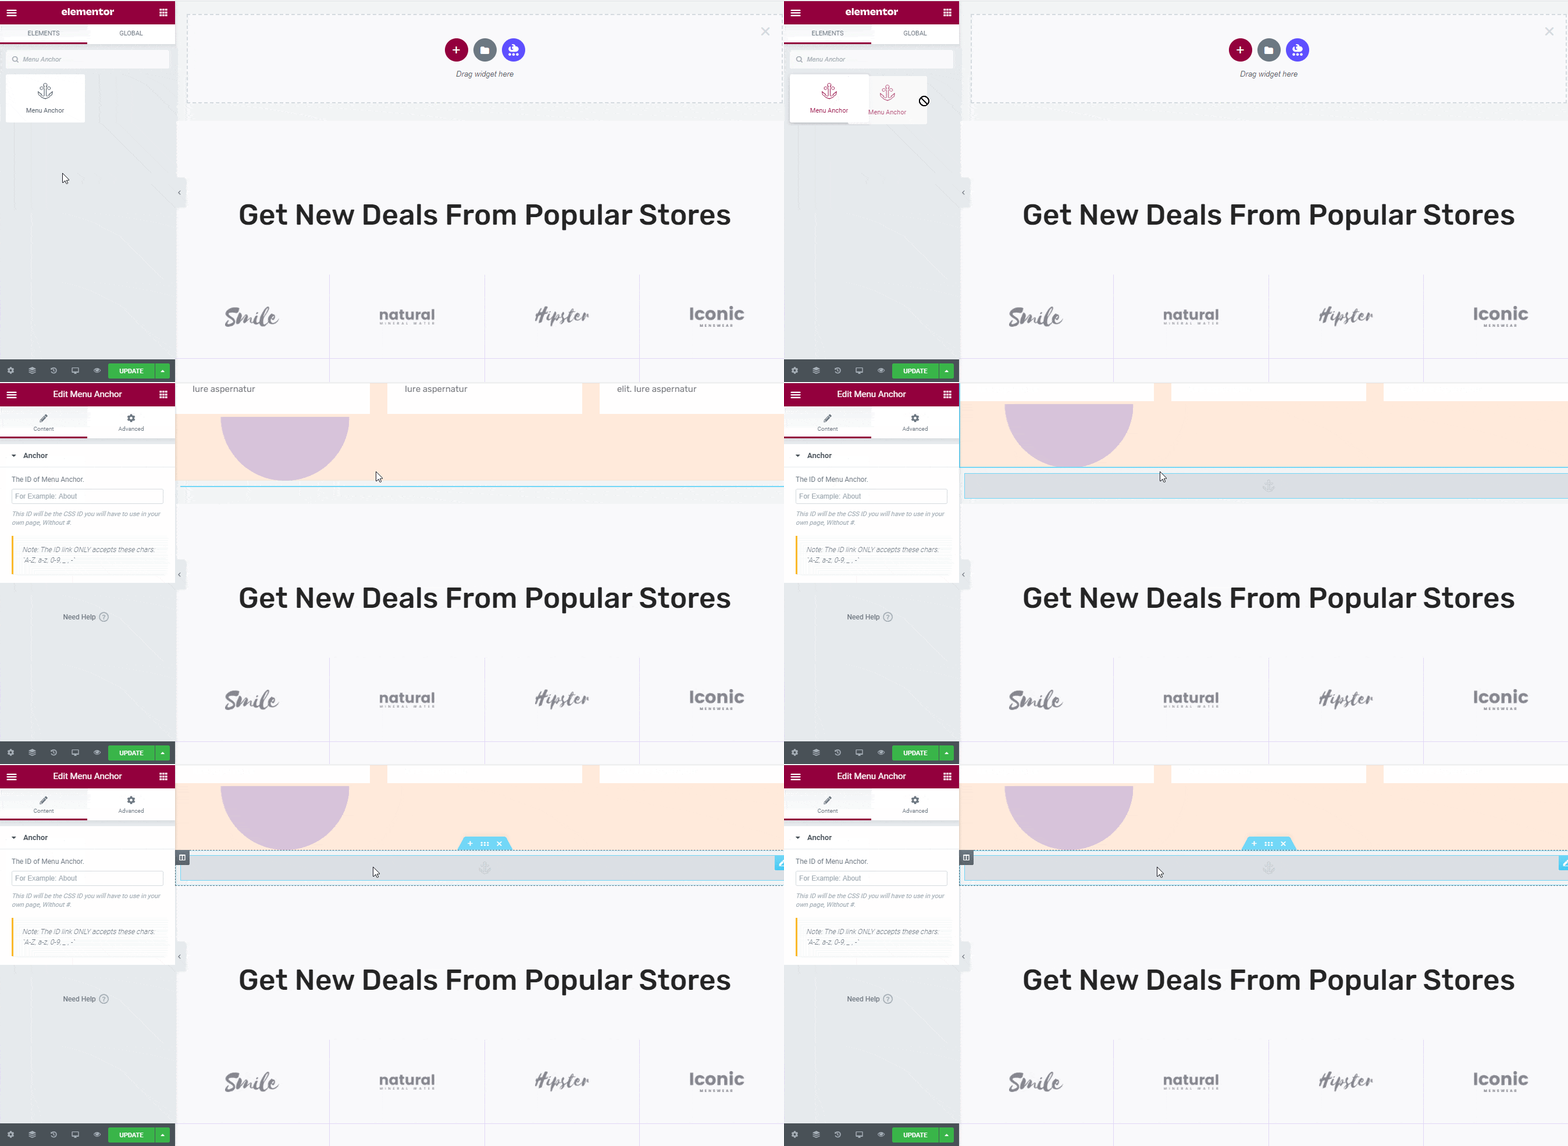
First, you have to drag & drop the Menu Anchor widget just above your desired section where you want to make an anchor link.

Anchor Link Elementor

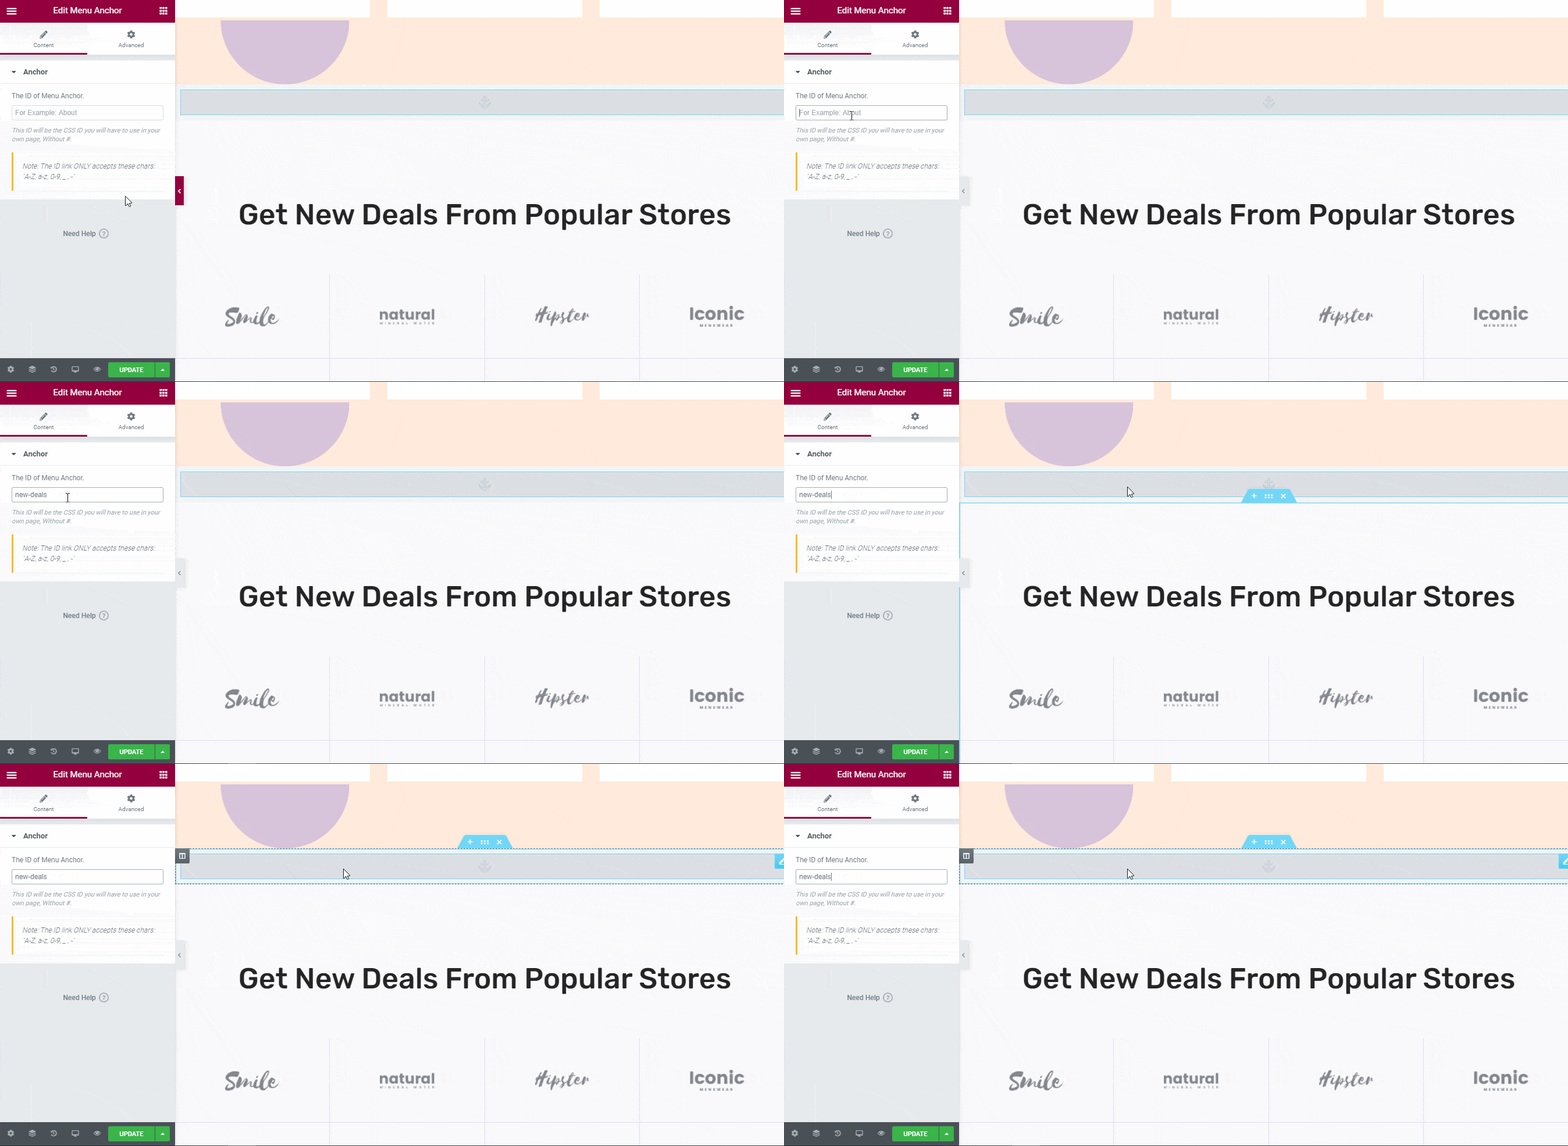
Next, you have to click on the ‘Content’ tab of that element to add ‘The ID of Menu Anchor’ to create your anchor link in Elementor as shown below.

Anchor Link Elementor

If you want to add multiple words to create an anchor link, you just need to use the sign ‘-’ to create a gap between each word to make it a link. 

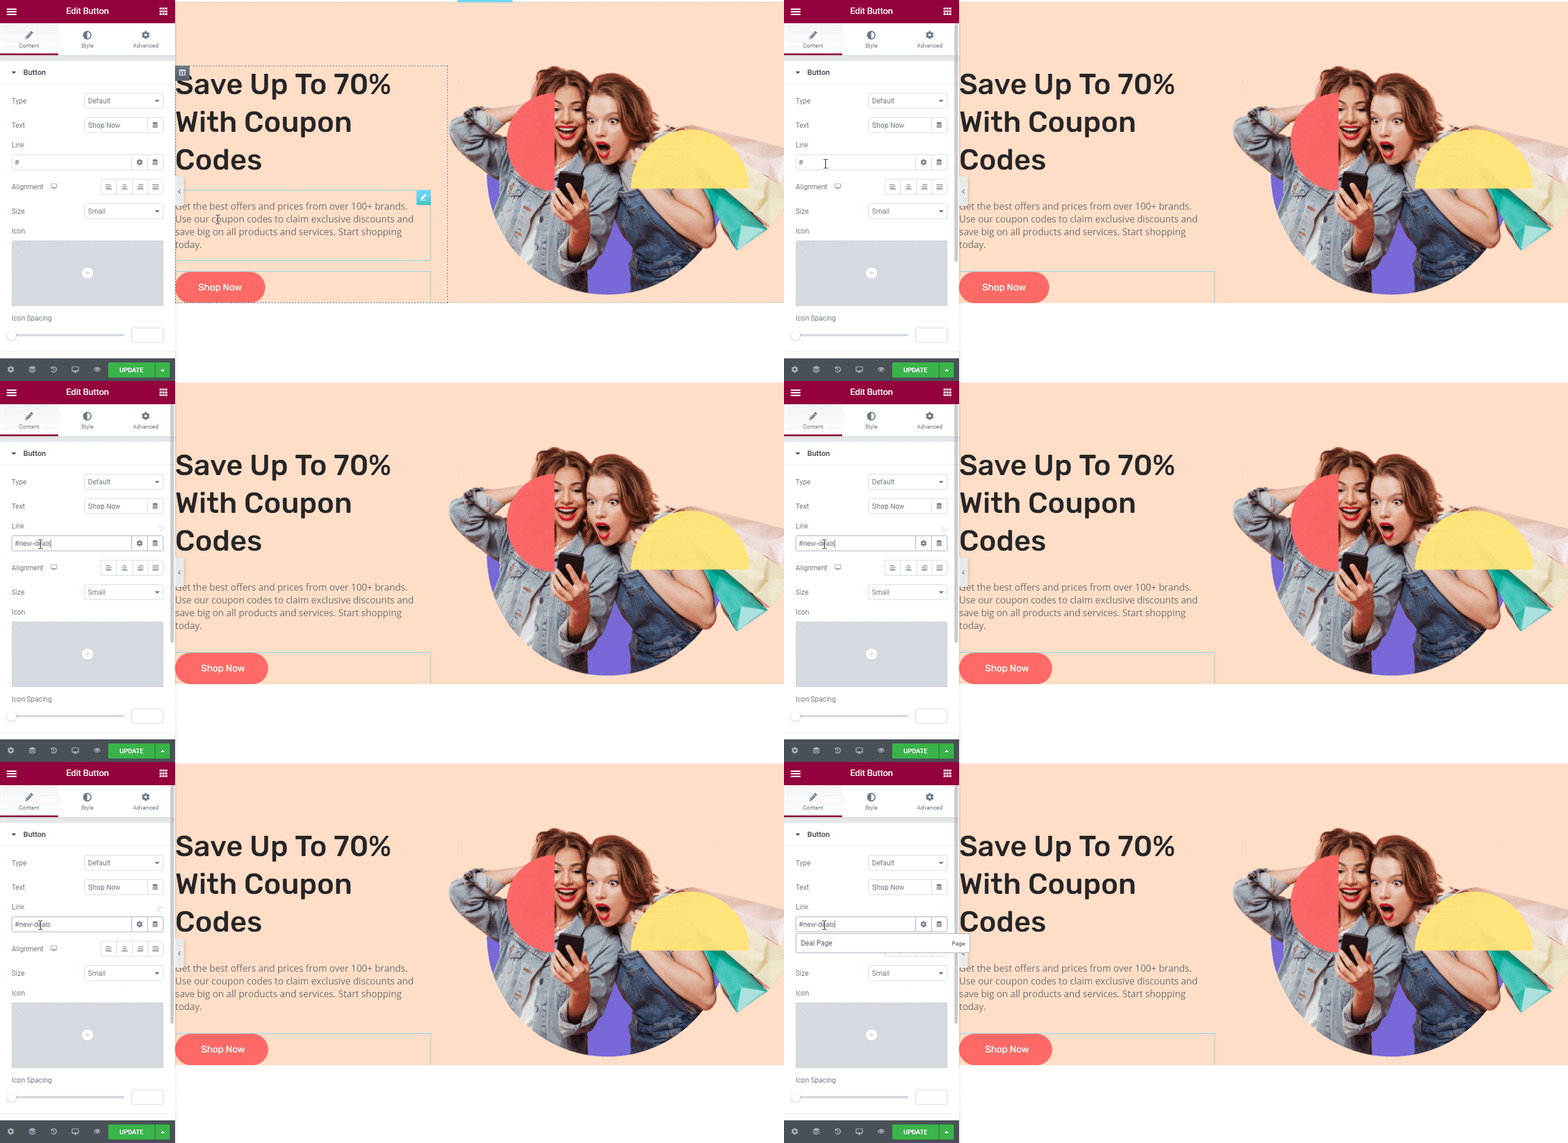
Next, click on any Elementor widget where you want to add the anchor link you have just created above. For this example, we will add our anchor link to our ‘Shop Now’ button. To do this, click on the Button element, and head over to the ‘Content’ tab in Elementor Editor.

Anchor Link Elementor

Afterward, you have to use the ‘#’ symbol, and then copy & paste the ID of your Menu Anchor in your desired call to action button link. This way, when a user clicks on the ‘Shop Now’ button, they will instantly be taken down to the Menu Anchor we have created earlier. The final outcome image is given below to make it more clear for you. Have a look!

Anchor Link Elementor

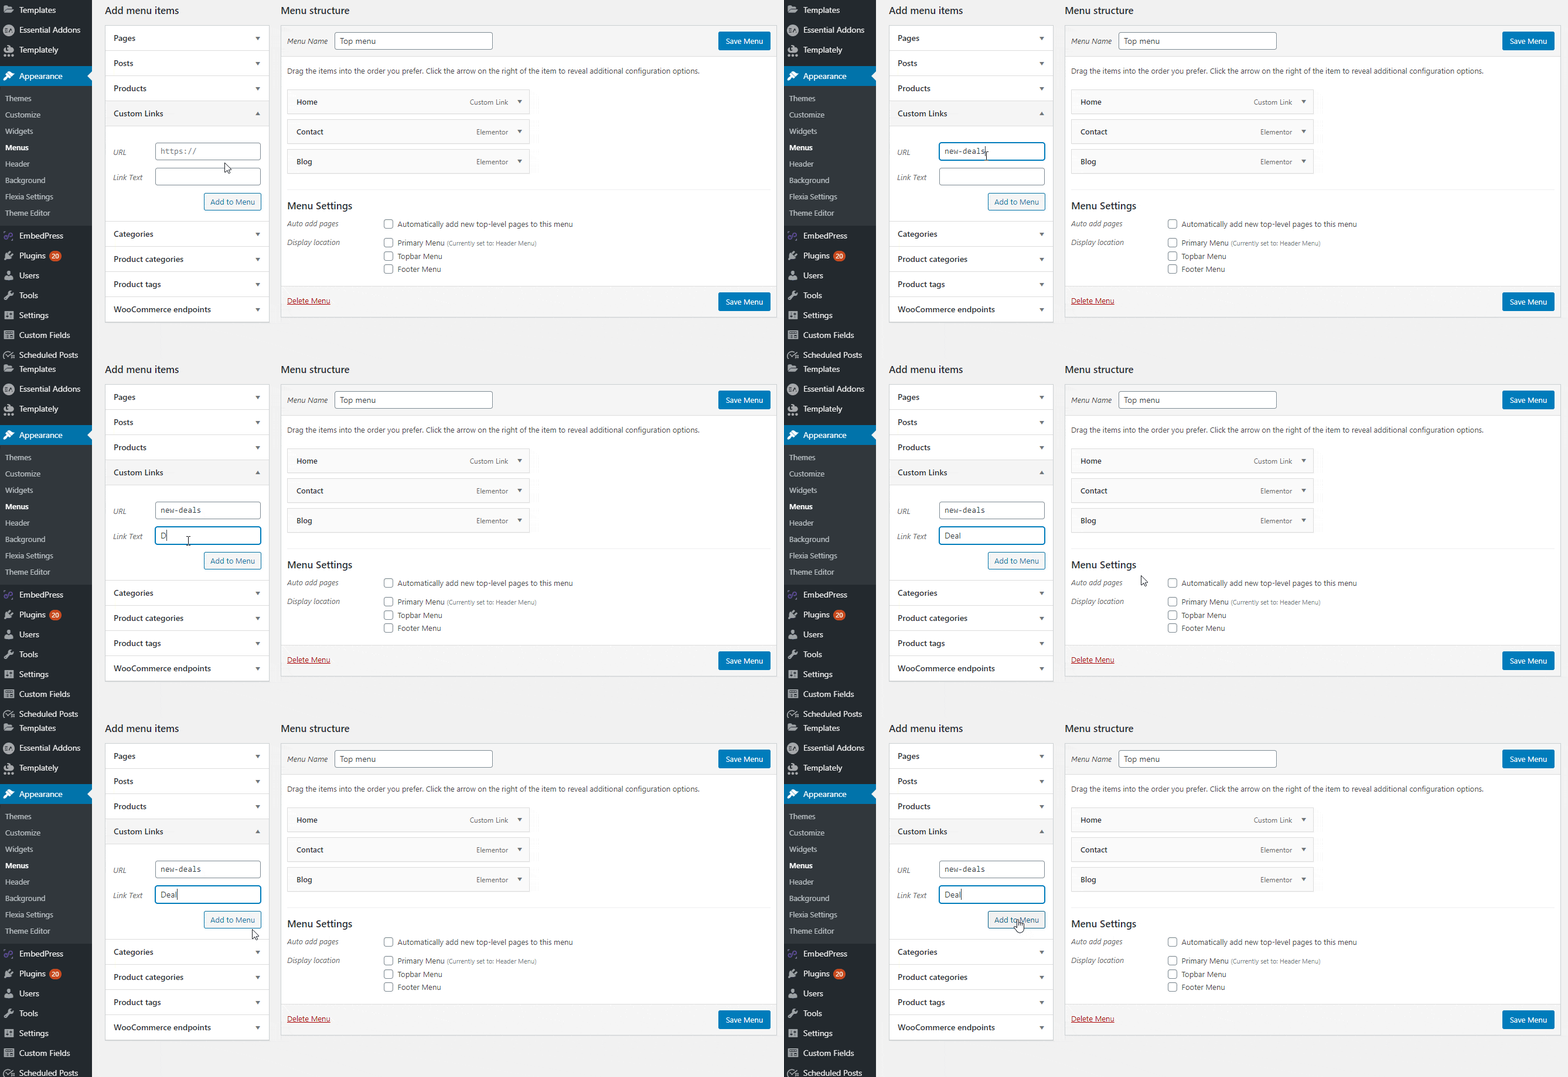
You can even use this Elementor Menu Anchor link for your WordPress Menu. Just copy & paste the link id and go to WordPress > Appearance > Custom Links.

Anchor Link Elementor

Now, you have to use a ‘#’ symbol before adding your desired Elementor Anchor Link in the WordPress custom menu ‘URL’. After that, you have to give your menu a name using the ‘Link Text’ section and hit the ‘Add to Menu’ button. 

Anchor Link Elementor

It will then automatically be added to your WordPress menu tab. Simple, isn’t it? Just seems difficult before knowing the right procedure.

Method 2: Generally Add Anchor Link To Any Text Element 

To add anchor links to your website content, you can easily click on any text element from the Elementor Editor.

Anchor Link Elementor

Afterward, choose your preferred text and insert the most relevant link to your anchor text and make it linked quickly.

Anchor Link Elementor

If you want to link your content that will lead your visitors to a specific place on your page you can use the link of the Menu Anchor element.

Anchor Link Elementor

So when your customer will click on the section they will be redirected to the particular section where you want them to go to.

Anchor Link Elementor

That’s how simply you can add Anchor Link in Elementor using the Menu Anchor element, link to text content from the Elementor Editor. Also, you can add your Elementor site anchor link anytime in your  WordPress menu in a matter of seconds to make your work flexible and easily manageable.

Hope you will find this blog helpful, if you want to read more go to our blog page, or can join our friendly Facebook Community to get in touch with other website creators.  

Online Shoe Website Elementor

How To Start Online Shoe Website Without Any Coding [FREE]

You can now make a stunning online shoe store website using most popular page builder Elementor. This way, anyone can easily build any type of website using ready Elementor template designs without coding, and just with a few clicks. Want to know in detail about creating an online shoe store website in Elementor? Take a deep dive into the blog below!

Online Shoe Website Elementor

Table of Contents

Why Should You Create An Online Shoe  Website?

As of now, eCommerce platforms have become popular by selling all kinds of products. Especially during this COVID-19 situation, you can get more sales with a fully functional online shoe store website. Check out the scenario below:

👉You can attract your customers by highlighting your products beautifully there.

👉All of your customers can choose and pick their preferred products right away.

👉24/7 order replacement, seamless online delivery,& easy online payment systems are available. 

👉Special discounts can easily be displayed and promoted to different social media platforms.

👉Customers can communicate with you directly through messages without any interruption. 

👉You can easily rank top having an SEO friendly, fully functional website and reach out to targeted customers without doing any extra effort. 

👉You can run any successful promotional activities online, paid campaigns, and more with a stunning online shoe store website. 

That’s how a fully functional online shoe store website will help you to step into the world of eCommerce and be successful in the digital world. 

Upsole

Online Shoe Website Template Pack for Elementor

Get Access

👠How To Create An Online Shoe Website?

Templately comes with 1000+ ready Elementor template designs to help you build any kind of website that can also serve your multipurpose business needs. You just have to insert your preferred template, add your own content to it, and then publish it to make it live.  

Introducing – Upsole a completely ready, fully responsive, free Elementor template pack by Templately. You can now design and publish your online shoe store website today without adding any single line of code. 

What Does Upsole – WooCommerce Elementor Template Pack Offer? 

With the Upsole you will get ten ready pages and two blocks to make a standout online shoe store website without coding for free. You just have to add, modify, and publish each. It’s fully responsive, SEO friendly, consists of animated widgets with creative sections, and more. 

✅Get a complete, beautifully designs Homepage, About Page & Contact Page.

✅Make an interactive Shop Page Page & Product Details Page to display your products.

✅Fully functional Login Page, Cart Page, & Checkout Page to organize the full online purchase system with ease. 

✅You will get a separate Blog Page and Blog Details Page to make your online shoe website business credible for your audiences. 

Click Here
Click Here
Click Here
Click Here
Click Here
Click Here
Click Here
Click Here
Click Here
Click Here
Previous slide
Next slide

🔰Things You Must Get Before Creating An  Online Shoe Website 

You must have to install and activate some necessary plugins before creating an online shoe website using the Upsole Elementor template pack from Templately. Let’s check out all the plugins below to use this ready template pack: 

🚀Get Started With Templately To Create A Stunning Online Shoe Website 

Let’s assume that you have installed and activated all the mentioned plugins that are required above. Now you are all set to go using the Upsole template pack in your Elementor editor. Follow these simple step-by-step guidelines below:

Online Shoe Website Elementor

Step 1: Insert The ‘Upsole’ Template In Elementor

Let’s click on Edit with Elementor to create a new page on the WordPress dashboard. In a few moments, it will come up with a new page in the Elementor editor. 

Online Shoe Website

Afterwards, you have to click on the middle blue icon of the page that comes with Templately. It will provide a popup window that will beautifully showcase all the ready templates of Templately. There you have to search for ‘Upsole’ or ‘Shoe Store’ in the search panel. It will automatically then show all the ready pages & blocks related to it.

Online Shoe Website Elementor

We will pick the ‘Upsole’ homepage template. Hit the ‘Insert’ button to load the page template on your website. You can add more pages for your online shoe website in the same way.

Online Shoe Website Elementor

Step 2: Customize The Design Of Your Online Shoe Website

You can now customize the design of your online shoe website template in Elementor. Add your preferred content in each creative section, drag & drop sections from one place to another, do a bit of modification, and it’s fully ready to become live.

Online Shoe Website Elementor

Step 3: Save Your  Online Shoe Website Design On MyCloud

Now, save your template designs in ‘MyCloud’ storage of Templately. Just right-click anywhere on the page and choose ‘Save Page to Templately’. This will save your online shoe website design on Templately’s cloud storage. You can later reuse this design or keep it saved as backup.

Online Shoe Website Elementor

If you want, you can use Templately WorkSpace to share your online shoe website designs anytime with your team and make a seamless collaboration on the cloud. 

Final Outcome: Your Very Own Online Shoe Website

Congratulations! After completing all the steps successfully, your online shoe website in Elementor will look like the one below. This is how you can create a beautiful online shoe website using the ‘Upsole’ ready template by Templately without coding.

Online Shoe Website Elementor

Sign up to Templately and get access to its stunning ready template collections and let us know your experience by commenting below. If you face any problem or need instant help, you can feel free to contact our support team anytime you want or join our friendly Facebook Community.

Jewelry eCommerce Website

How To Start Jewelry eCommerce Website & Successfully Sell Online

Starting your online jewelry eCommerce website can accelerate your business growth and take your business to next level. If you analyze the market for your online jewelry business, you will get to know how fastly it’s raising.

Jewelry eCommerce Website

As per a renowned eCommerce marketplace research, global online jewelry sales has hit $250 billion in 2020.  So you will have be a part of it if you want to be successful in your jewelry business. Let’s take a deep dive into this blog to get moved from your jewelry store to a jewelry eCommerce website without having any second thoughts.

Table of Contents

What Are The Benefits Of Having A Complete Jewelry eCommerce Website?

Taking steps towards creating a jewelry eCommerce Website will help you to expand and grow your business without facing any difficulties. eCommerce business makes your jewelry to every business aspect beautifully and without giving any extra effort. That’s why by creating a complete jewelry website, you can reach out to your targeted audiences right away. Take a look at the benefits of shorts below: 

✔️Represent your jewelry brand in a beautiful way

✔️Showcase high-resolution images, descriptions, and more to attract your consumers

✔️You can do online paid and non paid promotions

✔️Get indexed and rank top on search engines

✔️Get a huge exposure on social networking sites

✔️Reach out to your targeted audiences effortlessly

✔️That will boost site traffic, engagement, & conversions simultaneously

✔️Easily create direct communications with buyers avoiding oral conversations

✔️Saves your time and makes your Jewelry business more productive

Sparkle

Jewelry Website Template Pack For Elementor

Get Access

Tips To Kickstart Your Jewelry eCommerce Business 

Here, you will get to relate with some latest trends that will help you to effectively run your jewelry eCommerce website business online. Check out in detail below:

Make Sure To Get An Amazing Landing Page

Create a stunning jewelry landing page to represent your whole jewelry business beautifully on your jewelry eCommerce website. You have to highlight your trendy, latest, most popular jewelry or upcoming new jewelry design beautifully to attract your potential customers. You have to ensure the eye-soothing vibe of your jewelry designs to influence your audience to buy your product.

Watch The Video Tutorial To Learn Quickly

Showcase Your Jewelry Products In Beautiful Layout

You have to get a separate page to showcase your all amazing jewelry products in one organized place. That your audience can know every detail about your product with one click and add their desired jewelry product easily on their cart. 

Connect With Social Networking Sites 

Include your social networking sites, groups to your website beautifully to make your jewelry eCommerce website business credible online. You can easily gain the trust of your customer if you are a newcomer to this jewelry business, or even for a renowned one, it helps to collect desired traffic from your social sites. 

Fully Functional Online Payment Gateway

To make your jewelry eCommerce business smoother online, you have to ensure the online payment gateway on your website. Right now, people preferred online payment systems to accept all kinds of cards to make full payment online to avoid visiting the store.  

Create Direct Communication With Your Audience

You have to create a separate contact page on your jewelry eCommerce website. It will help you as a business owner to be successful in the long run that you care about your customers the most.

Why Should You Build Your Jewelry eCommerce Website Using Elementor? 

Without knowing any coding, you can easily build your website right away and publish it anytime only by using WordPress, and Elementor popular drag & drop page builder for WordPress makes that work flexible for tech to non-tech for everyone. You can not only build, but you can also customize and design your website in advance except touching any single line of code. 

That’s why Templately the ultimate templates cloud space for WordPress comes to offer you all exclusive 800+ ready Elementor template packs to build your jewelry eCommerce website to others just with one click. You have to just insert your preferred design, customize a bit with your own content, and make it live. That’s all you have to do.

Sparkle – Elementor Template For WooCommerce Jewelry Shop 💍

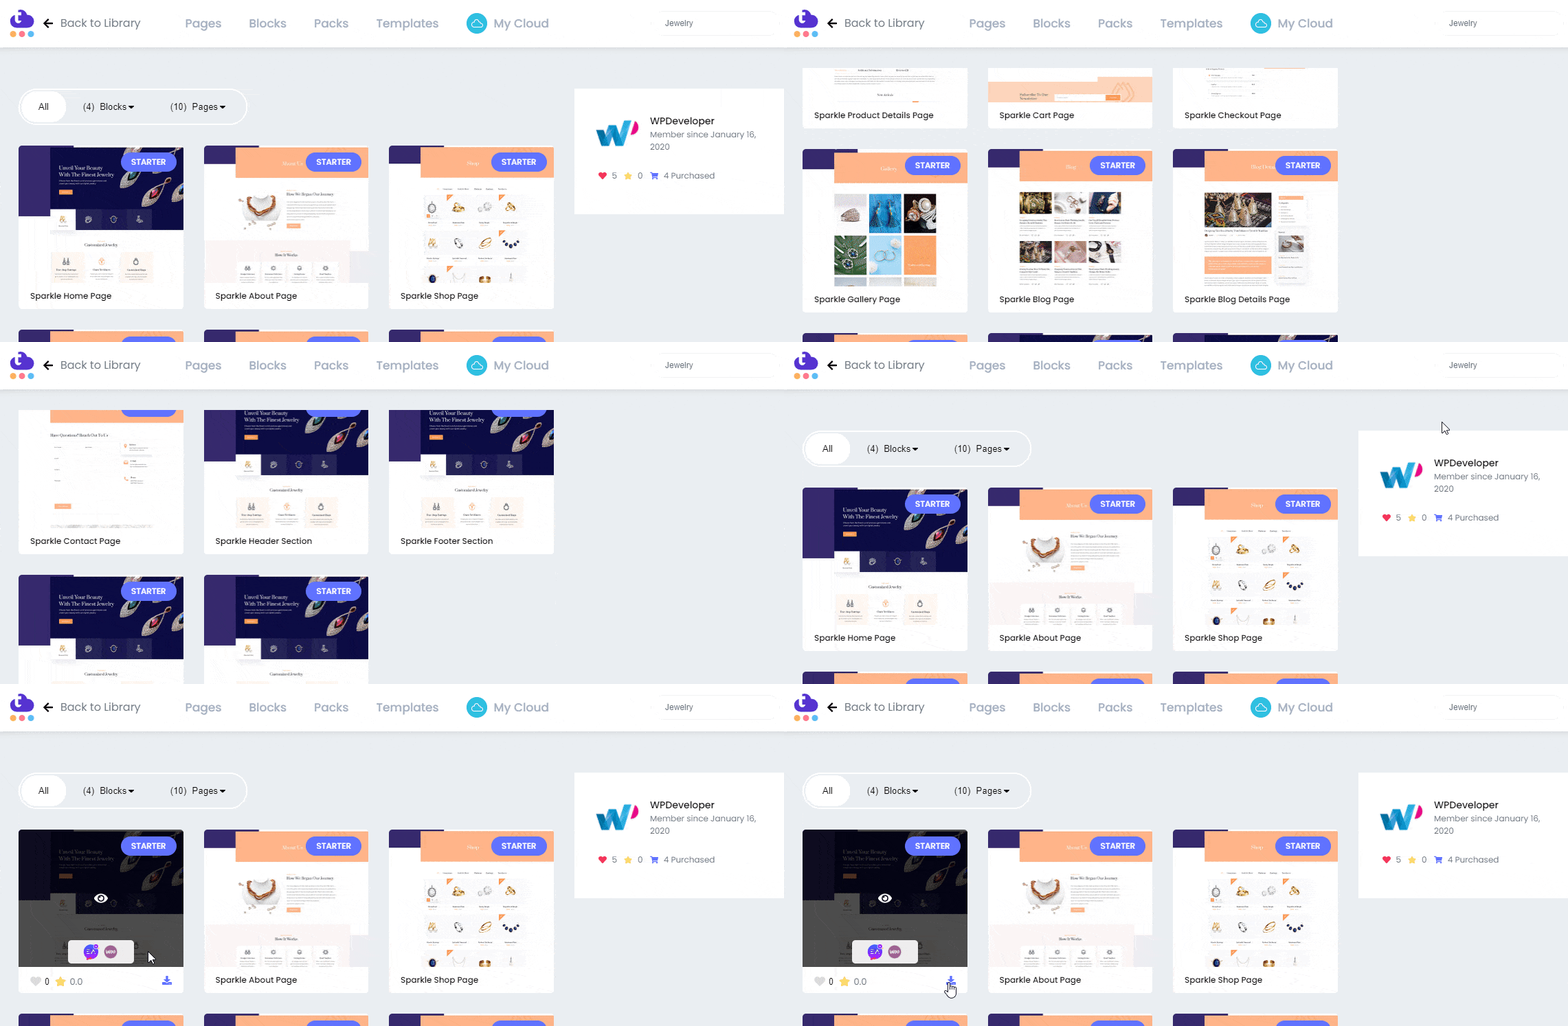
Introducing the Sparkle WooCommerce Elementor template pack by Templately that provides ten outstanding ready pages and four blocks. You can use each of the beautifully designed pages, add any of its predesigned blocks where you feel the necessity, and customize it in the way you want. 

Take a look at some ready page template designs of Sparkle jewelry eCommerce website pack below:

⪢An interactive, responsive, fully functional Homepage to attract your jewelry eCommerce business customers at the very first look. 

⪢Separate organized Shop Page template to display your all exclusive jewelry product uniquely using the Sparkle jewelry eCommerce website. 

⪢Showcase high-quality images of your jewelry design to attack your potential and permanent both customers to have a great sale using this outstanding Gallery Page layout. 

⪢You can enlighten your visitors about your jewelry by adding a proper description using its stunning Product Details Page

⪢Your customers can easily add products to their cart using this ready Add To Cart Page of Sparkle jewelry eCommerce website template. 

⪢You can help your customer by providing a fully functional Checkout Page to complete the online billing of their preferred products and a lot of ready pages are available.

Click Here
Click Here
Click Here
Click Here
Click Here
Click Here
Click Here
Click Here
Slide Heading
Lorem ipsum dolor sit amet, consectetur adipiscing elit. Ut elit tellus, luctus nec ullamcorper mattis, pulvinar dapibus leo.
Click Here
Previous slide
Next slide

Things You Must Need Before Creating A Jewelry eCommerce Website

Let’s get a few things done before creating a Jewelry eCommerce Website using the ‘Sparkle’ Elementor template pack from Templately. Check out the necessary plugins that you must have to use for creating this jewelry website: 

🚀Get Started With Templately To Create A Stunning Jewelry eCommerce Website

Now that you have installed all the mentioned plugins above, you are ready to use the Sparkle template pack in your Elementor editor. Follow these simple step-by-step guidelines below:

Jewelry eCommerce Website

Step 1: Insert The ‘Sparkle’ Template In Elementor

Let’s click on Edit with Elementor to create a new page on the WordPress dashboard. In a few moments, it will then come up with a new page in the Elementor editor. 

Jewelry eCommerce Website

Afterward, you need to click on the middle icon of the page that comes with the Templately. It will provide a popup window that will beautifully showcase all the ready templates of Templately. You have to search for ‘Sparkle’ or ‘Jewelry’ on the search panel. It will automatically then show all the ready pages & blocks related to it.

Jewelry eCommerce Website

We will pick the ‘Sparkle’ homepage template. Hit the ‘Insert’ button to load the page template on your website. You can add more pages for your jewelry eCommerce website in the same way.

Jewelry eCommerce Website

Step 2: Customize The Design Of Your Jewelry eCommerce Website

You can now use the responsive, ready template to publish your Jewelry eCommerce Website using Elementor without adding a single line of code. You can add your preferred content in each creative section, drag & drop one to another, do a bit of modification, and it’s fully ready to become live.

Jewelry eCommerce Website

Step 3: Save Your Jewelry Website Template Design On MyCloud

Now, save your template designs in ‘MyCloud’ storage of Templately. Just right-click on the design and press ‘Save Page to Templately’ to save it on cloud space. It helps you to create a backup of your design without needing extra space.

Jewelry eCommerce Website

You can even reuse your saved template designs as many times you want. You can also share your Jewelry eCommerce Website design with your team using Templately WorkSpace.

Congratulations! After completing all the steps successfully, your jewelry eCommerce website in Elementor will look like the one below. This is how you can create a beautiful jewelry eCommerce website using the ‘Sparkle’ ready template by Templately without coding.

Jewelry eCommerce Website

Sign up to Templately and get access to its stunning ready template collections and let us know your experience by commenting below. If you face any problem or need instant help, you can contact our support team anytime you want. 

Electronic Store Website

How To Make Your Own Electronic Store Website On WordPress [Ready Template Inside]

Making your own electronic store website on WordPress using ready template designs is easier than you think. You don’t have to start from scratch; you can make the whole website the way you want with one single click. 

Sounds amazing, right? Read on below to find out how to make your own electronic store website on WordPress and get access to ready templates.

Table of Contents

Reasons Why People Buy Electronic Products From Online

Customers are depending mostly on online purchases because of pandemic. It saves time and energy to buy a favorable electronic product online. Customers can see details, and choose from a variety of products there. 

No Time Limits

Customers can make purchases whenever they want or have free time. They don’t have to rush for anything, and don’t have to maintain any time limits. 

Varieties of Products

Customers can get a variety of products, descriptions, and check out the reviews of present customers before purchasing the product. They don’t have to ask for anyone to show you the product you want to purchase. They can just click, check, and make the purchase without any interruptions.   

Product Price Comparison 

Customers do a lot of research about product price plans in comparison to others, which is very easy in online platform. Then they take the ultimate purchase decision with confident.

Saves Time & Cost-Effective 

It doesn’t take much time to purchase your desired electronic products online. Customers can use the advanced search button to filter products according to their needs. After that they check and add the products to their cart.

Online Payment & Delivery Facility

It’s easier for customers to complete their online purchase payment quickly using their cards or other ways online securely. Or they can make the payment on the spot. Both options are open for customers to go with. Also, they will get the home delivery facility without any visiting to shop, your customer can get their preferred products on the door.

Ebox

Electronic Store Website Template Pack for Elementor

Get Access

Business Tips To Boost Your Online WooCommerce Electronic Store Website Sales

An electronic store website can get you huge exposure and complete half the work for running your business. Another half will depend on how you are doing marketing promotions and highlighting your electronic products in your online electronic store. Let’s check out some effective online business tips to boost your electronic store website sales online below:

➨First of all, get a fully functional, attractive, responsive landing page design to make a great online impression. That will help you attract your customer with the very first look.

➨Make sure your website is responsive on all available devices, especially for mobiles. As customers are now mostly on phone. 

➨Your customer must be able to quickly choose and go through the products. They can filter products according to their desired needs and make it purchase then and then.

➨Individual single product details page you must have to get to enlighten your customers. That your customers can know every single detail about your electronic product, feel the credibility, and do purchase.

➨The most important part is to collect your customer opinion right away by having a detailed communication page with a fully functional form layout with other available channels. 

➨Surely you must have to ensure some essential things like your customers can add your preferable products on the cart. Give a final check and complete the online purchasing using a fully functional check out page. 

➨You can easily promote your product sales with beautiful sales popups. Don’t forget to share on social networks too.

So you can relate that why customers are now mostly relying on online shopping, get attached to your electronic store website, and make purchases successfully. Maintaining these simple business tips can make your online business successful and make you rank top on your customer choices.  

Get Started With Ebox – Elementor Template Pack To Create Your Online Electronic Store Website 

You can use Elementor, the most popular WordPress page builder, to make your electronic store website without coding. All you need to do is get a ready Elementor template pack to create your electronic store website with a single click.

The best place to get beautifully designed ready Elementor templates is Templately. When you sign up for an account on Templately, you can get access to stunning 800+ ready template collections for Elementor. Along with a complete, separate electronic store website eCommerce template pack for WordPress to make a standout site.

Templately gives you a gorgeous, WooCommerce-compatible, premium Ebox Elementor template pack to create your eCommerce electronic store website online without coding. You will get eight ready pages and blocks to make your eCommerce website as per your preferences. You just have to insert any of the templates you want, add your own content to it, and make it stand out just with a few clicks. 

👉An Interactive and appealing Home Page template to attract your customers.

👉Separate, fully functional Products Page to display all your electronic store products.

👉Showcase descriptions, all feature beautifully in detail using Single Products Page.

👉Publish your special discount notices to blogs using the Blog Page template.

👉Blog Details Page will redirect your audiences in the beautifully designed.

👉Customers can easily do their enormous online purchases using this Checkout Page

👉Your customers can easily add their products and check on using the Add To Cart Page.

👉Contact Page will help you to maintain direct communication with your customers.

Things You Must Get Before Creating An Electronic Store Website

To use this premium Elementor template pack ‘Ebox’ by Templately, you need some required plugins. Check them out below: 

🚀Step By Step Guide: How To Create Your Electronic Store Website Using Templately 

After installing the plugins mentioned above, you are ready to use the Ebox template pack in the Elementor editor. Just follow the simple step by step guidelines below:

Step 1: Insert ‘Ebox’ Ready Homepage Design By Templately

Let’s click on Edit with Elementor to create a new page on WordPress. Within a few seconds, it will come up with a new page in the Elementor editor.

Afterward, you need to click on the blue icon that comes with the ‘Templately’. It will then come up with a popup window to showcase all ready collections of Templately there.

Now search for ‘Ebox’, and you will see all of its ready pages & blocks related to it. We will pick the homepage design of the ‘Ebox’ electronic store website template by Templately. 

You have to hit the ‘Insert’ button and start customizing the ready template design as per your requirements.

Step 2: Style Your Electronic Store Website Template

Without coding, you can now customize the ready Ebox homepage template. You can now write your own text or add visual content in each creative section. If you want, you can drag & drop any section from one place to another, insert any of its ready blocks if necessary, or do other modifications to add your own style.

Step 3: Save Your ‘Ebox’ Ready Template Design On Cloud

If you want, you can now save your electronic store website template design in Templately l ‘MyCloud’ storage space and thus create a backup. Right-click anywhere on your page and choose the ‘Save Page to Templately’ option to save it.

Also, you can even reuse your saved template designs on as many sites as you want. Besides, you can enjoy seamless collaboration and share your ready designs with other team members with Templately WorkSpace. 

Take A Look At Your Electronic Store Website

Congratulations, there you go! You have now successfully used this stunning ready template pack ‘Ebox’ from Templately and created an electronic store website in Elementor without coding.

Explore Templately ready template collections if you haven’t tried it out yet, and let us know your experience by commenting below. If you face any problem or need any quick help, you can freely contact our support team anytime you want. Don’t forget to join our friendly Facebook Community and connect with other website designers too.