With the blink of an eye, you can now make your website header interactive using Elementor headers. You can create a user-friendly header menu easily with this new theme builder. Let’s take a deep dive into this blog to know more about Elementor headers!

What Does Elementor New Theme Builder Offer?
The latest release of the Elementor 3.0 design system has upgraded its interface dramatically. You can now manage your whole site design from one organized place using this new Elementor theme builder. You just have to check, edit, and change your entire website outlook whenever you want from there.
You will get the full freedom to customize and organize the way you want. The header, footer, page templates, or any individual sections can be handled flexibly because of its easy, user-friendly interface. With this, you can now take your website design to a new level to attract your potential site visitors.
How To Create Elementor Headers Using New Theme Builder?
Now you will get to know how to create your Elementor headers using Elementor’s new theme builder updates. But before getting started, you need to create a menu and manage your menu from WordPress dashboard Appearance →Themes→ Menus.
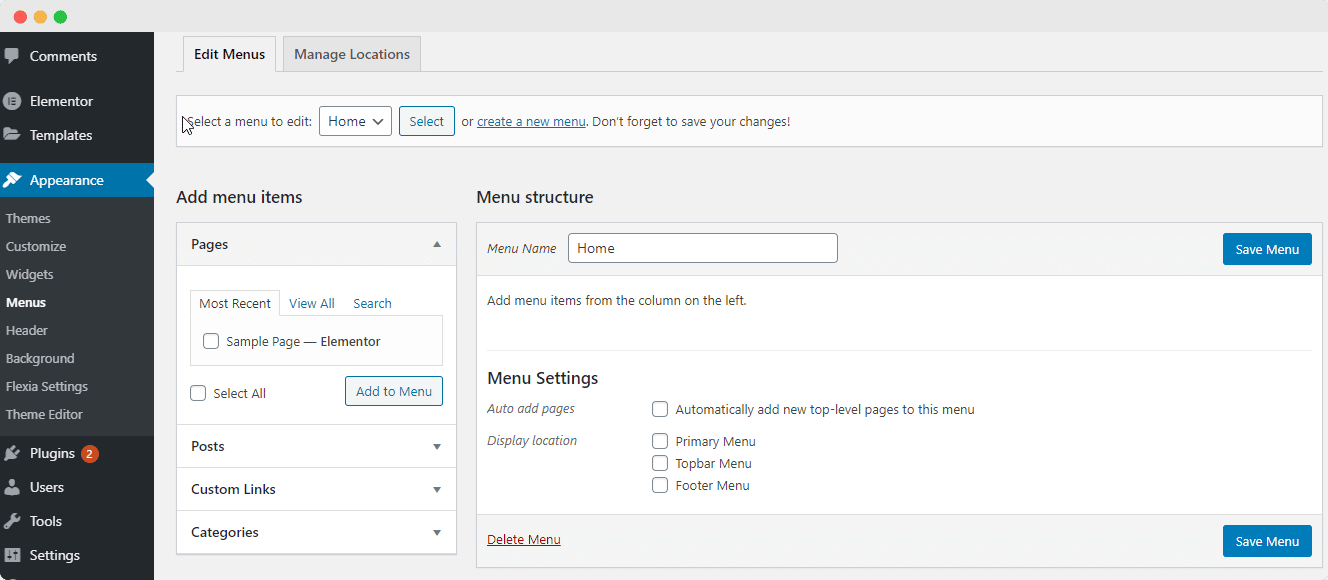
After that, you can choose any of the Elementor headers blocks to set up the design of your website menu. Now let’s create your Elementor headers just by following the simple step by step guidelines below:
Step 1: Configure The New Elementor Theme Builder
First, go to your WordPress dashboard and click on the Elementor Templates→Theme Builder →Header → Add New.
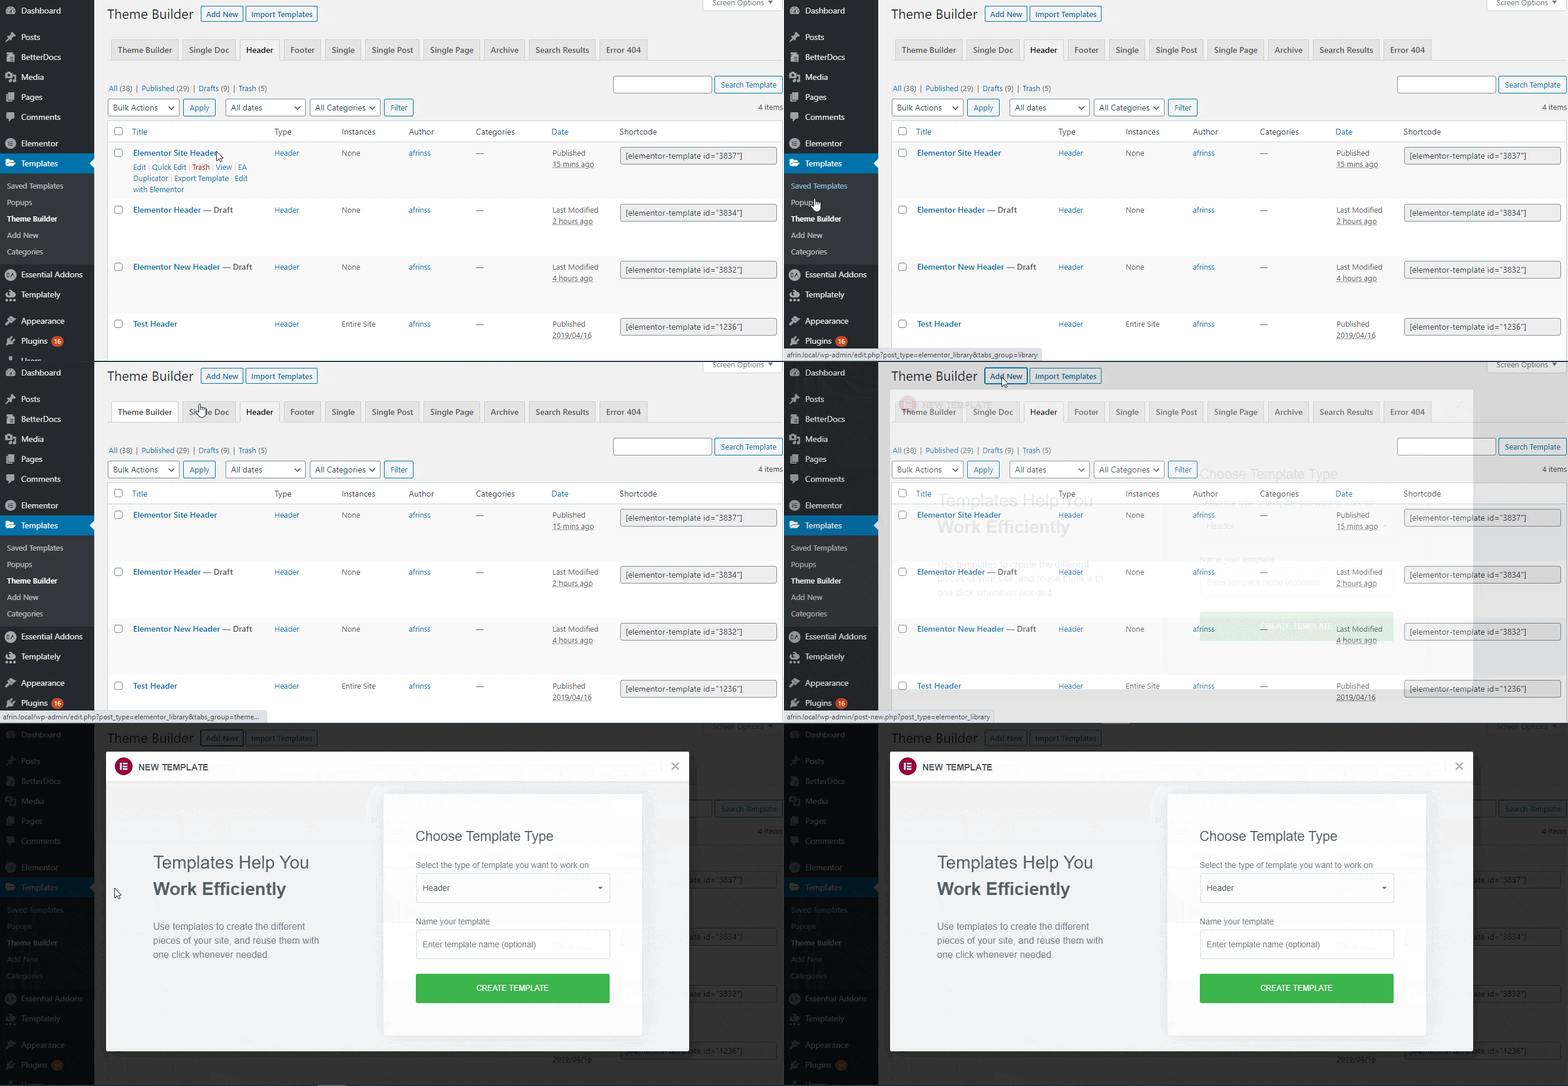
Afterward, you have to give your header template a name and hit the ‘Create Template’ button to proceed further.
Step 2: Pick Your Preferred Header Block
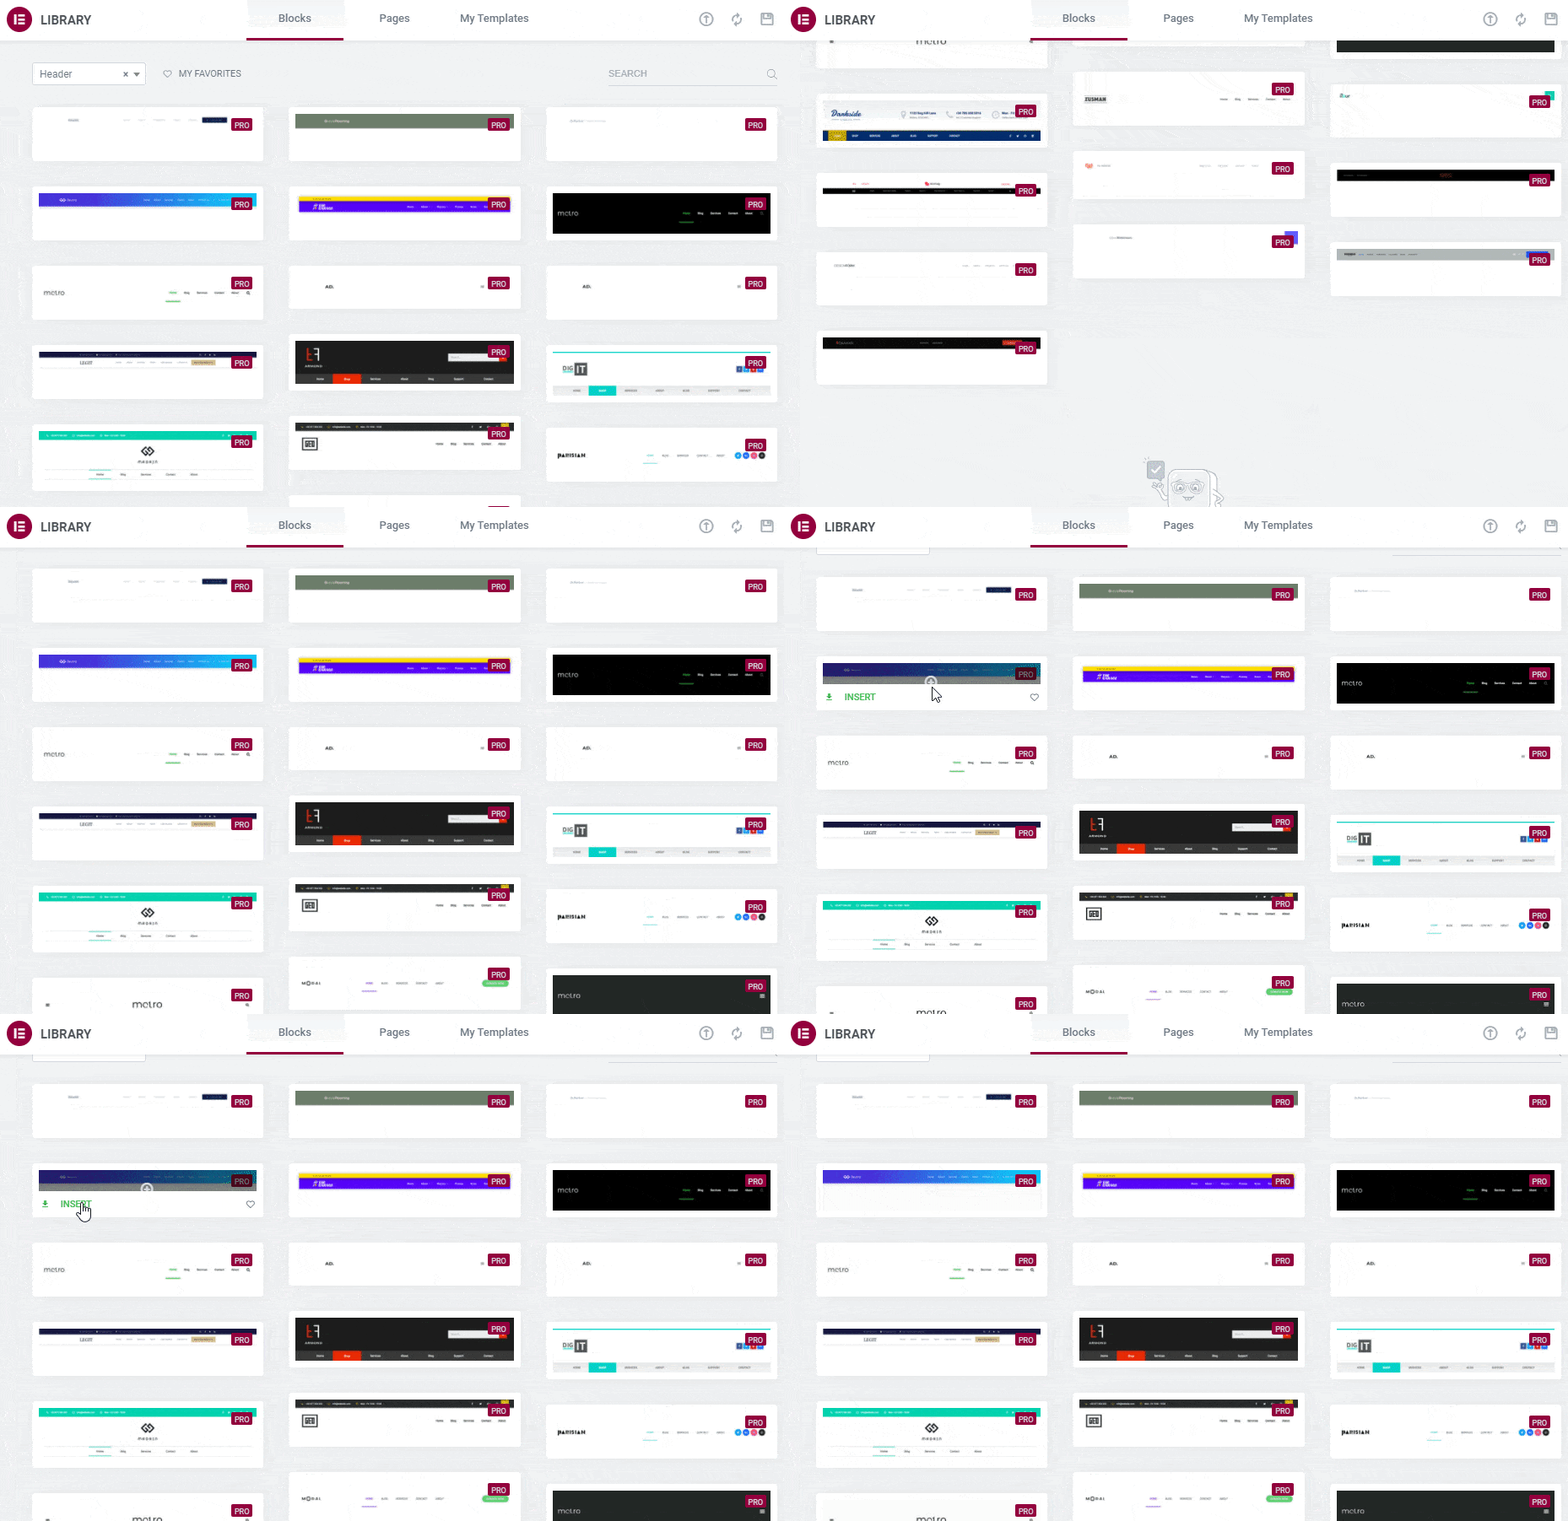
Now you can choose your preferred Elementor headers from here and hit the ‘Insert’ button to start modifying it.
You have to set your preferred Elementor header type by using the ‘Menu’ option. After clicking on it, you will get a drop-down menu there. You can pick the one you want to display.
But as we mentioned above, you will only get these header options in the drop-down menu only if you have configured it before from your WordPress dashboard. And if you didn’t do it yet, then configure it first and then make it visible here. As we created a ‘Top Menu’ and make it selected from the drop-down menu option.
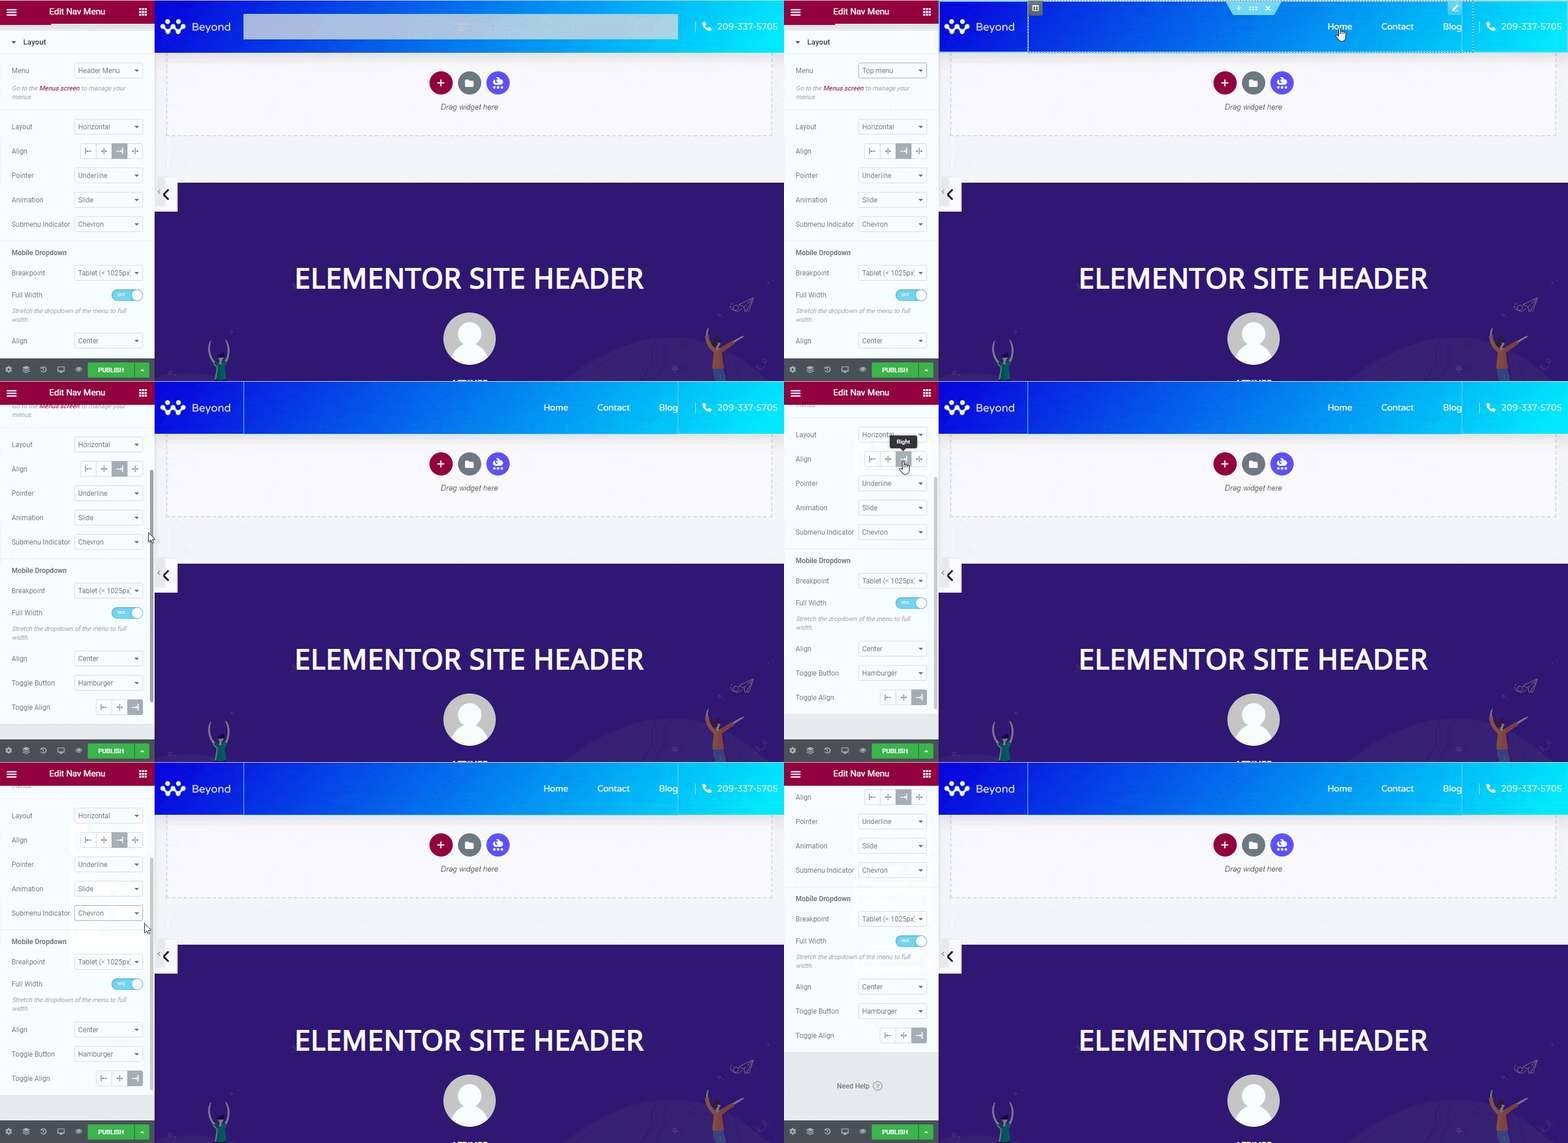
You can add animations, colors, and style it as per your preference. You have now full control over the customization to make it fit for your site environment. That your visitors can easily get connected with your website outstanding header design and be your customer forever.
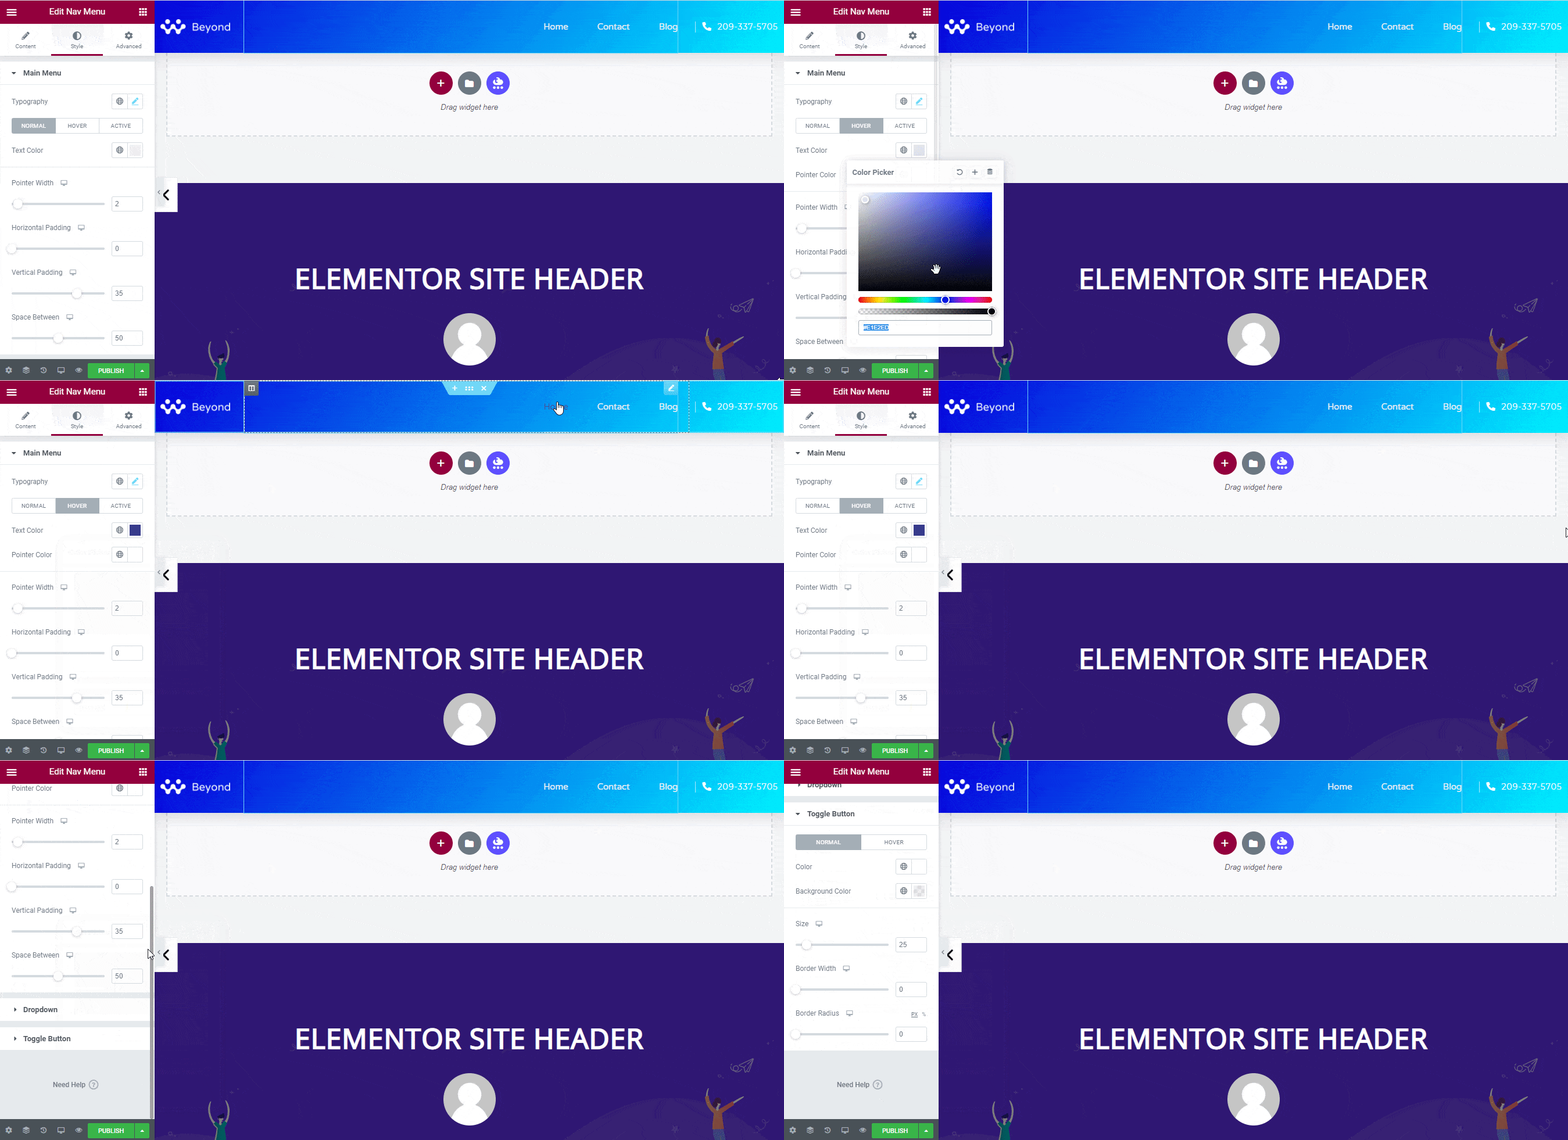
Step 3: Set Up The Conditions
After completing the customization process, you can now use these Elementor headers on your website. For that, you have to click the ‘Publish’ button. It will then come up with a popup window there.
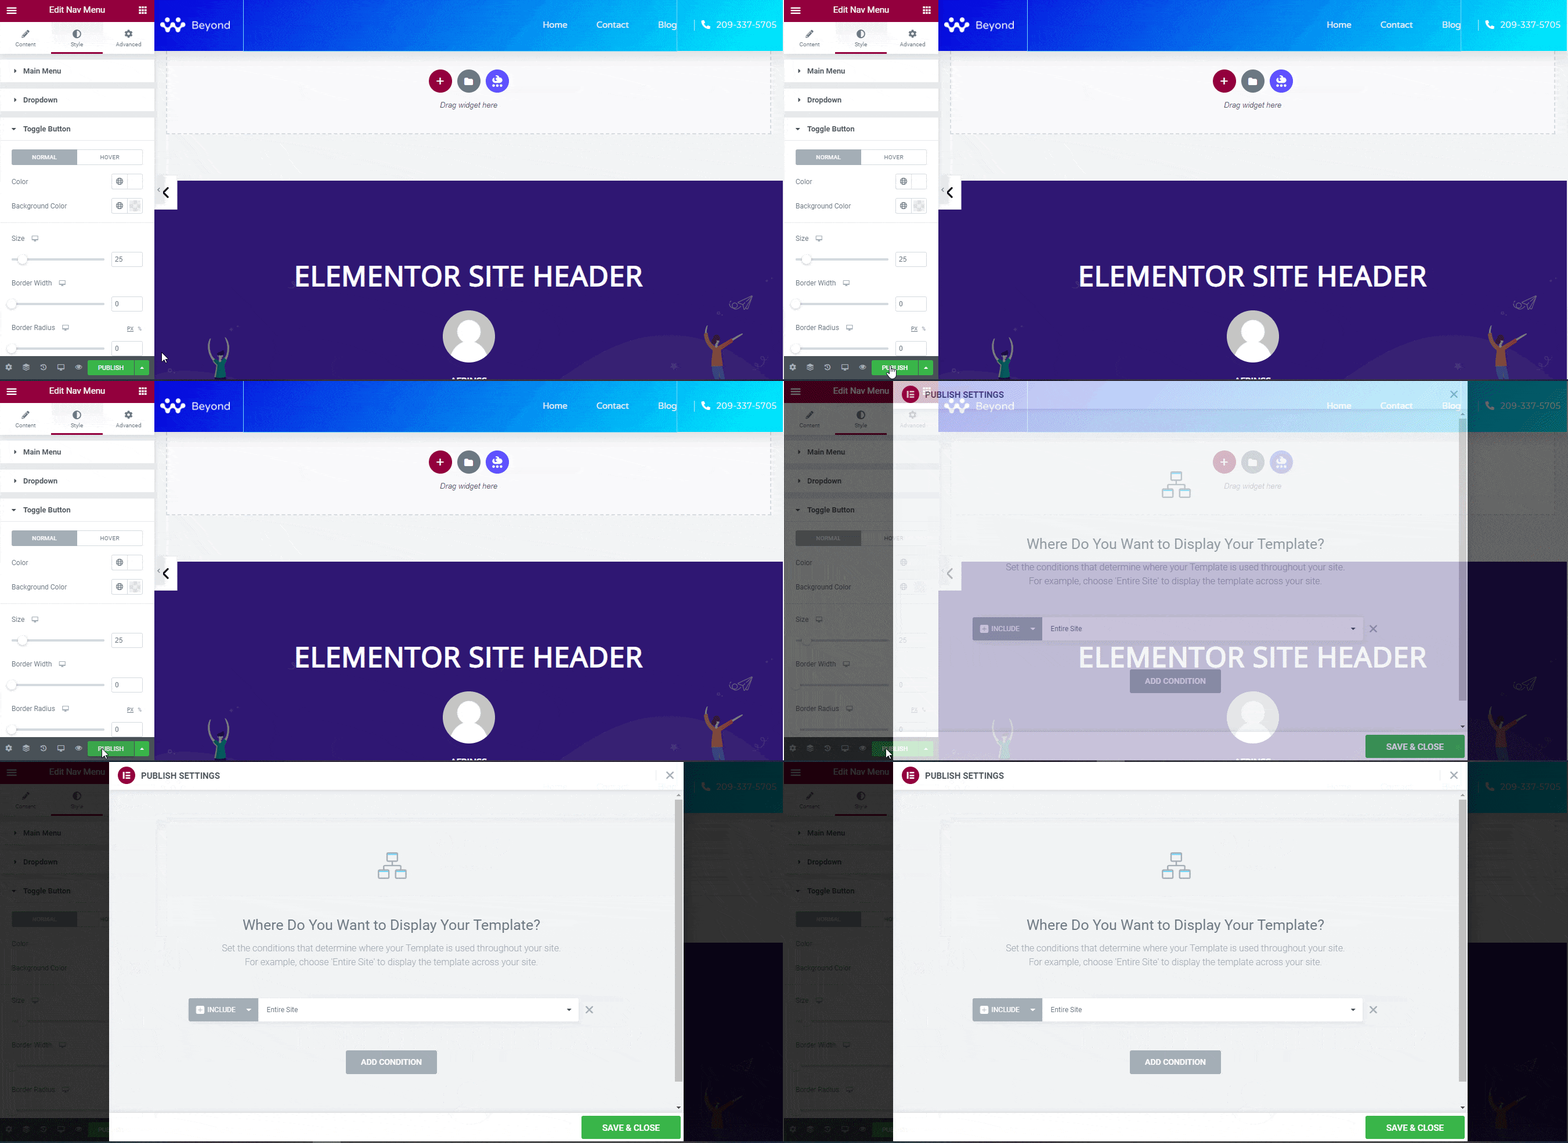
From there, you need to ‘Add Conditions’ to pick the perfect place to display your recently created Elementor headers. Now just hit the Save & Continue button to make your header live on your website design.
Final Outcome
Many Congratulations! Now your Elementor header is live on your website just by following the simple step guidelines of this blog.

The website header leads visitors to visit your website on other pages. You have to ensure the user-friendliness of the design and give it a look that your website audience feels attracted to. Using Elementor’s new theme builder interface, you can now make the changes on your website header the way you want. You can use different types or can maintain the same design for all your website pages.
Hope you will find this blog helpful and let us share your experience by commenting below. You can also feel free to join our beautiful WordPress expert community on Facebook to build up a strong connection.

