Have you ever wondered how Google discovers and then indexes your website to the search engine? If you know how a sitemap in WordPress works, you can easily implement the tactics to rank better in search engine results. Let’s learn everything there is to know about WordPress sitemaps and how to improve your website’s ranking.

📜 A Beginner’s Guide to Understanding the Sitemap in WordPress
Basically, a WordPress sitemap is a blueprint of your website through which you can let the search engines know about your existing pages in a machine-readable format. The search engine bots crawl through your website following the given paths in the sitemap and create a database of your pages and posts by indexing.
Formerly all website sitemaps used to be written in HTML format, but nowadays it has changed. The use of sitemaps has developed in recent years, and they are now provided in an XML format rather than HTML, with search engines as their primary audience.
A sitemap also produces a report on all the links that have been used in your WordPress. It also indicates the importance of each link than the other and if you update your website regularly or not. Sitemaps do not boost your website on the fly, instead, they make it easier for search engines to crawl your site. This means, with the help of WordPress sitemaps, you will be able to show more pages in the search engine result and drive more traffic to your website.
🔔 Ultimate Benefits Of Using Sitemaps In Your Website
Through using WordPress sitemaps you can detect and solve a number of website issues easily. Even though submitting XML or HTML sitemaps does not guarantee any better ranking of your website, it helps you maintain the internal management of your website. Moreover, it also does not ensure any kind of link authority. Now let’s dive in and explore all the benefits of using WordPress sitemaps in one glance.
👉 Sitemaps allow search engines to crawl through your content more quickly than they would otherwise. This may also result in your material being indexed more quickly.
👉 By adding sufficient information to your sitemap, you can tell Google that particular pages on your site should be crawled first. Thus you can prioritize important pages by adding metadata.
👉 WordPress sitemaps keep track of everything happening on your website. A single website is rarely built by an individual; keeping this in mind, we can say that producing an overall report keeps everyone on the same page.
🗺️ Do You Need XML Sitemap Instead Or HTML Sitemap?
For any new website owner, a sitemap is extremely important to even appear on search engine result pages. For example, if you own a blog website, you will not be backlinking enough which will make it harder for the search engines to find you out. On the other hand, sitemaps allow you to signify which pages are important for your website.
When it comes to opting for XML or HTML sitemaps, it solely depends on the type of website you have. HTML sitemaps help you to have a user-friendly website no matter what. If you have a website that publishes news and updates of one niche and frequently links to the older posts, you can have HTML sitemaps for your website. After all, user-friendly websites are also ranking better in search engines. So HTML sitemap will help you nevertheless. HTML mainly stores the data of existing pages, posts, and all-over contents.
On the other hand, having an XML sitemap is the best thing you can do. After all, Google recommends having an XML sitemap because it ensures that search engines are aware of your site’s URLs. It also includes additional information and the context of each and every URL. Another important thing is that your XML sitemap can order your pages in relation to one another so that search engines may understand which portions of your site are the most significant.
So lastly if you think about which type of sitemap is useful for your website, the most recommended suggestion would be to have both on your site. So that you can make the best use of both kinds of sitemaps.
⚡ Does WordPress Automatically Produce Sitemap For Your Website?
Did you know that WordPress websites rank better usually? It might be the reason that WordPress automatically produces sitemaps for each website without any use of plugins. Usually, this WordPress sitemap includes the type of your content, tags that you have used in your content, posts, pages, categories, and even archive pages. If you want to customize the default WordPress sitemap, you must know the PHP language to edit it. If you do not want to create sitemaps using coding, you can opt for relevant plugins as well.
💡 Guide: Manually Create WordPress Sitemap For Your Website
A sitemap is concrete programming that you can deploy on your website easily. Follow this step-by-step guide and create a WordPress sitemap manually without any hassle.
Step 1: Go To Your WordPress Theme’s functions.php File
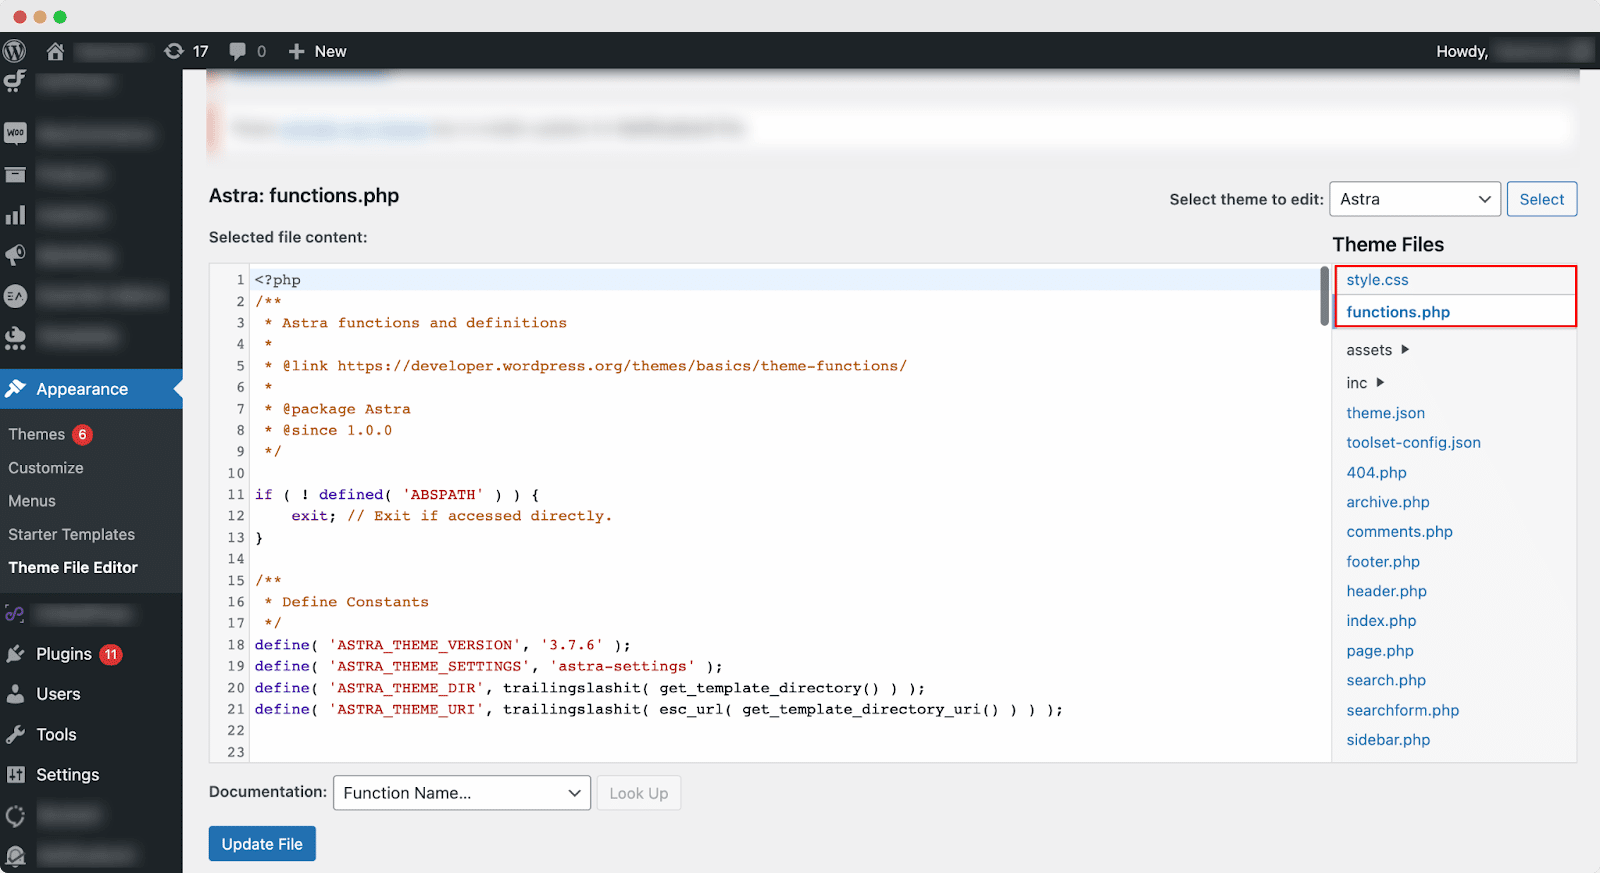
The first step is to go to your WordPress dashboard and click on ‘Appearance’ from the left-hand side. After that, you need to choose the ‘Theme File Editor’ option. You will be redirected to a new page. Here you need to choose the ‘function.php’ option and the code of your theme will appear.

Now you need to paste this below code at the bottom of your theme’s function file.
| /* ————————————————————————- * * WordPress Dynamic XML Sitemap Without Plugin * Codes By Emrah Gunduz & All In One SEO * Updated And Edited By EXEIdeas /* ————————————————————————- */ add_action(“publish_post”, “eg_create_sitemap”); add_action(“publish_page”, “eg_create_sitemap”); function eg_create_sitemap() { $postsForSitemap = get_posts(array( ‘numberposts’ => -1, ‘orderby’ => ‘modified’, ‘post_type’ => array(‘post’,’page’), ‘order’ => ‘DESC’ )); $sitemap = ‘<?xml version=“1.0” encoding=“UTF-8”?>‘; $sitemap .= ‘<?xml–stylesheet type=“text/xsl” href=“sitemap-style.xsl”?>‘; $sitemap .= ‘<urlset xmlns=”http://www.sitemaps.org/schemas/sitemap/0.9“>‘; foreach($postsForSitemap as $post) { setup_postdata($post); $postdate = explode(” “, $post->post_modified); $sitemap .= ‘<url>‘. ‘<loc>‘. get_permalink($post->ID) .’</loc>‘. ‘<priority>1</priority>‘. ‘<lastmod>‘. $postdate[0] .’</lastmod>‘. ‘<changefreq>daily</changefreq>‘. ‘</url>‘; } $sitemap .= ‘</urlset>‘; $fp = fopen(ABSPATH . “sitemap.xml”, ‘w’); fwrite($fp, $sitemap); fclose($fp); } |
Now you need to create a file called sitemap-style.XSL where you need to paste the below code as well.
| <?xml version=”1.0″ encoding=”UTF-8″?><xsl:stylesheet version=”2.0″ xmlns:html=”http://www.w3.org/TR/REC-html40″xmlns:image=”http://www.google.com/schemas/sitemap-image/1.1″ xmlns:sitemap=”http://www.sitemaps.org/schemas/sitemap/0.9″ xmlns:xsl=”http://www.w3.org/1999/XSL/Transform”> <xsl:output method=”html” version=”1.0″ encoding=”UTF-8″ indent=”yes”/> <xsl:template match=”/”><xsl:variable name=”fileType”> <xsl:choose> <xsl:when test=”//sitemap:url”>Sitemap</xsl:when> <xsl:otherwise>SitemapIndex</xsl:otherwise> </xsl:choose> </xsl:variable><html xmlns=”http://www.w3.org/1999/xhtml”><head><title><xsl:choose><xsl:when test=”$fileType=’Sitemap'”>Sitemap</xsl:when><xsl:otherwise>Sitemap Index</xsl:otherwise></xsl:choose></title><meta http-equiv=”Content-Type” content=”text/html; charset=utf-8″ /><style type=”text/css”>body {font-family:Helvetica,Arial,sans-serif;font-size:68.5%;}table {border:none;border-collapse:collapse;}table {font-size:1em;width:100%;}th {text-align:left;padding:5px;}tr.stripe {background-color:#f7f7f7;}</style></head> <body> <div id=”content”> <h1>XML Sitemap By EXEIdeas</h1> <div> <p><xsl:choose><xsl:when test=”$fileType=’Sitemap'”> This sitemap contains <xsl:value-of select=”count(sitemap:urlset/sitemap:url)”></xsl:value-of> URLs</xsl:when> <xsl:otherwise>This sitemap index contains <xsl:value-of select=”count(sitemap:sitemapindex/sitemap:sitemap)”></xsl:value-of> sitemaps</xsl:otherwise></xsl:choose></p> </div><xsl:choose><xsl:when test=”$fileType=’Sitemap'”><xsl:call-template name=”sitemapTable”/></xsl:when> <xsl:otherwise><xsl:call-template name=”siteindexTable”/></xsl:otherwise></xsl:choose> </div> </body> </html> </xsl:template> <xsl:template name=”siteindexTable”> <table cellpadding=”3″><thead><tr><th width=”50%”>URL</th><th>LastChange</th></tr></thead><tbody><xsl:variable name=”lower” select=”‘abcdefghijklmnopqrstuvwxyz'”/><xsl:variable name=”upper” select=”‘ABCDEFGHIJKLMNOPQRSTUVWXYZ'”/><xsl:for-each select=”sitemap:sitemapindex/sitemap:sitemap”><tr><xsl:if test=”position() mod 2 != 1″><xsl:attribute name=”class”>stripe</xsl:attribute></xsl:if><td><xsl:variable name=”itemURL”><xsl:value-of select=”sitemap:loc”/></xsl:variable><a href=”{$itemURL}”><xsl:value-of select=”sitemap:loc”/></a></td><td><xsl:value-of select=”concat(substring(sitemap:lastmod,0,11),concat(‘ ‘, substring(sitemap:lastmod,12,5)))”/></td></tr></xsl:for-each></tbody></table> </xsl:template> <xsl:template name=”sitemapTable”><table cellpadding=”3″><thead><tr><th width=”50%”>URL</th><th>Priority</th><th>Change Frequency</th><th>LastChange</th></tr></thead><tbody><xsl:variable name=”lower” select=”‘abcdefghijklmnopqrstuvwxyz'”/><xsl:variable name=”upper” select=”‘ABCDEFGHIJKLMNOPQRSTUVWXYZ'”/><xsl:for-each select=”sitemap:urlset/sitemap:url”><tr><xsl:if test=”position() mod 2 != 1″><xsl:attribute name=”class”>stripe</xsl:attribute></xsl:if><td><xsl:variable name=”itemURL”><xsl:value-of select=”sitemap:loc”/></xsl:variable><a href=”{$itemURL}”><xsl:value-of select=”sitemap:loc”/></a></td><td><xsl:if test=”string(number(sitemap:priority))!=’NaN'”><xsl:value-of select=”concat(sitemap:priority*100,’%’)”/></xsl:if></td><td><xsl:value-of select=”concat(translate(substring(sitemap:changefreq, 1, 1),concat($lower, $upper),concat($upper, $lower)),substring(sitemap:changefreq, 2))”/></td><td><xsl:value-of select=”concat(substring(sitemap:lastmod,0,11),concat(‘ ‘, substring(sitemap:lastmod,12,5)))”/></td></tr></xsl:for-each></tbody></table> </xsl:template></xsl:stylesheet> |
Step 2: Test Newly Created Sitemap File
This code will erase the old text and replace it with fresh content in the original file now that you’ve added a new page or post to your blog. The sitemap can be seen at www.mydomain.com/sitemap.xml, which is a modified XML sitemap.
Step 3: Submit Your Sitemap To Search Engine
Once you’ve built the XML sitemap URLs, you may submit them to search engines like Google or Bing. Use Google Search Console to verify the website’s owner and upload your sitemap.
From the Google Search Console, search for your website. Navigate to index and then sitemap. And finally, submit your WordPress sitemap URL.
🔥 WordPress Plugin Solutions To Create WordPress Sitemap
WordPress plugins are useful in creating WordPress sitemaps. No coding is required because a good sitemap plugin will bundle your URLs into a sitemap for you. Some plugins will index your sitemaps by submitting them to services like Google Search Console and Bing Webmaster Tools. Here are the top 3 WordPress plugins to create a WordPress sitemap without doing any coding.
1. All In One SEO

All in One SEO is one of the most popular WordPress SEO plugins. It provides a complete SEO toolset that over 3M+ professionals use to boost the search rankings of their websites. It also has intelligent XML sitemaps. All in One SEO’s sitemap module is also entirely customizable and requires no code. It allows you to include or exclude post kinds and taxonomies based on your needs, as well as prioritize your highest-converting sites to ensure that they are crawled and indexed.
2. Yoast SEO

Yoast SEO is one of the top WordPress SEO plugins. It’s an all-in-one plugin for your SEO needs, so whether you need sitewide SEO, on-page SEO, or sitemaps, this plugin can handle it all. Yoast SEO generates an XML sitemap providing connections to your website content after you activate and enable the sitemap feature. This sitemap will automatically reload whenever you make changes to your content, such as adding or removing a page or post.
3. Simple Sitemap

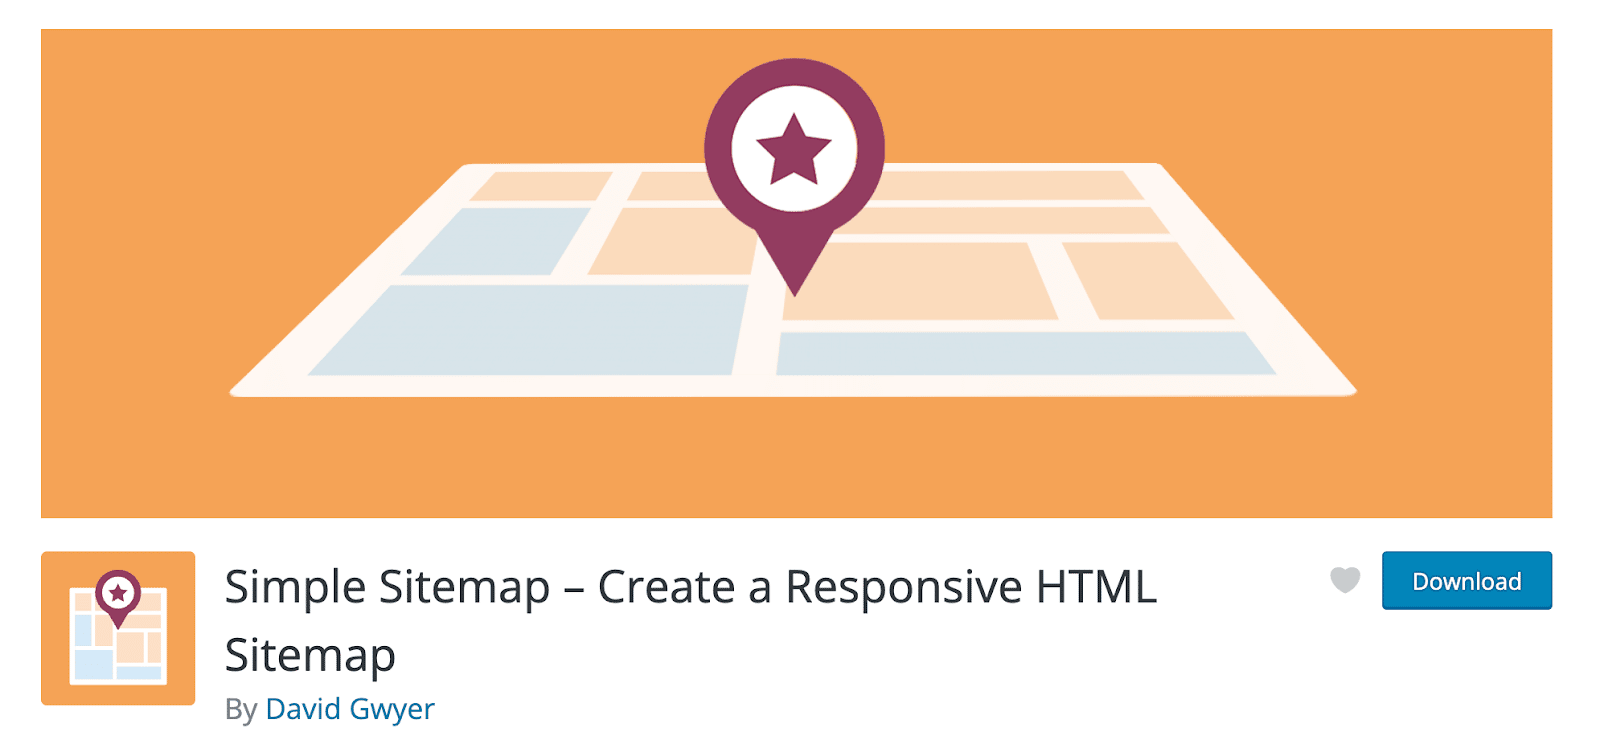
Simple Sitemap is a free plugin that automatically generates and uploads a basic HTML sitemap to your website. With two accessible blocks and five shortcodes, you can create a sitemap and configure it just inside the WordPress editor. Visitors will have a more convenient way to navigate your website this way.
We hope this tutorial showed you how to make a WordPress sitemap. As previously said, adding a sitemap to your website will only benefit it. If you have a threat, Google will not penalize you because there are no recognized dangers. It is the most beneficial of the sitemap advantages.
If you find this blog useful enough, subscribe to our channel and join our community to share your valuable views on any topic.


![[New Extension] How to Show Vertical Text on Elementor Websites?](https://essential-addons.com/wp-content/uploads/2025/11/Essential-Addons-New-Extension-Vertical-Text-Orientation-1024x576.jpg)


