Do you know how easy it is to create an evergreen countdown timer in Elementor that instantly grabs attention? Using Essential Addons you can add an interactive evergreen countdown timer and boost the revenue of your marketing campaigns with ease. In this blog, we are going to discuss how you can create, customize, and display an evergreen timer in Elementor with just a few clicks. So, without further ado, let’s get started.

✨ Top Unique Examples Of Countdown Timers In Use
Countdown timers are widely used in marketing campaigns to accelerate engagement, and hence revenue, in a short period of time. This amazing marketing tool can help you to create urgency among your visitors, push them to make a positive purchasing decision, and convert them into your paying customers. And so, before going to the tutorial on adding a countdown timer in Elementor, let’s have a quick look at the top use cases of an evergreen countdown timer.
1. Countdown Timer On Event Page

Event Pages are built to announce special events and provide all information related to them. You can use a countdown timer on that page to let your visitors know when the event is scheduled and how many days are left to start your program. In this way, you can easily let your visitors know your date and time and encourage them to sign up for your event.
2. Countdown On Announcements Page

You can also find countdown timers on announcement pages very often. Just like event or deal announcements, these can be similar news-sharing websites that declare product releases, sports events, etc.
Using a timer on this type of page, you can easily hype up the interest among your visitors and boost your conversion rates. A countdown timer mixed with powerful copies can skyrocket your sales and help you achieve marketing goals with ease. So, if you are planning to launch a product or open a show, you can use a countdown timer to accelerate your conversions.
3. Countdown Timer On Deal Pages

Deal pages are very important to any business to boost their sales on different occasions. While creating a deal page you need to explain what you are offering to your customers and provide a clear idea of the special offerings. Therefore, if you add a countdown timer on your deal page, it will help you create a sense of urgency among your visitors and increase your conversion rate.
4. Countdown In Popup Window

Adding a countdown timer beside your limited-time offerings could be a great idea to boost your conversion rate. You can see how ConvertFlow offers its limited spots by adding a countdown timer beside the call-to-action button. Here any visitors would be interested to click on the call to action button before the offer ends.
📖 Guide: How To Create An Evergreen Timer In Elementor Easily?
Elementor makes web building super easy with its drag-and-drop and simple customization features. You can build any web page in Elementor with its amazing widgets and add all kinds of functionality to your web page in just a few clicks.
To create an evergreen timer on this outstanding website builder you need to install & activate the following Elementor widget library on your website.
🧰 Essential Addons For Elementor

Essential Addons is the ultimate Elementor widgets library where you can find 85+ ready widgets and 10 useful extensions to make your web creation super smooth. It can help you to make your dream website live without any coding.
In addition, you will find a fully customizable, 100% responsive EA Countdown widget to easily add an evergreen countdown timer in Elementor. Before starting this guideline, install & activate Essential Addons on your website.
Step 1: Add The EA Countdown In Elementor
First of all, you need to open the page where you want to add an evergreen timer on Elementor. Now, find the ‘EA Countdown’ widget from the search option. After that, drag and drop the widget where you want to insert your evergreen timer.

After inserting the element on your web page, you can update the content on your Elementor countdown timer and style as you want. You will find all the options that you need to personalize your evergreen countdown timer with absolute ease.

Step 2: Configure The Content Settings
Go to the ‘Content’ tab on the right side where you will find a few options like ‘Timer Settings’, ‘Content Settings’, and ‘Expiry Action’. Navigate to the ‘Timer Settings’ then choose the ‘Evergreen Timer’ from the ‘Type’ option. Once you select this option, you will find some new fields where you have to configure the evergreen timer for your website.

Afterward, set the time for the countdown timer and toggle on the ‘Recurring Countdown’ option to set the restart and stoppage time. Choose the preferable time for your countdown timer before going to the next step.
Then, go to the ‘Content Settings’ and choose the layout for the timer you want. You can enable or disable the minutes, hours, etc. from there. Also, configure the content for ‘Expire Action’ with your preferred settings.

Step 3: Style Your Evergreen Countdown Timer
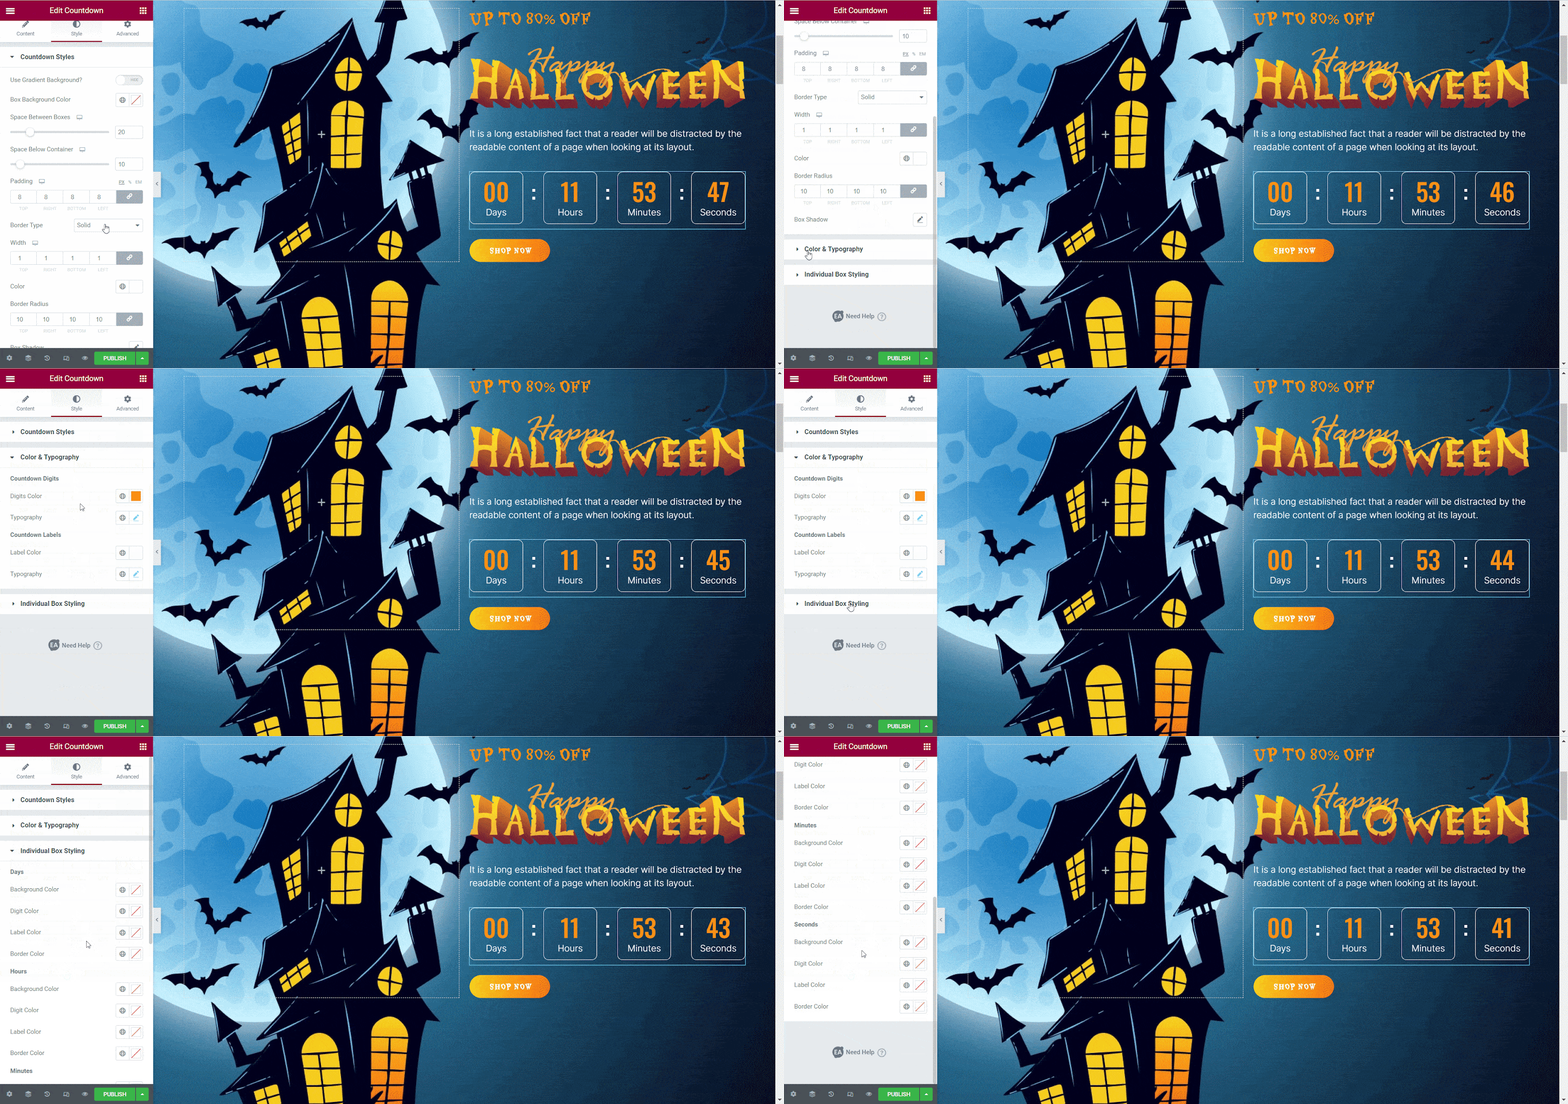
Once you are done configuring the content, now go to the style option and adjust the timer style as you want. From the ‘Countdown Styles’ option, you can personalize the background of your timers and change the outlook as you want.

From the ‘Color & Typography’ option, choose the color that you want and adjust the typography of your timer. Afterward, add more customization to each box as you like and make the evergreen timer look as you want. If you want to learn more about customizing Elementor countdown timer, you check out this documentation.
Step 3: Publish Your Evergreen Countdown Timer
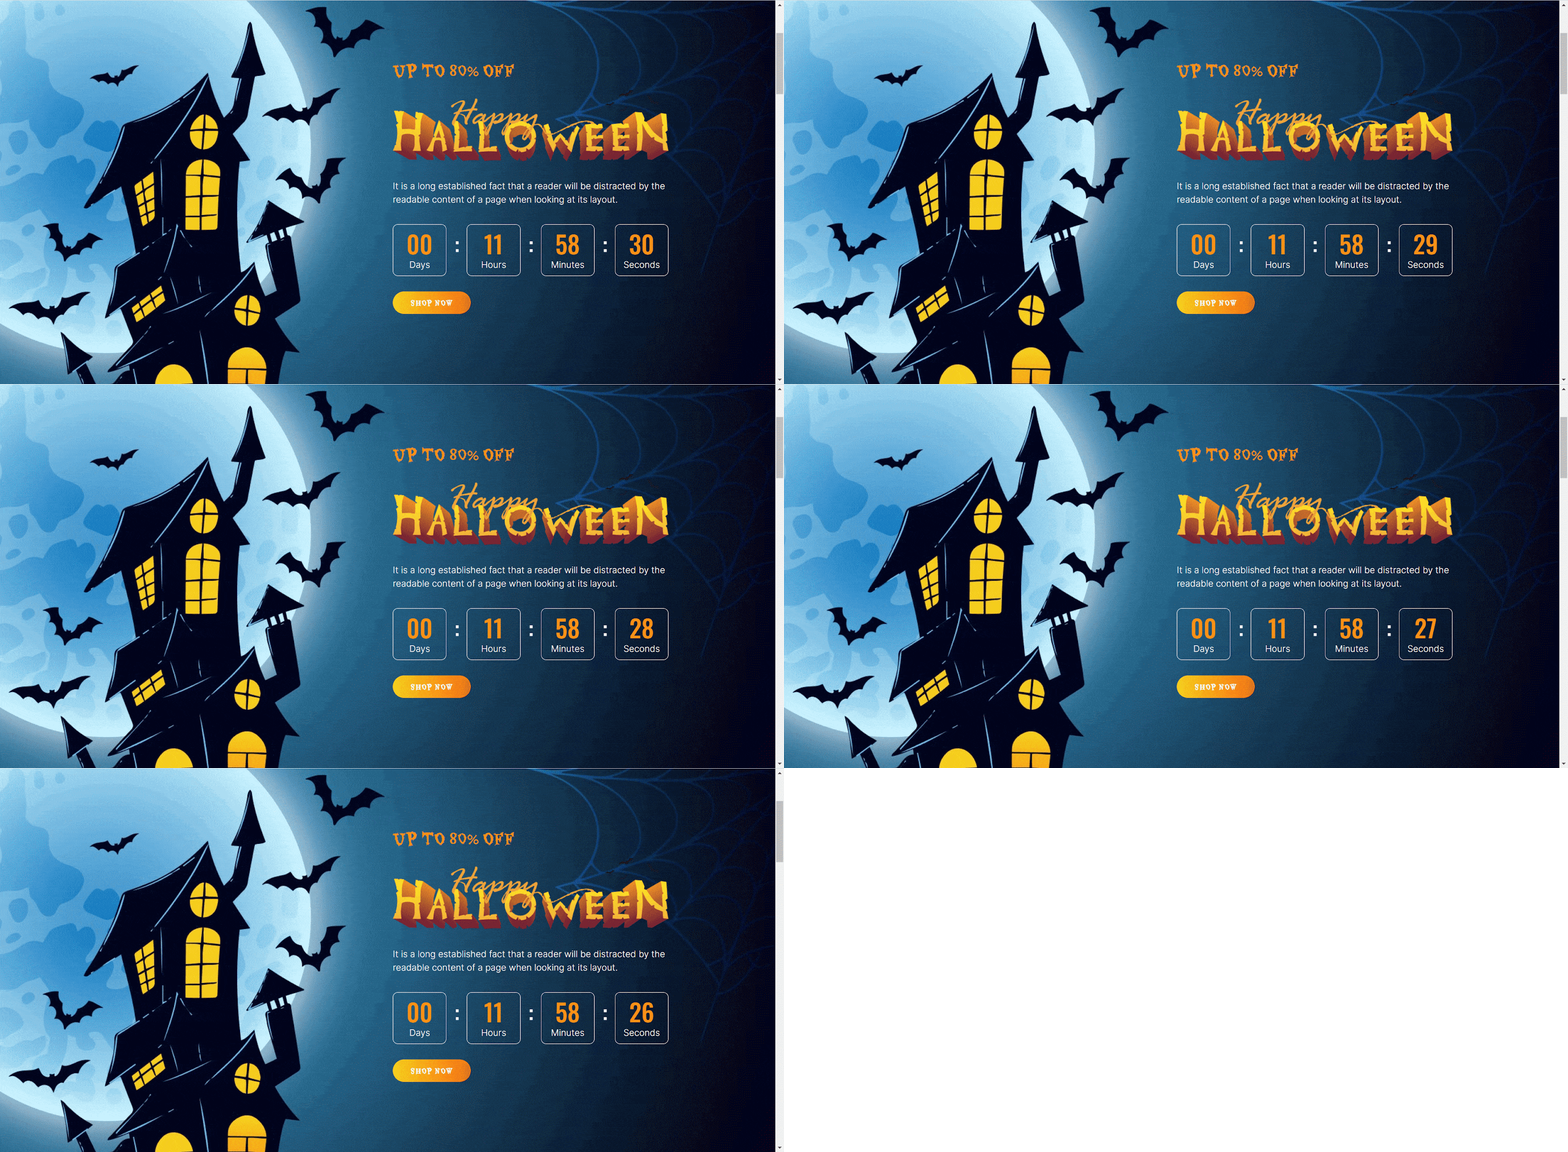
Once you are done with all the customization, now click on the ‘Update/Publish’ button to make the evergreen timer live on your website. Check out the final outcome on the image here:
⏰ Skyrocket Your Sales With Evergreen Countdown Timer In Elementor
Now that you know how to add an evergreen countdown timer in Elementor, you can add them anytime on your website. Just make sure you use the countdown timer in the right place to make the most out of your marketing campaigns. So, don’t wait anymore to add an evergreen countdown timer and boost your sales at ease.

Have you found our blog useful? If you do, then please subscribe to our blog and join our Facebook Community for more useful guides, tips and tricks, updates, and more. Also, feel free to knock out our dedicated support team if you face any issues while adding this widget to your website.
