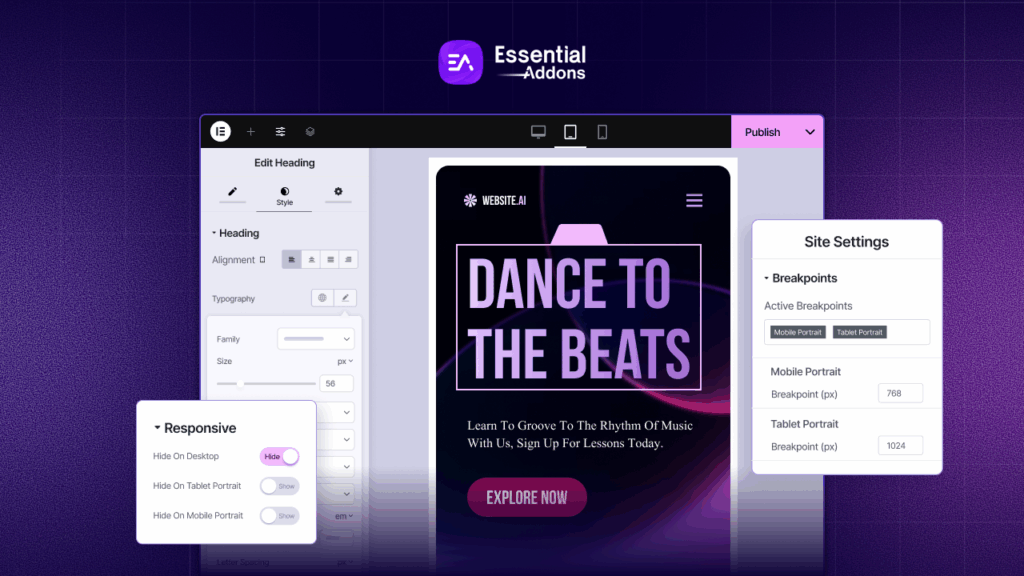
It may sound impossible at first, but with the right web builder and access to ready templates, you can effortlessly create your WordPress website in 1 hour, without even needing to add a line of code. All you have to do is drag and drop the elements you want on your website (menus, images, text boxes, etc) and go live!
Don’t believe us? We’ve got the complete guide on how to create your first WordPress website in 1 hour right here, if you are up for the challenge. Dive in and see how easy it is to create your website with just a few clicks here and there.
Myth Or Fact: Can You Really Create A WordPress Website In 1 Hour?
If you are someone who is just starting out with WordPress, it can get pretty overwhelming if you don’t know where to begin with. Most importantly, if you are just a beginner, then you probably have some misconceptions about creating a website.
Here, we are going to bust some of the most common myths about creating a WordPress website.
Myth 1: You need to know HTML and Javascript to create a website.
Truth: If you are using WordPress, there’s no need for coding to create your website. In fact, with the help of drag-and-drop editors like Elementor and ready website templates from resources like Templately, anyone can create a WordPress website in 1 hour without having to touch a line of code.
Myth 2: Creating beautiful websites is very expensive.
Truth: If you decide to design your website from scratch using web builders like Elementor, you can effortlessly create stunning websites without spending a pretty penny.
Myth 3: You need to go through a lot of hassle to get a hosting provider, domain names, etc.
Truth: If you know the best managed hosting providers, setting up your WordPress website is a piece of cake. Lucky for you, we have a list of some of the most recommended hosting providers right here in this tutorial below.
Myth 4: Installing WordPress is very hard and you cannot do it on your own.
Truth: Manually installing WordPress might seem a bit tricky to a beginner, but thankfully, nearly all hosting providers will install the WordPress software for you. In most cases, the costs for this are included in their pricing plan.
Still, if you want to manually install WordPress, then you will find detailed step-by-step guidelines on WordPress.org. We have also included the basic guidelines for manually installing WordPress here, but it is completely optional as your hosting provider will take care of it for you.
Myth 5: Once you design and publish your website, you cannot make changes.
Truth: Not entirely true. Web design trends are constantly changing and improving, so even if you make your website live, it is good practice to stay on top of web design trends and update your website accordingly.
Step By Step Guide: Create Your Website In 1 Hour
If you are now up for the challenge, then set your timer, because we are about to show you how you can create your WordPress website in 1 hour.
Of course, to make sure that you can follow this guide every step of the way without getting lost, we strongly recommend that you bookmark this page. We have also added the entire walkthrough in a series of checklists that you can tick off to make sure you are going on track.
So let’s get right to it!
Step 1: Getting Ready To Launch Your WordPress Website
One of the first things you will need to do to launch your WordPress website is getting the right domain name and hosting provider. Once you have those covered, you can get started with installing WordPress and configuring the basic settings required to launch your WordPress website in 1 hour.
Choosing Your Website Domain Name: Tips & Tricks
When it comes to choosing your domain name, you want to pick a name that will help you stand out from the crowd.
But don’t get carried away! Unique names are a must for a brand new website, but you must pick a name that is short, easy to spell and therefore easy to remember. The goal is to choose a domain name that will stick–it needs to serve the long-term purpose of your website, it needs to properly reflect your brand and it must be easy for site visitors to recall.
Sounds too complicated? We’ll break it down with some real life examples.
Consider the fashion giant SHEIN. Think of their brand name; it’s short and easy to remember. It’s unique. And, it’s also relevant (we’ll explain that in a bit).
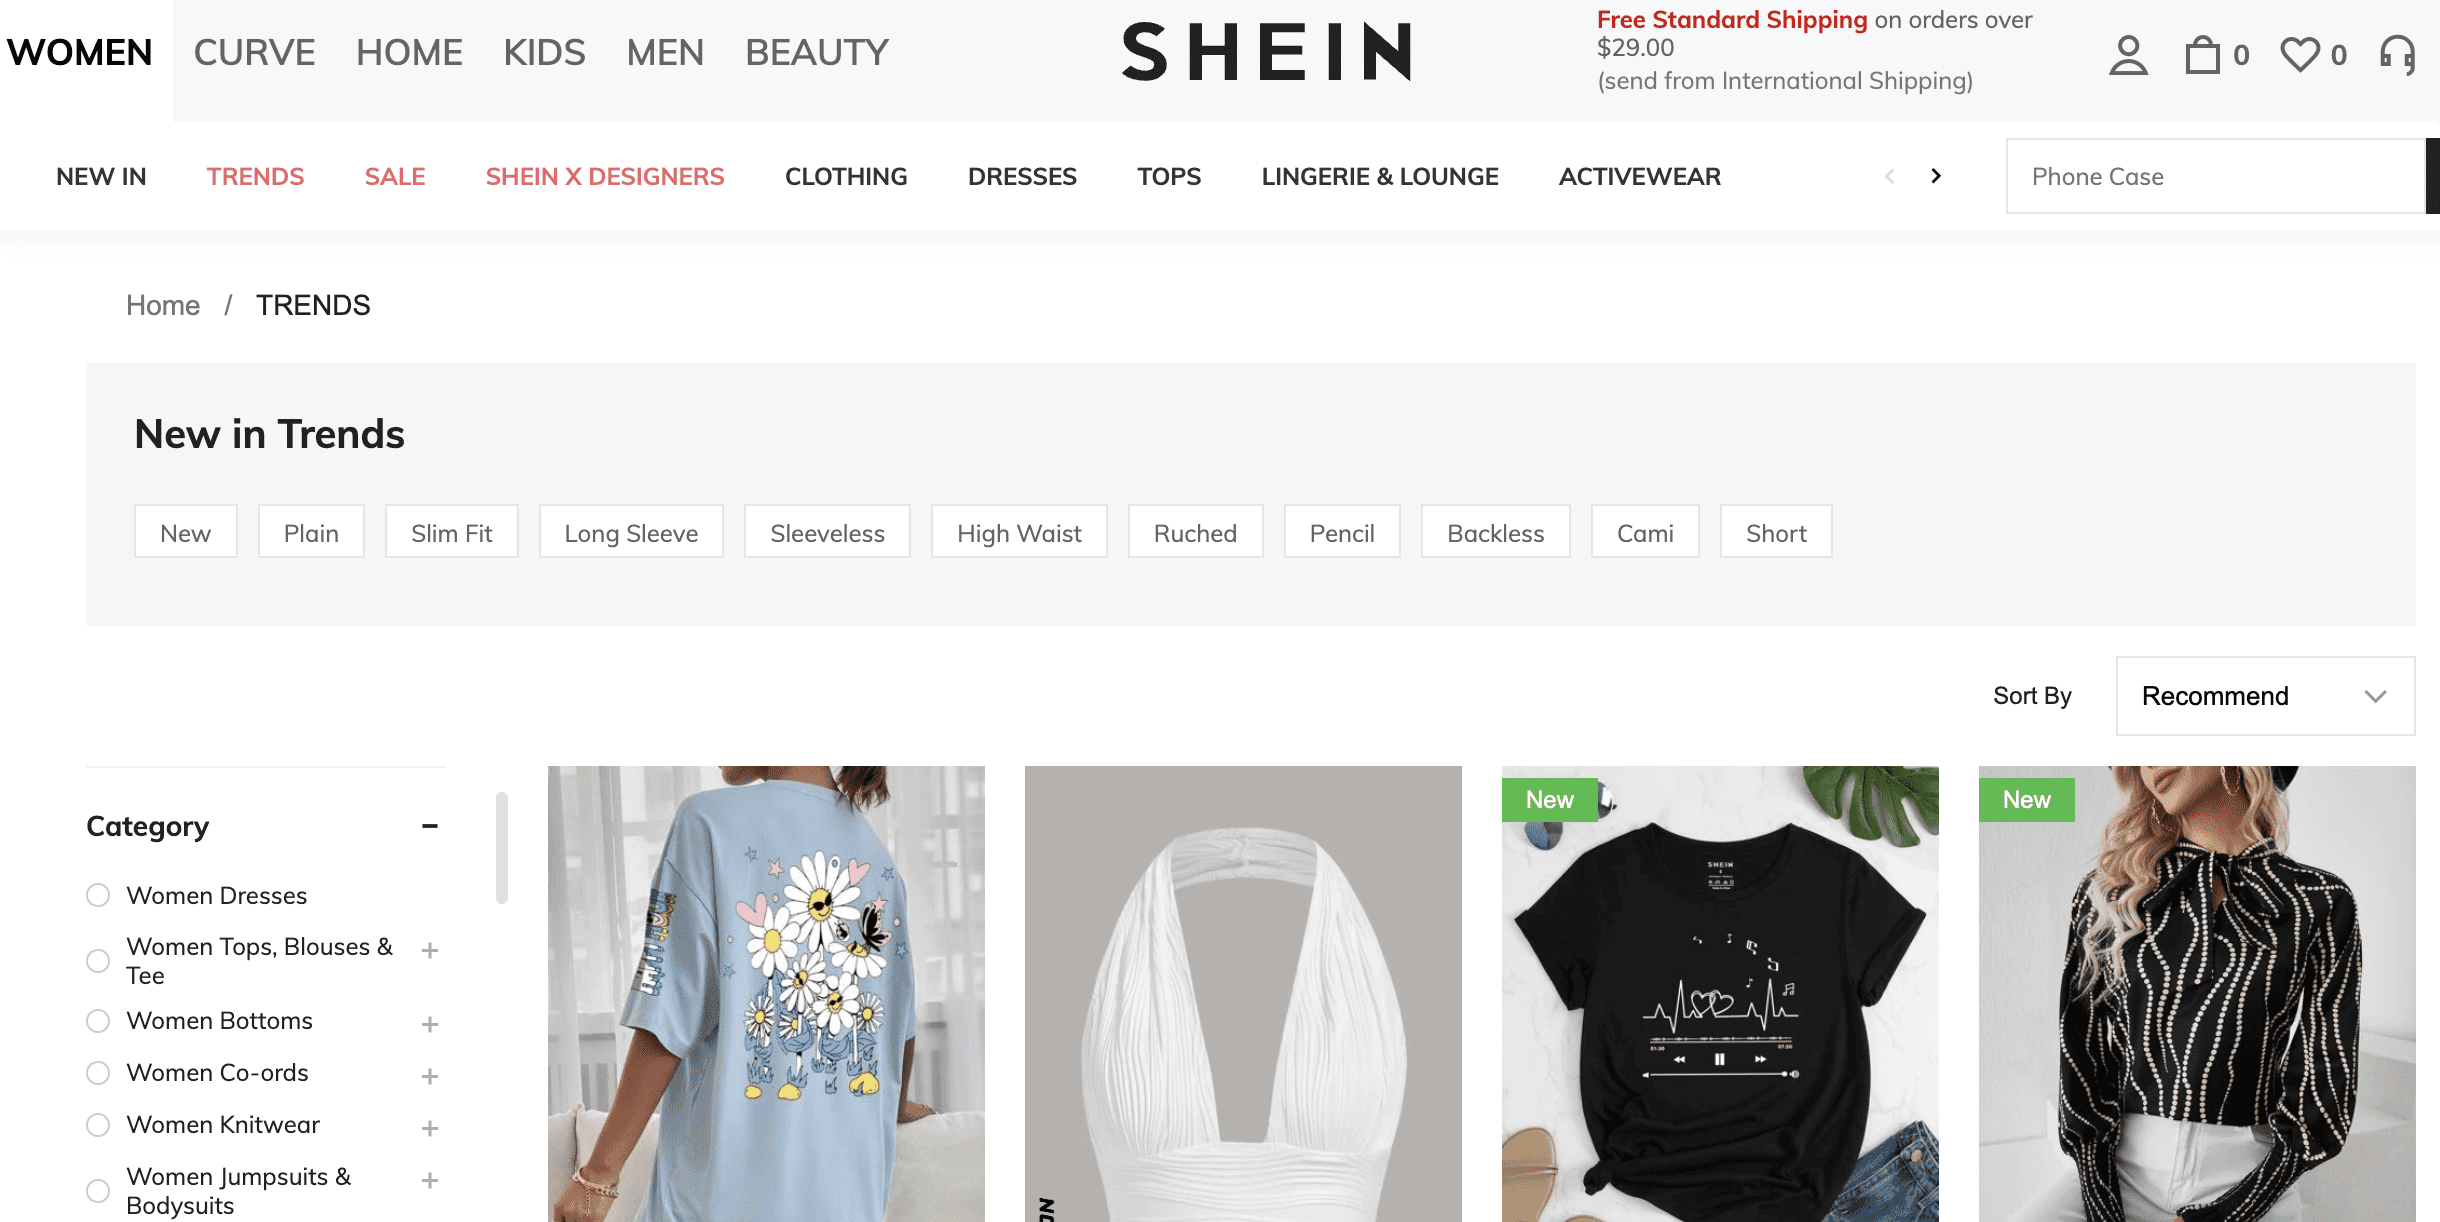
You might be wondering now: how did SHEIN get its name? And how can you pick a domain name that sticks like SHEIN did?
Originally, the brand name SHEIN had their website registered under the domain name SheInside.com, which in itself was a play on the phrase “See Inside”. As the business grew bigger and more popular, this eCommerce fast fashion giant made the right move to shorten their website name to SHEIN, and updated their tagline to “Shine In, Shine Out”.
Similarly, for your WordPress website, whether it is a personal website, a blog, an online business, you also need to think about what your tagline or brand persona will be and come up with a domain name that represents it accurately.
Get The Right WordPress Managed Hosting Provider
Once you have the right domain name for your website, you need to select the right WordPress managed hosting provider.
There are tons of great WordPress hosting providers out there that you can choose from. But how will you know which one is the right fit for you and your website’s requirements?
The easiest way to choose the best WordPress managed hosting provider is by considering the three main important factors: speed, uptime, and support. Weigh these factors and compare them with what your website requires, and you’ll be on the right track for choosing the best WordPress managed hosting provider.
To help you out, we have compiled a list of some of the most popular and trusted hosting providers for WordPress. Dive in and take a look, or check out our guide here.




Install WordPress And Set Up Your Website
Once you have decided which hosting server you want to go for, you need to install and set up your WordPress website.
Usually, your hosting provider will take care of installing WordPress for you, which will save you a lot of time and hassle.
If you are curious, you can easily install WordPress manually by following these basic steps outlined here. But if you want to create your first WordPress website in 1 hour, we recommend letting your hosting provider take care of it and skipping straight to Step 2 of our guide here.
DIY Guide To Installing WordPress Manually
⏬Download and install the WordPress package. You can get the latest version of the software from WordPress.org. Before doing this, make sure you have read the prerequisites for installing WordPress.
🔀 Create a database for WordPress on your web server along with a user with all administrator privileges and permissions.
⏫ Upload your WordPress files to the web server.
🔃 Run the WordPress installation script by accessing the URL where you uploaded your WordPress files.
Step 2: Configure Your Website After Installing WordPress
After installing your WordPress website, you need to take care of some essential tasks. Here are the most important things to do after installing WordPress.
Update Your Website Title, Tagline And Timezone
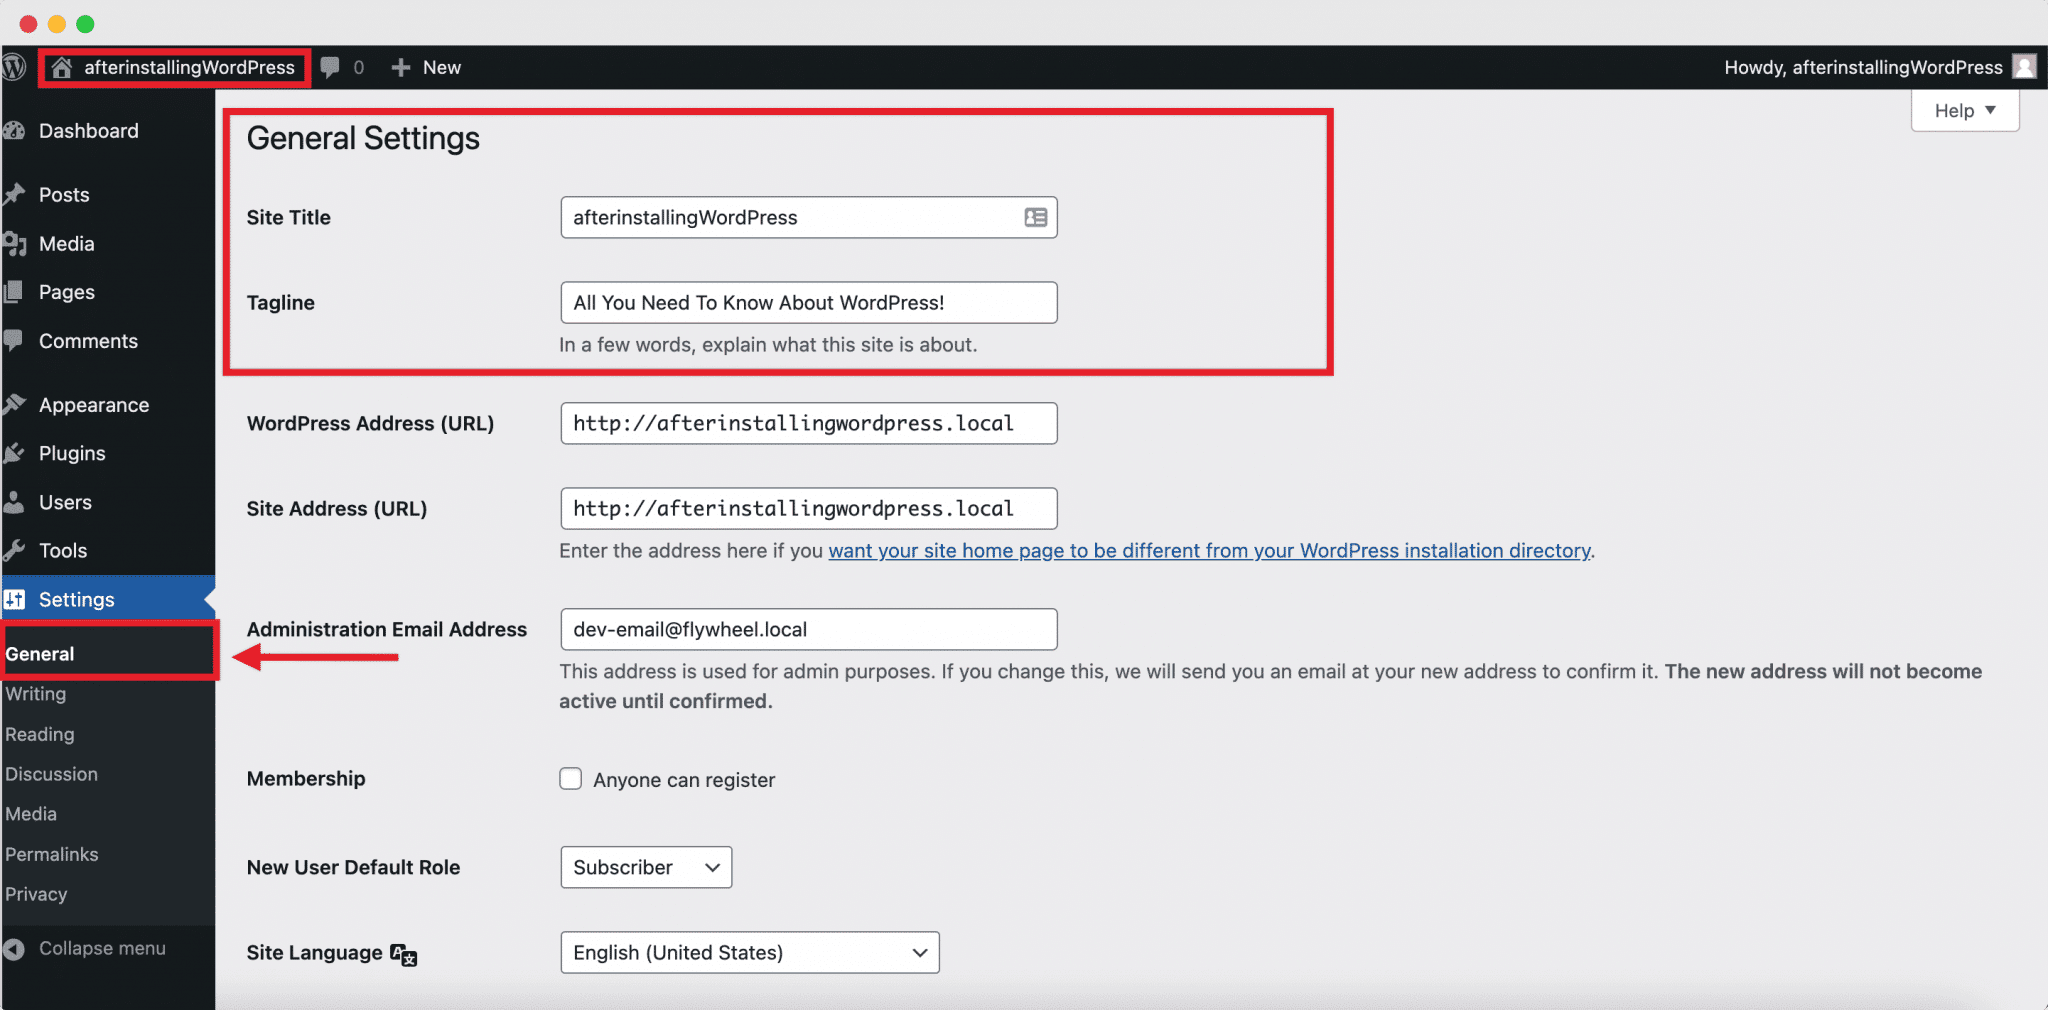
One of the first things you want to do, after installing WordPress, is updating your website title, tagline and timezone. Your website title and tagline will be one of the first things a site visitor or search engine sees, so it’s important to take care of these as soon as you are done installing WordPress.
You can update this effortlessly by simply logging in to your WordPress dashboard, then heading over to the Settings→ General tab as shown below.
Next, you’ll need to update your website timezone.
Wondering why?
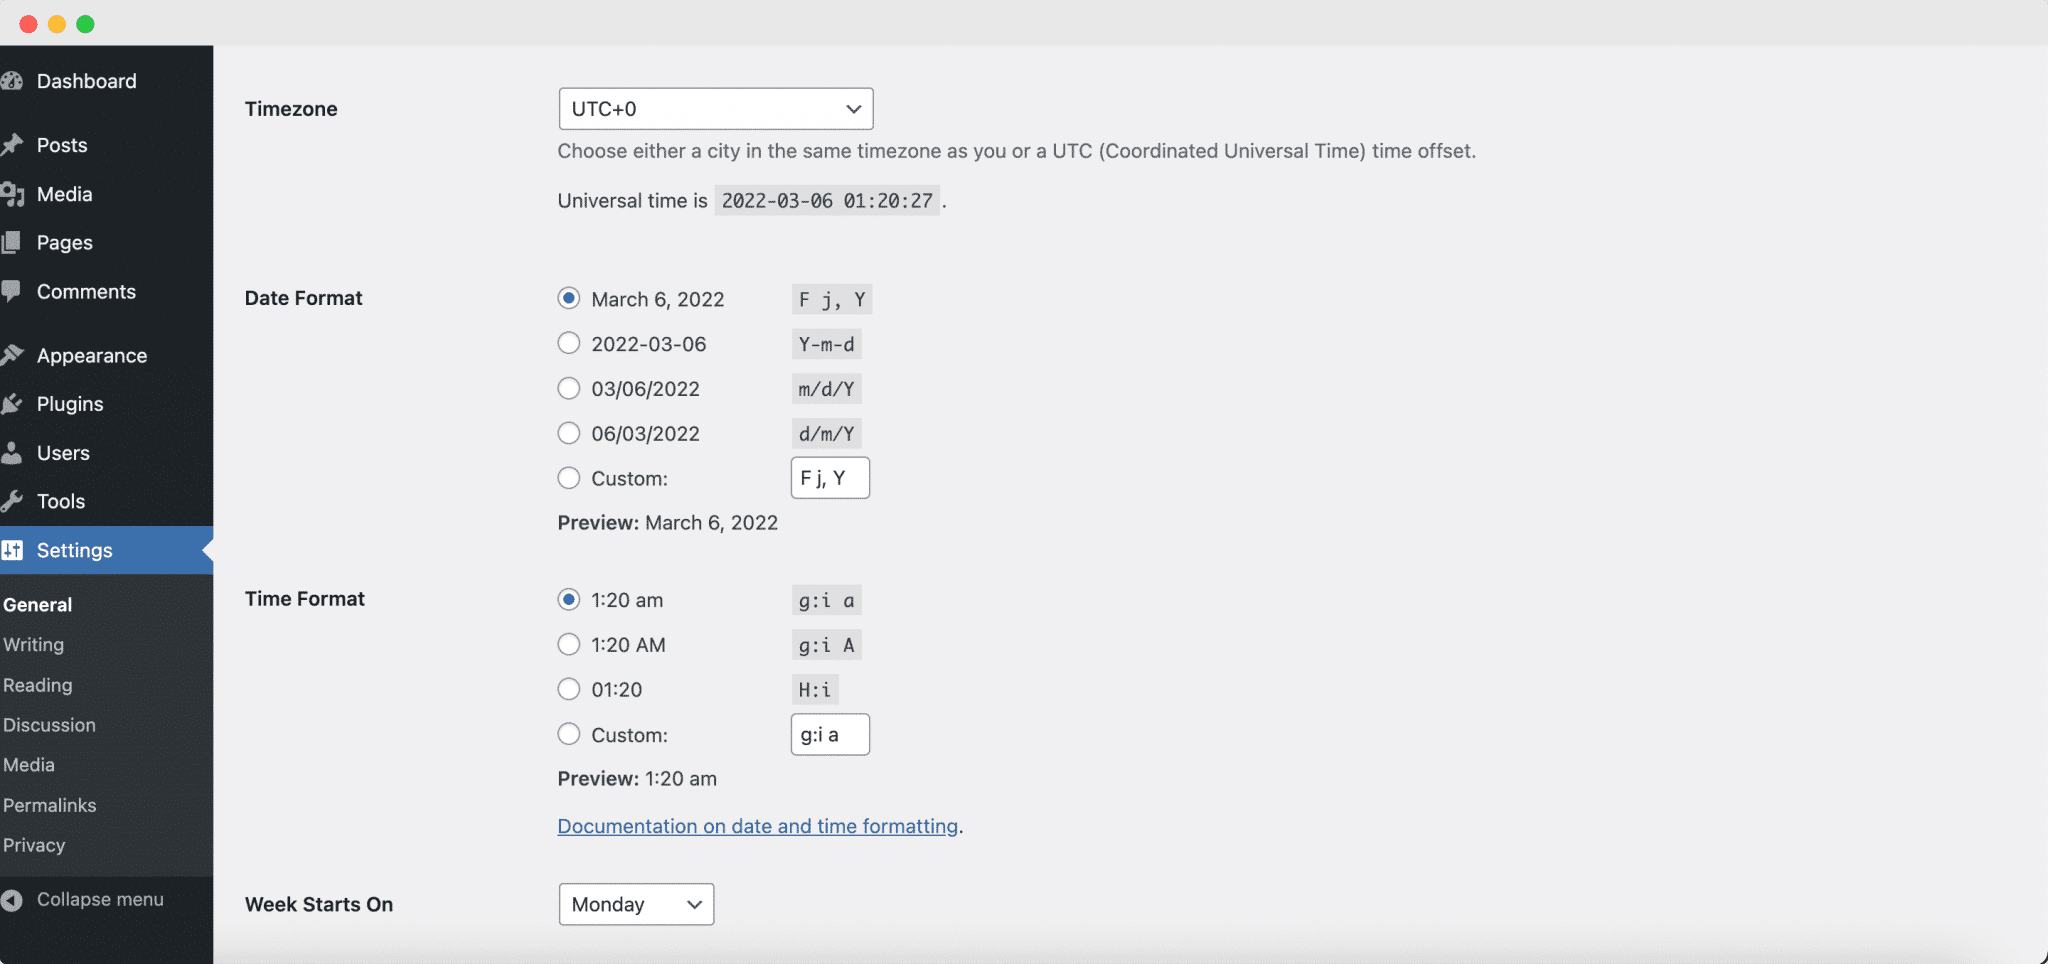
In order to make sure your content is being published at the correct time, you need to configure your website timezone. If you already have an intended target audience in mind, and you want to schedule your content according to their geolocation, then updating your website timezone will be very helpful for you.
Once again, you will find the options for changing your website timezone from Settings→ General tab (simply scroll down the page until you see the option).
Create Your Profile, Password And Add An Avatar
When you are done setting up the basic details of your WordPress website, it’s time to create your user profile. A lot of WordPress users ignore this step, but if you are creating a portfolio website, a personal website, or something similar, creating a proper profile will help you build and grow your online presence.
WordPress by default lets you create a Globally Recognized Avatar, or Gravatar in short, using the email address for your WordPress account.
![]()
Decide On Your URLs And Permalink Structure
Now, for some of the more advanced setup and configurations. In this step, we’ll show you how to set up your URLs and permalink structure.
From your dashboard, you can head over to Settings→ General and fill up the sections for WordPress Address and Site Address as shown below.
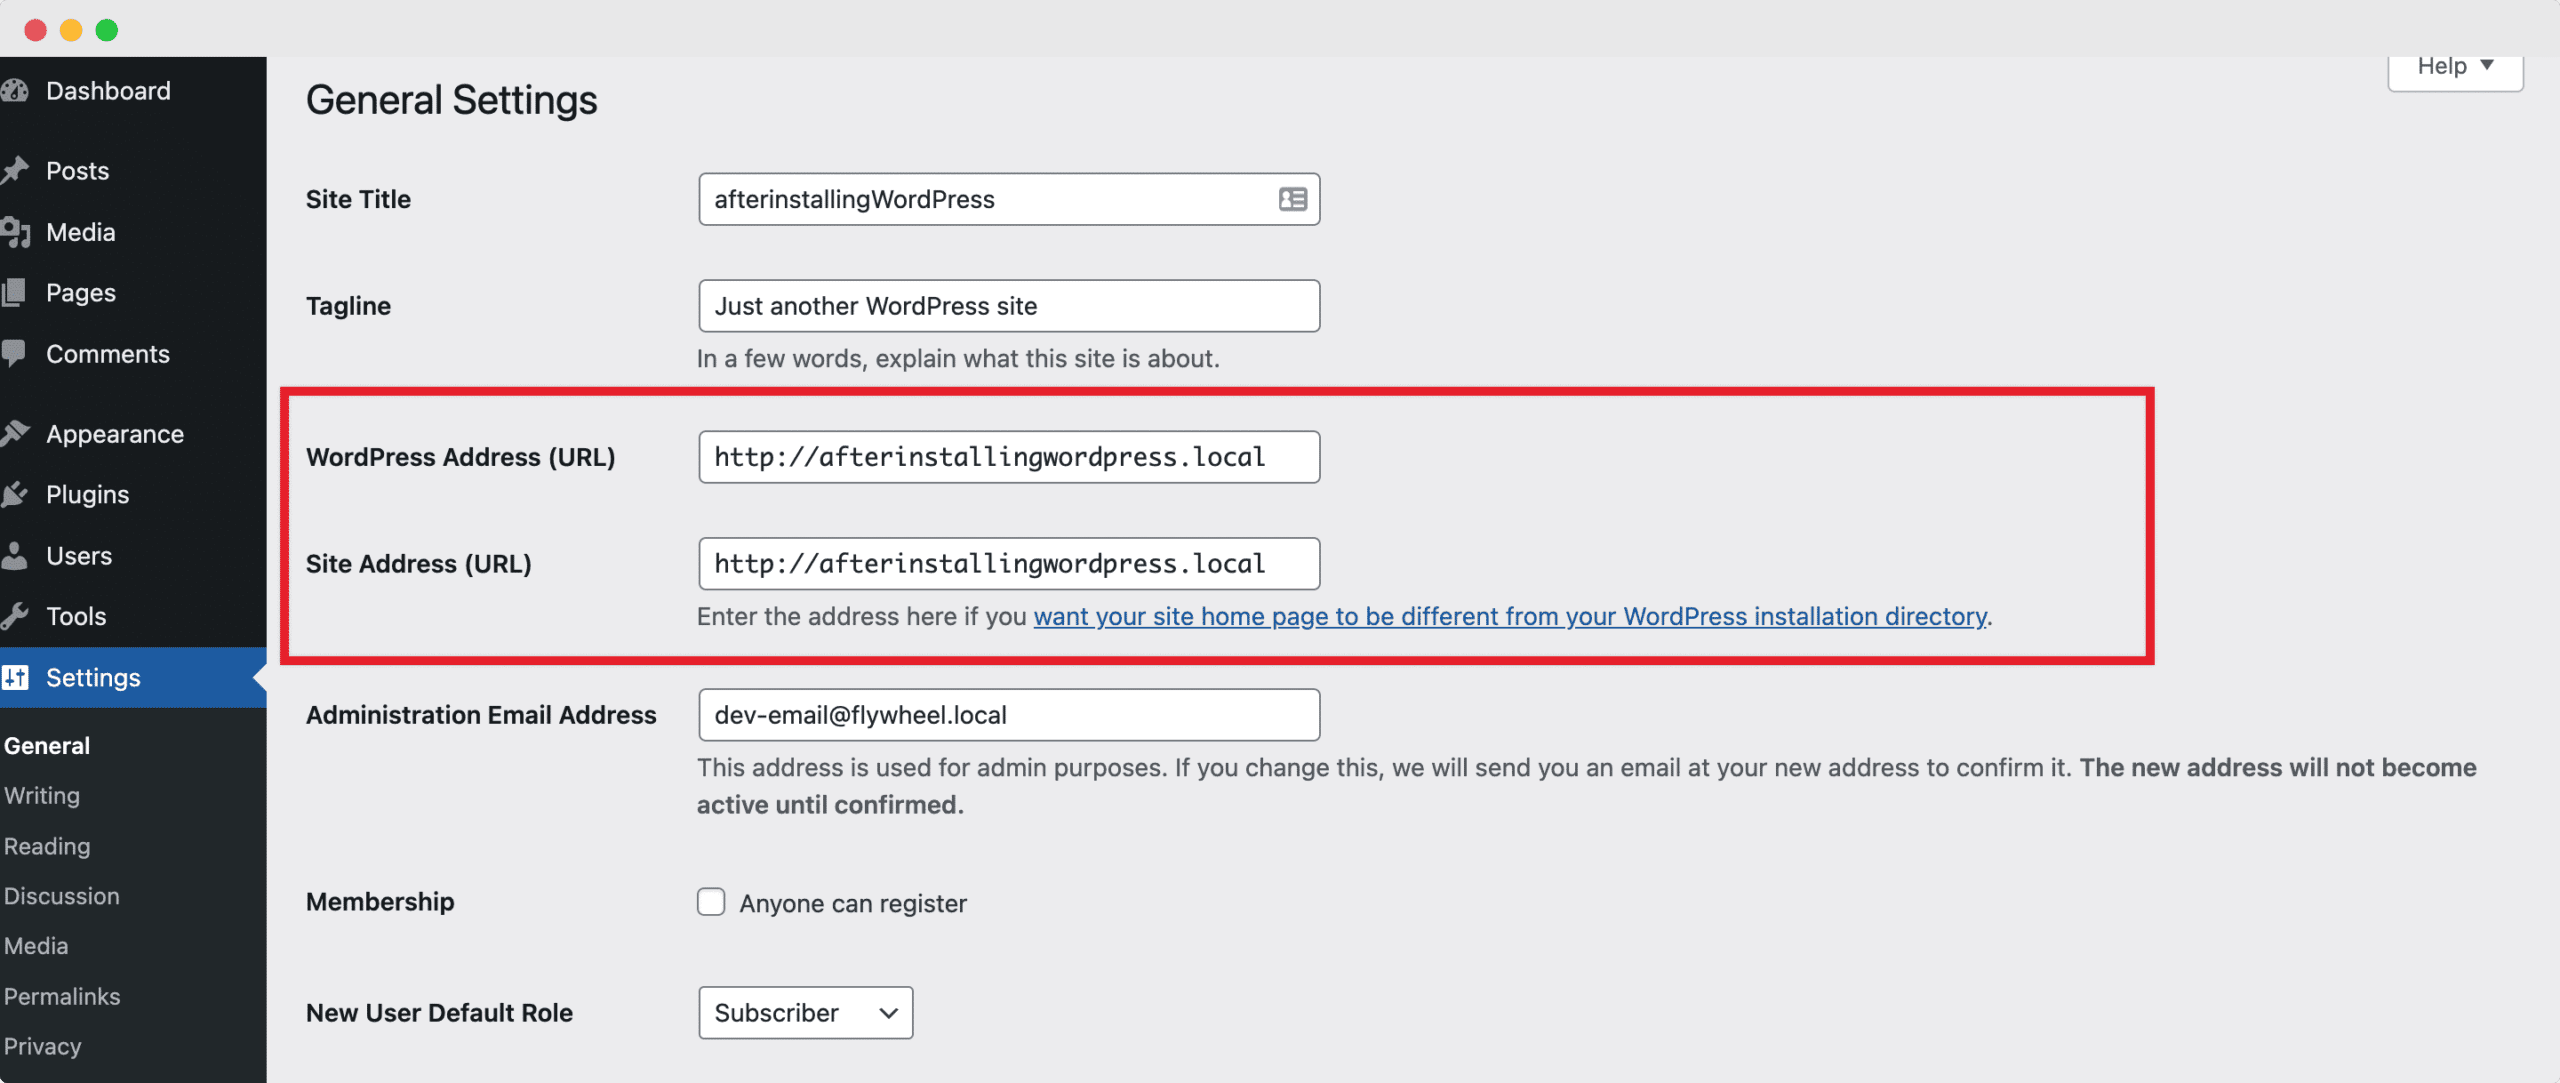
Your WordPress Address is where your WordPress files and folders are located or stored. It contains your admin pages, media files, plugins, themes and much more.
The Site Address on the other hand is the URL that your website visitors will type in to land on your Home Page. It is the “frontend” of your website.
In most cases, the WordPress Address and the Site Address are the same.
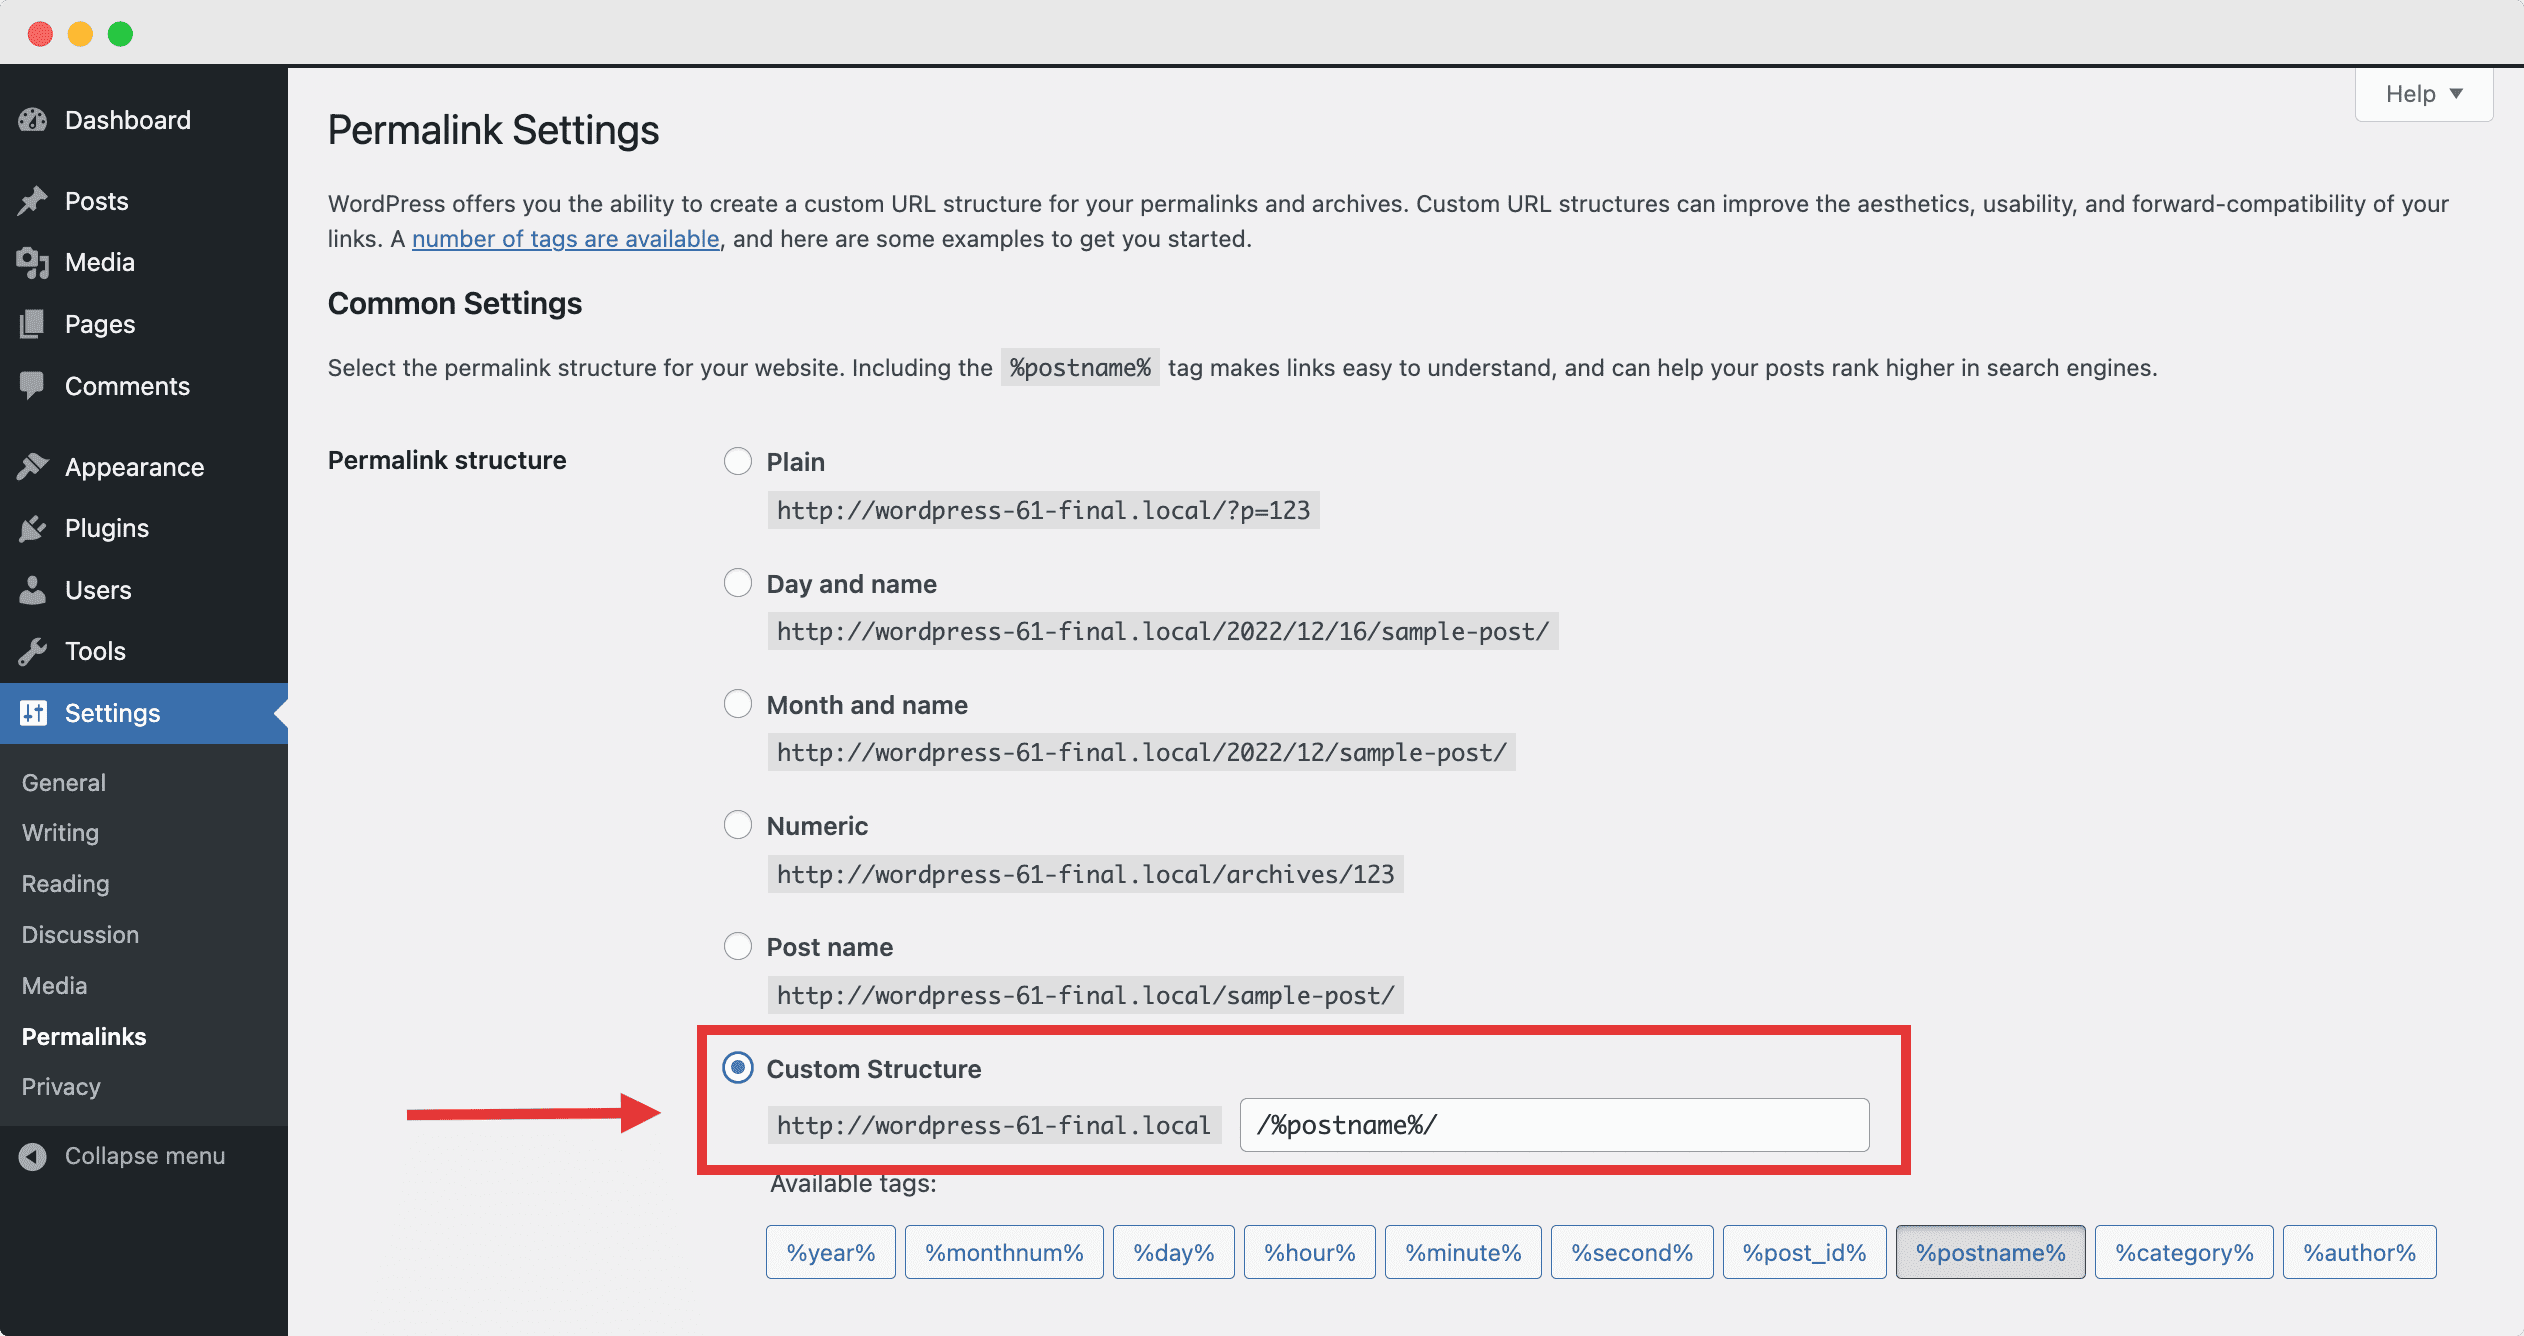
After this, you need to decide on your permalink structure. This determines how the URLs for your pages and posts will be displayed. When deciding on your permalink structure, it is important to consider ranking factors for SEO as well as what would make the most sense for the nature of your website.
Typically, it is strongly recommended to choose the 5th default permalink structure from WordPress or the /%postname%/ structure.
Customize The Appearance Of Your WordPress Theme
Next, it’s time to take care of the aesthetics of your WordPress website.
💡Important Note: if you want to use advanced website builders to create polished, stunning and professional looking web pages, you can easily skip to Step 3 of this guide.
If you want to keep your WordPress website minimalistic, and only customize your website by using themes, then you can choose the best WordPress themes and effortlessly make your website attractive to site visitors.
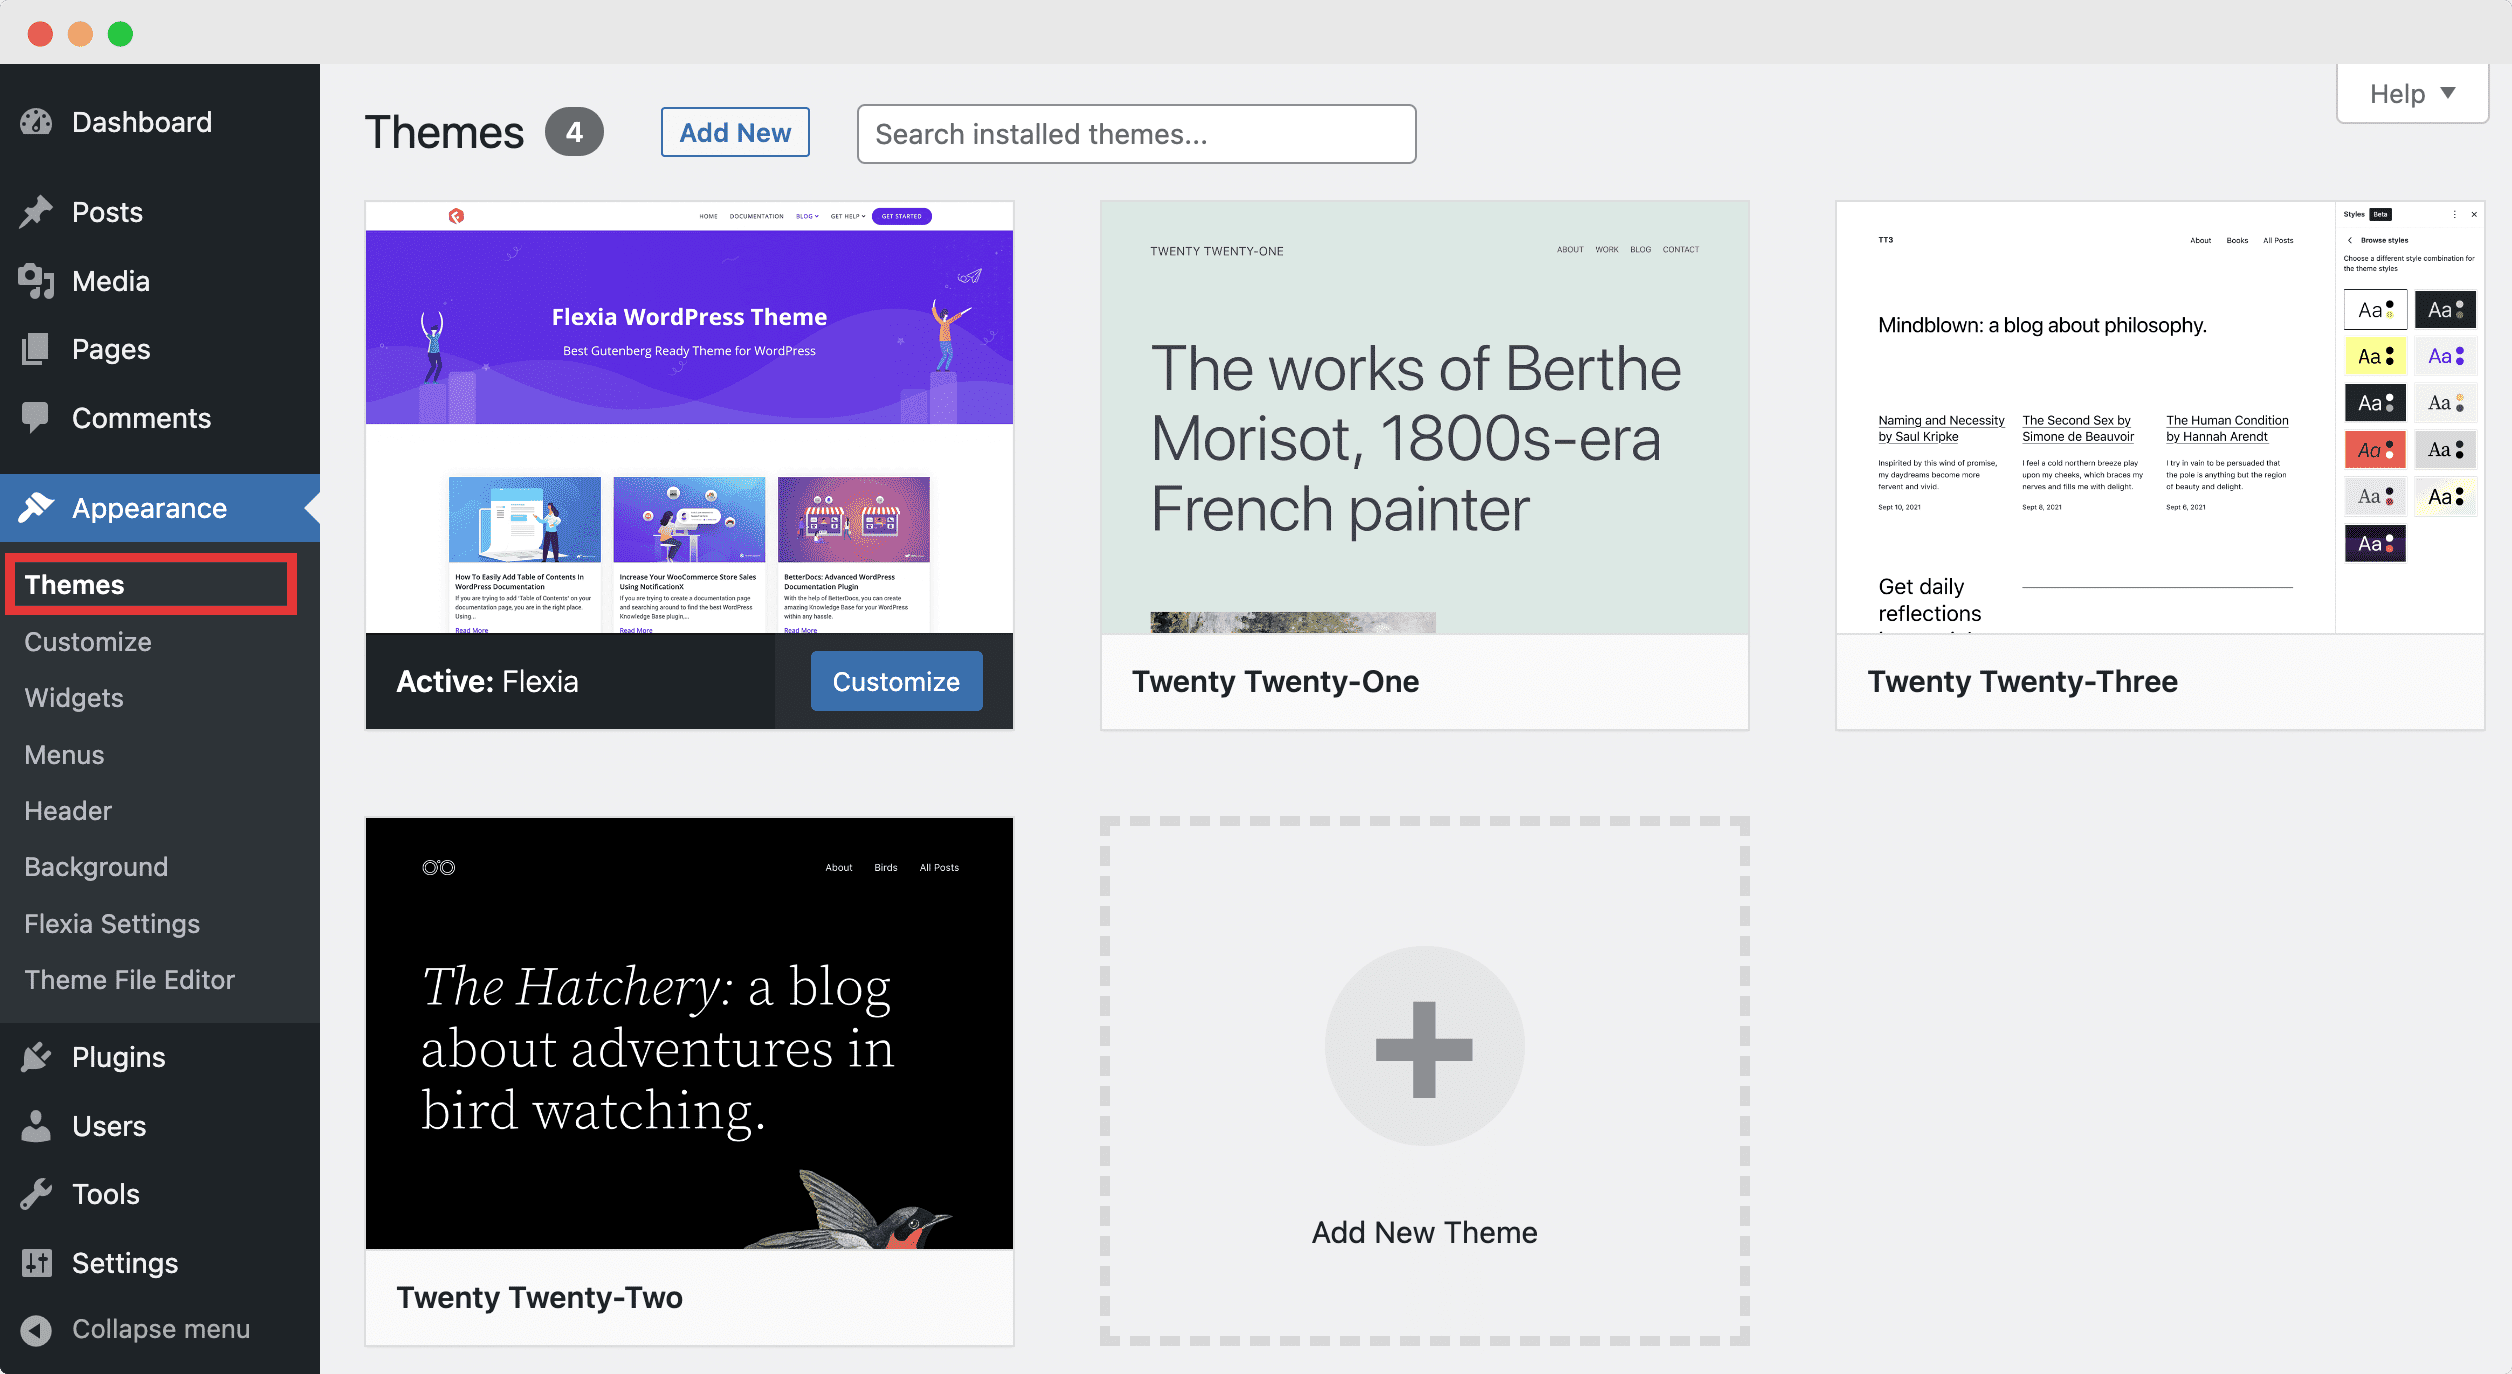
One of the most lightweight and flexible WordPress themes that we recommend is Flexia. This stunning WordPress theme comes packed with tons of customization options and ready layouts to help your website stand out from the crowd.
To customize your WordPress theme, head over to Appearance→ Themes and then select which theme you want to activate. After activating a theme, you can click on the ‘Customize’ button to design your WordPress website however you want.
Add Unique Favicons Or Site Icons To Your WordPress Website
Finally, you need to add unique favicons or site icons to your WordPress website. These will load in the browser window of a site visitor whenever they land on any of your website pages, and can help you build brand awareness effortlessly.
You can add favicons or site icons to your WordPress website by going to Appearance→ Customize and then look for the options to add the site icons. Usually, you will find these options under the ‘Site Info’ settings in the Customizer.

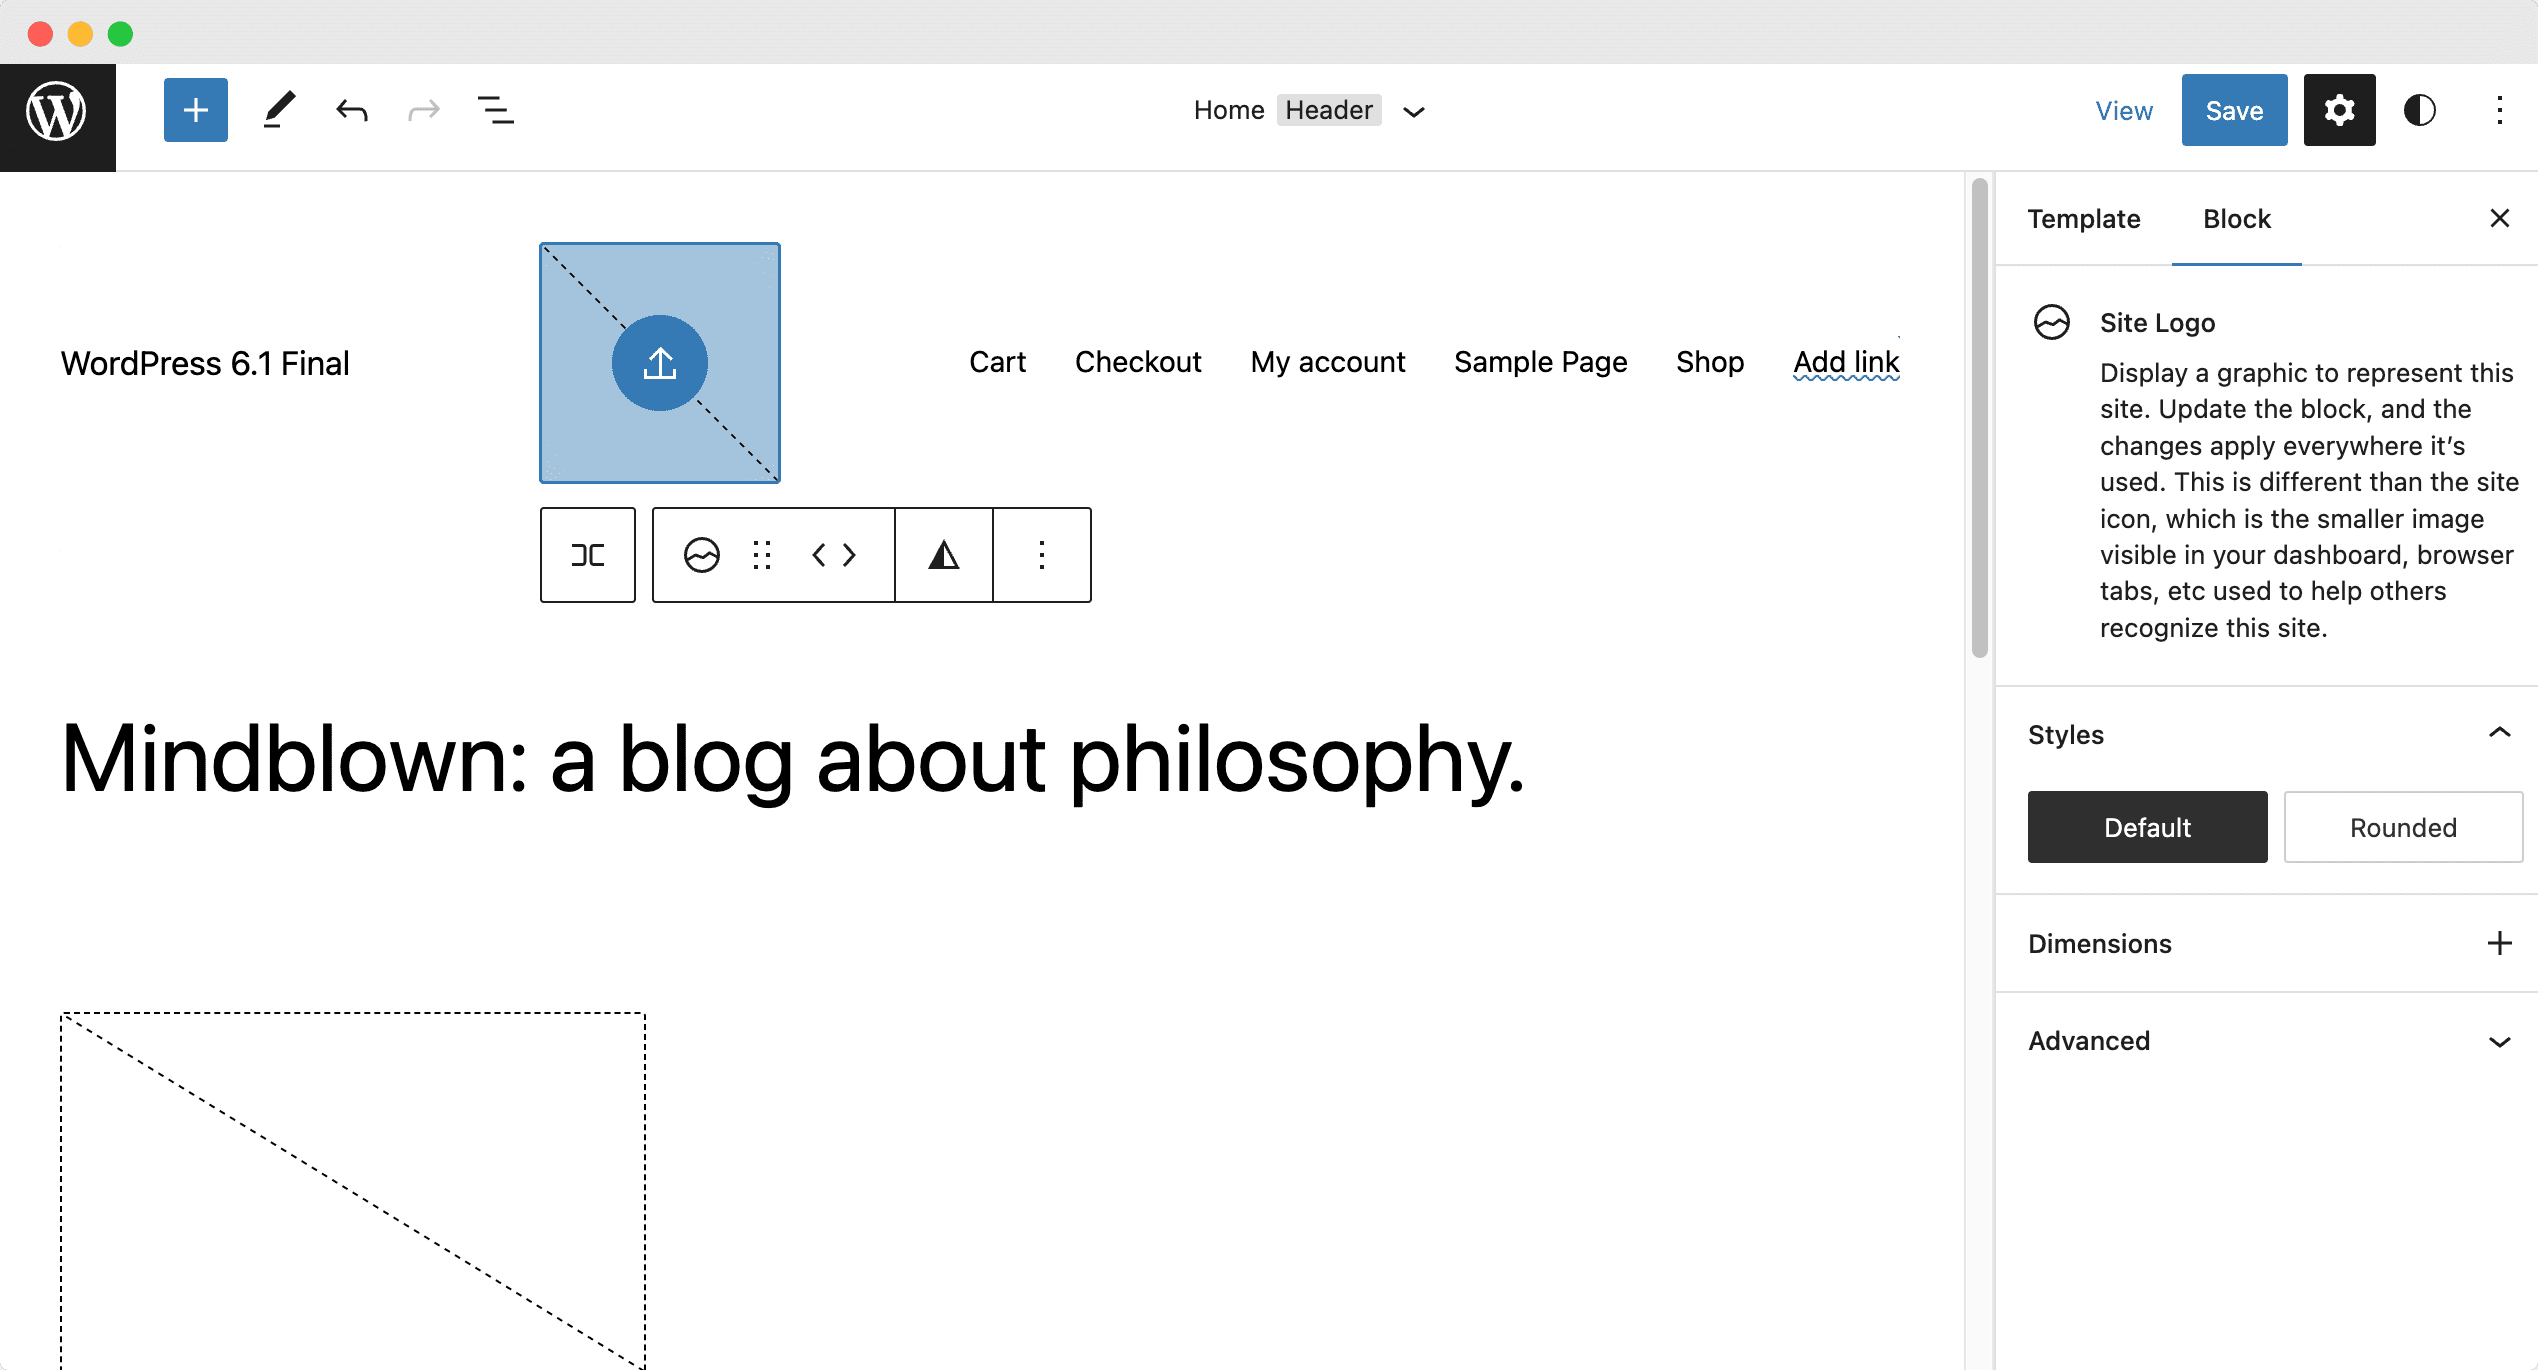
If you are using a WordPress block theme such as the theme Twenty Twenty-Three, then you will need to navigate to Appearance→ Editor and then add the ‘Site Logo’ block to the header as shown below.
By now you are already nearly done creating your first WordPress website in 1 hour! There’s just a few small steps remaining for ensuring security and SEO for your website.
If you want, you can just continue to Step 4 of this guide for those tutorials.
Or, if you want to put in a little more effort into the aesthetics of your WordPress website and add a little more of that WOW! Factor for your website visitors, then check out how you can create stunning web pages without any coding with Elementor and Essential Addons.
Step 3: Create Stunning Web Pages With Ready Templates [Optional]
Anyone who is familiar with web design on WordPress must be familiar with the game changing drag-and-drop web builder, Elementor. With more than 10 million users, Elementor is the number one choice for creating jaw-dropping, beautiful, sleek web pages without coding.
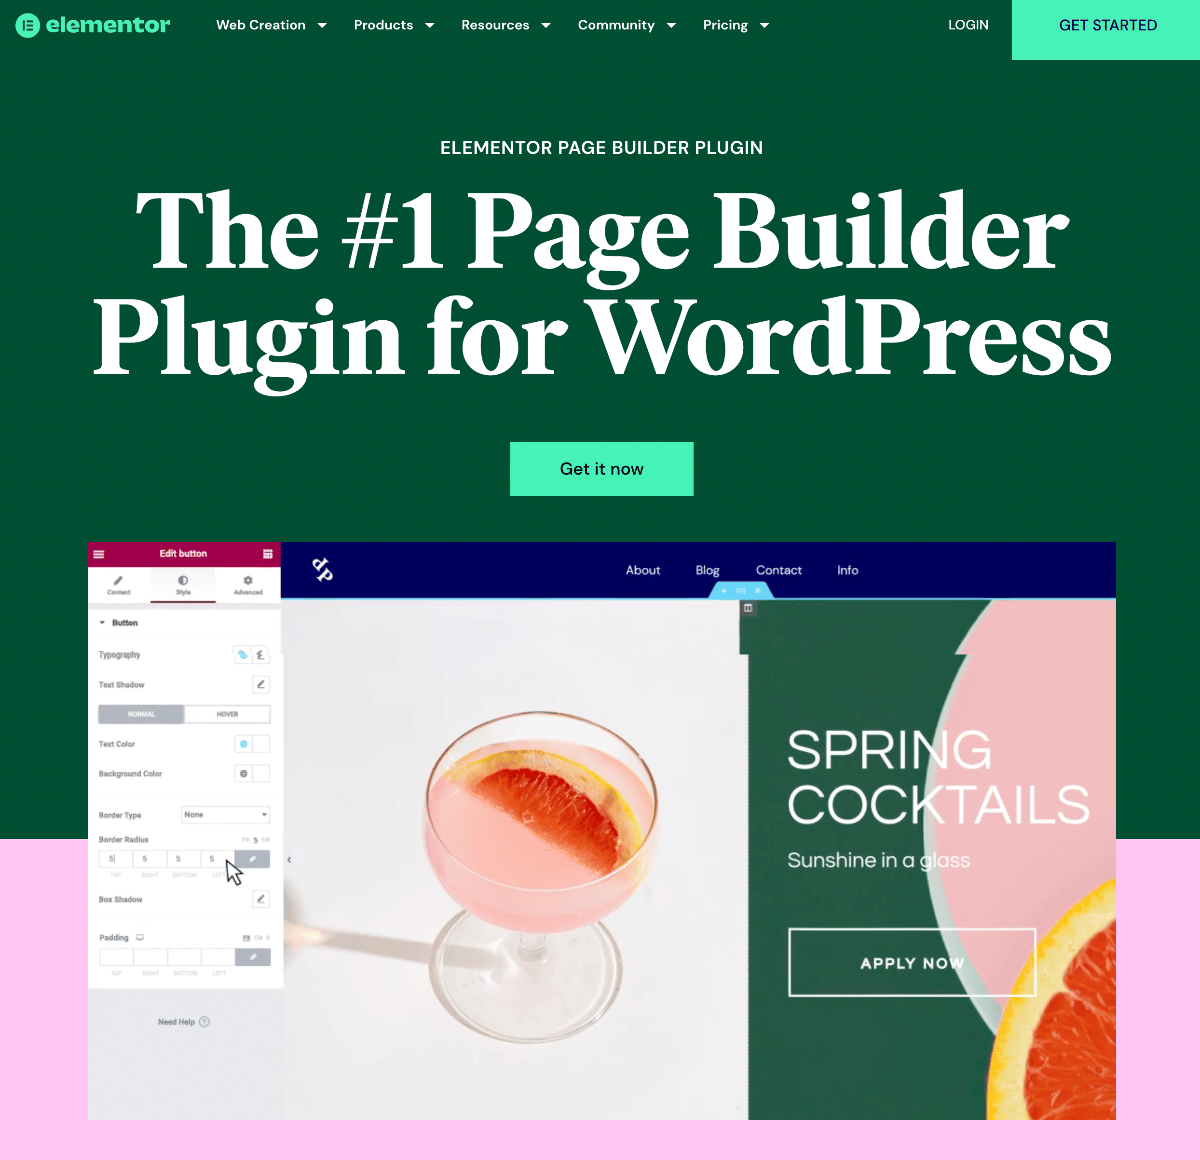
All you have to do is install Elementor plugin, follow the on-screen instructions and then you are good to go!
You can just create a new page, open the Elementor editor, and just start dropping whichever widgets you need to create a beautiful web page.
On its own, Elementor has over 100+ widgets to help you design and create web pages for any kind of website. But if you want to go the extra mile, you can also use the most popular widgets library for Essential Addons.

Trusted by more than 1 million users from over 180 countries, Essential Addons for Elementor has 90+ advanced widgets to take your web building experience in Elementor to new heights.
From tons of creative widgets like NFT Gallery, Flip Boxes, Advanced Search, to essential widgets for online stores such as a WooCommerce Checkout, Essential Addons for Elementor has everything you could possibly need to create your WordPress website with just a few clicks.
💡 Recommended: Top 10 Web Design Principles
When designing your WordPress website in 1 hour, don’t go in blind. Read up about the most important web design principles and try to adhere to them when designing your web pages to give the best possible experience to your site visitors and boost engagement.
Step 4: Install Security & Back Up Plugins
By now, you should have a stunning WordPress website ready for launching. But don’t hit the ‘Publish’ button just yet. There are still some important things to take care of before you launch your WordPress website.
First and foremost, you need to ensure site security and backups for your WordPress website. There are tons of advanced plugins and tools available that you can use to scan your WordPress website for vulnerabilities, including:
WPSec: a fantastic, lightweight tool that is known for scanning and finding issues that arise when installing WordPress, and is therefore an excellent tool to start with.
MalCare Security: a free cloud-based scanning plugin that checks all of your files and looks out for any issues in your database.
Sucuri Site Check: this is one of the most popular anti-malware tools for WordPress.
Check out this full list of the best tools for scanning your WordPress site, and also make sure to take a look at our complete guide on how to create a WordPress backup, and also how to restore a WordPress backup as well.
Step 5: Set Up SEO To Rank Your WordPress Website
After taking the necessary precautions to protect your website from vulnerabilities and malware attacks, you need to optimize your WordPress website for SEO.
SEO, or Search Engine Optimization, is the process by which you can make your website more visible online by utilizing the best practices and getting your website content properly indexed or crawled by search engines.
When it comes to improving your website SEO, there are several different things you will need to keep in mind. Luckily for you, we have the ultimate WordPress SEO Checklist that you can use to drive traffic to your site.
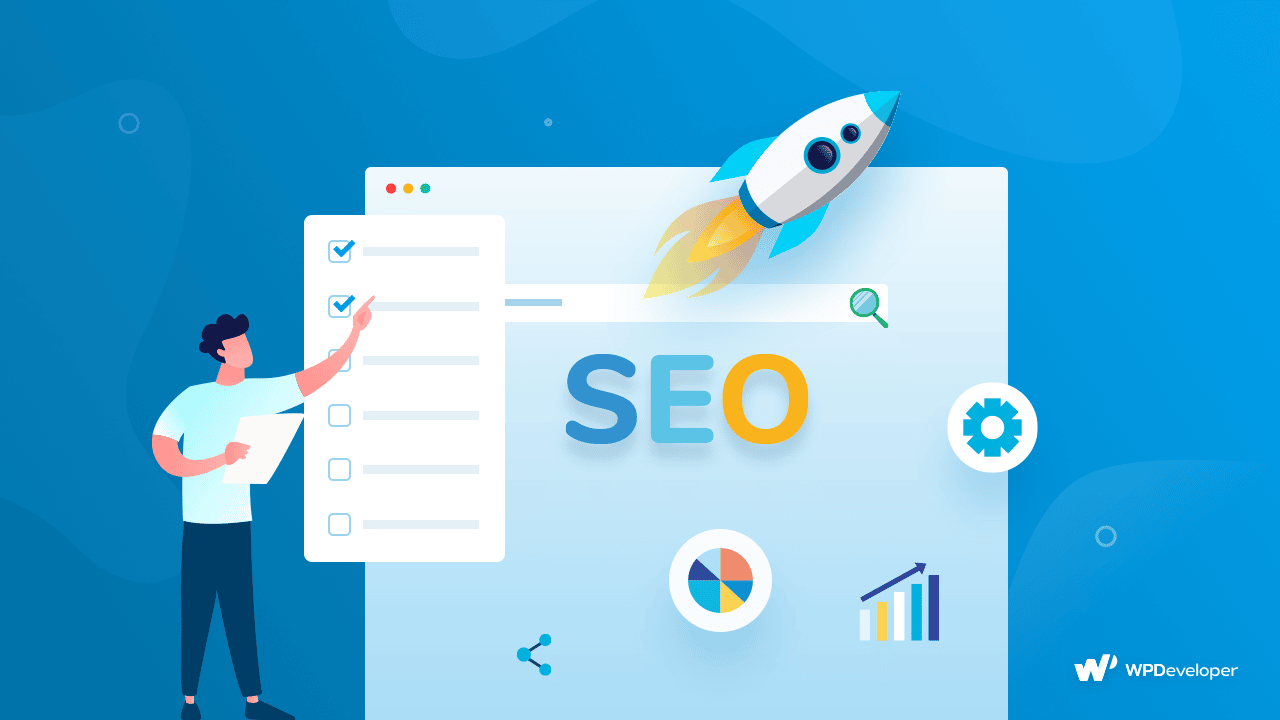
Of course, to implement these SEO strategies, you will need to use the best SEO plugins for WordPress as well. Here are our top 3 most recommended ones:
Rank Math: a powerful SEO plugin for WordPress with tons of features to help you improve your website rank.
Yoast SEO: one of the most popular WordPress SEO plugins used by more than 5 million users.
All In One SEO: a complete, advanced SEO solution with an easy-to-use interface and unique features.
Not sure which of these is the right SEO plugin for you? Then take a look at our detailed comparison of the best SEO plugins here.
Step 6: Ensure Accessibility For Your Website Visitors
Before launching your WordPress website, you need to make sure that your website design and content is accessible for all users.
If you have read our guide on web design principles which we mentioned above, then you already have an idea of why accessibility is important.
Ensuring that everyone, no matter what diverse backgrounds they may have, can access your online content should be at the core of your web design. Creating website content that is accessible is essential for making the web an inclusive space for everyone. And to help you out, we have several detailed guides on inclusivity in web design as well as accessibility for WordPress here.
Step 7: Thoroughly Scan And Test Your Website For Issues
You are nearly there! By this stage, you should be more than ready to launch your WordPress website. Before making your website live, thoroughly test every feature, button and links on your website and scan for any issues.
You should also be running a speed test on your WordPress website at this stage. After all, if your website takes too long to load, you are definitely going to lose traffic and engagement. You can find out about the best tools to run speed tests here.
Step 8: Launch Your WordPress Website And Spread The Word!
And now for the final unveiling! If everything is working fine after testing your WordPress website, you can go ahead and launch your site for the world to see.
With these simple steps, you can effortlessly create your WordPress website in 1 hour. All it takes is some careful planning and preparation, and you are good to go!
If you enjoyed this tutorial, don’t forget to subscribe to our blog or join our friendly Facebook Community.
![[New] Create Liquid Glass Effects o[New] Create Liquid Glass Effects on Your Elementor Website within Minutesn Your Elementor Website within Minutes](https://essential-addons.com/wp-content/uploads/2025/09/Liquid-Glass-Effect-Blog-Banner-1024x576.jpg)
