If you are an owner of an online business, then you probably already know how important it is to have a WooCommerce Checkout Page that is both attractive, interactive and easy to use for your site visitors. However, what you probably didn’t know is that you can easily create a beautiful Checkout page for your online store in less than 5 minutes!
The best part? You don’t need to have any coding experience to do this. All you have to do is set up a WooCommerce shop to sell your products, and use the page builder Elementor to create a beautiful WooCommerce Checkout page.
Table of Contents
Simplifying WooCommerce Checkout To Improve User Experience
In order to have satisfied customers who will return to your online store, you need to focus on improving your customer’s experience. To do this, you have to make sure that your online store loads quickly and smoothly, and is easy to understand.
For this reason, it is important to simplify your WooCommerce Checkout Page to improve your site visitor’s experience. Thankfully, this is very easy to do and requires no coding skills!
Things You’ll Need To Design WooCommerce Checkout Page
To design a WooCommerce Checkout Page, you first need to make sure that you have the following WordPress plugins installed:
- WooCommerce: Without the WooCommerce plugin installed, you cannot set up a Woocommerce Store. So make sure you have this plugin installed and activated too.
- Elementor: In order to set up a WooCommerce store without needing to code, make sure you have installed and activated Elementor.
- Essential Addons for Elementor: this plugin contains tons of cool, useful elements or widgets for your website. For this tutorial, you will need the element EA Woo Checkout to quickly design your WooCommerce Checkout Page. You can find out how to install Essential Addons for Elementor here.
Watch The Video Tutorial
How To Create WooCommerce Checkout Page With Elementor In About 5 Minutes
Now that you have installed and activated all of the plugins mentioned above, it’s time to create your WooCommerce Checkout Page. Before you can do that though, you need to set up your WooCommerce store with Elementor if you haven’t already.
Once you have set up your WooCommerce store, follow these steps to create a WooCommerce Checkout Page using Elementor and EA Woo Checkout.
Step 1: Assign A New Page As Your WooCommerce Checkout Page
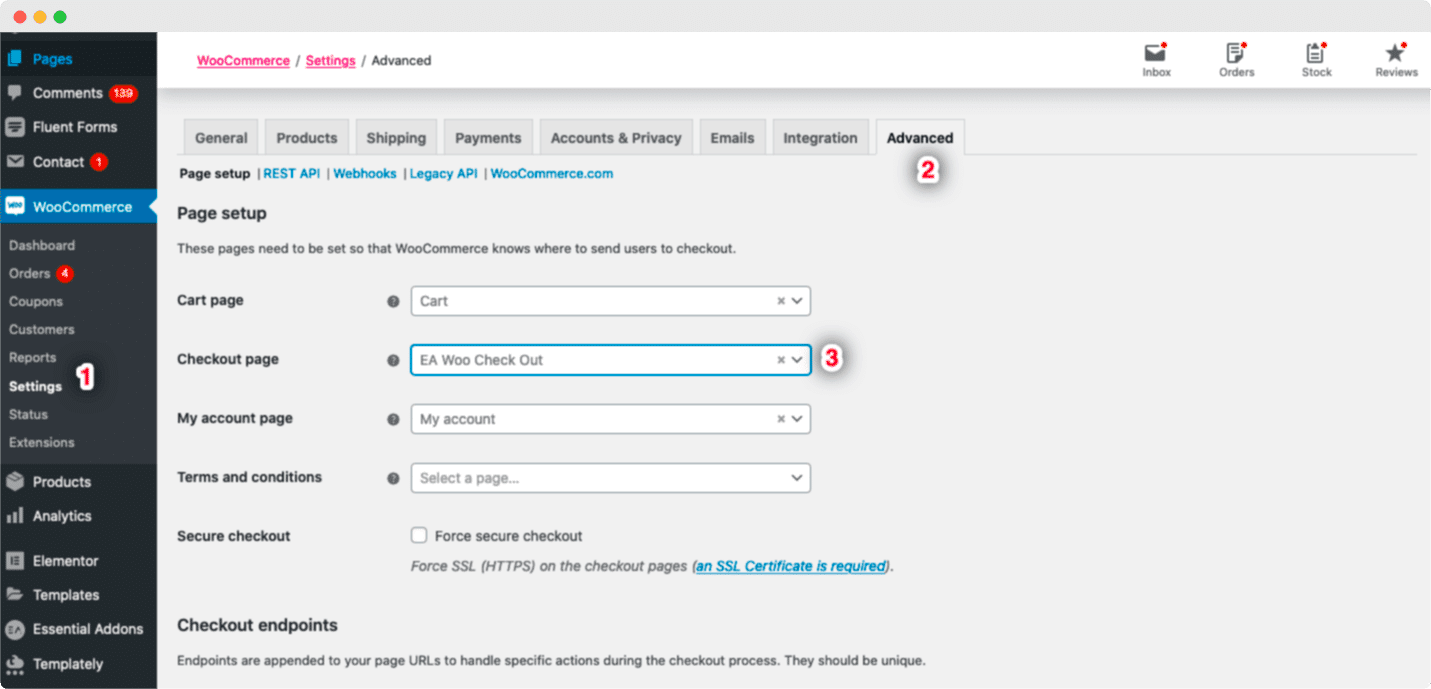
The WooCommerce plugin comes with a default Checkout Page. However to design your own beautiful Checkout Page with EA Woo Checkout you will need to replace the default Checkout page with another page of yours.
To do this, create a new page from your WordPress Dashboard. Next, navigate to WooCommerce ->Settings and click on the ‘Advanced’ tab. From here, you can assign your desired page as your Checkout page. Simply click on the Checkout page option and pick any of the pages from the drop-down menu as your WooCommerce Checkout page.
Step 2: Activate EA Woo Checkout
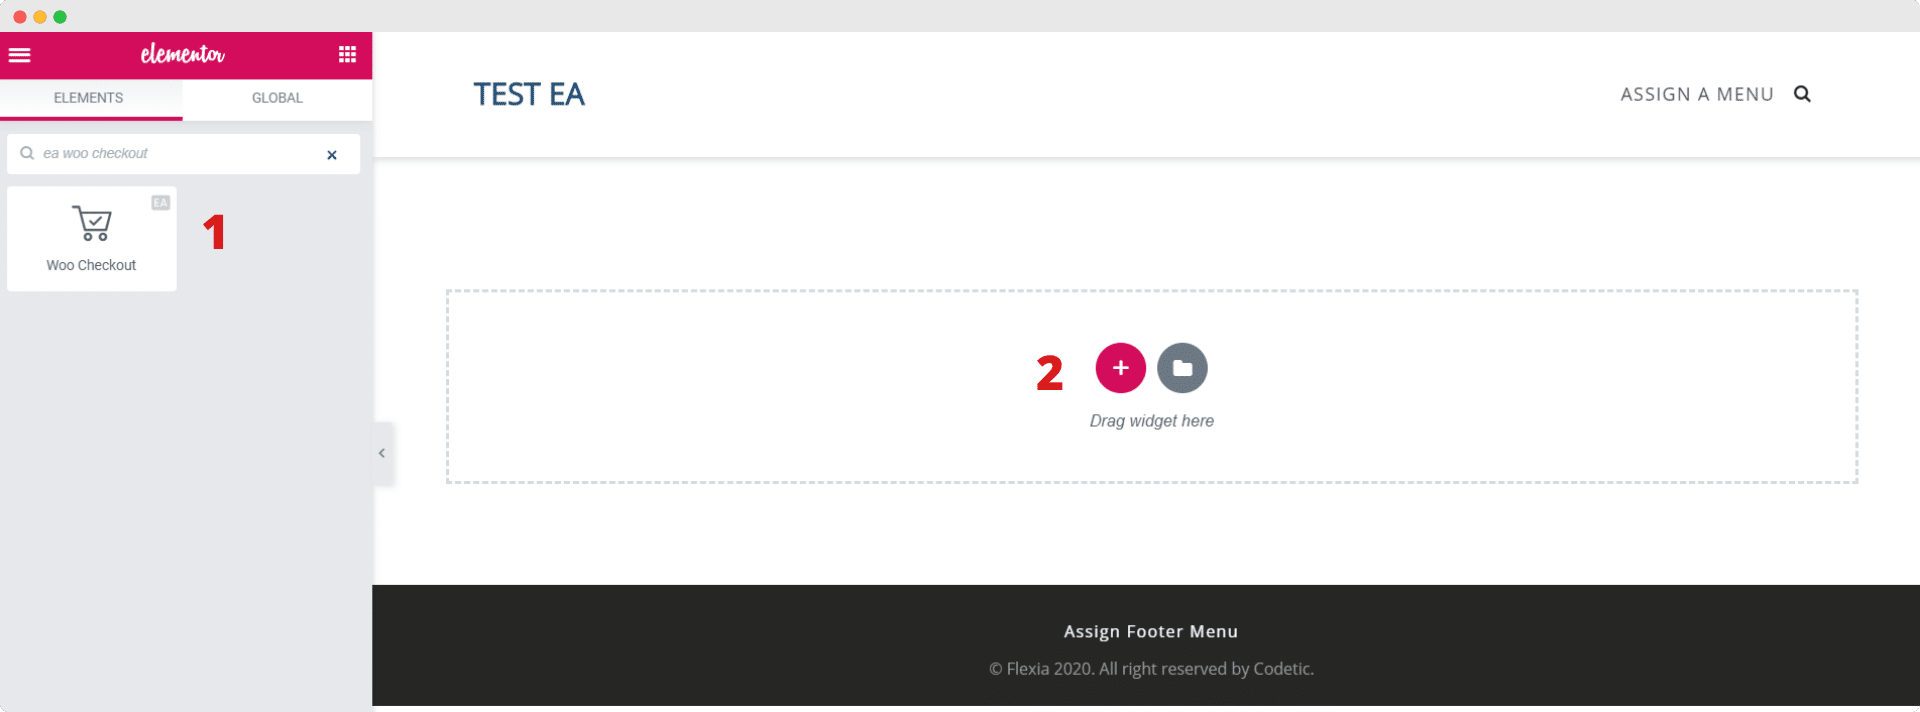
Next, you have to activate the element EA Woo Checkout. To do this, you have to edit your WooCommerce Checkout page using the Elementor Editor. Find the ‘EA Woo Checkout’ element from the ‘Search’ option under the ‘ELEMENTS’ tab.
Now all you have to do is just Drag & Drop the ‘Woo Checkout’ element into the ‘Drag widget here‘ or the ‘+’ section.
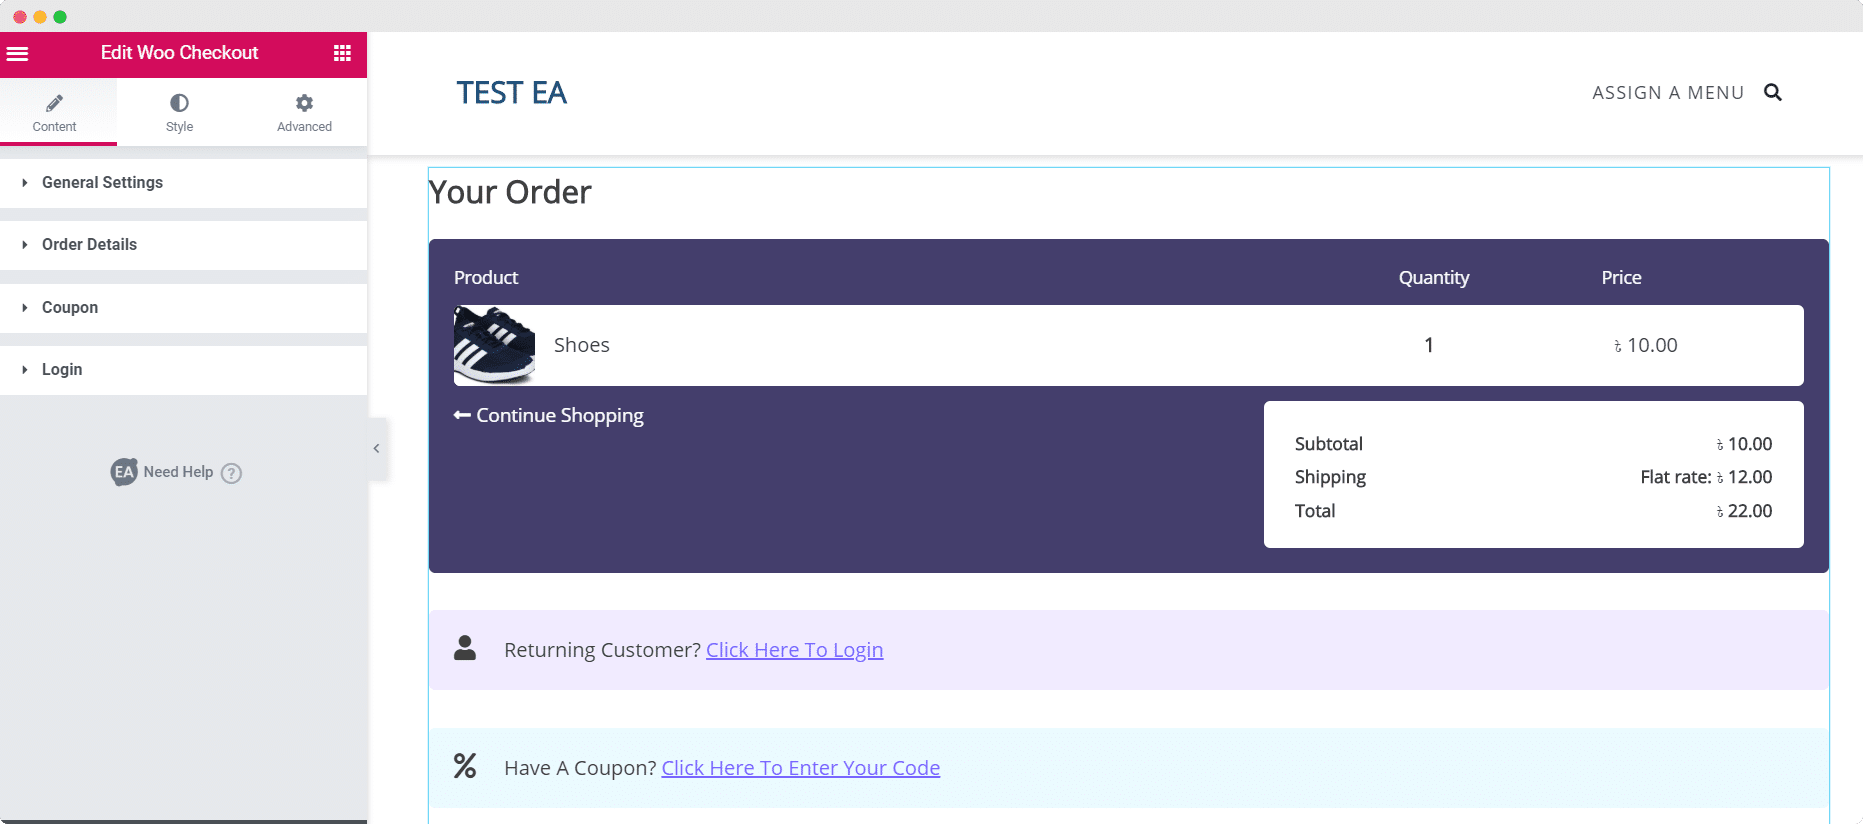
Once you drag and drop the element into any section of your page, this is the default layout you will see.
Step 3: Edit The Content Of Your Woo Checkout Page
Now that you have successfully activated the EA Woo Checkout element, you can start editing the content of your Woo Checkout Page to make it more suitable for your WooCommerce store.
Under the ‘Content’ tab you will see several options such as General Settings, Order Details, and others. You can configure these settings to customize the content of your Woo Checkout page however you want.
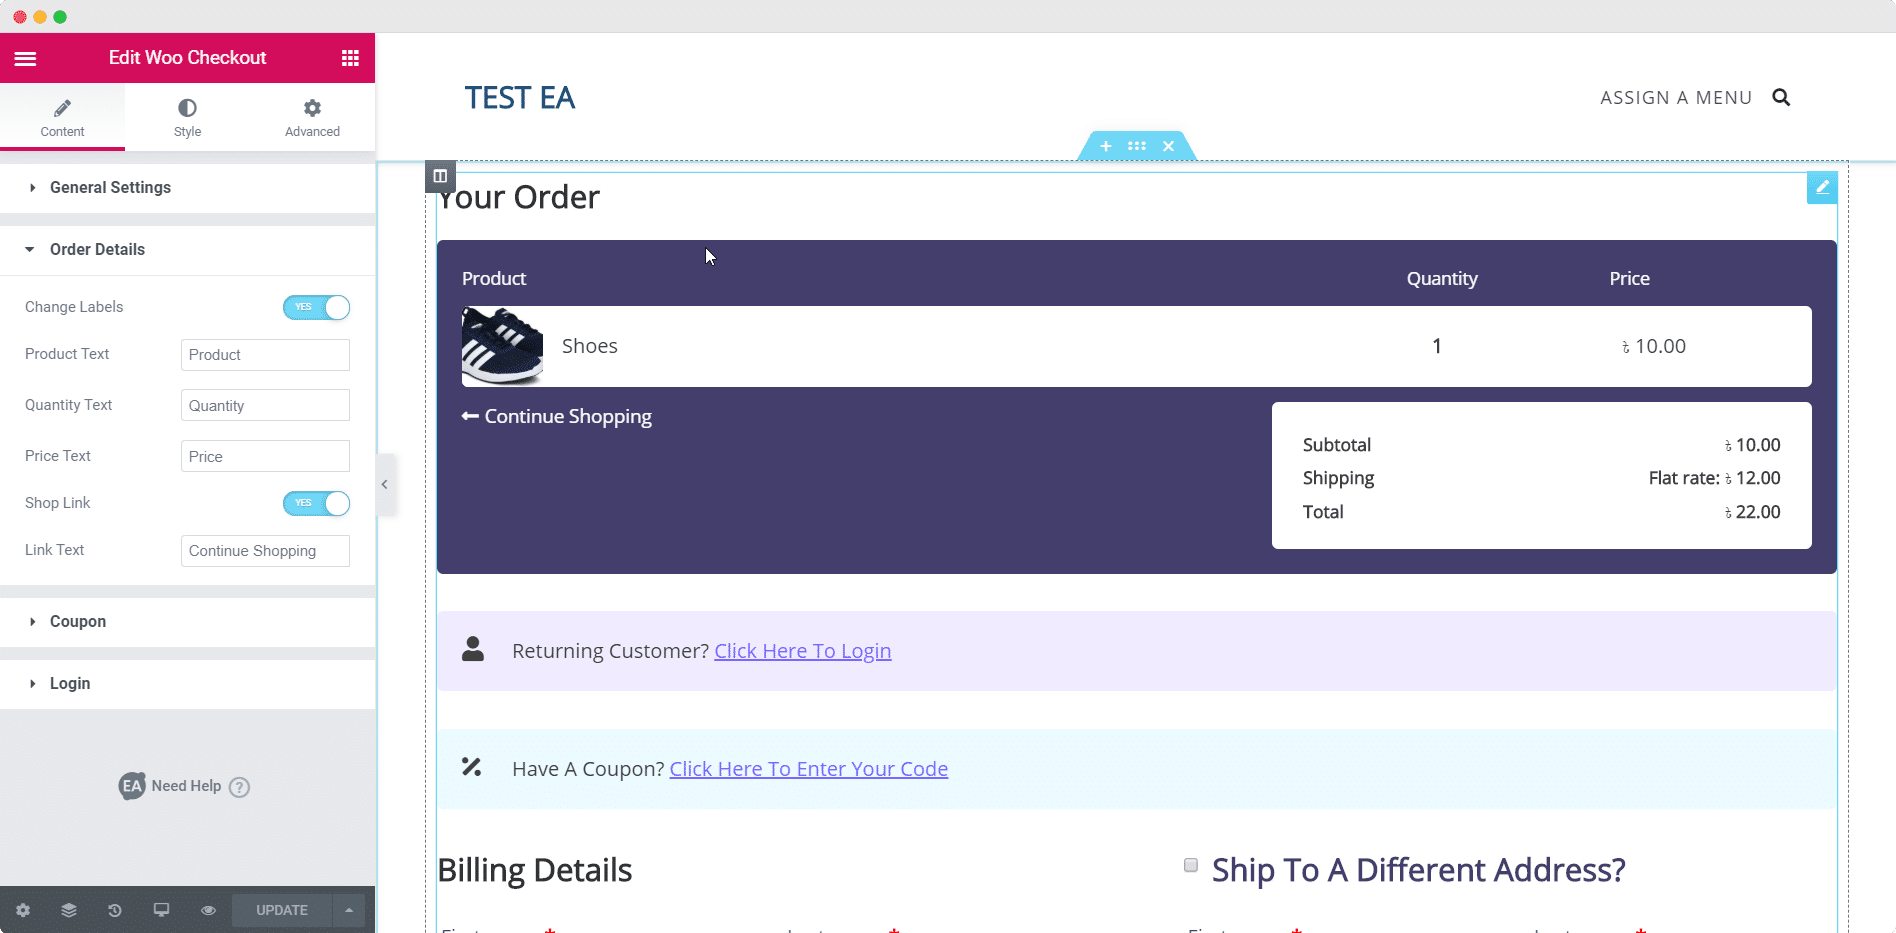
You can find more details about how to configure the content settings of EA Woo Checkout on our documentation page.
If you have the pro version of Essential Addons, you can choose between two more layouts–the Multi Steps Layout and the Split Layout.
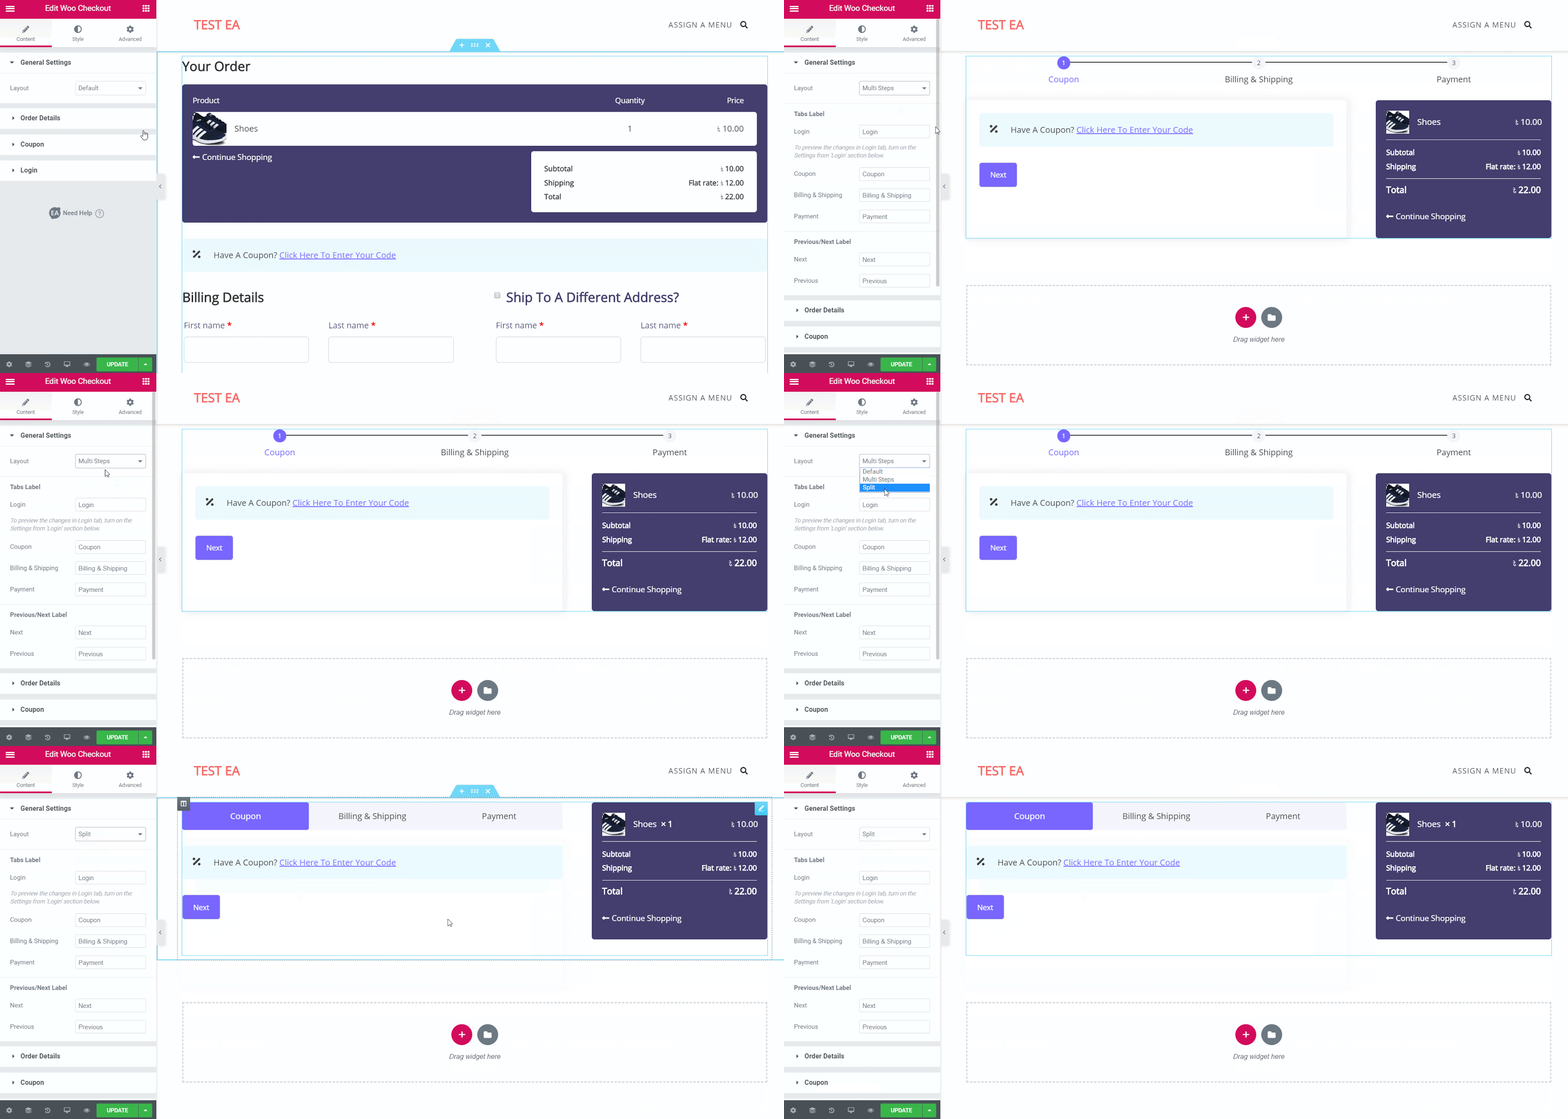
The Multi Steps Layout and the Split Layout comes with a few additional styling options to make your Woo Checkout page truly stand out. You can read more about how they work in our documentation.
Step 4: Style Your Woo Checkout Page
When you are done with editing the content of your Woo Checkout Page, it is time to start styling it to make it look more attractive to your customers.
There are tons of options available to style your Woo Checkout Page in any way you like. Just click on the ‘Style’ tab to customize different areas of your page. You will see many different options like ‘Section Title’, ‘Order Details’, ‘Login’, ‘Coupon’ and more.
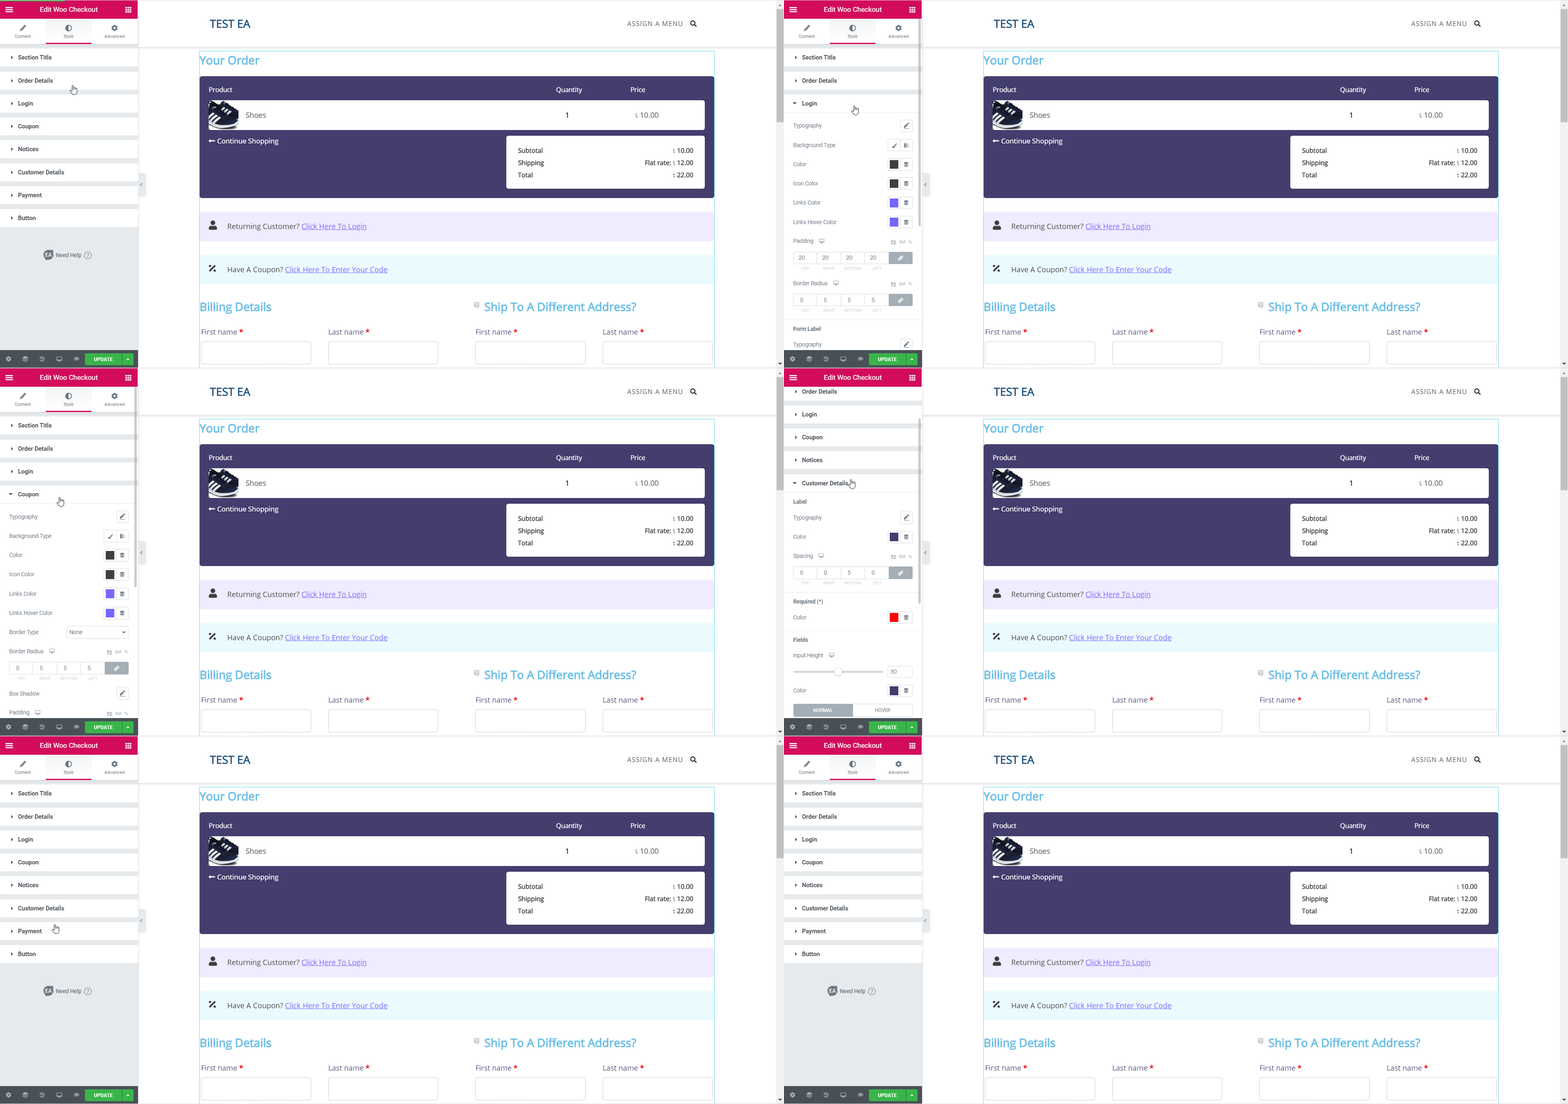
Tweak and try out all of the options, or visit our documentation page to find out how to style EA Woo Checkout. With just a few clicks you’ll be able to change the colors, typography and much more to make your Woo Checkout Page stand out to customers.
Step 5: Save Your Changes And View Final Outcome
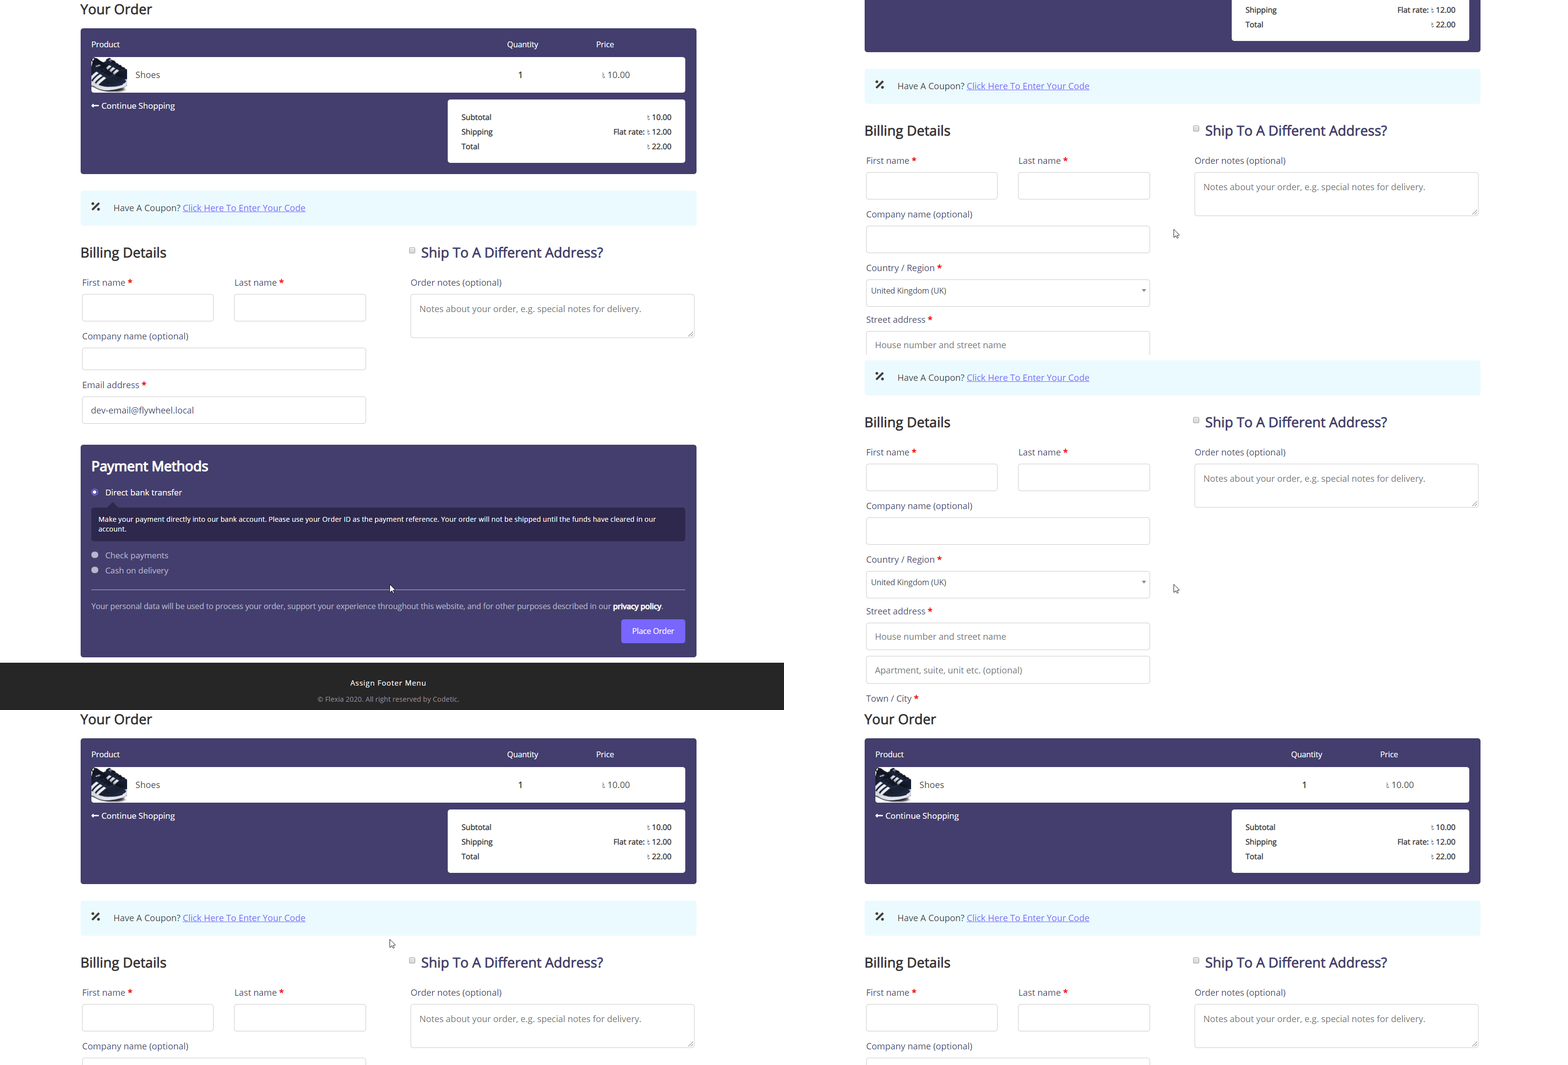
If you are done styling your Woo Checkout Page, make sure to save your changes. You can preview the final outcome before publishing your page.
🎁 BONUS: WooCommerce Template Pack for Elementor [FREE]
Looked around for a perfect WooCommerce Template for Elementor & felt dissapointed? Well, we have got good news for you. Introducing EleShoply template pack from Templately – stunning Elementor template to create your eCommerce store without any coding. This stunning ready template pack comes with multiple pages along with ready WooCommerce Checkout Page design.
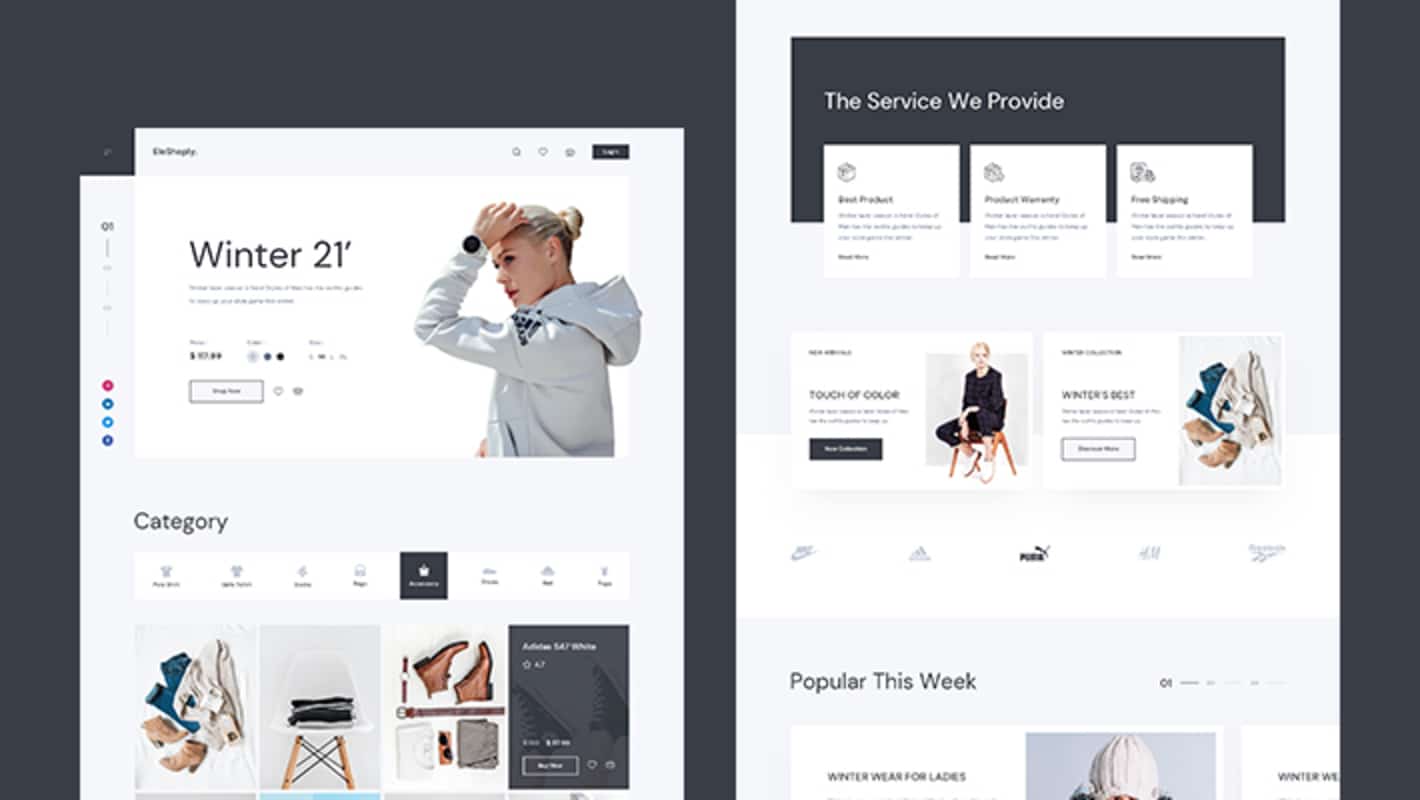
It also conntains several beautiful ready to use pages including:
- Home Page
- Product Collection Page
- Single Product Page
- Shopping Cart Page
- Account Page
- Checkout Page
- About Us Page
- Contact Us Page
You can instantly create a stunning WooCommerce checkout page using this ready Elementor template in two easy steps:
Step 1: Insert The EleShoply Template Pack From Templately
First, sign up for account on Templately and install the Templately plugin for WordPress. Afterwards, edit your assigned Woo Checkout Page with Elementor Editor. You will see a blue Templately icon.
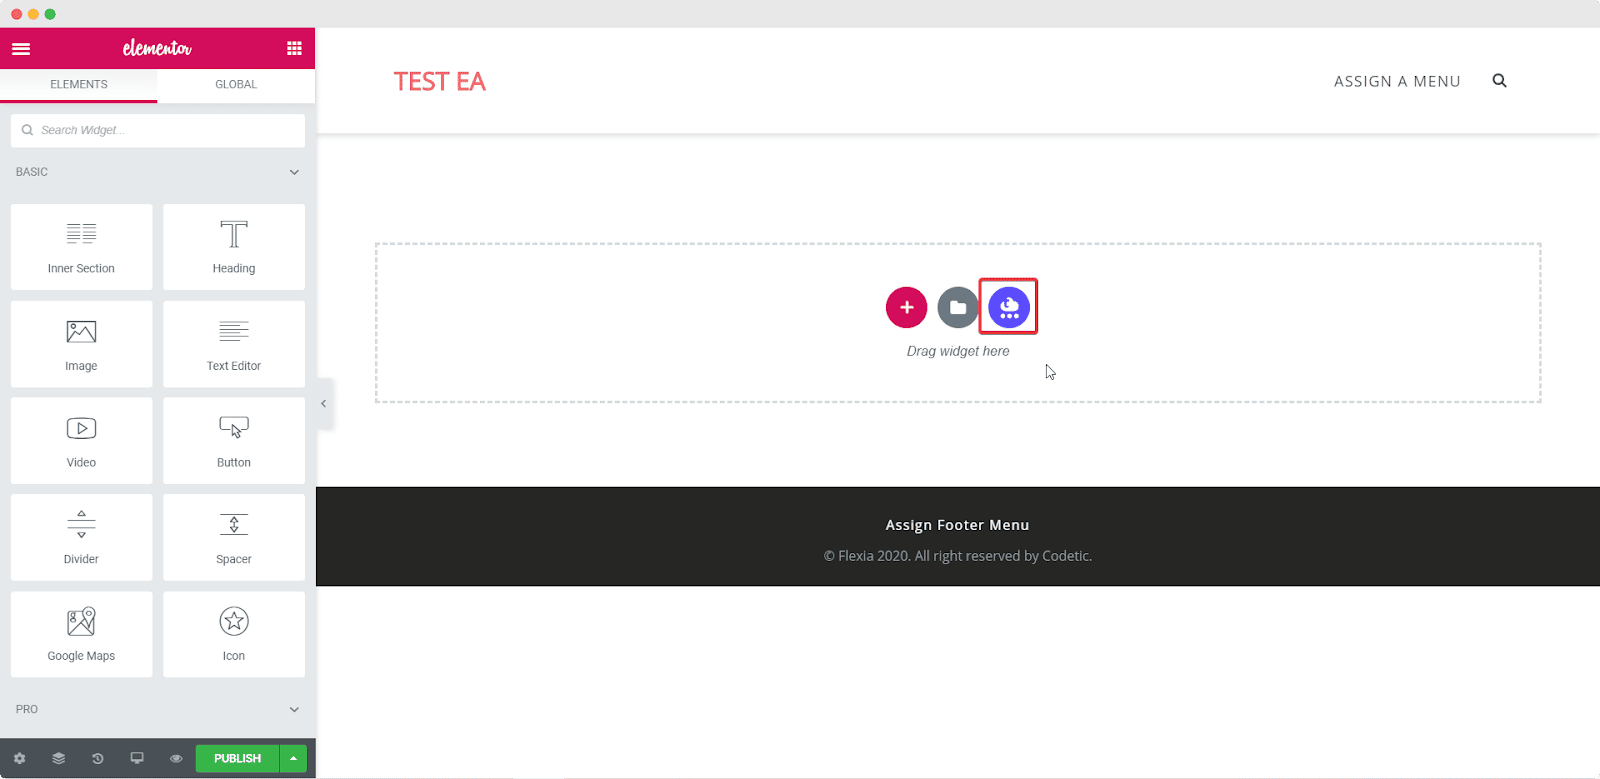
When you click on this icon, a popup window will open where you will see all the Elementor templates available with Templately. Search for ‘EleShoply’ and insert the EleShoply Checkout Page into your Elementor site.
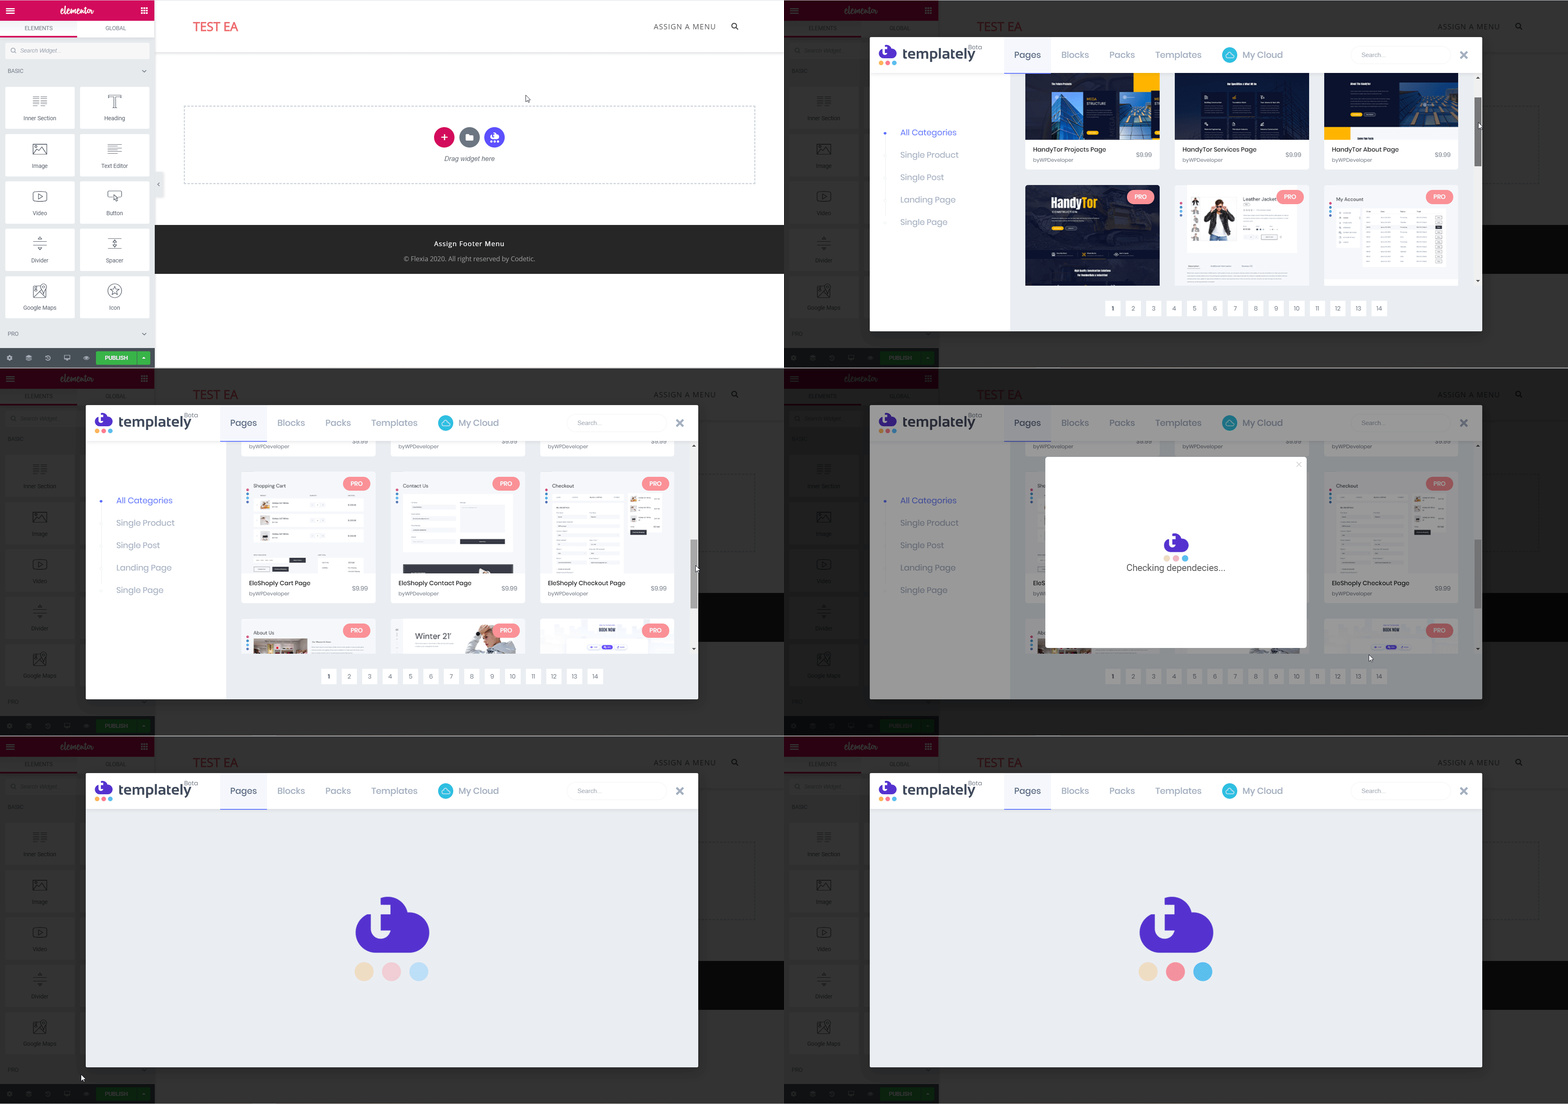
Step 2: Customize The Page To Suit Your Style
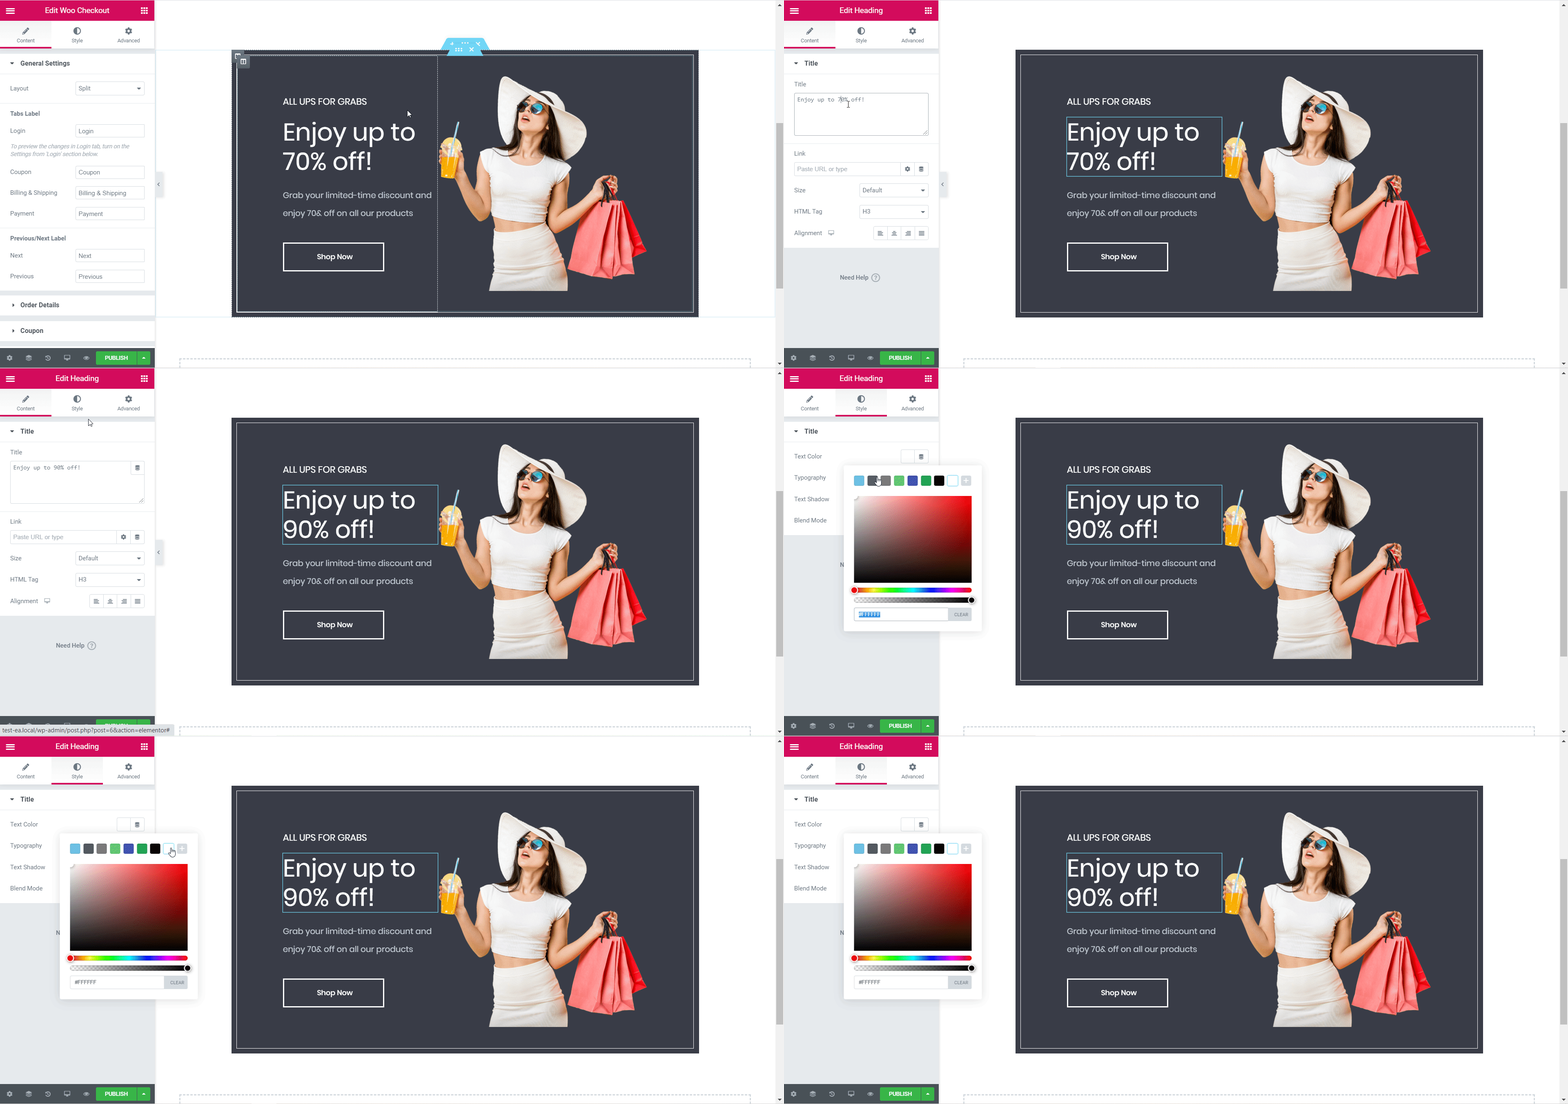
Now you can customize your Woo Checkout Page to add your personal style to it. When you are done customizing your Checkout Page, simply save your changes and publish it for the world to see.
Final Words
That’s it! You are ready to publish your Woo Checkout Page. It takes no more than five minutes to set it all up and style your Checkout Page however you like. And you don’t even need to touch a single line of code to do it! So try out Elementor and check out Essential Addons for other cool, useful elements.
If you still have more questions, you can browse through our documentation page or contact our support team for further assistance.
Liked this tutorial? Feel free to share your thoughts with us in the comments below.


![[New Extension] How to Show Vertical Text on Elementor Websites?](https://essential-addons.com/wp-content/uploads/2025/11/Essential-Addons-New-Extension-Vertical-Text-Orientation-1024x576.jpg)
