No matter how amazing the product collection you have, if you cannot display them beautifully on your website, it will be hard to attract potential customers. That’s why we have brought you WooCommerce Product Gallery widget for Elementor, which allows you to showcase your products beautifully in a gallery layout without coding.

Using this widget from Essential Addons For Elementor, you can make your online store look more appealing. Your customers can find out their desired products easily from your product gallery. Let’s find out how to use the ‘Woo Product Gallery’ widget from Essential Addons to make your online store stand out easily.
Showcase Your WooCommerce Products Gallery Without Coding
Most of the online stores usually use a product gallery page to display all of their products in one place. If you want to add one, you will be able to help your customers to browse through all products at once. It also makes your website look appealing and attractive to your potential customers.
The best part of using the Woo product gallery widget on your online store is you can customize everything to your choice without any coding. Starting from the typography to background color, you can change it all. You can even add categories for your WooCommerce products and design their appearance. You will also have the options to choose layouts for your product image gallery.

For instance, there is no alternative to adding ‘on sale’ tags to announce a discount sale. Using a WooCommerce Product Gallery, you can effortlessly use sale tags on your products and customize them. You need to explore all the settings to get the best out of this amazing widget. That’s why this widget lets you add several useful ‘Call To Action buttons in style to use on your online store.
An interactive web page is better than a list of products. With the ‘EA Woo Product Gallery’ widget, you can make your online store more eye-catching and attract potential customers to buy your products.
How To Easily Create WooCommerce Product Gallery In Elementor?
Creating a WooCommerce website for an online store using Elementor is easier because you can design your website with amazing widgets. Before you start creating a website with Elementor, you need to add your products to the WooCommerce store first. Now you are ready to install and activate all the useful plugins you need to start using WooCommerce Product Gallery widget on your website. Let’s find out all the essential plugins you need to install.
Things You Need To Create A WooCommerce Product Gallery
- Elementor: If you want to create a WooCommerce product gallery without coding, you need to install and activate Elementor first and then you are good to go.
- WooCommerce: Of course you need to install and activate the WooCommerce plugin to create an online store on WordPress.
- Essential Addons For Elementor: Since the ‘Woo Product Gallery’ widget is from Essential Addons for Elementor, you must install and activate Essential Addons on your website.
Step 1: Activate WooCommerce Product Gallery Widget
Let’s make your WooCommerce website more interactive and vibrant using the WooCommerce product gallery for Elementor. Before getting started make sure you have set up your WooCommerce store already.
The WooCommerce Product Gallery must first be enabled in Elementor. From your WordPress dashboard, go to Essential Addons→ Elements and make sure the ‘Woo Product Gallery‘ widget is turned on. Remember to click the ‘Save Settings’ button to confirm that your changes are saved.

From the ‘Elements’ tab inside of Elementor, search for the ‘EA Woo Product Gallery’ widget. Easily drag and drop the element anywhere you want to show the gallery.

Step 2: Begin Customizing Your Content Settings
After you have successfully dropped the element in the right place, you can start customizing your content according to your WooCommerce website.
From the content tab, you can customize ‘Layouts’, ‘Product Settings’, ‘Sale Out’ or ‘Stock out’ badge, ‘Load More’ buttons and so on. Based on your WooCommerce theme, you need to choose the right pattern to design your website. For this tutorial blog, we are designing a plant-based WooCommerce online store.

Customize Your Layout Settings
‘Woo Product Gallery’ widget comes with two different layouts with four preset styles to flexibly customize your online store. In the ‘Layout’ section, you can change the number of columns for your WooCommerce products. For example, showcasing four columns might seem cluttered for your website. You can show three columns to make it minimal.
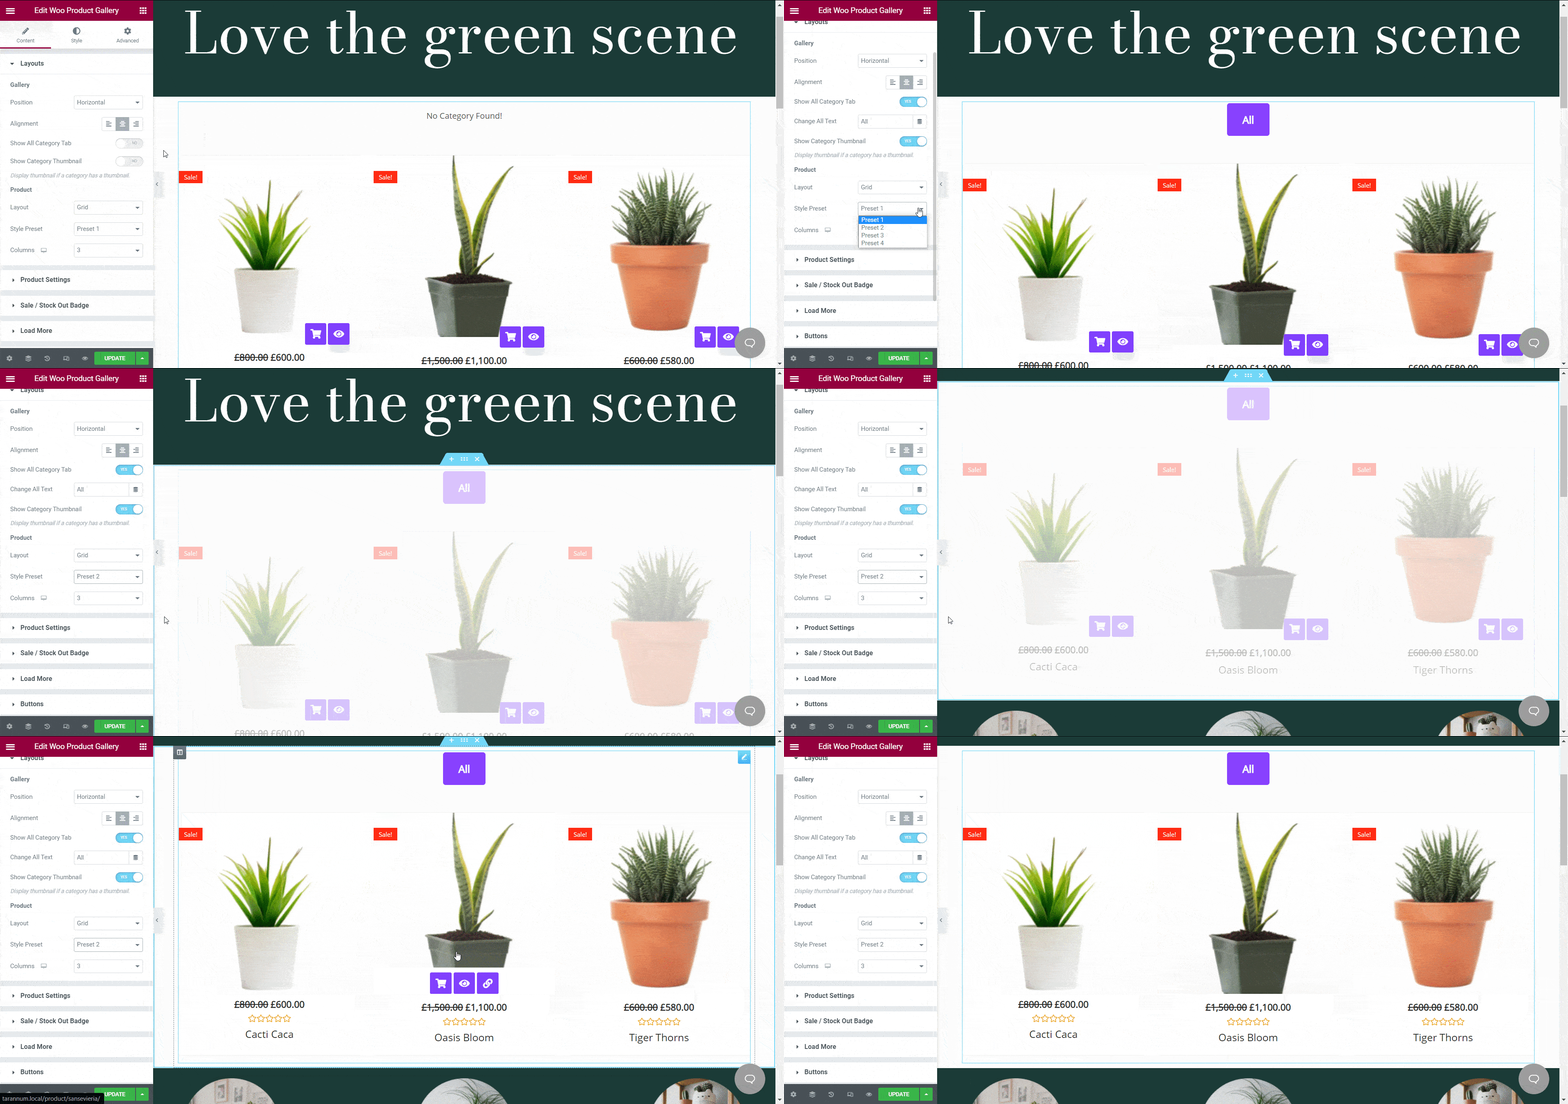
Flexibly Configure Product Settings
As mentioned earlier, you can create categories for your products using WooCommerce product gallery for Elementor. Adding categories from the ‘Product Setting’ section makes it easier for your customers to find their desired products.
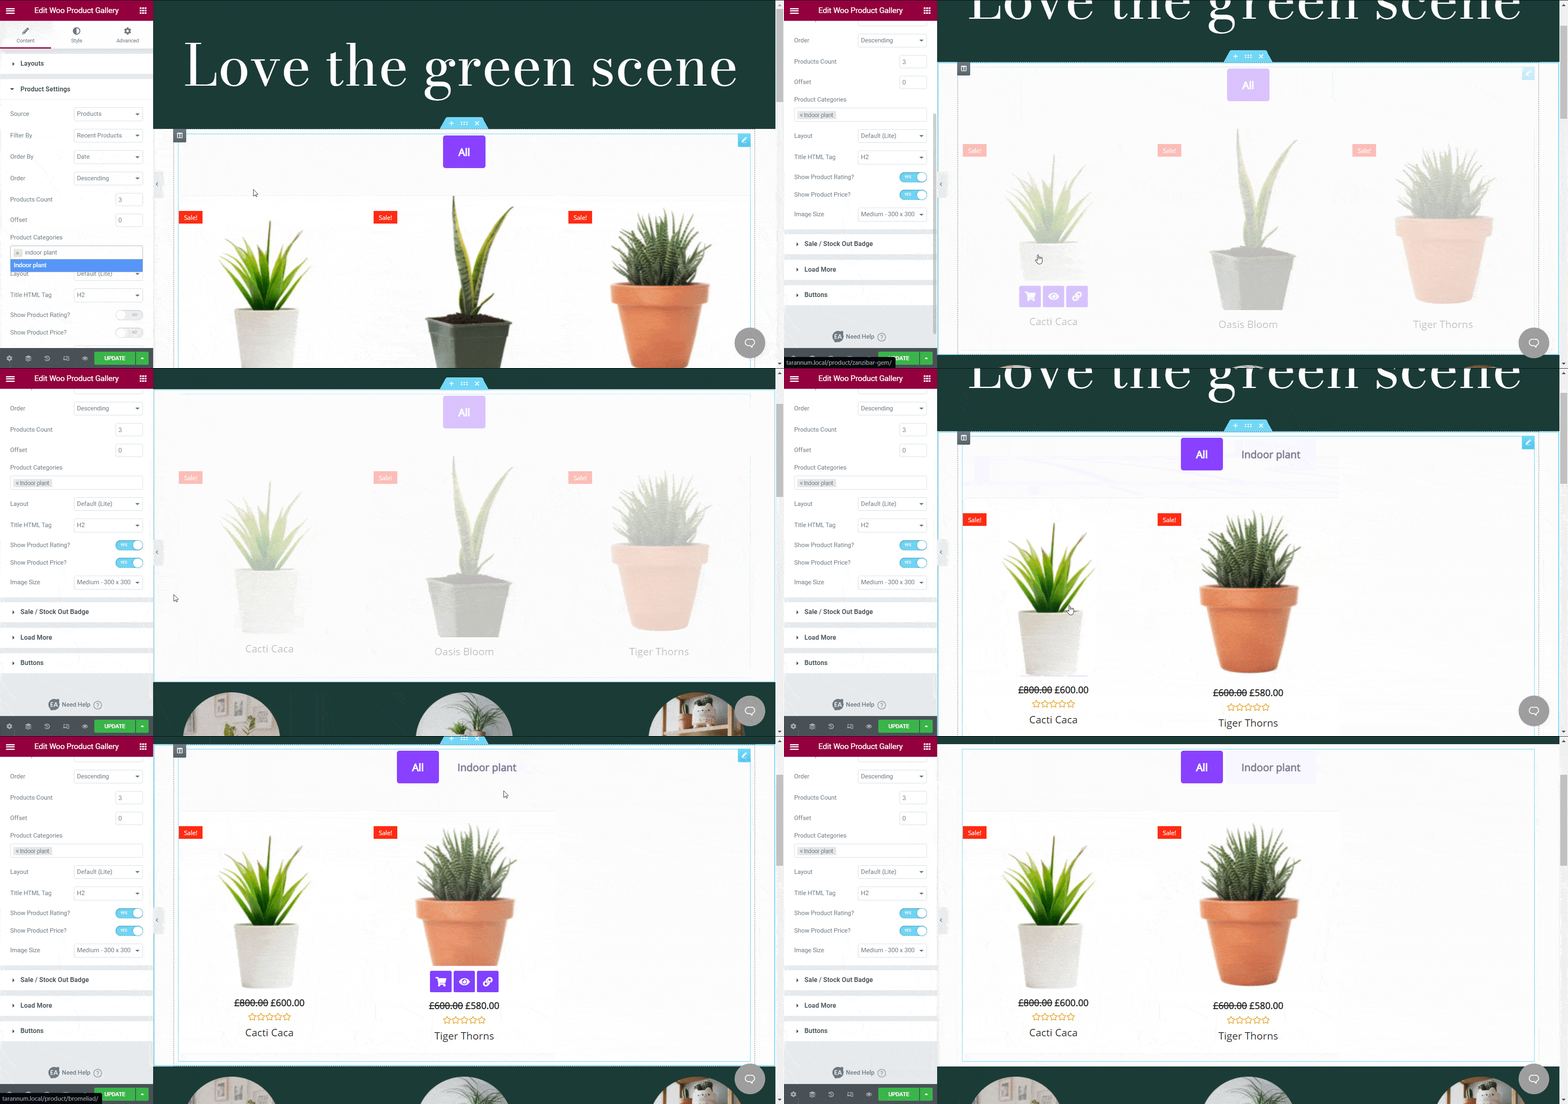
Add Sales Badge With Each Product
Besides adding prices with your WooCommerce products, you can add a sales badge or stock out a badge with it. Suppose you are running an on-sale campaign on your WooCommerce store, you can add the ‘On Sale’ tag to all of your products by playing around with the ‘Sale/Stock Out Badge’ settings. You have the flexibility to customize this badge according to your preference.
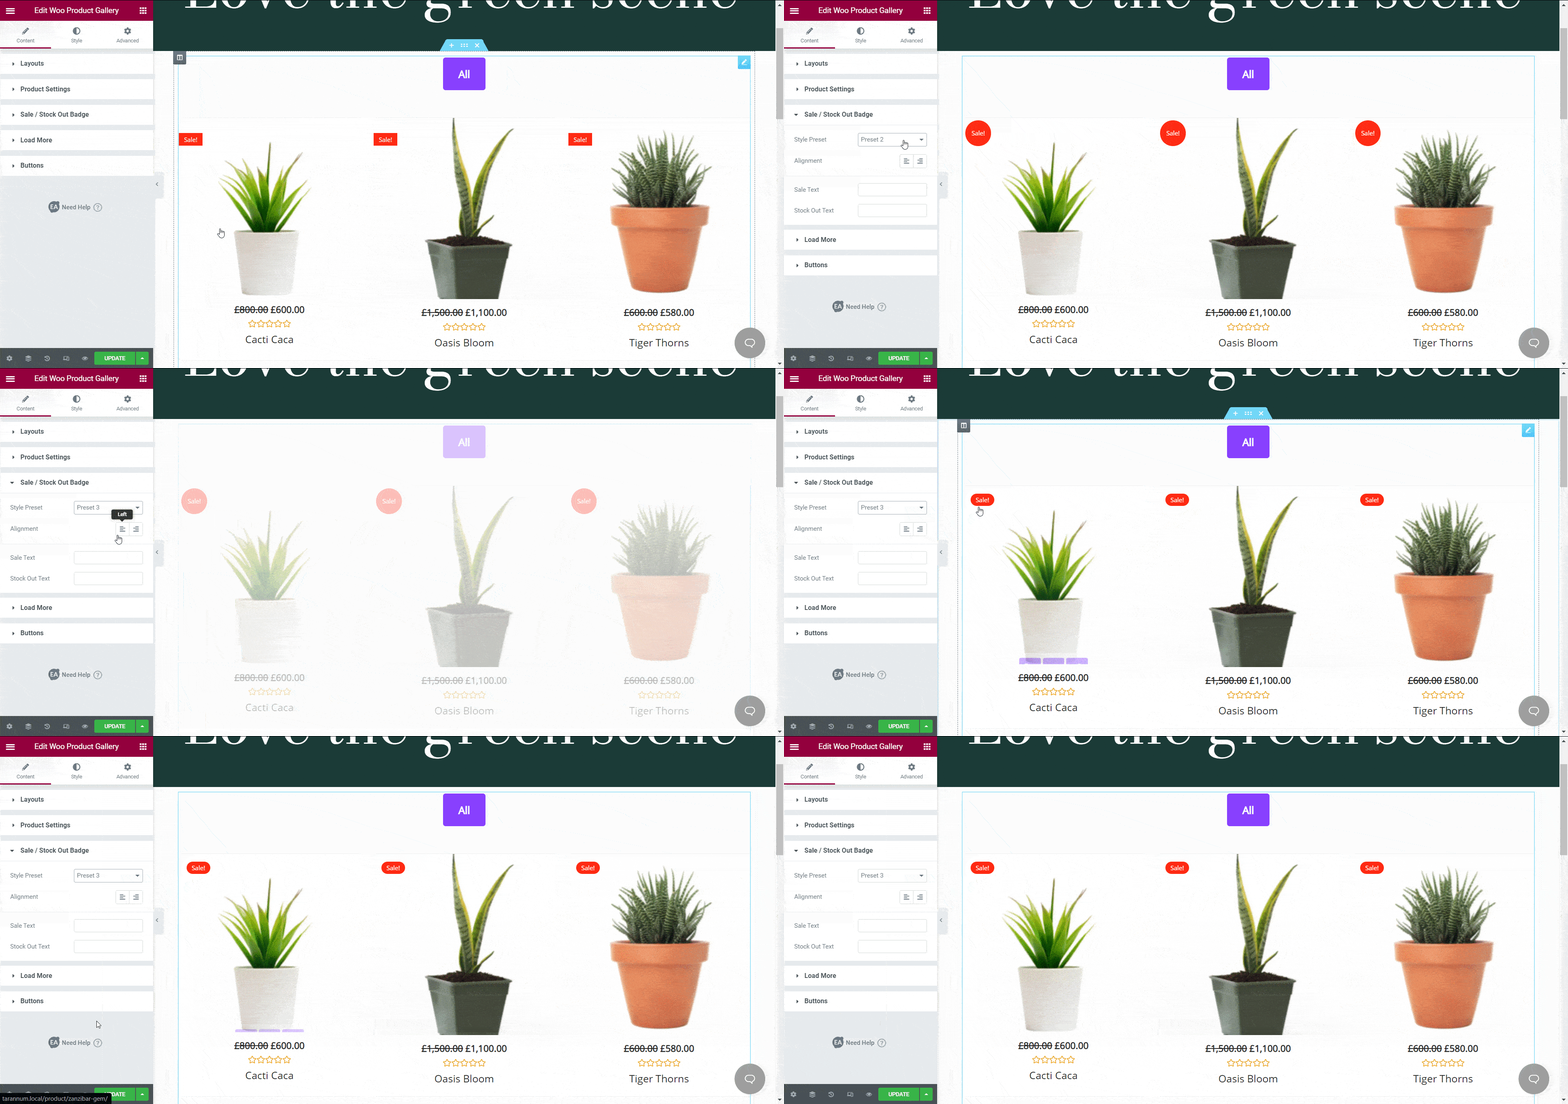
Create Attractive Buttons For Your Store
With this widget, you can toggle the ‘Load More’ button with other call-to-action buttons for a better user experience. If your potential customer finds your website content appealing, he might be interested to explore more and click on the ‘Load More’ button. So this simple button is useful for your WooCommerce website and you can set it up using ‘EA Woo Product Gallery’ widget for Elementor.
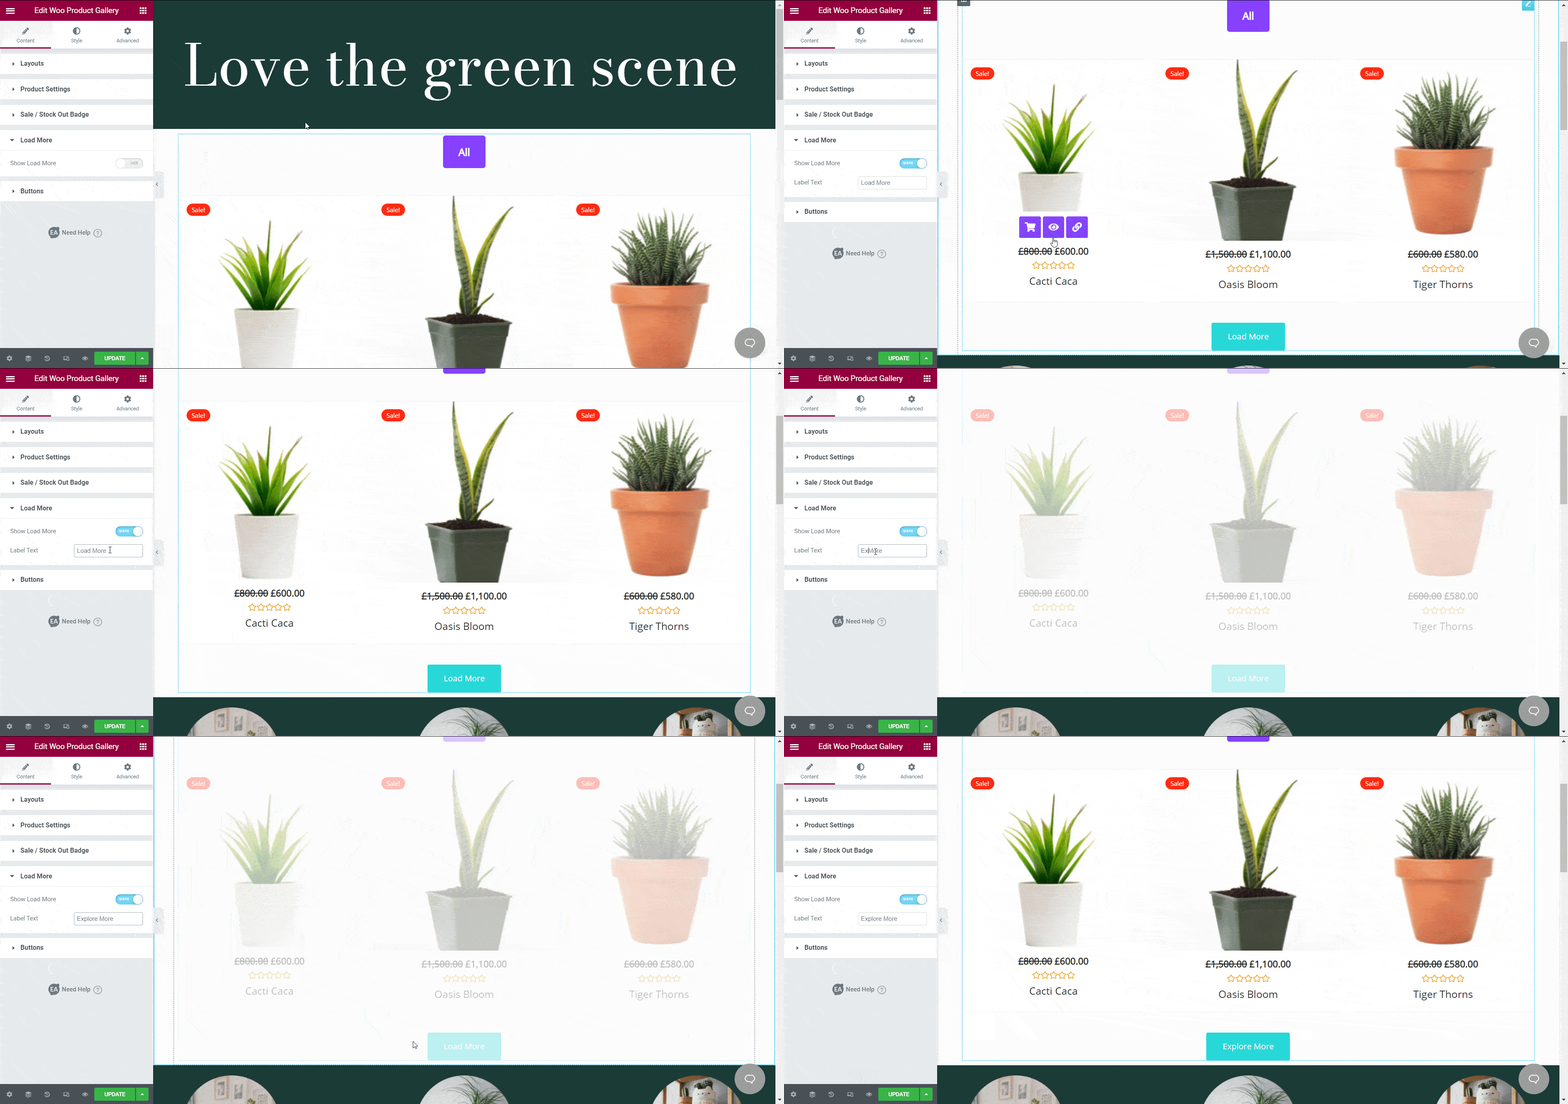
From the ‘Button’ option from this widget, you will get three choices like ‘Show Quick View’, ‘Show Add To Cart’ and ‘Image Clickable’. You can easily display the buttons that you want to show with your WooCommerce products. The ‘Show Quick View’ button will eventually come in handy for your customers to quickly check out the product with useful details. They do not have to click on the product and see the details. It will save their time and your website’s usability will instantly increase.

If you display the ‘Add To Cart’ button along with the products, you are also inviting your potential customers to take immediate action. When you are putting the call to action buttons in a reasonable place on your WooCommerce website, people tend to take necessary action immediately. Thus a simple but useful step can help you grow your sales.
Clickable images are more attractive than static product images. That is why you can make your website more interactive just by making your product images clickable. When someone clicks on one of your product images, they will see the details and take steps as you navigate them.
Step 3: Style Your WooCommerce Product Gallery
As you have configured how you want to show your WooCommerce products on your online store, now it is time to design the layout with six different styling options. You will get designing options for ‘Gallery styles,’ ‘Products’, ‘Color and Typography’, ‘Button’, ‘Load More’ buttons and ‘Popup’. You can edit the appearance and change the background color of your gallery from the Gallery styles option. For this blog, we have set the background color to green so that it goes with our plant store theme. You can change the background color of items, border type, and many more.

Besides tweaking these options, you can also change the padding, alignment or box-shadow if you need to. You will get even better at designing your own website if you explore all of these possibilities while customizing your WooCommerce website.
Look into all the settings available to see how you may improve the appearance of your website. You can modify the font size, font colors, and more in the ‘Color & Typography‘ section, for example. To make your WooCommerce product gallery stand out, you can also tweak and design the options under the ‘Load More‘ and ‘Popup’ sections. For more tips on how to style your WooCommerce product gallery, you can check out our detailed documentation here.
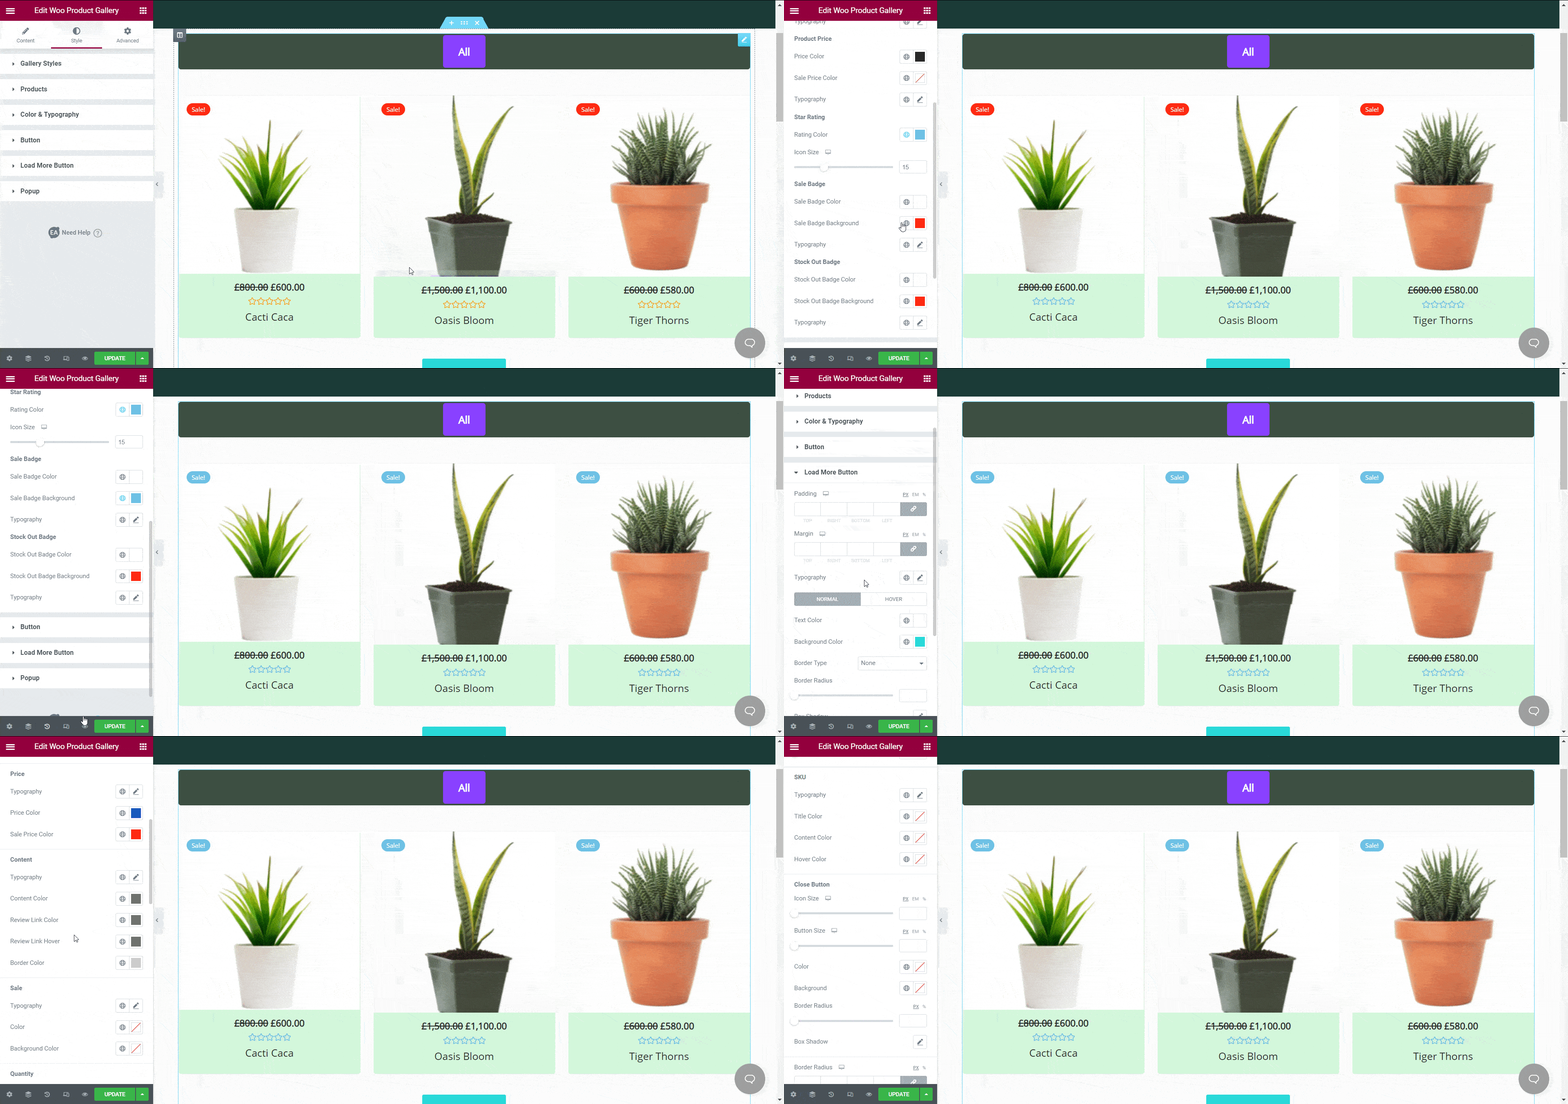
Now you may publish your page if you are happy with how your product gallery looks. Take a look at the WooCommerce product gallery we have created in Elementor for this tutorial.
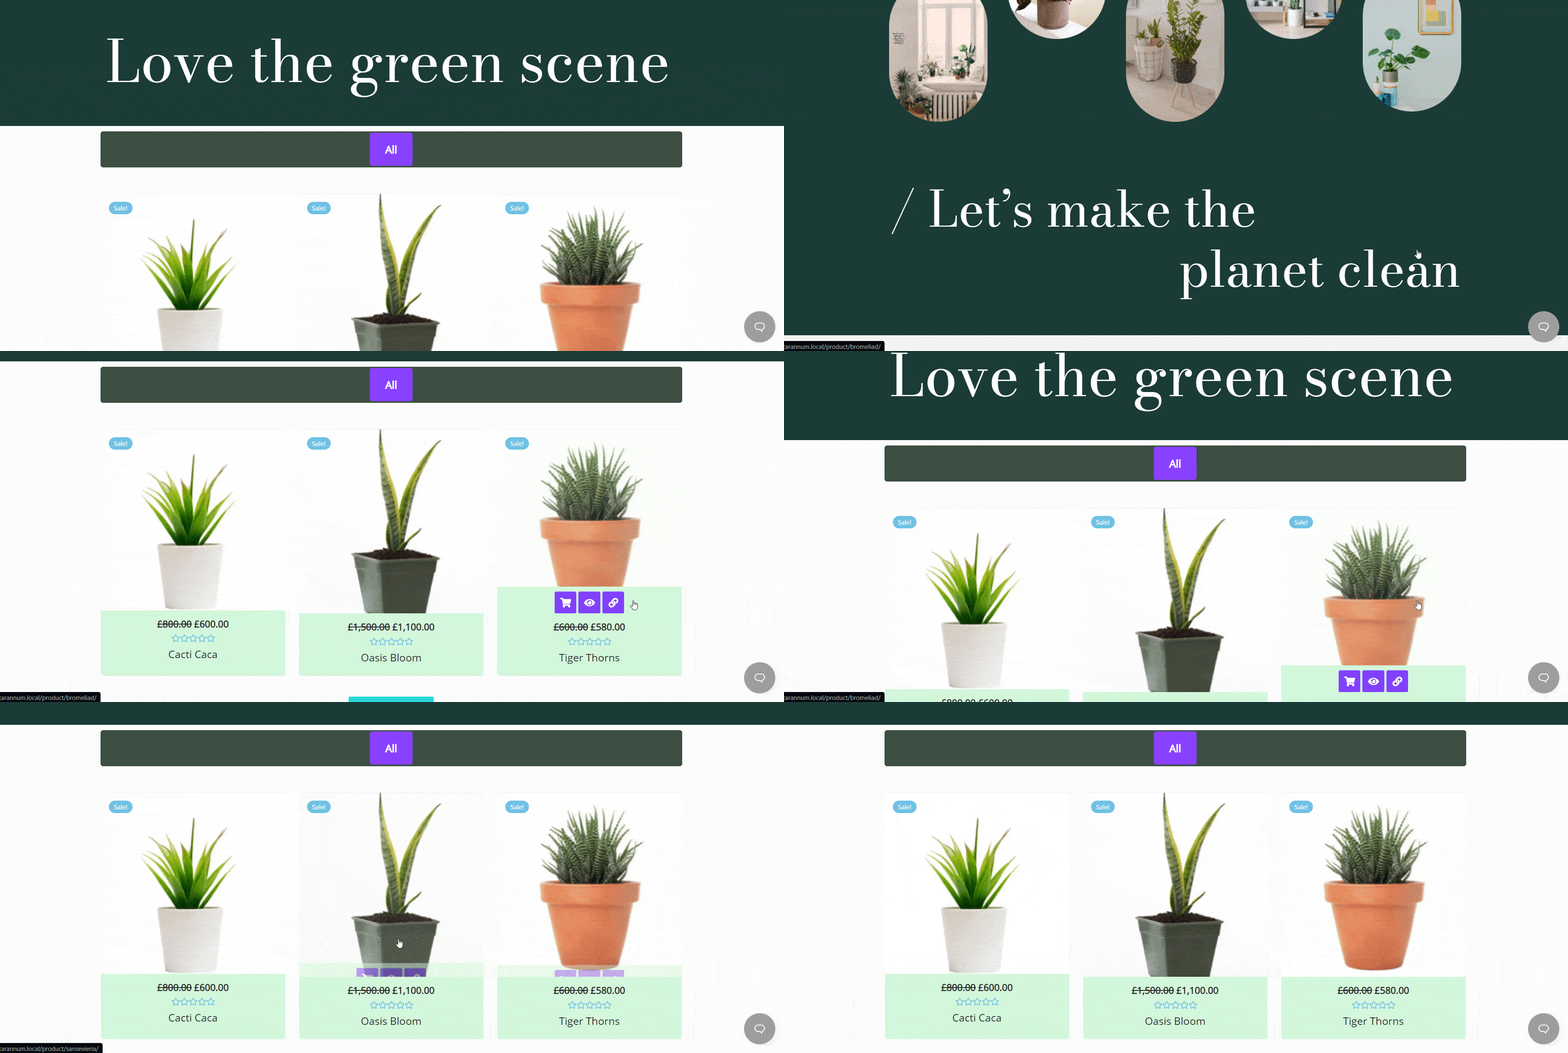
As you can see, Essential Addons for Elementor makes it very easy to create a stunning online store by helping you create an attractive and interactive WooCommerce product gallery without coding. Try it out for yourself, and feel free to reach out to our support team if you need any assistance.
For more updates about the latest Elementor addons, web design tutorials, tips and tricks and more, subscribe to our blog or join our friendly Facebook community.
Bonus: Create Outstanding Websites Using Ready Templates
Do you enjoy building websites on Elementor? You can get exclusive access to 1000+ ready templates from Templately, the ultimate templates cloud for WordPress with unique cloud collaboration features. Sign up for an account today and start creating beautiful websites instantly in a matter of minutes.


