Sharing your beautiful Instagram feed on your WordPress website is a great way to boost your follower count and get more engagement. But to do this, you need to create or generate your Instagram access token first. Don’t worry, this is easier than you think. Today, we will show you how you can collect your Instagram access token in only three easy steps.
Why Do You Need To Collect Instagram Access Token?
Sharing photos from third-party accounts is prohibited by Instagram. So, in order to prove that you have permission to share Instagram images on your WordPress website, you need to retrieve your Instagram access token. This token is basically a set of characters that allow other applications access to your Instagram account.
It may sound like too much trouble, but this is actually a very secure way to ensure that your content on Instagram is being protected from people who do not have permission to use your photos.
Once you have the access token, you can simply connect your Instagram account to your WordPress website and share your stunning photos with your site visitors.
How To Create Instagram Access Token In 3 Easy Steps?
In this section, we are going to give you a step-by-step walkthrough on how to create your Instagram access token within minutes. You do not need any extra tool to do this; you just have to make sure that your Instagram account is public, and then you have to create an app on Facebook Developers. Here’s how you can do it without breaking a sweat.
Step 1: Add A New App On Facebook For Developer
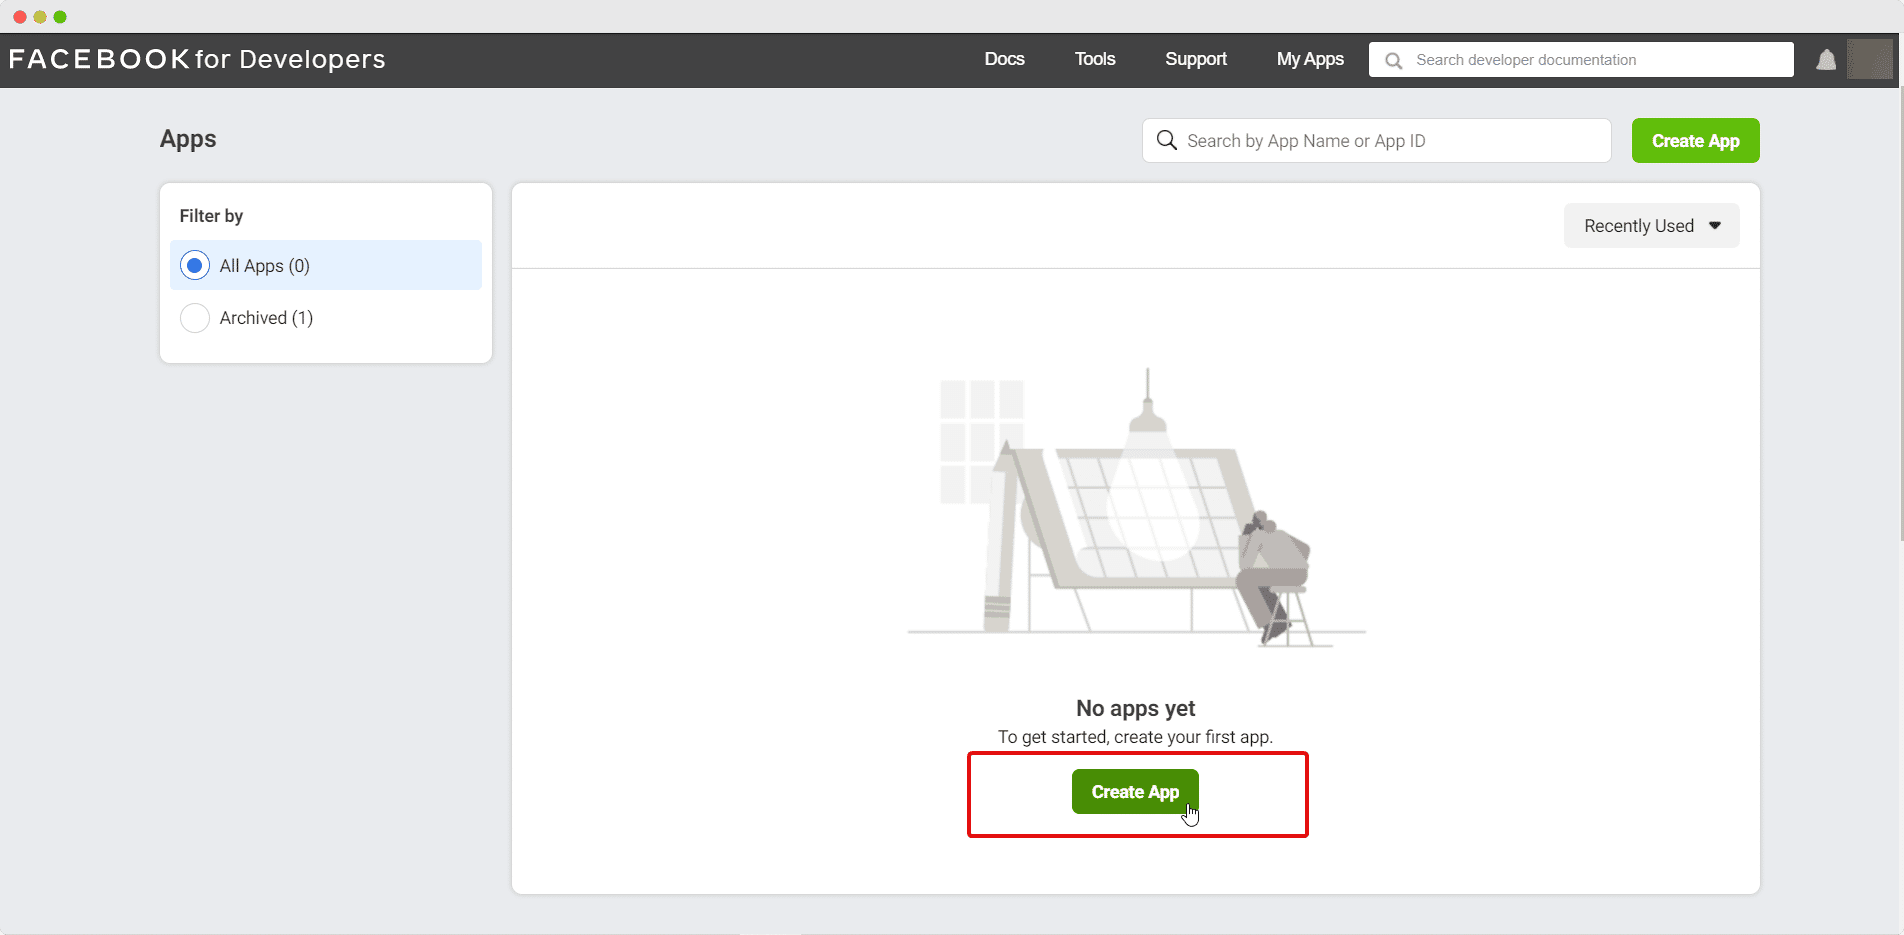
First, head over to Facebook Developers Account and log in with your own Facebook profile credentials. Afterwards, click on the ‘My App’ button at the top of the page. This will redirect you to a new page where you can click on the ‘Create App’ button to add a new app on Facebook developer.
As soon as you click this button, a popup will appear where you have to choose what you want your app to do. This decides the permissions that your app will need. In this case, you will need to go for the ‘Something Else’ option as shown below.
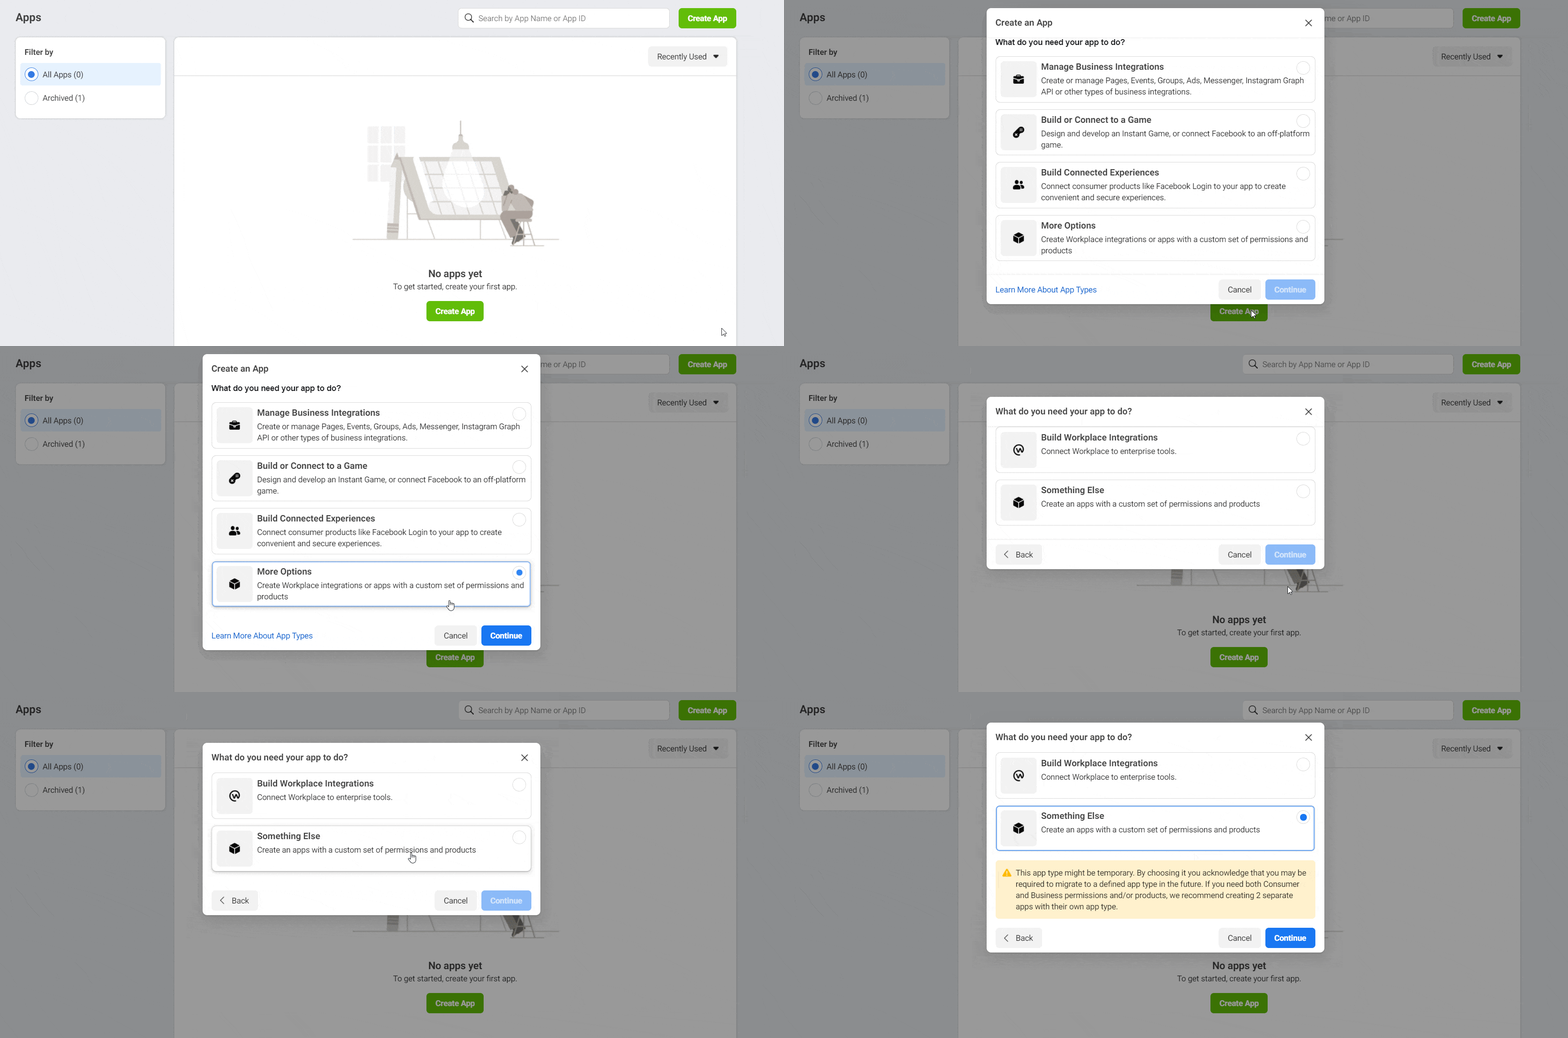
Afterwards, give a name to your app inside the ‘App Display Name’ input field. Enter your email address and choose a Business Manager if you have one. When you are done, click on the ‘Create App’ button.
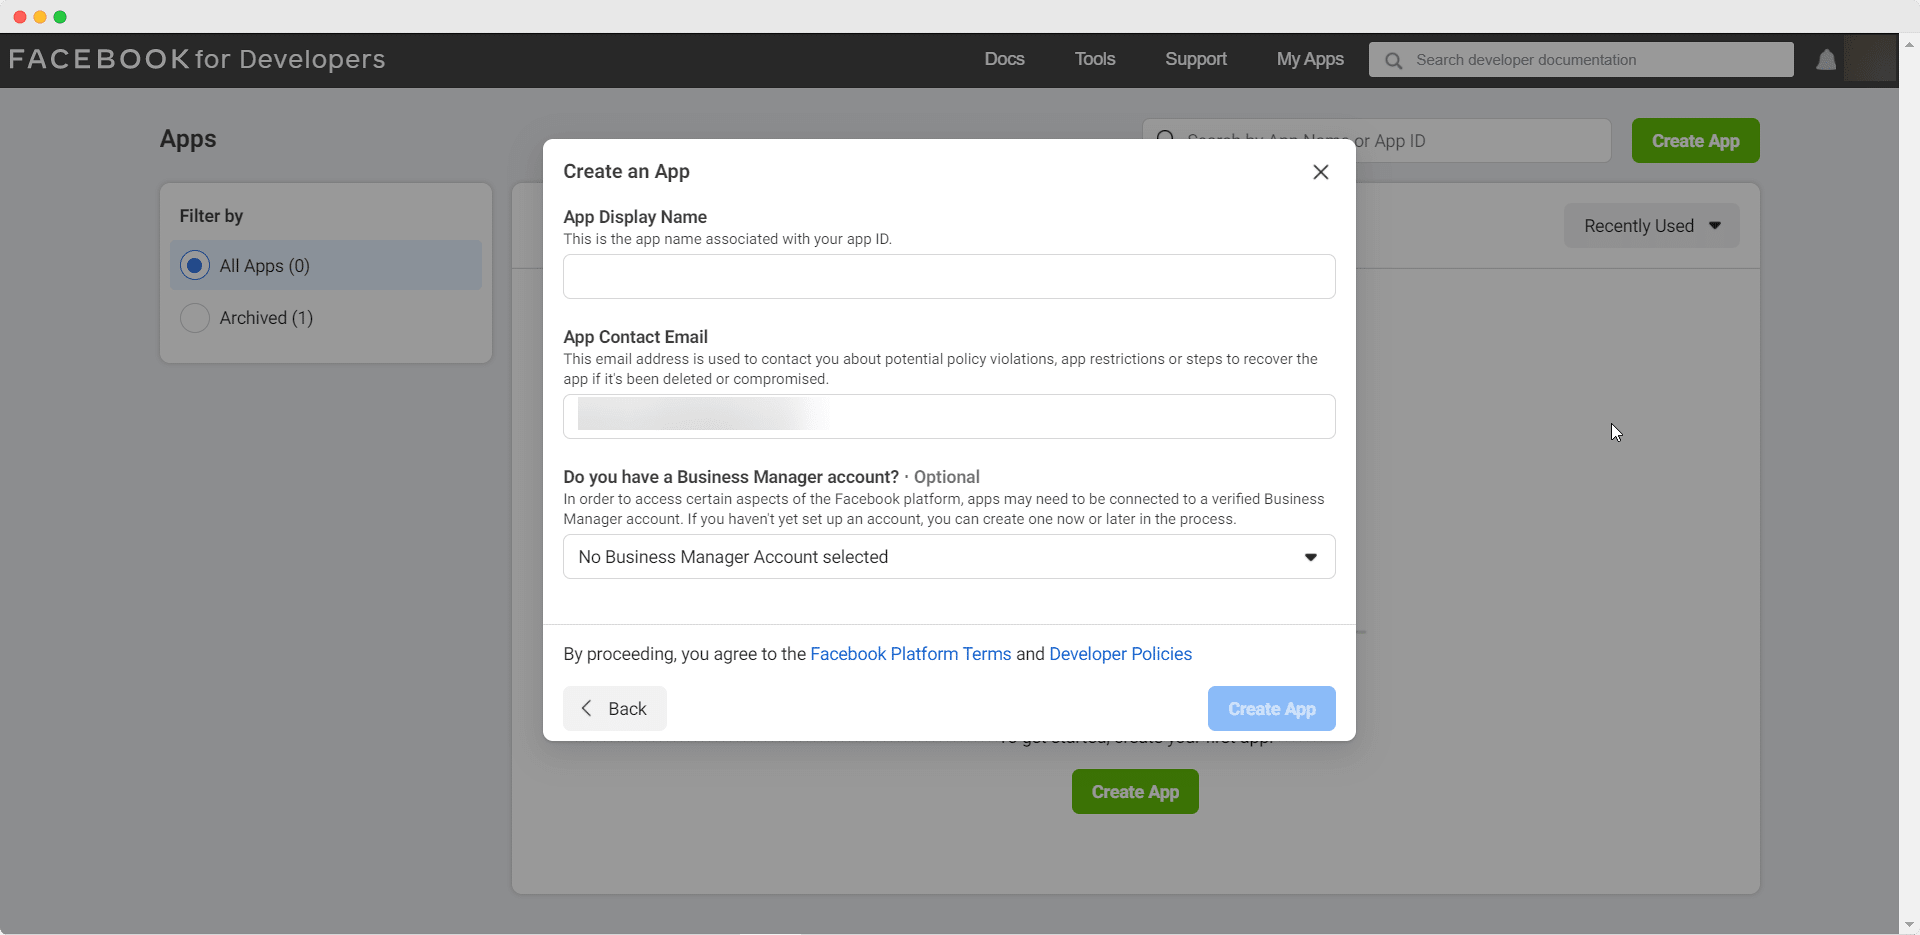
That’s it! You have successfully created a new app on Facebook Developers. Wasn’t that easy?
Now, you just have to set up the Instagram Basic Display API. This is the API that allows your app to get access to your profile information, photos and videos from your Instagram account. Move on to the next step to learn how to set up Instagram Basic Display.
Step 2: Configure Instagram Basic Display
As soon as you create your app on Facebook developer, you will be taken to a new page. From here you will see several different options as shown below. Click on the ‘Set Up’ button under Instagram Basic Display.

You will be taken to the ‘Basic Display’ page where you have to scroll down and find the ‘Create New App’ button. Click on this button and then enter the name of the app you created earlier.
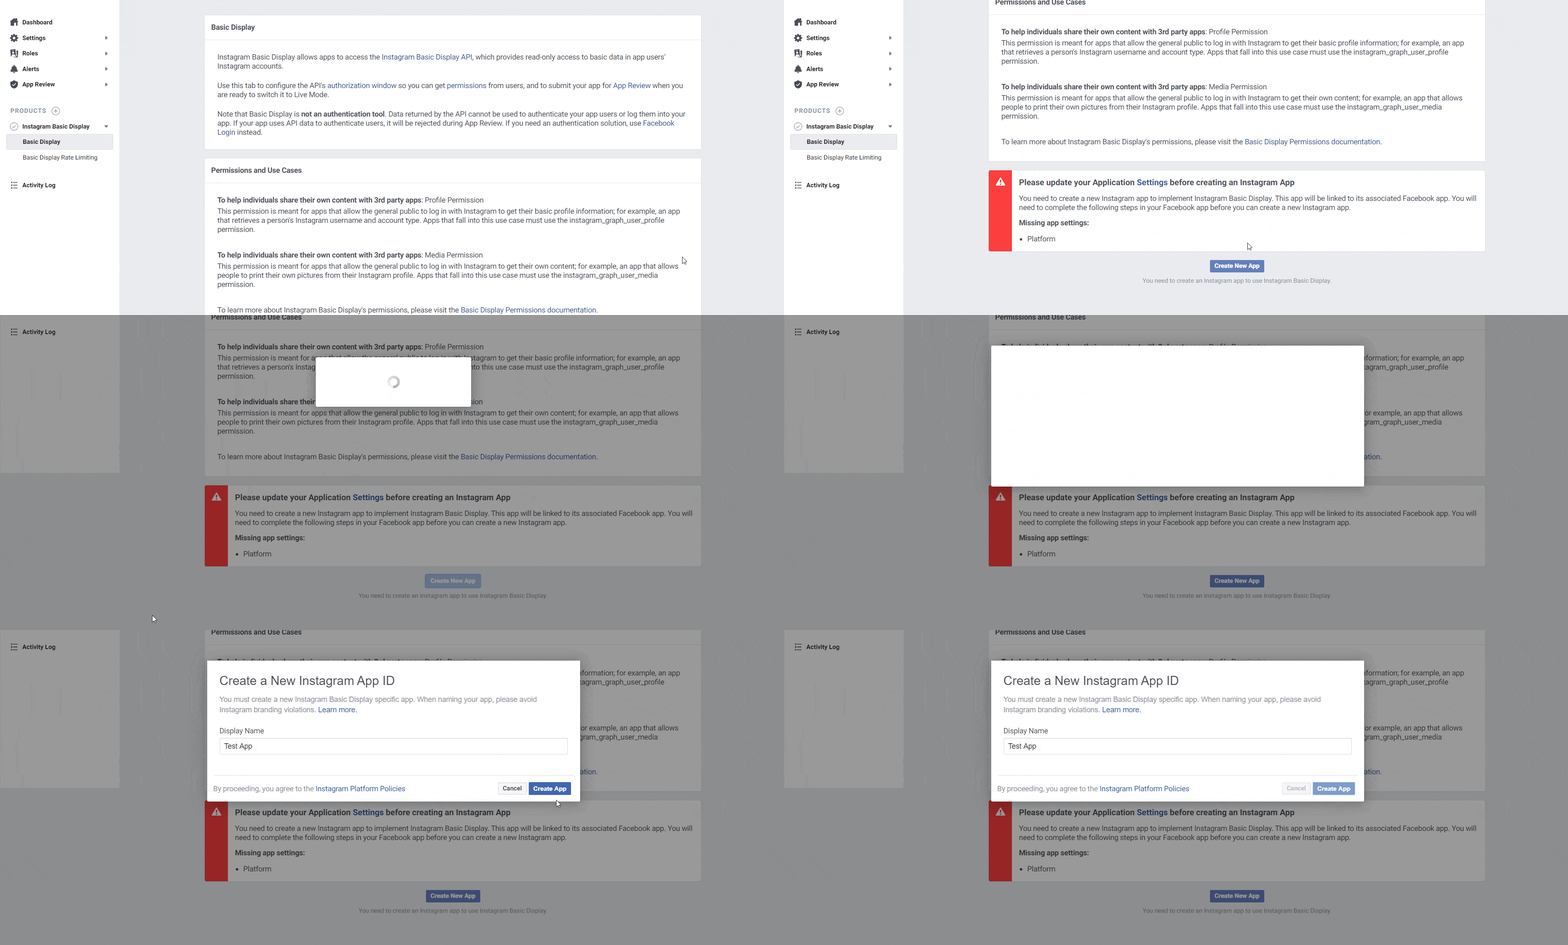
You are done configuring Instagram Basic Display. Now it’s time to go retrieve your Instagram access token.
Step 3: Generate Your Instagram Access Token
To get your Instagram access token, first you add an Instagram Test user. From the ‘Basic Display’ page, scroll down until you find the ‘Add or Remove Instagram Testers’ button.

Simply add the Instagram user ID of the person you want to set as your tester. If you are planning on sharing your own photos and videos, then just add your own Instagram username to grant access to your account.
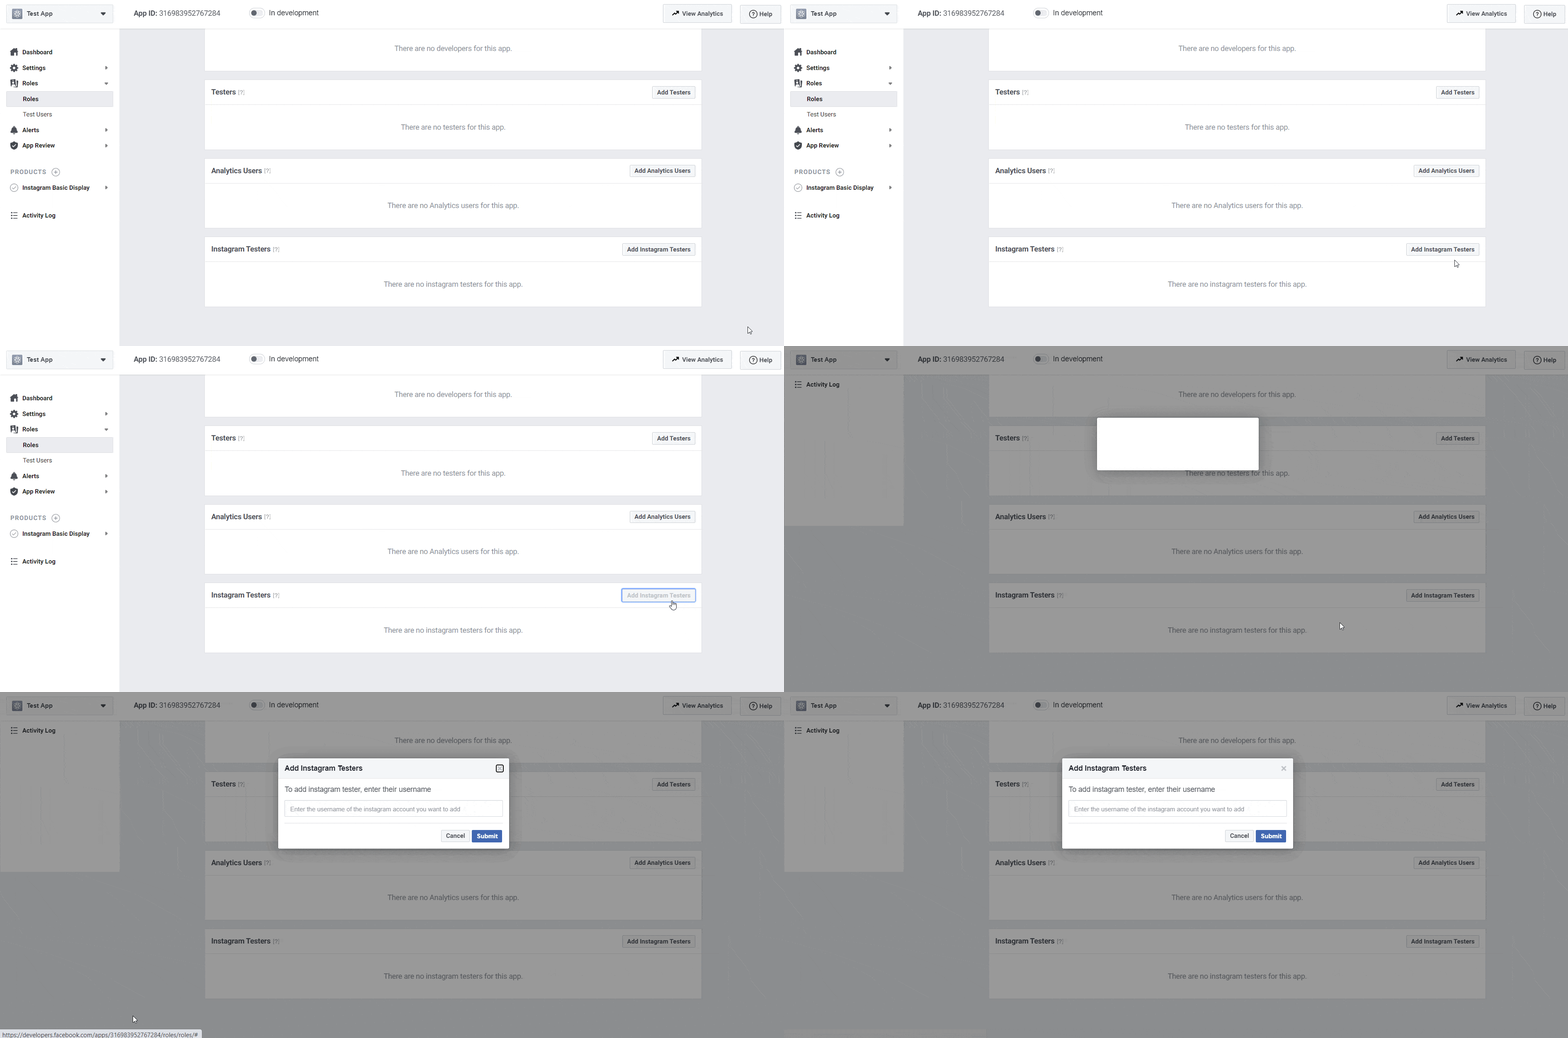
Once that’s done, log in to your Instagram account and navigate to Settings→ Apps and Websites and click on the Tester Invites tab as shown below.

Accept the invitation and return to your Facebook Developers dashboard. Click on the app you have created and go to the ‘Basic Display’ page. Afterwards, scroll down to the ‘User Token Generator’ section and click on the ‘Generate Token’ button.

A pop-up will appear with your Instagram access token. You can now copy this token to your clipboard and show your Instagram posts on your WordPress website.
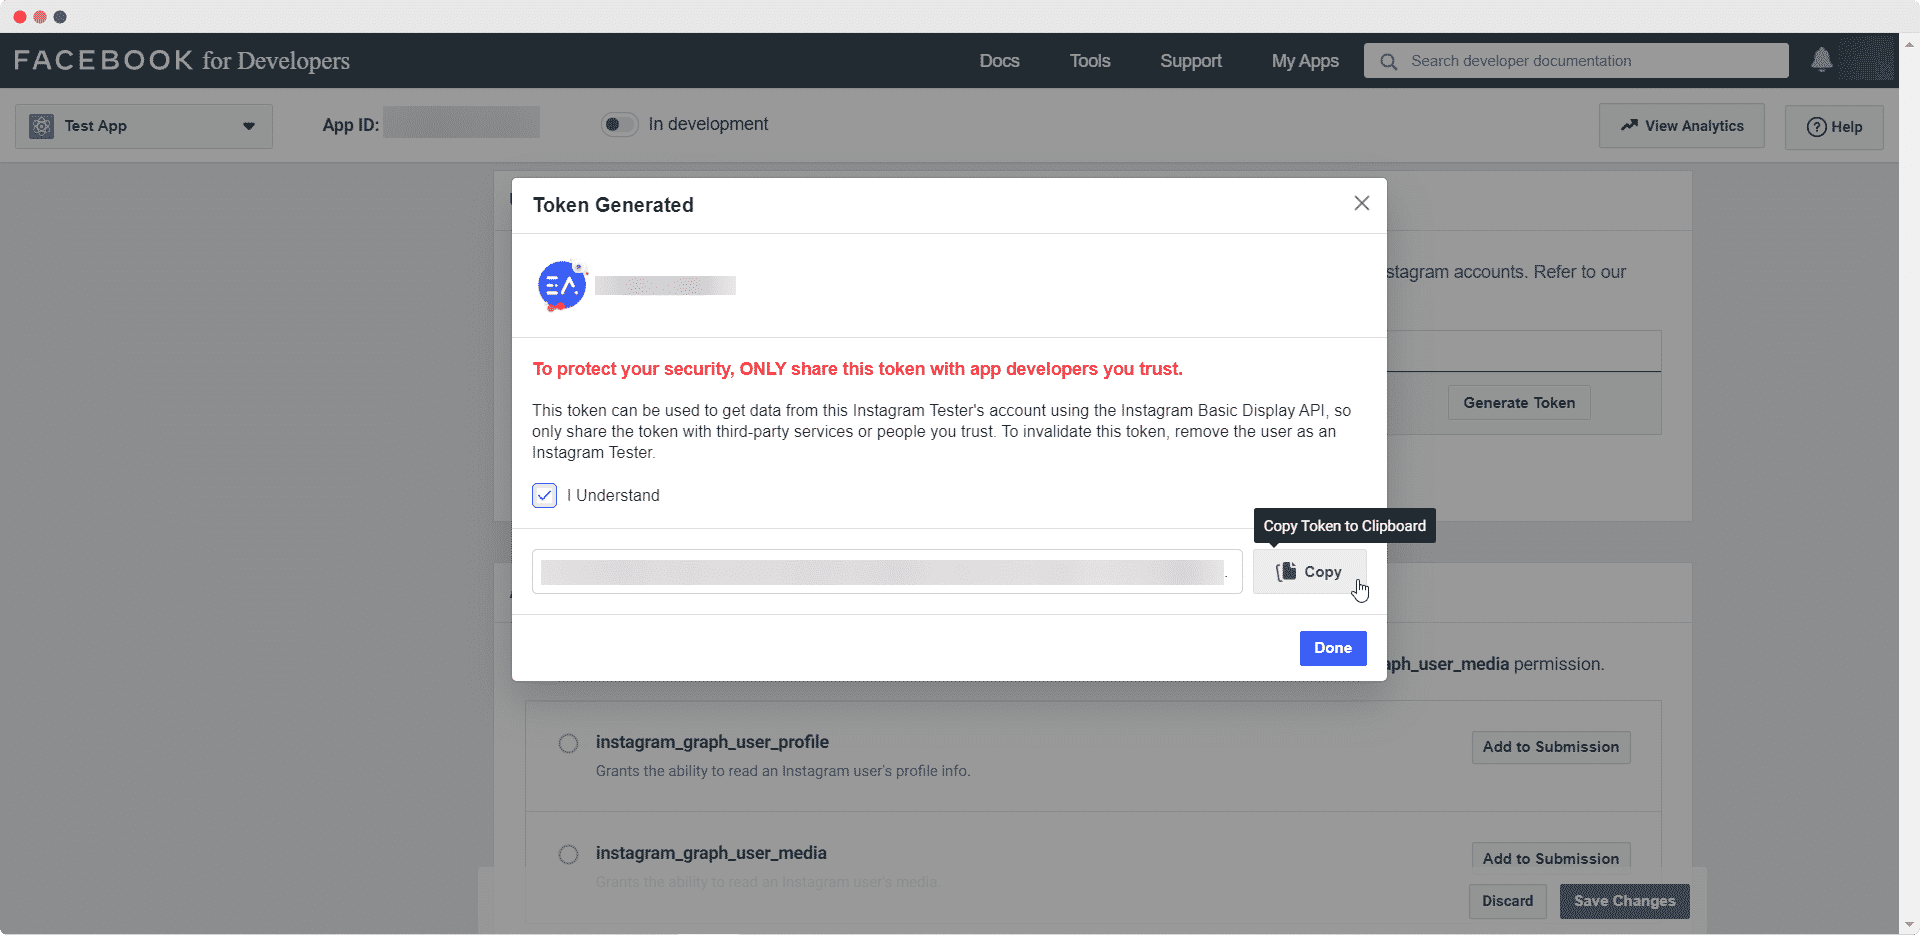
Just like that, you can easily collect your Instagram access token to share your Instagram photos and videos on WordPress. All it takes is three simple steps and you are good to go.
How To Display Your Instagram Feed On WordPress Using Elementor?
If you love page building with Elementor, then you can display your Instagram feed in a spectacular way using Essential Addons For Elementor. This is one of the most popular elements libraries for Elementor and is beloved by more than 1 million happy users. It comes with over 70 amazing elements to help you enhance your Elementor page building experience. One of these elements includes the EA Instagram feed, which lets you display your Instagram photos in a beautiful way.
All you have to do is drag-and-drop the EA Instagram Feed element anywhere on your web page, and then enter the Instagram access token that you have collected. Your Instagram feed will then be automatically displayed on your WordPress website. Check out this guide to find out more.
That’s how you can easily create your own Instagram access token and boost your engagement by sharing your photos and videos on your WordPress website. For more tips and tricks, fun tutorials, news and updates, make sure to subscribe to our blog or join our friendly Facebook Community.
![[New Extension] How to Show Vertical Text on Elementor Websites?](https://essential-addons.com/wp-content/uploads/2025/11/Essential-Addons-New-Extension-Vertical-Text-Orientation-1024x576.jpg)


