How To Display Posts Using Content Timeline #
With the EA Content Timeline element, you can showcase your WordPress posts in a beautiful horizontal or vertical layout. With this advanced widget, you can display both custom or dynamic sources & create a stunning timeline without using any code. Let’s check out the step-by-step guide below to use the EA Content Timeline widget in Elementor.
How To Activate EA Content Timeline? #
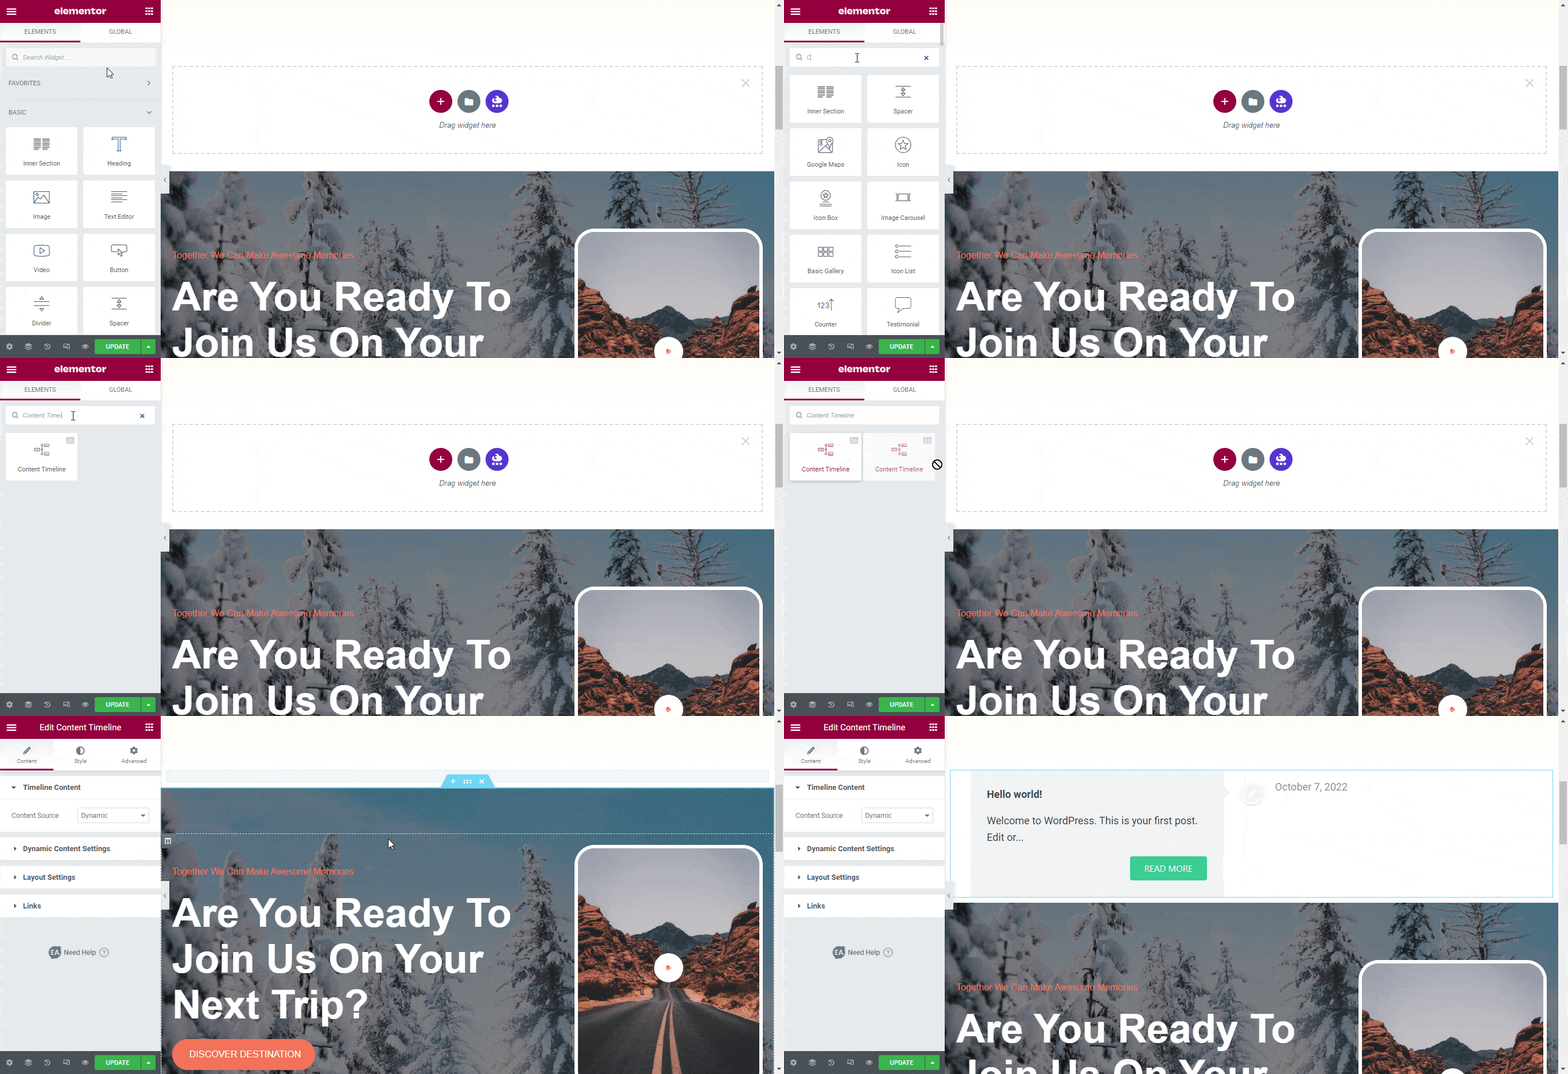
To use this Essential Addons element, go to the ‘ELEMENTS tab and search for the ‘EA Content Timeline’ element. Drag and drop the ‘EA Content Timeline’ into the ‘Drag widget here‘ or ‘+’ section.
How To Configure The Content Settings? #
The first option is Custom or Dynamic. The custom layout lets you manually pick blogs/posts for the timeline. Whereas the Dynamic layout will automatically fetch published content from your WordPress website.
Timeline Content #
Under the ‘Timeline Content’ you can choose your content source as custom or dynamic. You can add any blog/post on the page while working with custom content. And the dynamic content will fetch your content from your WordPress website.

Custom Content Settings #
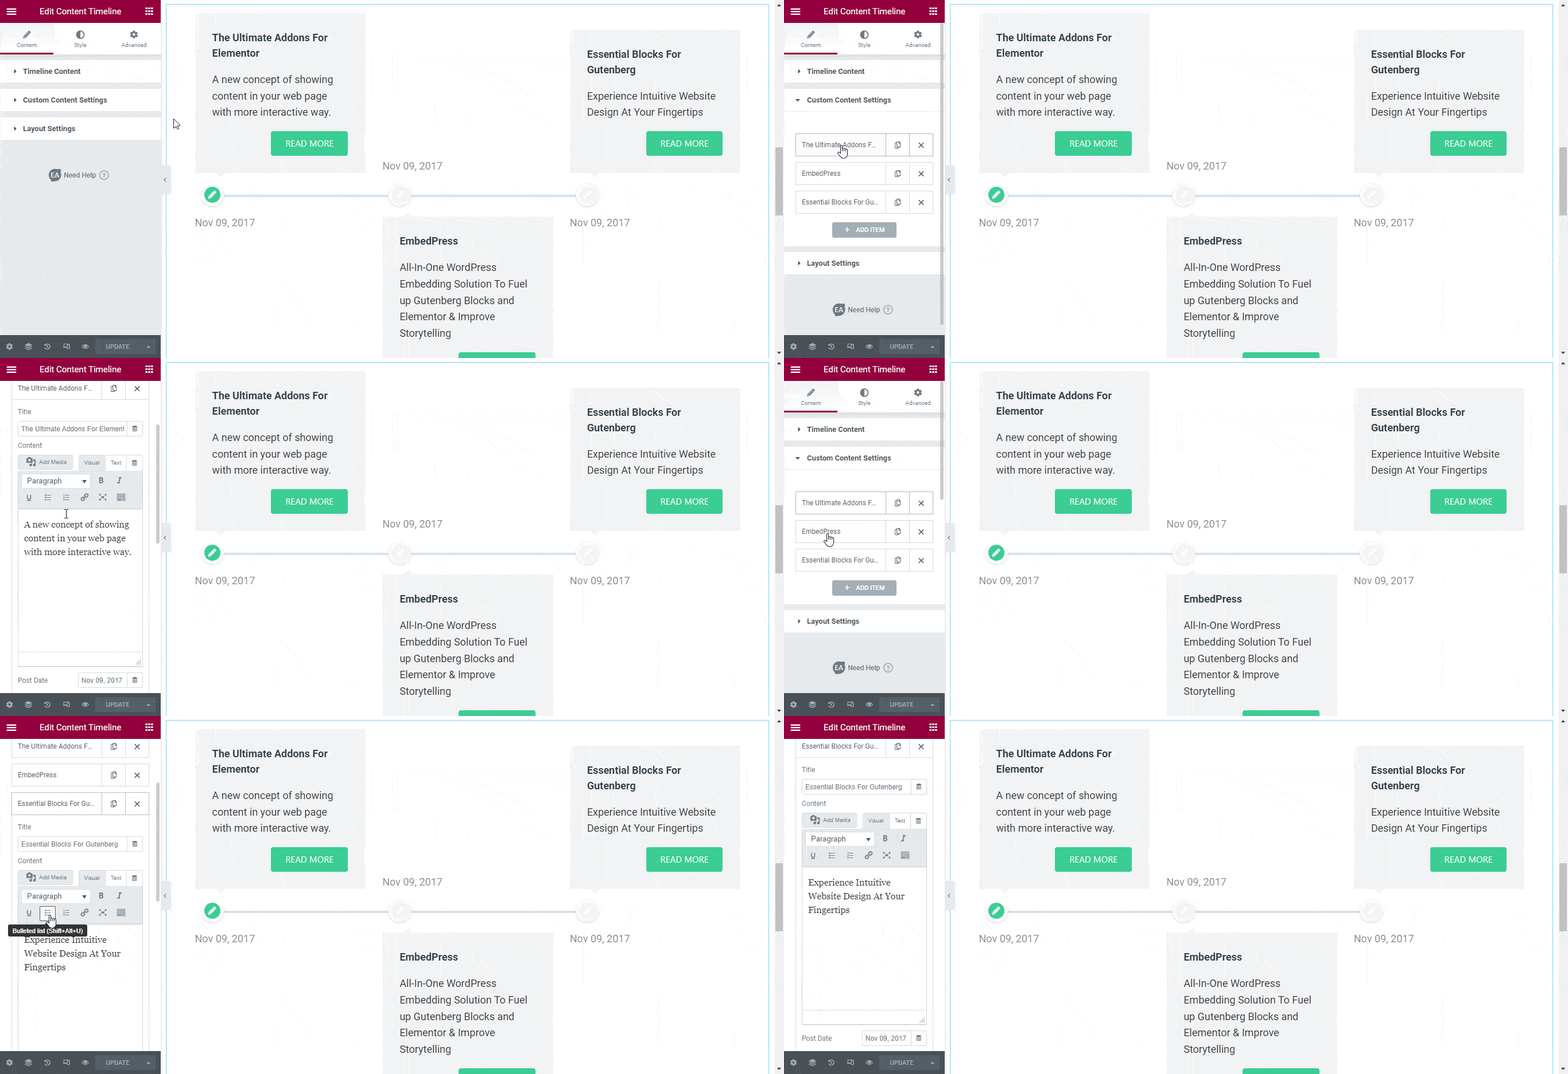
From here you will see the blocks emerging from the timeline as separate entities. Once you click over one of them, you will see more customization options. From here fill up the Title, content, and Post Date fields. Choose an image from the drop-down list. And lastly, assign any link to the button. This way you can link actual blogs to the timeline custom blocks.
Dynamic Content Settings #
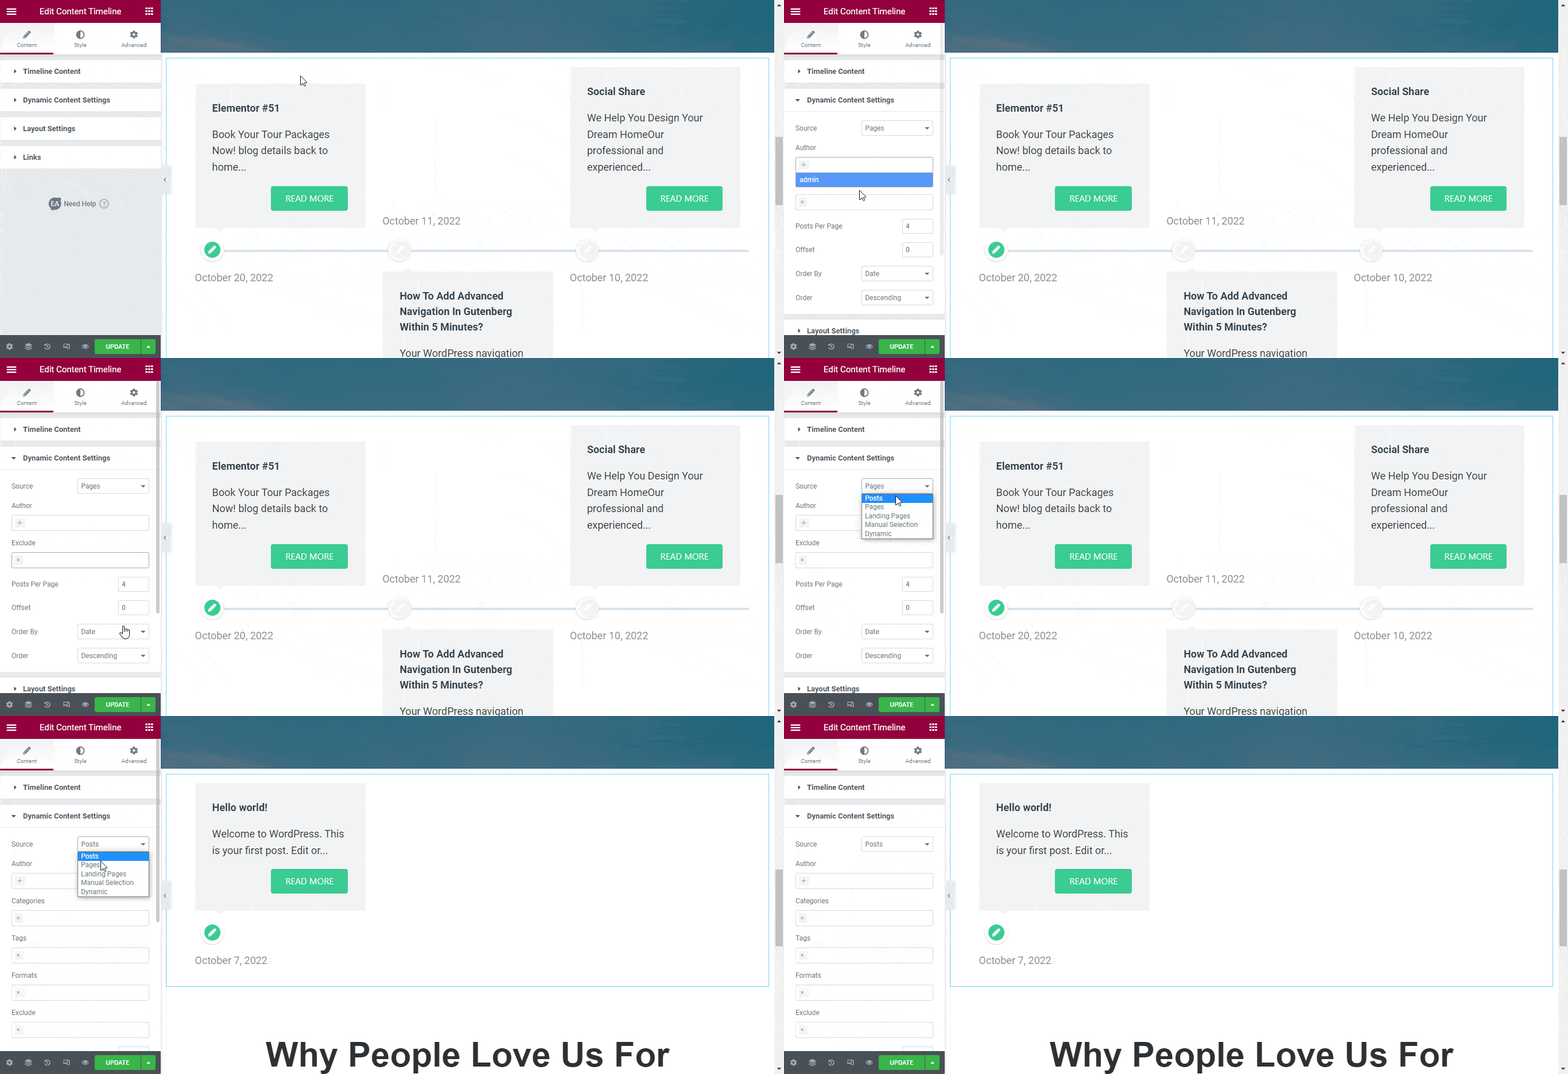
First, choose what type of content you want to include in the timeline-Post or Page. You can further the timeline by picking by category of blogs. Additionally, you can order the posts by date in ascending or descending order.
From the layout settings, you can edit the label text, and pick an icon. Toggle on/off to show/hide the title, or excerpt.
Layout Settings #
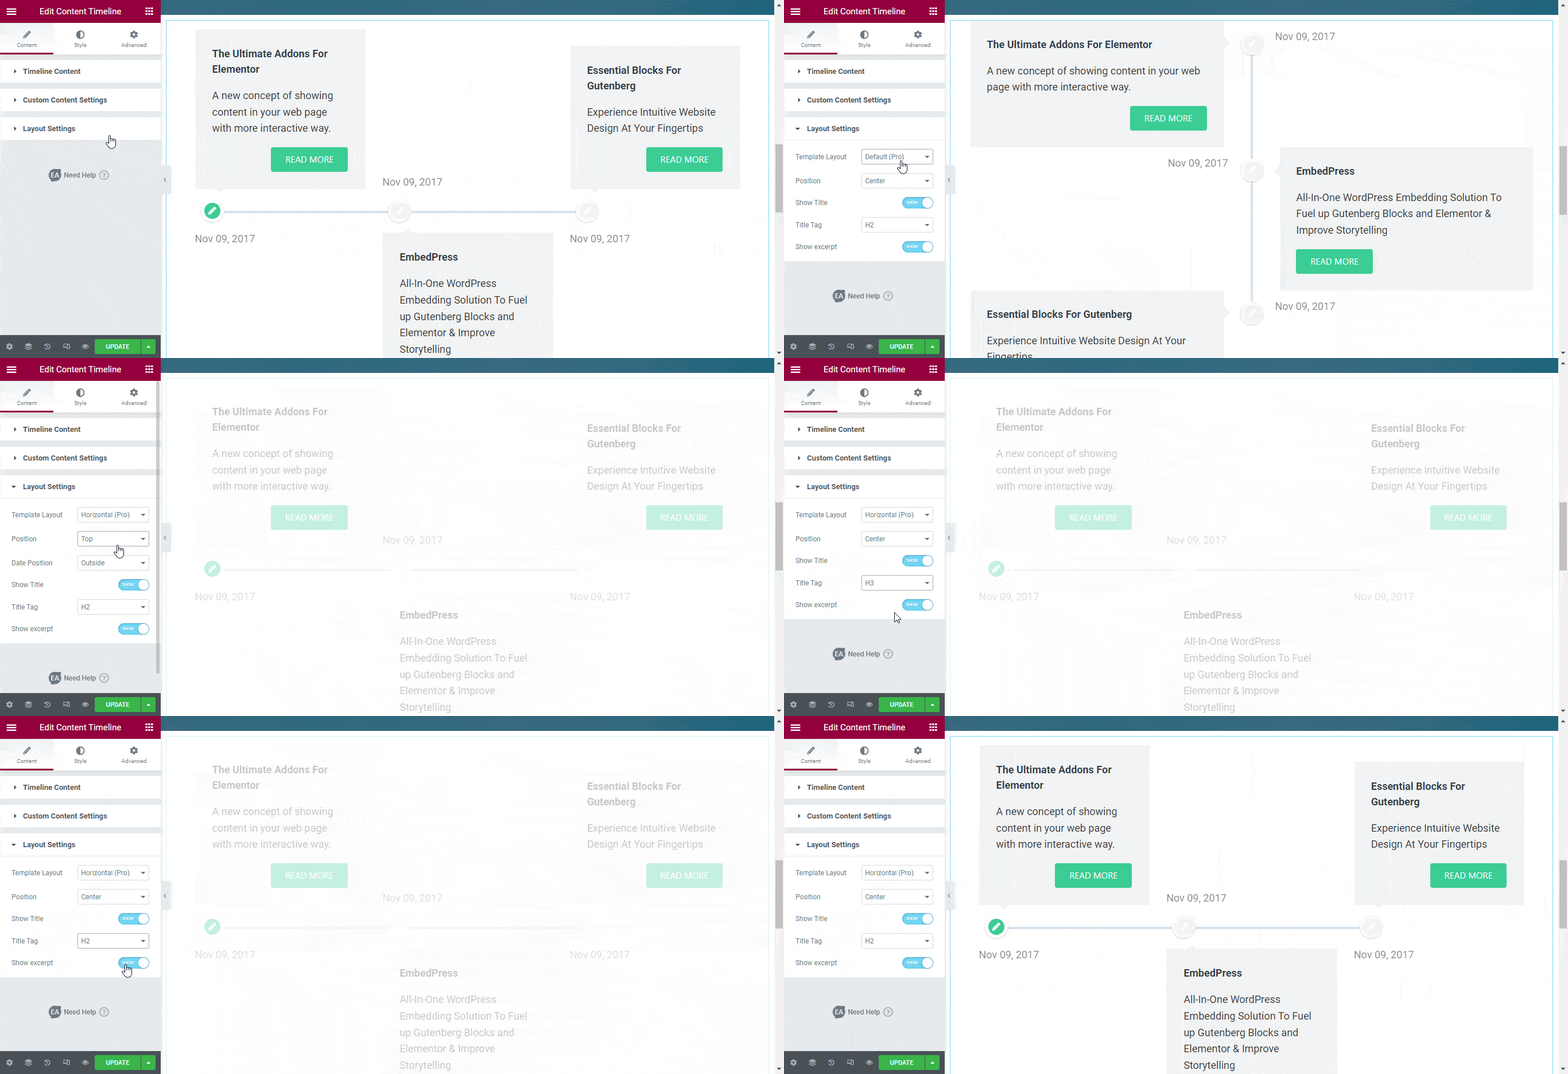
Under the Layout tab, you can choose between the default Vertical Layout or the Horizontal Layout. Also, you can change your content position, title tag, excerpt, and much more.
How To Style EA Content Timeline? #
You will have numerous customization options under the Style tab. From Timeline Style you can pick an Active and Inactive color for the timeline. Pick any Card Style you want and adjust the padding, margin, radius, and box shadow for the cards. With Bullet Style, you can customize the bullet size, bullet position, and border width. Additionally, you can customize the bullets differently for both active and inactive states. If you want, you can adjust the typography for the title, excerpt, and date separately. Under the Color and Typography tab. See how beautiful Content Timelines you can build with Essential Addons.
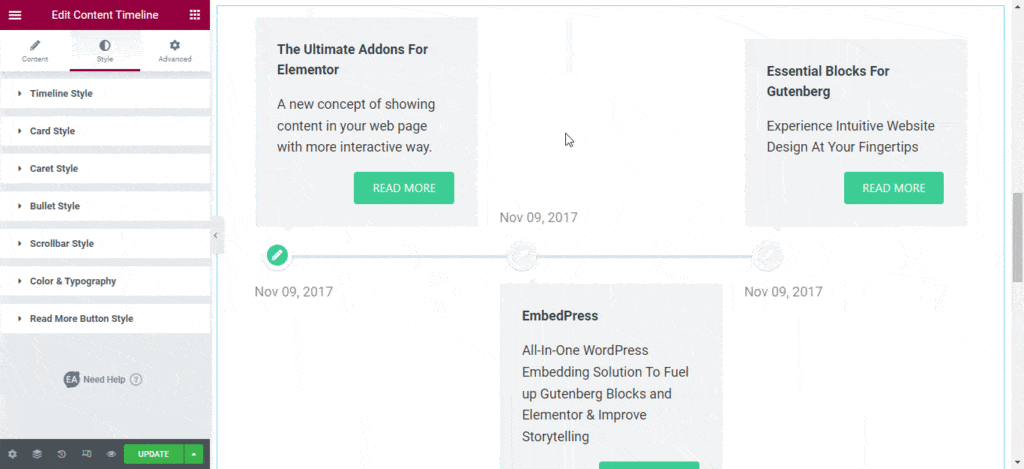
Final Outcome #
You can customize your Content Timeline widget to your liking by following some simple basic steps and tweaking them a little.

Using the EA Content Timeline widget, you can easily present your WooCommerce products on your eCommerce website with gorgeous layouts.
Getting stuck? Feel to contact our support for further assistance.
