If you encounter any errors when trying to automatically update your plugin, you can try the manual update for that case. Let’s follow this below guideline to manually update Essential Addons for Elementor PRO.
How To Manually Update Essential Addons PRO? #
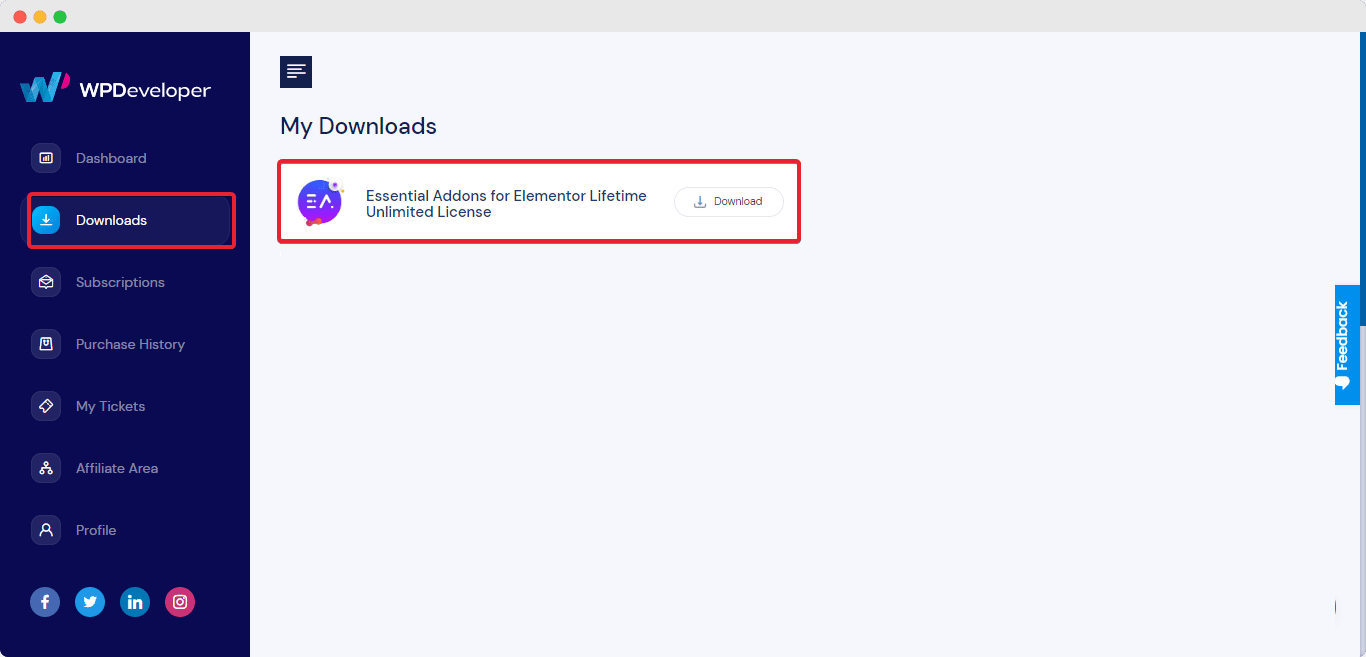
Step 1: Download the latest version of Essential Addons PRO from your WPDeveloper Account. Login to your WPDeveloper Account and switch to the ‘Downloads’ tab. Afterward, click on the plugin file name and Essential Addons PRO will be downloaded.

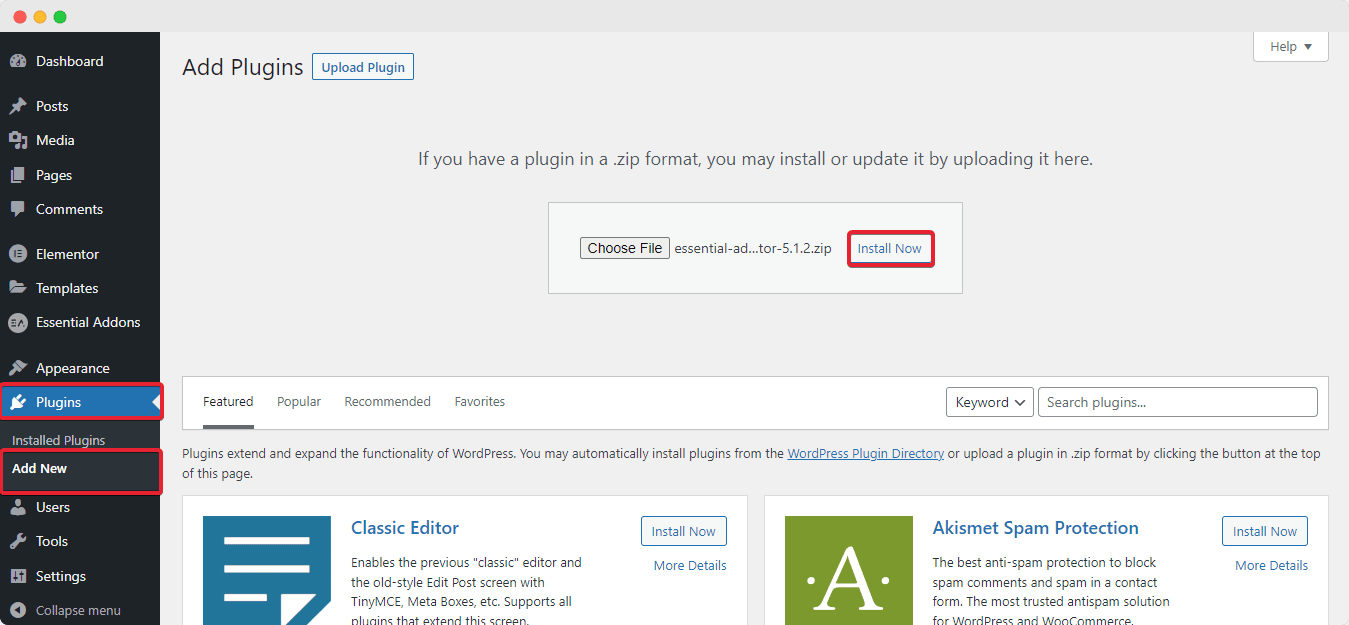
Step 2: Let’s switch to your WordPress website and go to your WordPress dashboard. Afterward, simply navigate to your ‘Plugins’ page from your WordPress Dashboard. Then, click on the ‘Add New’ option and upload the Essential Addons for Elementor PRO plugin that you have downloaded. Do not unzip the zip file of the plugin. After successfully uploading, click on the ‘Install Now’ button.

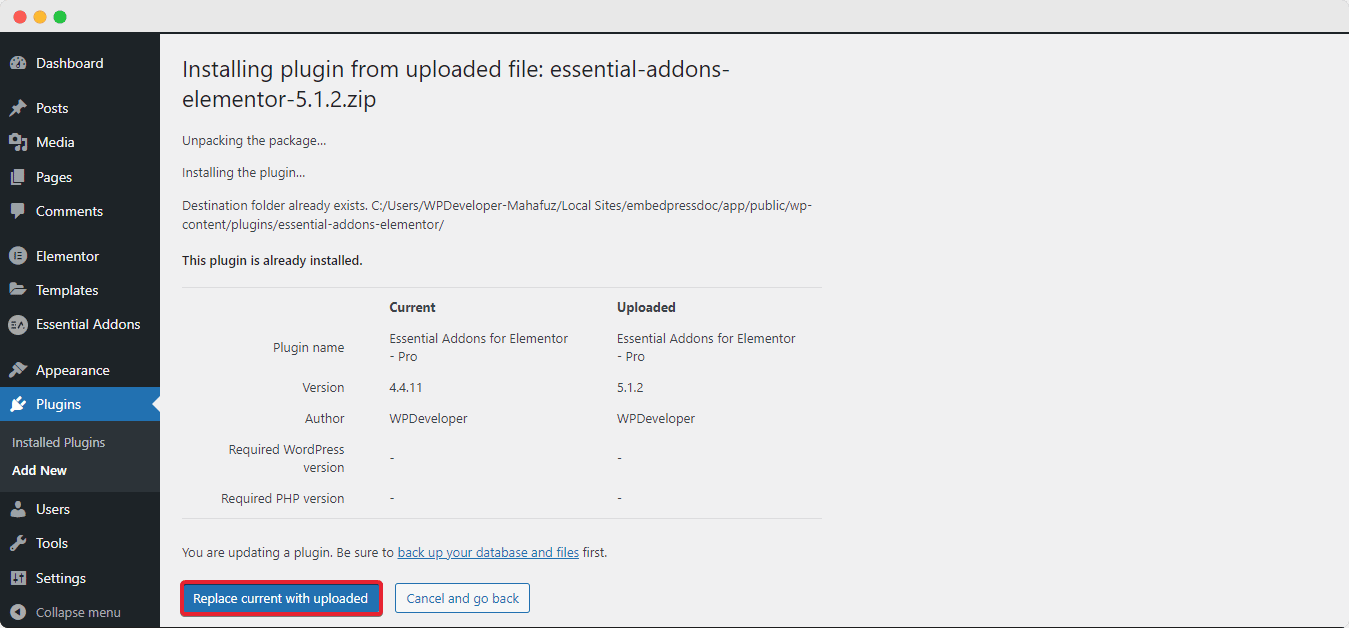
Step 3: After installation is finished, simply just hit the ‘Replace current with Uploaded’ button. Your older version of Essential Addons PRO will then be replaced by the newer version you have just installed.

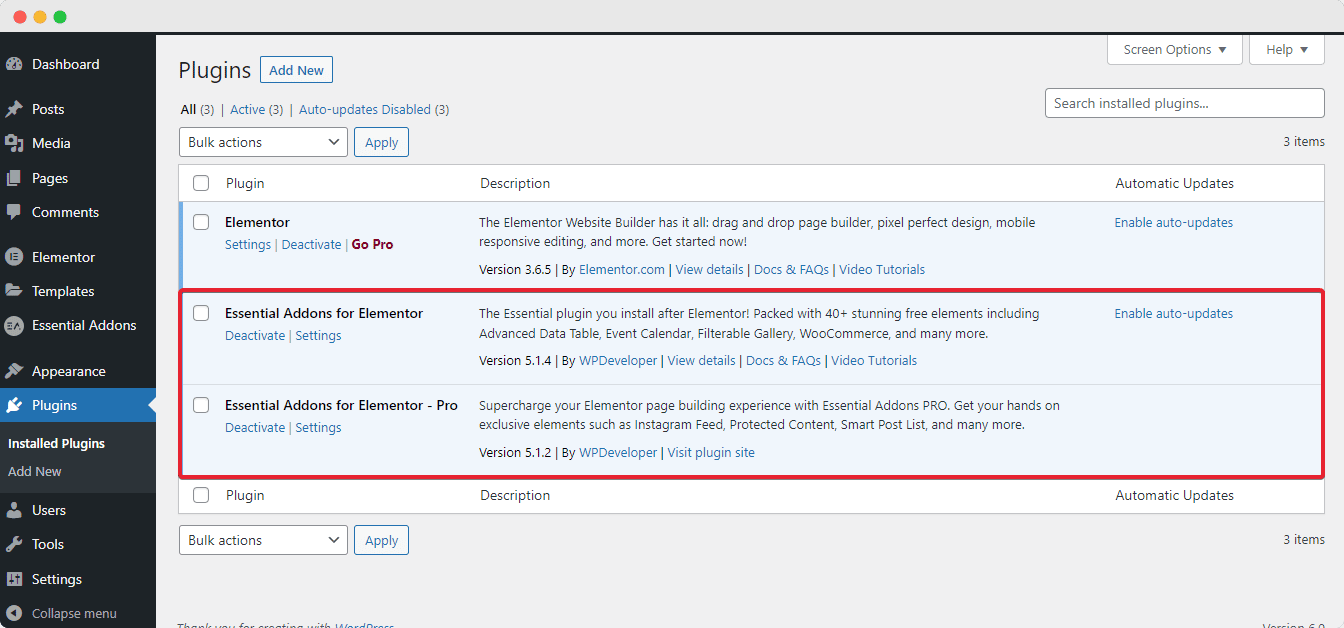
Step 4: After you are done with previous step, Essential Addons PRO will be activated on your website. This is how your plugins page will look like:

This is how you can manually update Essential Addons for Elementor PRO quite easily. After you have completed the update, make sure that you have the license key for Essential Addons PRO activated.
Apart from this process, there are also a few other ways you can manually update Essential Addons PRO. For further details, you can check out this article on 3 different ways you can manually update your plugin.


