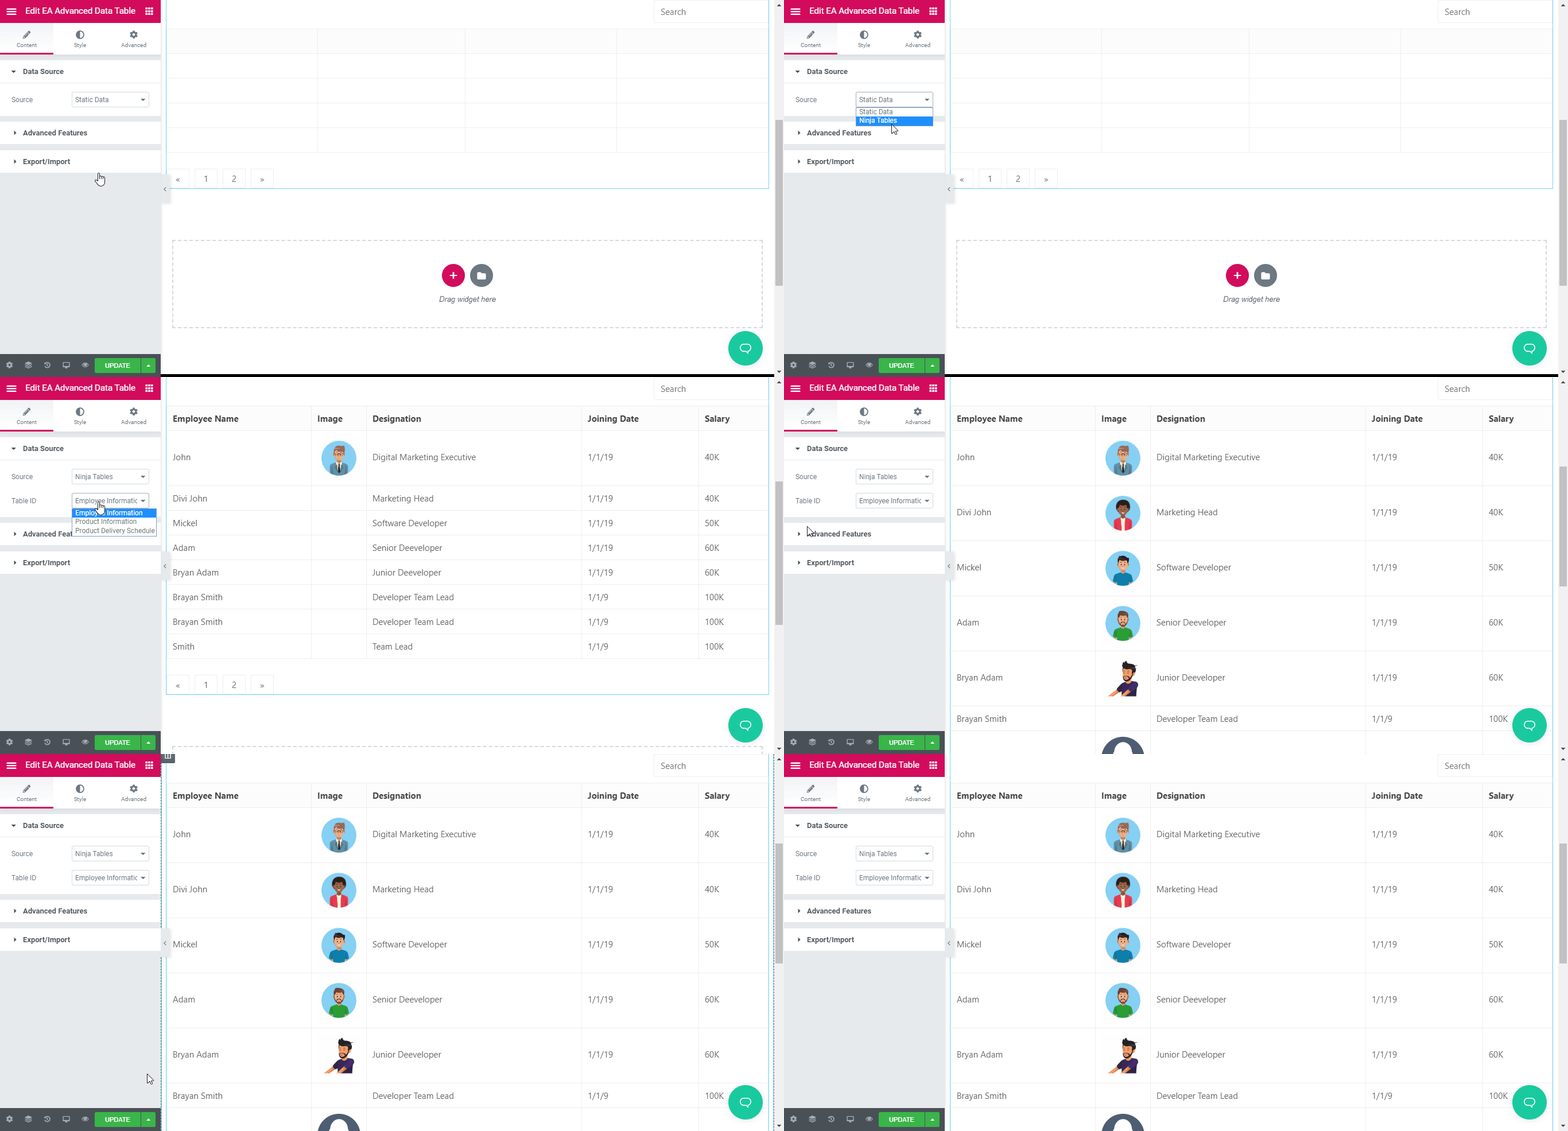
EA Advanced Data Table offers integrations with Google Spreadsheet, TablePress, and NinjaTables right from your Elementor dashboard. As a result, you can easily display your table from these third-party sources and customize them any way you want.
How to Integrate Google Sheets With EA Advanced Data Table? #
Check out the below guideline to connect your Google Spreadsheet with EA Advanced Data Table:
Collecting Google Sheet API Key #
You can showcase your Google Sheets on your WordPress website as well by using EA Advanced Data Table. You just have to create ‘Credentials’ to generate and set the ‘API Key’, ‘OAuth client ID’, and ‘Refresh Token’ in the settings.
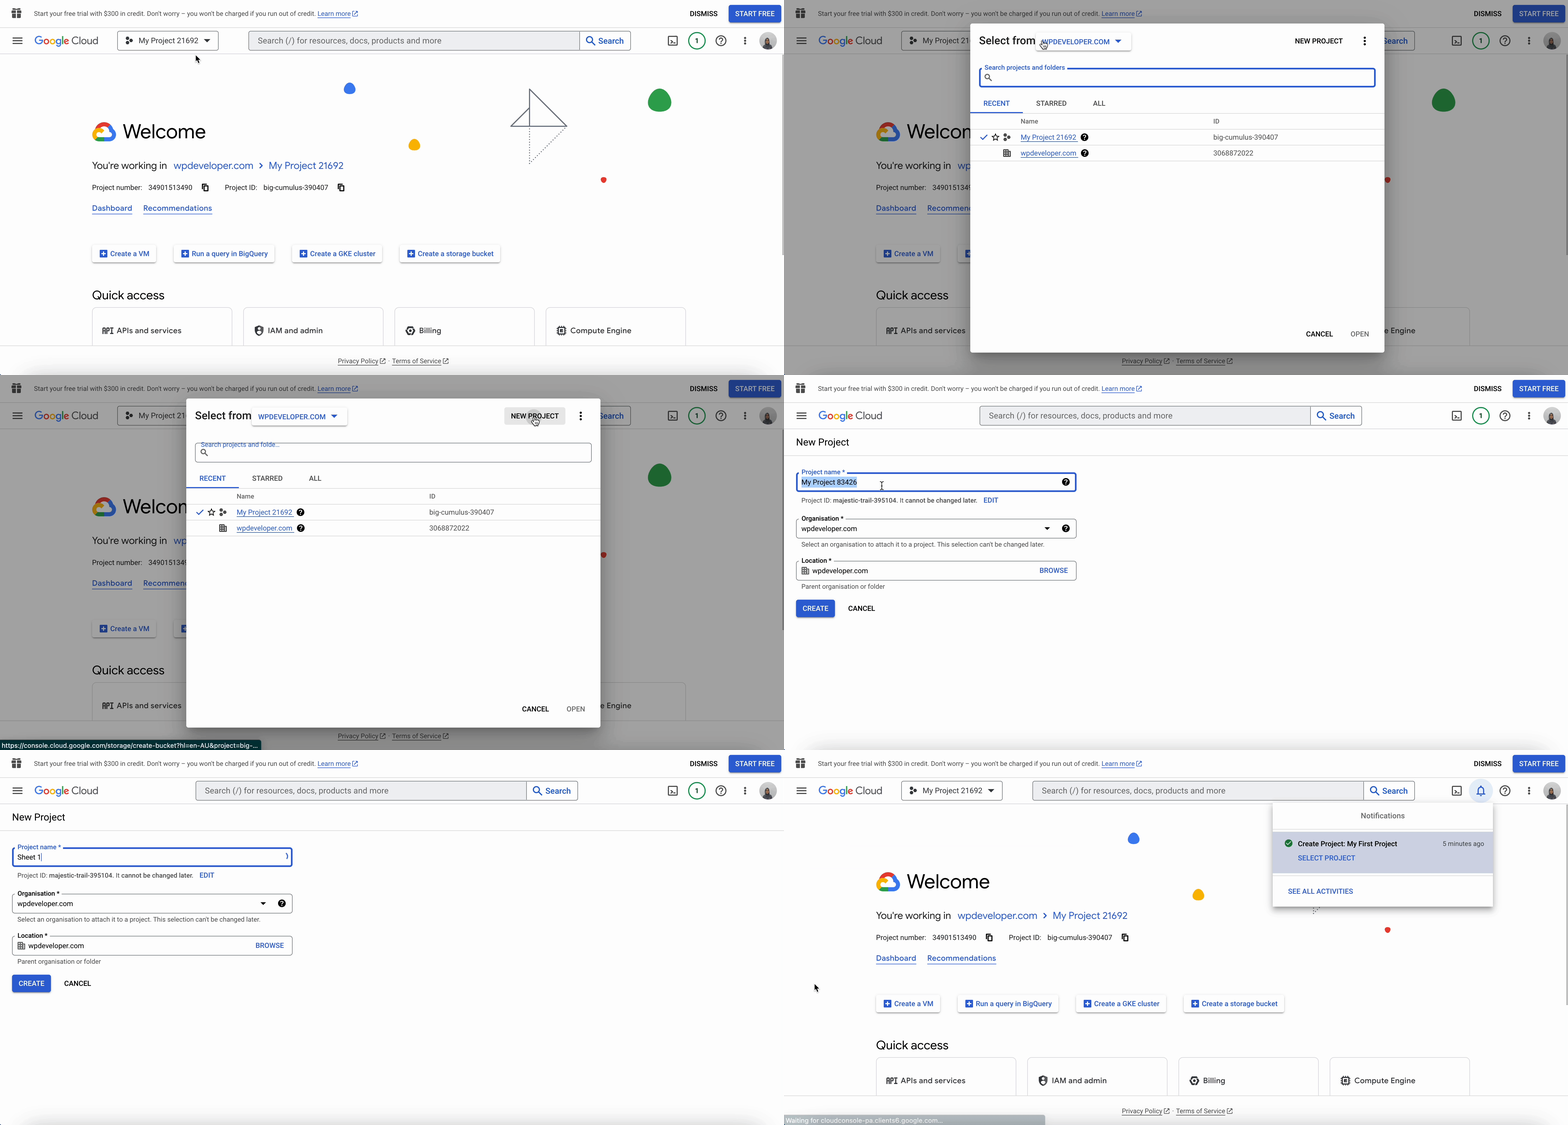
To do that, simply go to the Google Developers Console to generate your Google Sheet API. Afterward, you need to create a project and give it a name by clicking on ‘My Project’ → ‘New Project’ from the Dashboard.
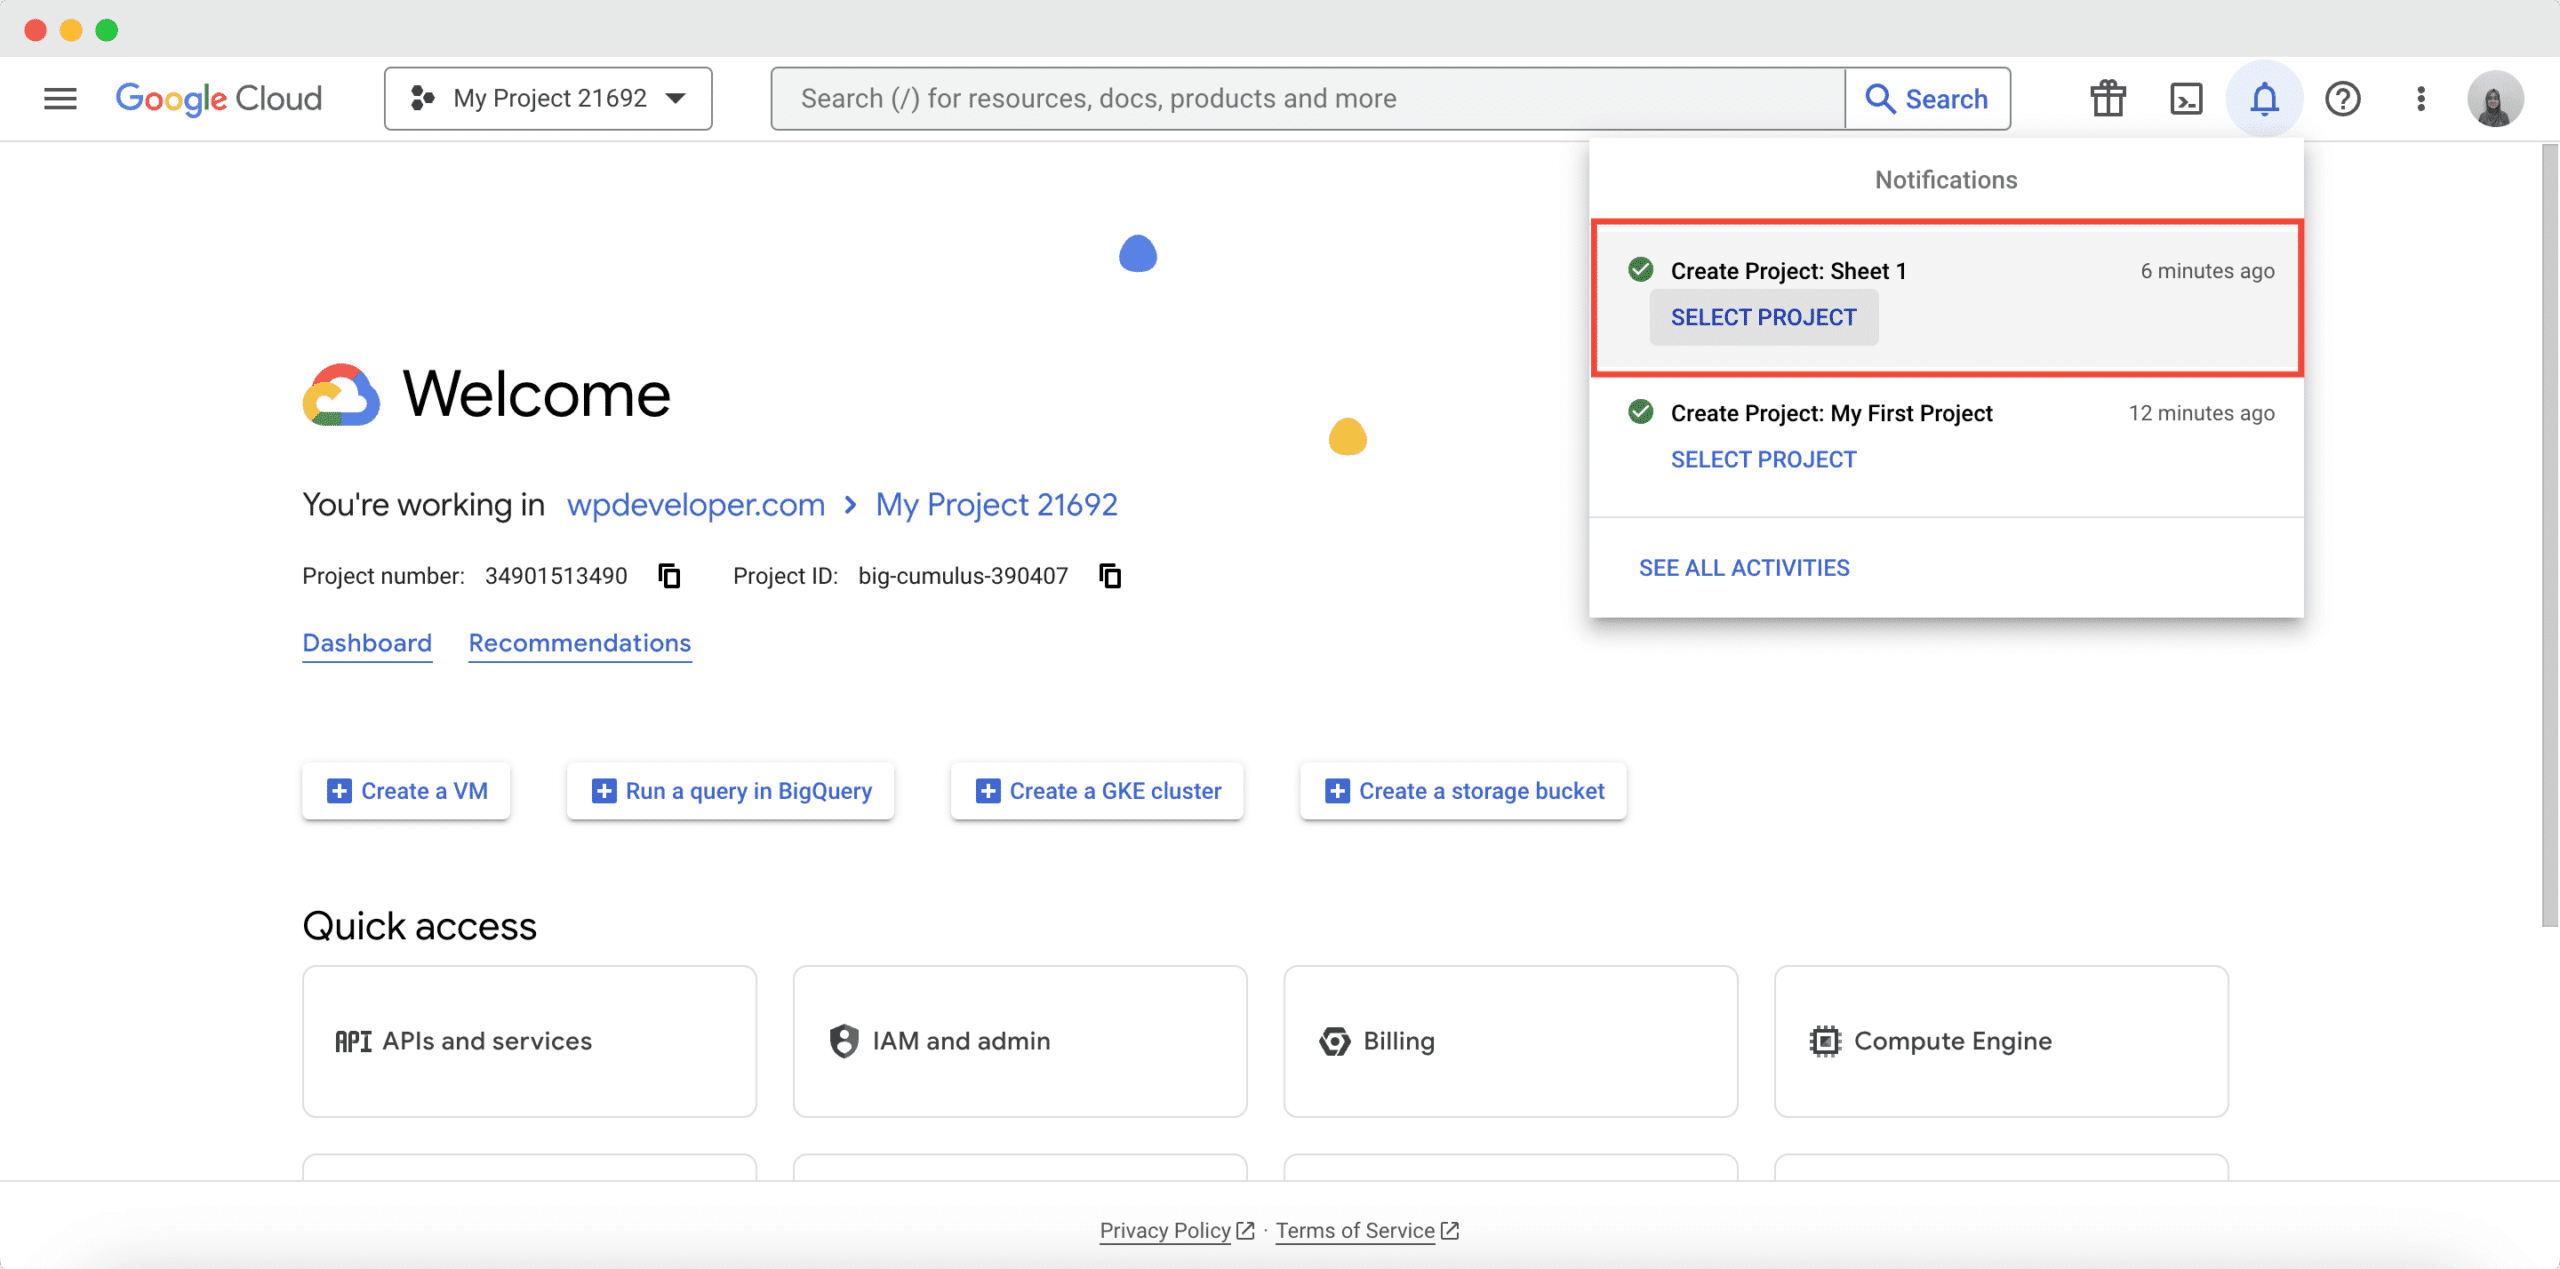
After creating the new project in the Google Cloud Console platform, you have to select the project. To do that, click on the ‘Notification’ icon, then choose ‘Select Project’ from the drop-down.
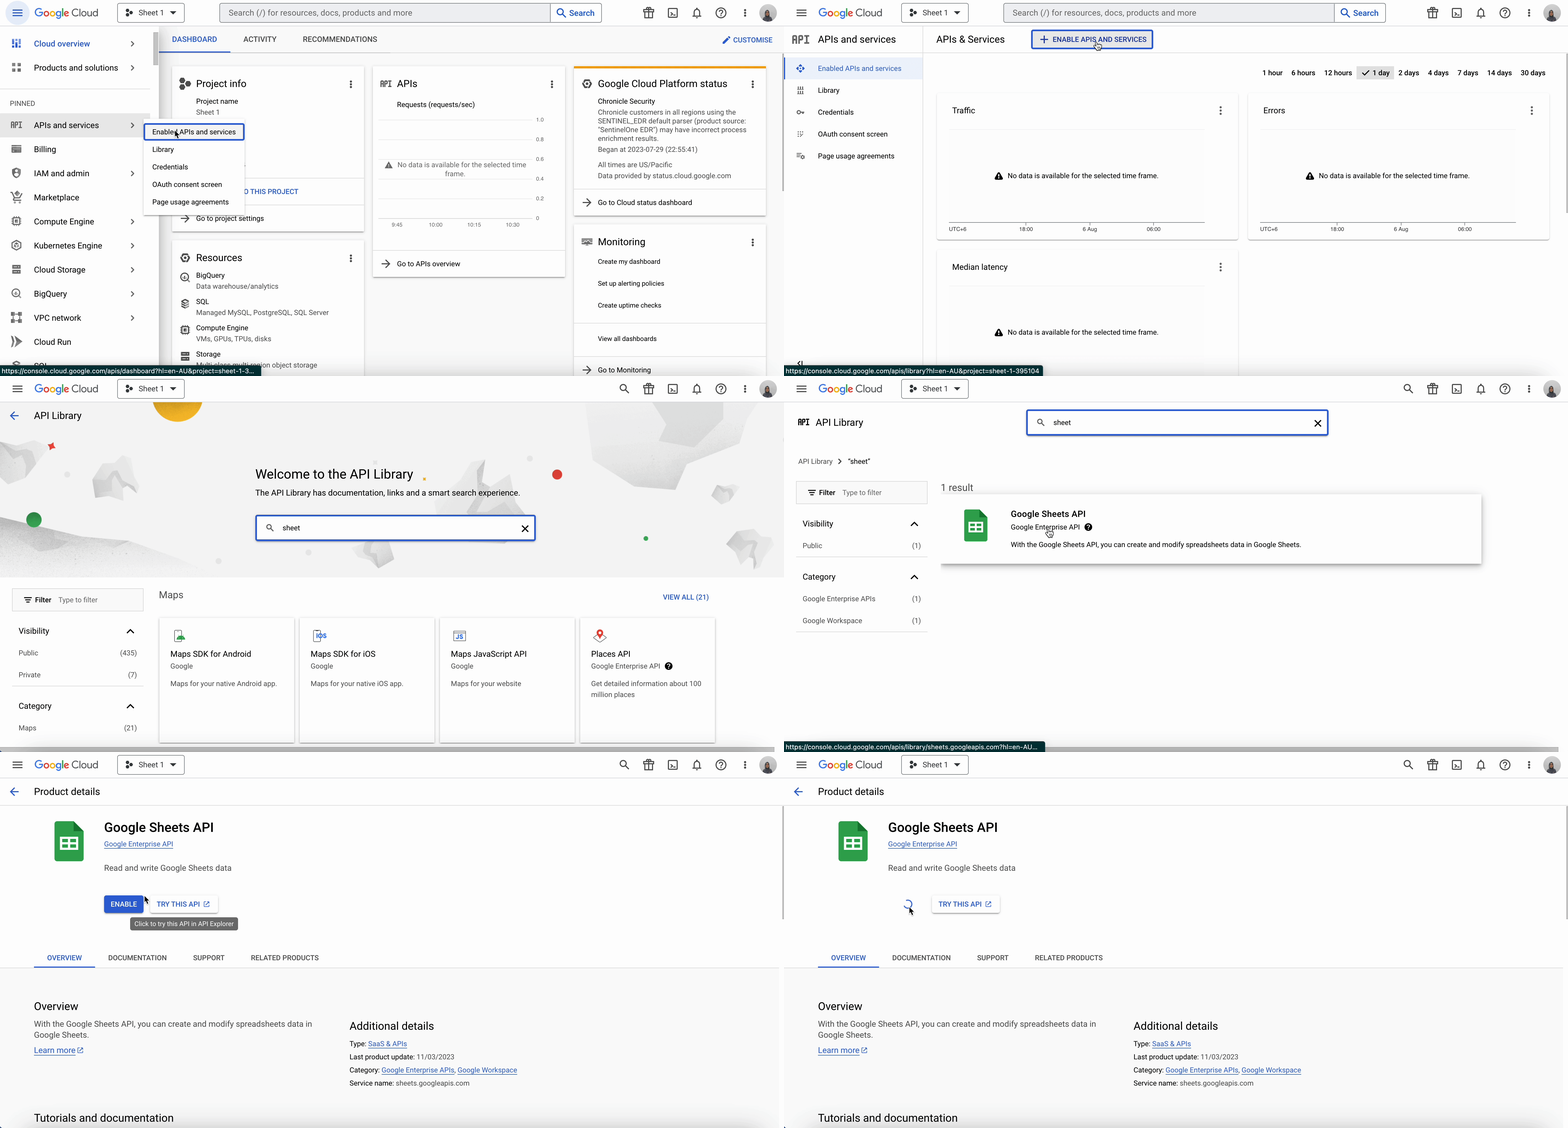
Then click on the ‘Enable APIs and Services’ section to go to the Google Sheet API portion to enable it. It will redirect you directly to the API library. Search for ‘Google Sheet API’, and then click on the ‘Enable’ button to enable it.
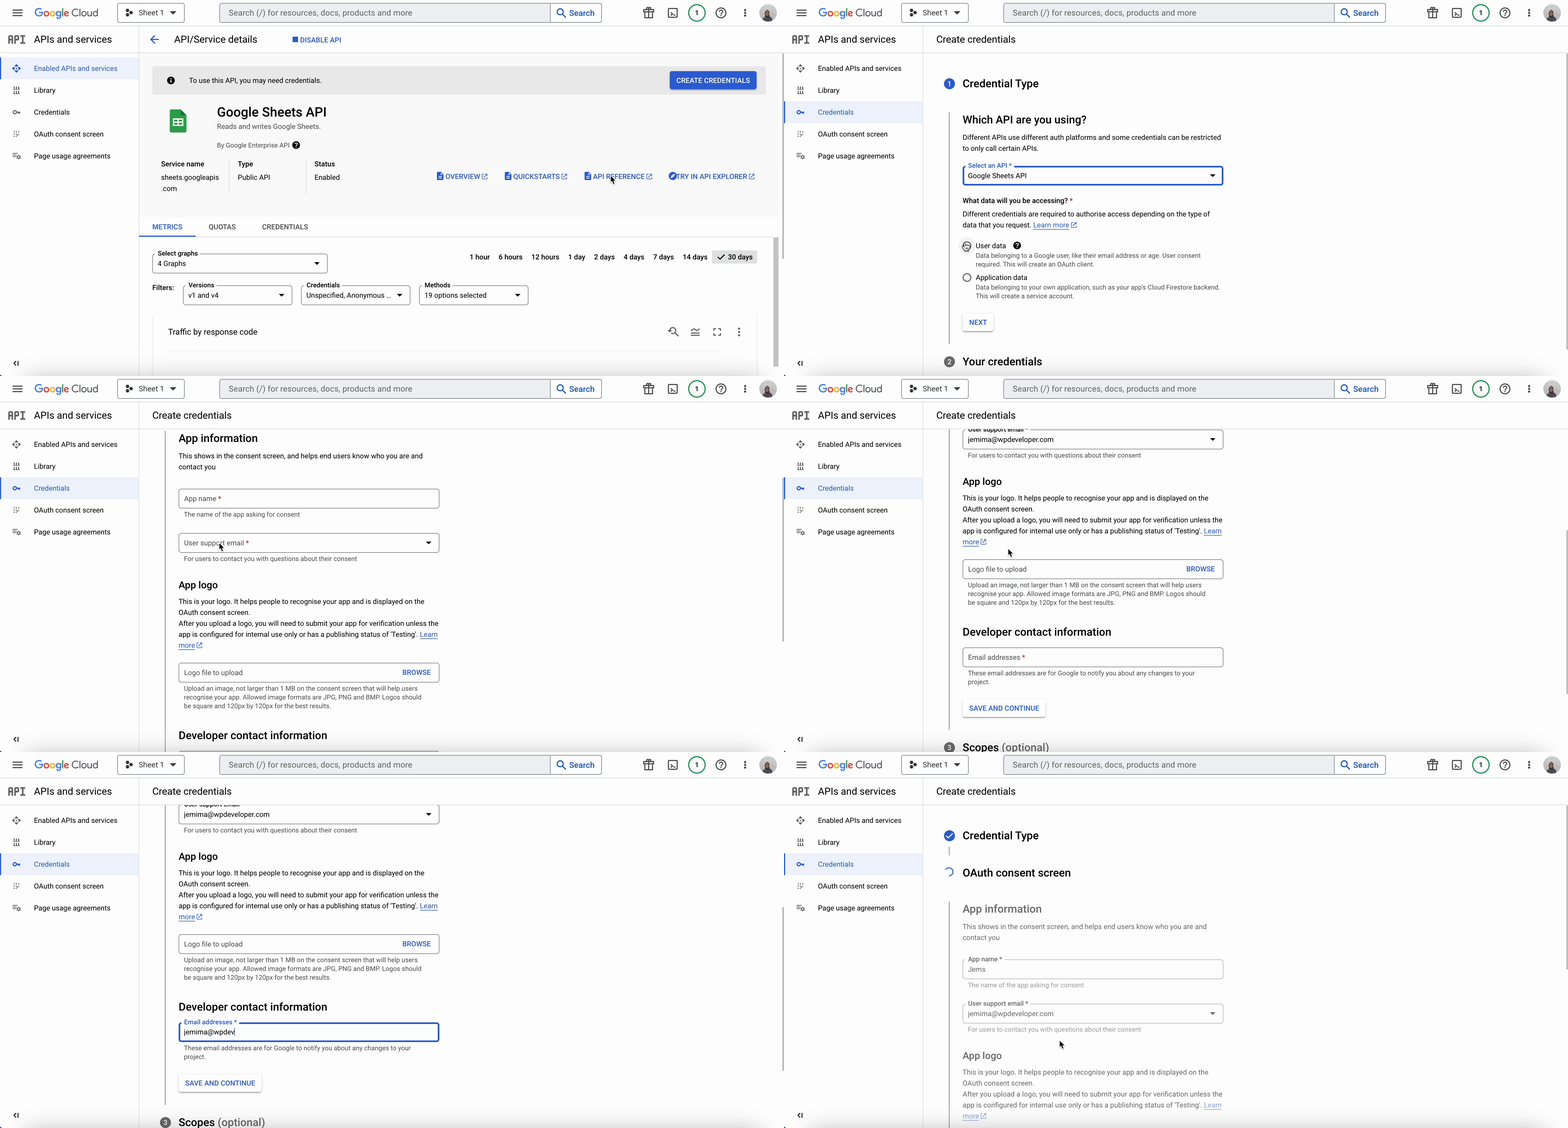
Now, you have to create credentials to retrieve Google Sheet API. Click on the ‘Create Credential’ button. Then fill up the necessary fields like Credential Type, App Information, Logo, Email ID, etc. As Credential Type, select ‘Google Sheets API’. Also, tick on the ‘User Data’ field as the ‘What API you are accessing?’ field.
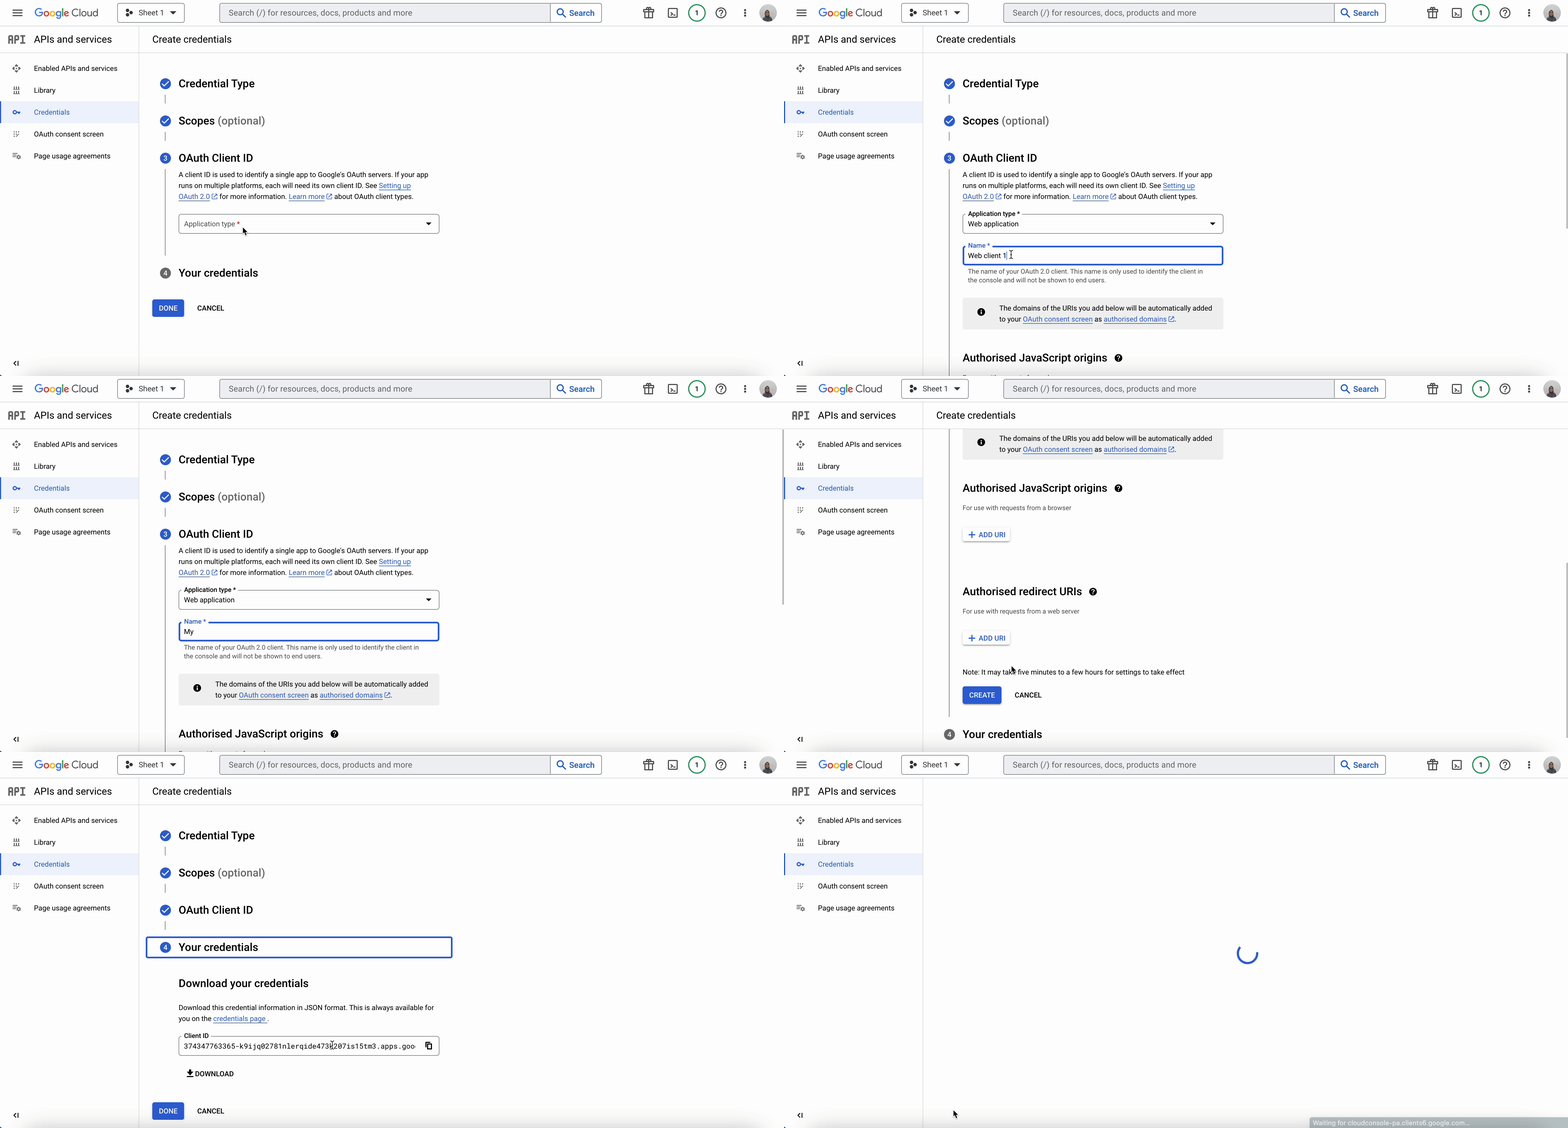
In the ‘OAuth Client ID’ field select ‘Web Application’ from the drop-down and add the Application Name. After that, click on the ‘Create’ button. Instantly you will get access to your Google Sheet OAuth credentials. You can download them or copy them for future use.
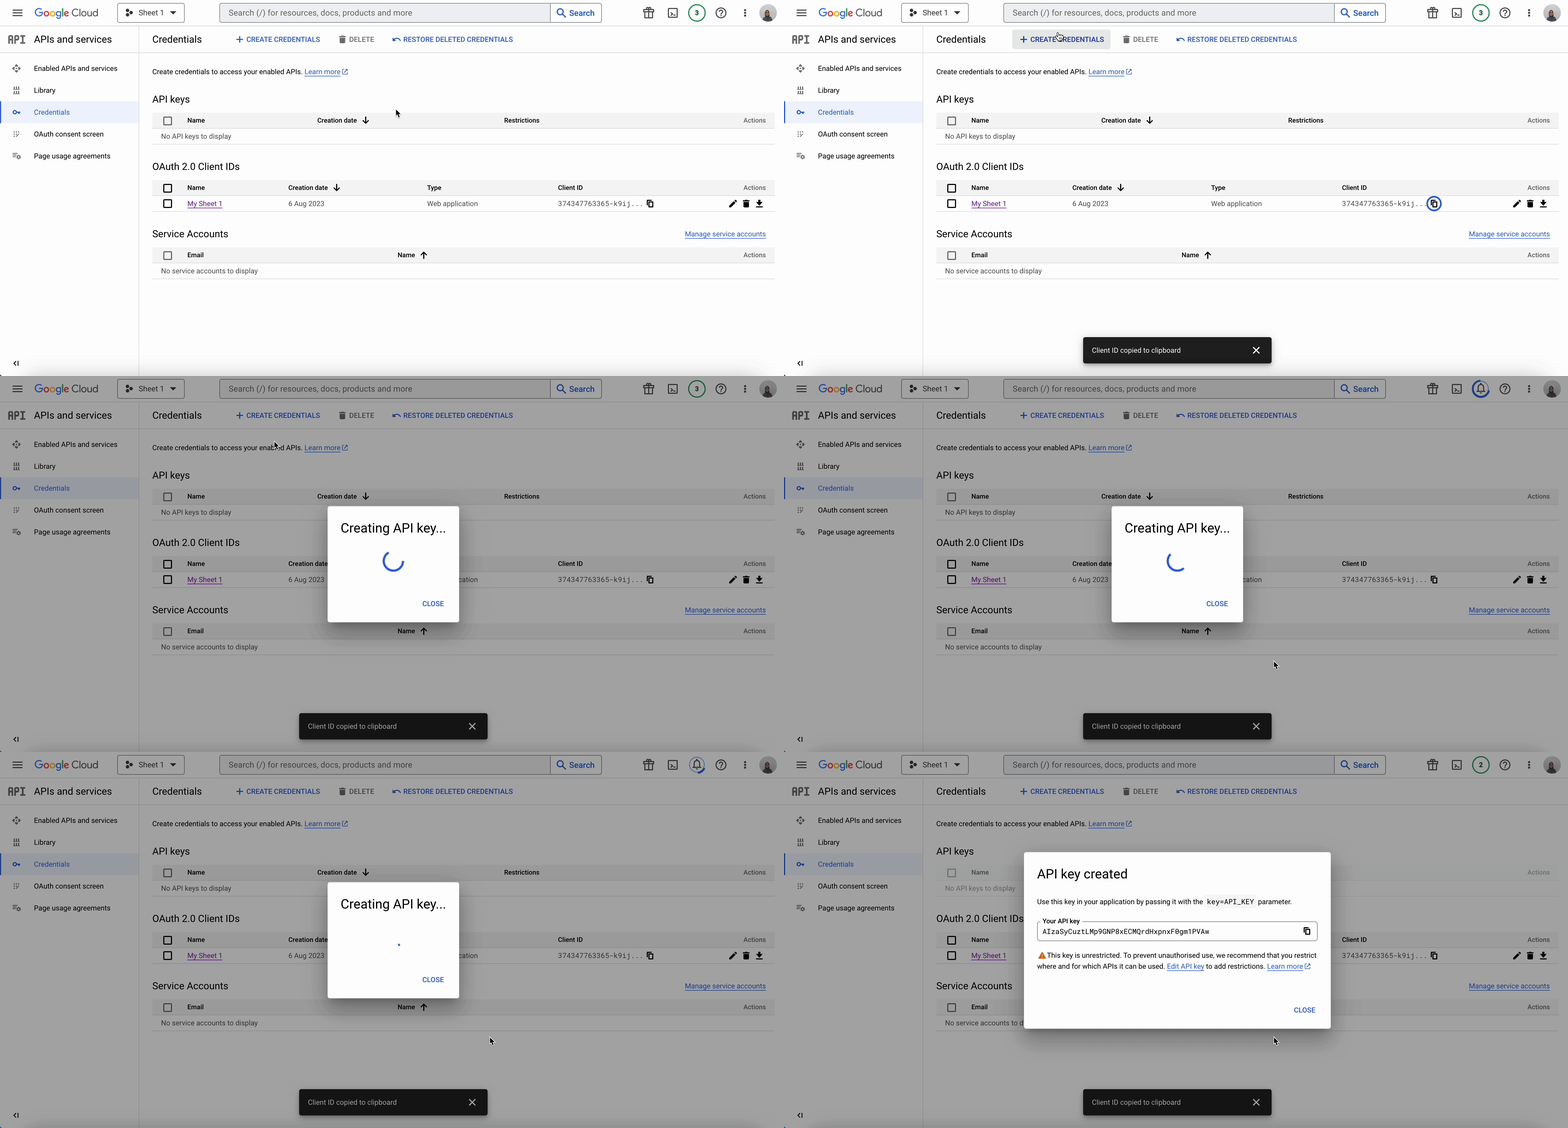
Now time to retrieve the Google Sheet API key. On the next page, click on the ‘+ Create Credentials’ button from the top bar. Select ‘API Key’ from there and the key will be created shortly.
Retrieve Sheet ID #
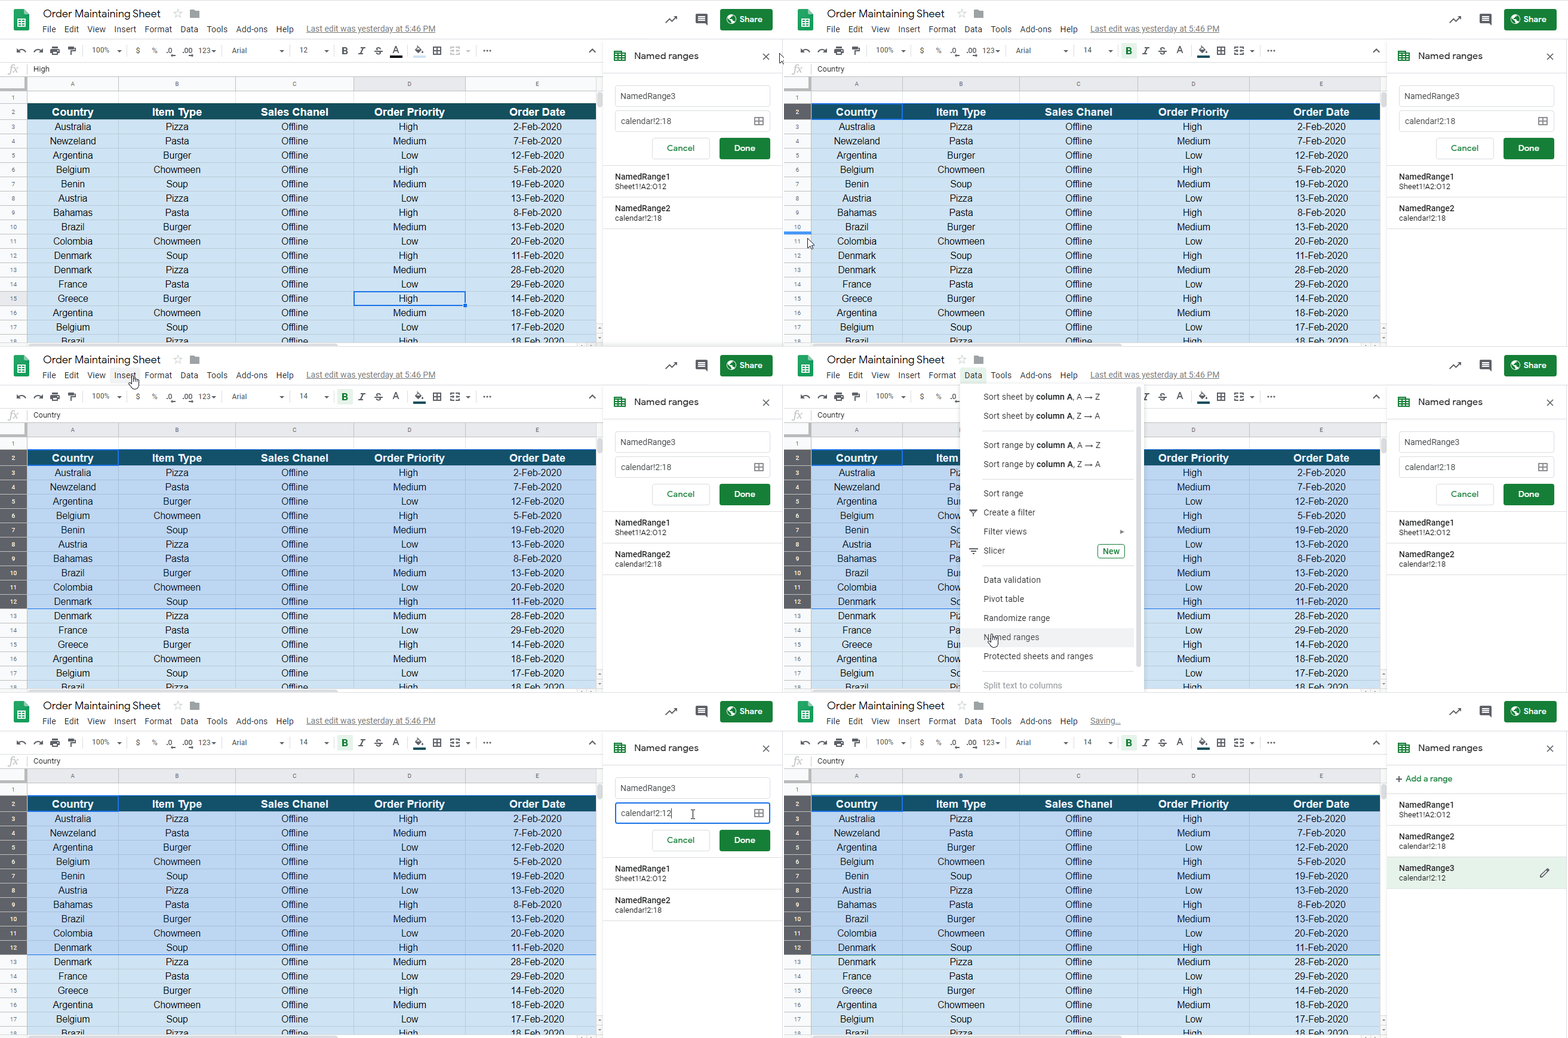
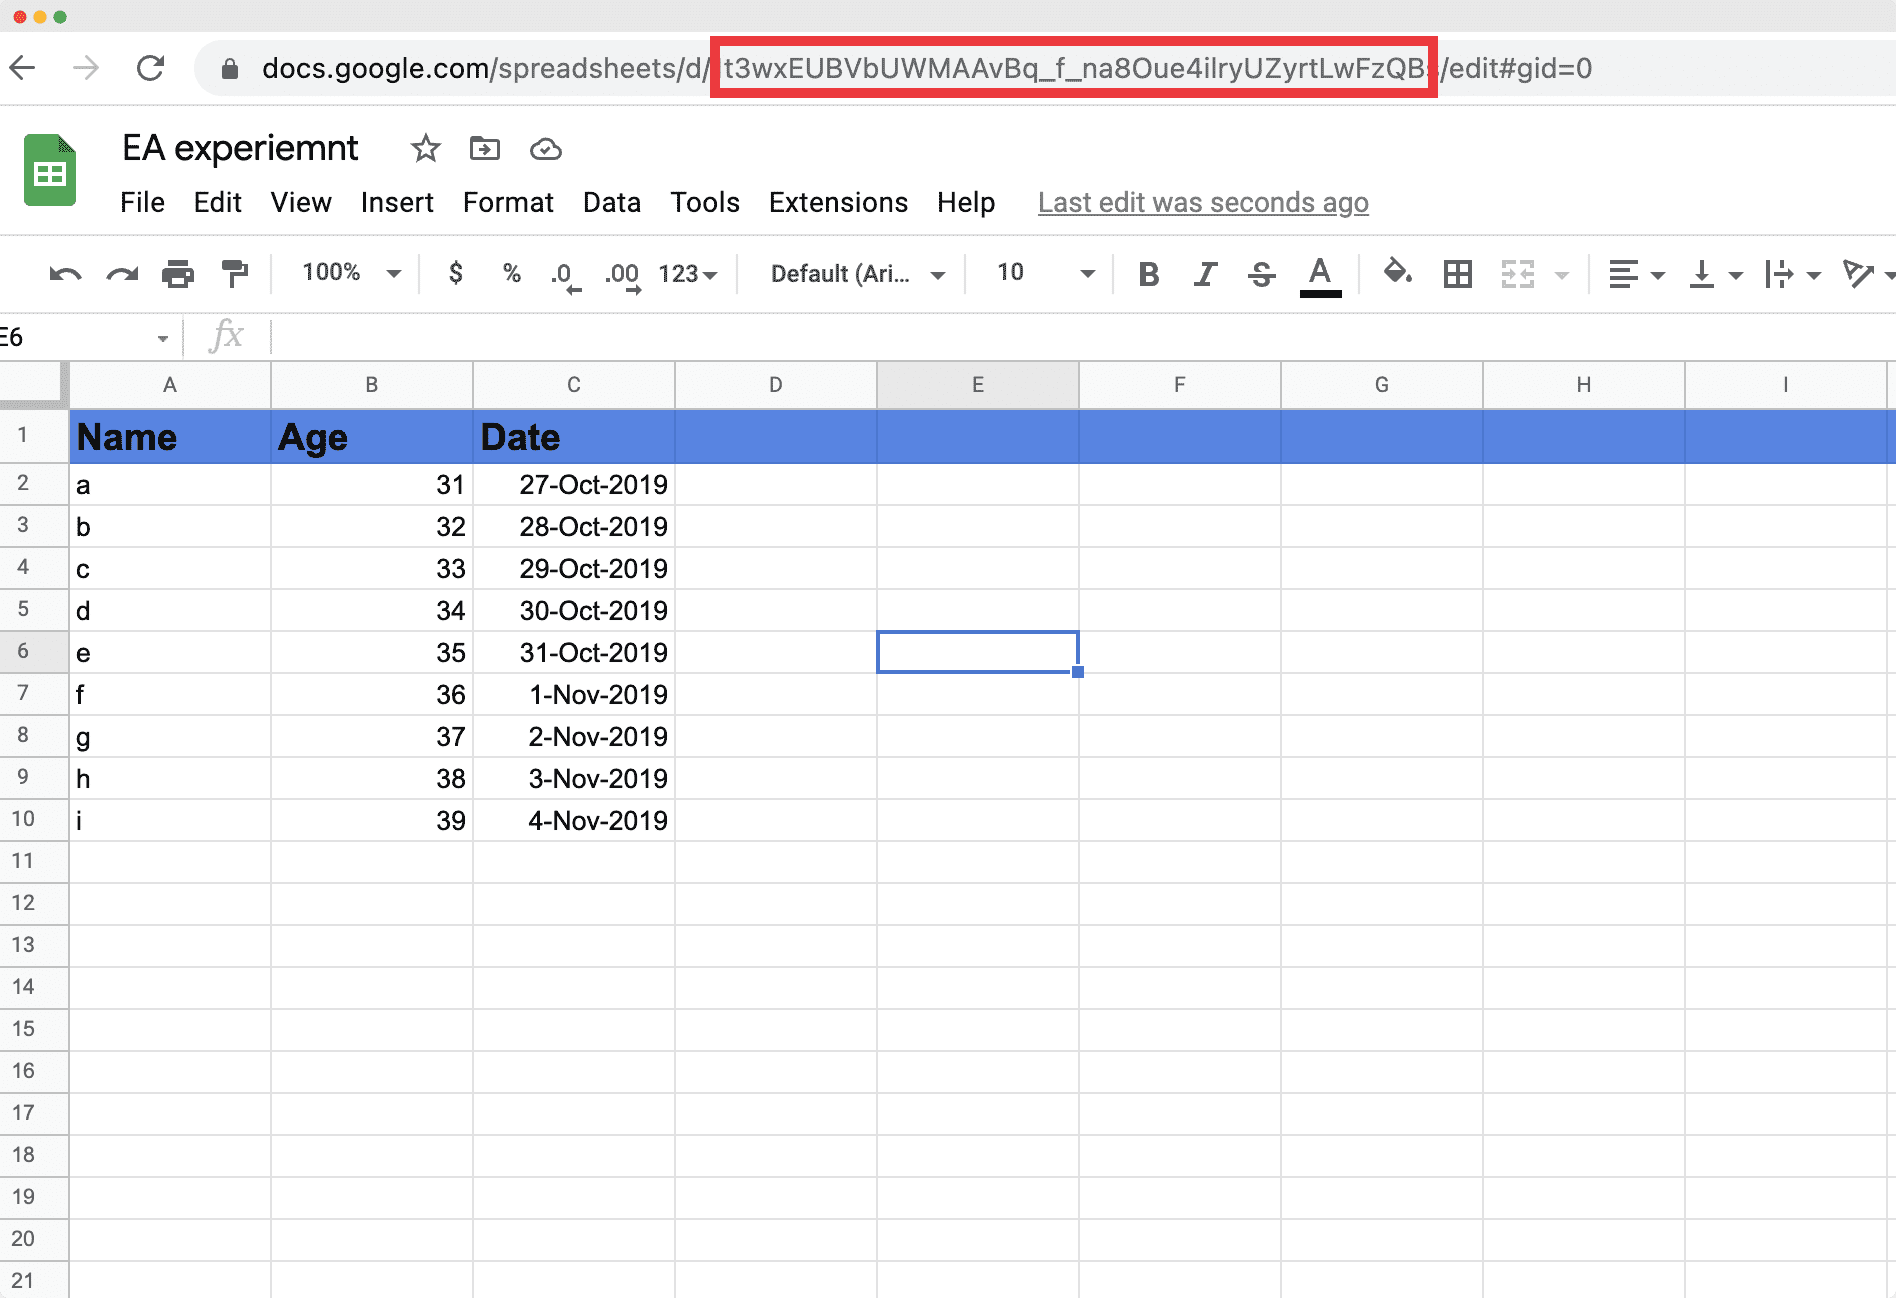
Now, let’s collect your Sheet ID from the top of your Google Sheet. The ‘Sheet ID’ is the value between the “/d/” and the “/edit” in the URL of your spreadsheet.
Pick a Range #
Then, pick your Table Range from the Google Sheet which you want to display on your EA Advanced Data Table. From Data tab, click on the ‘Name Ranges’and then rename it.
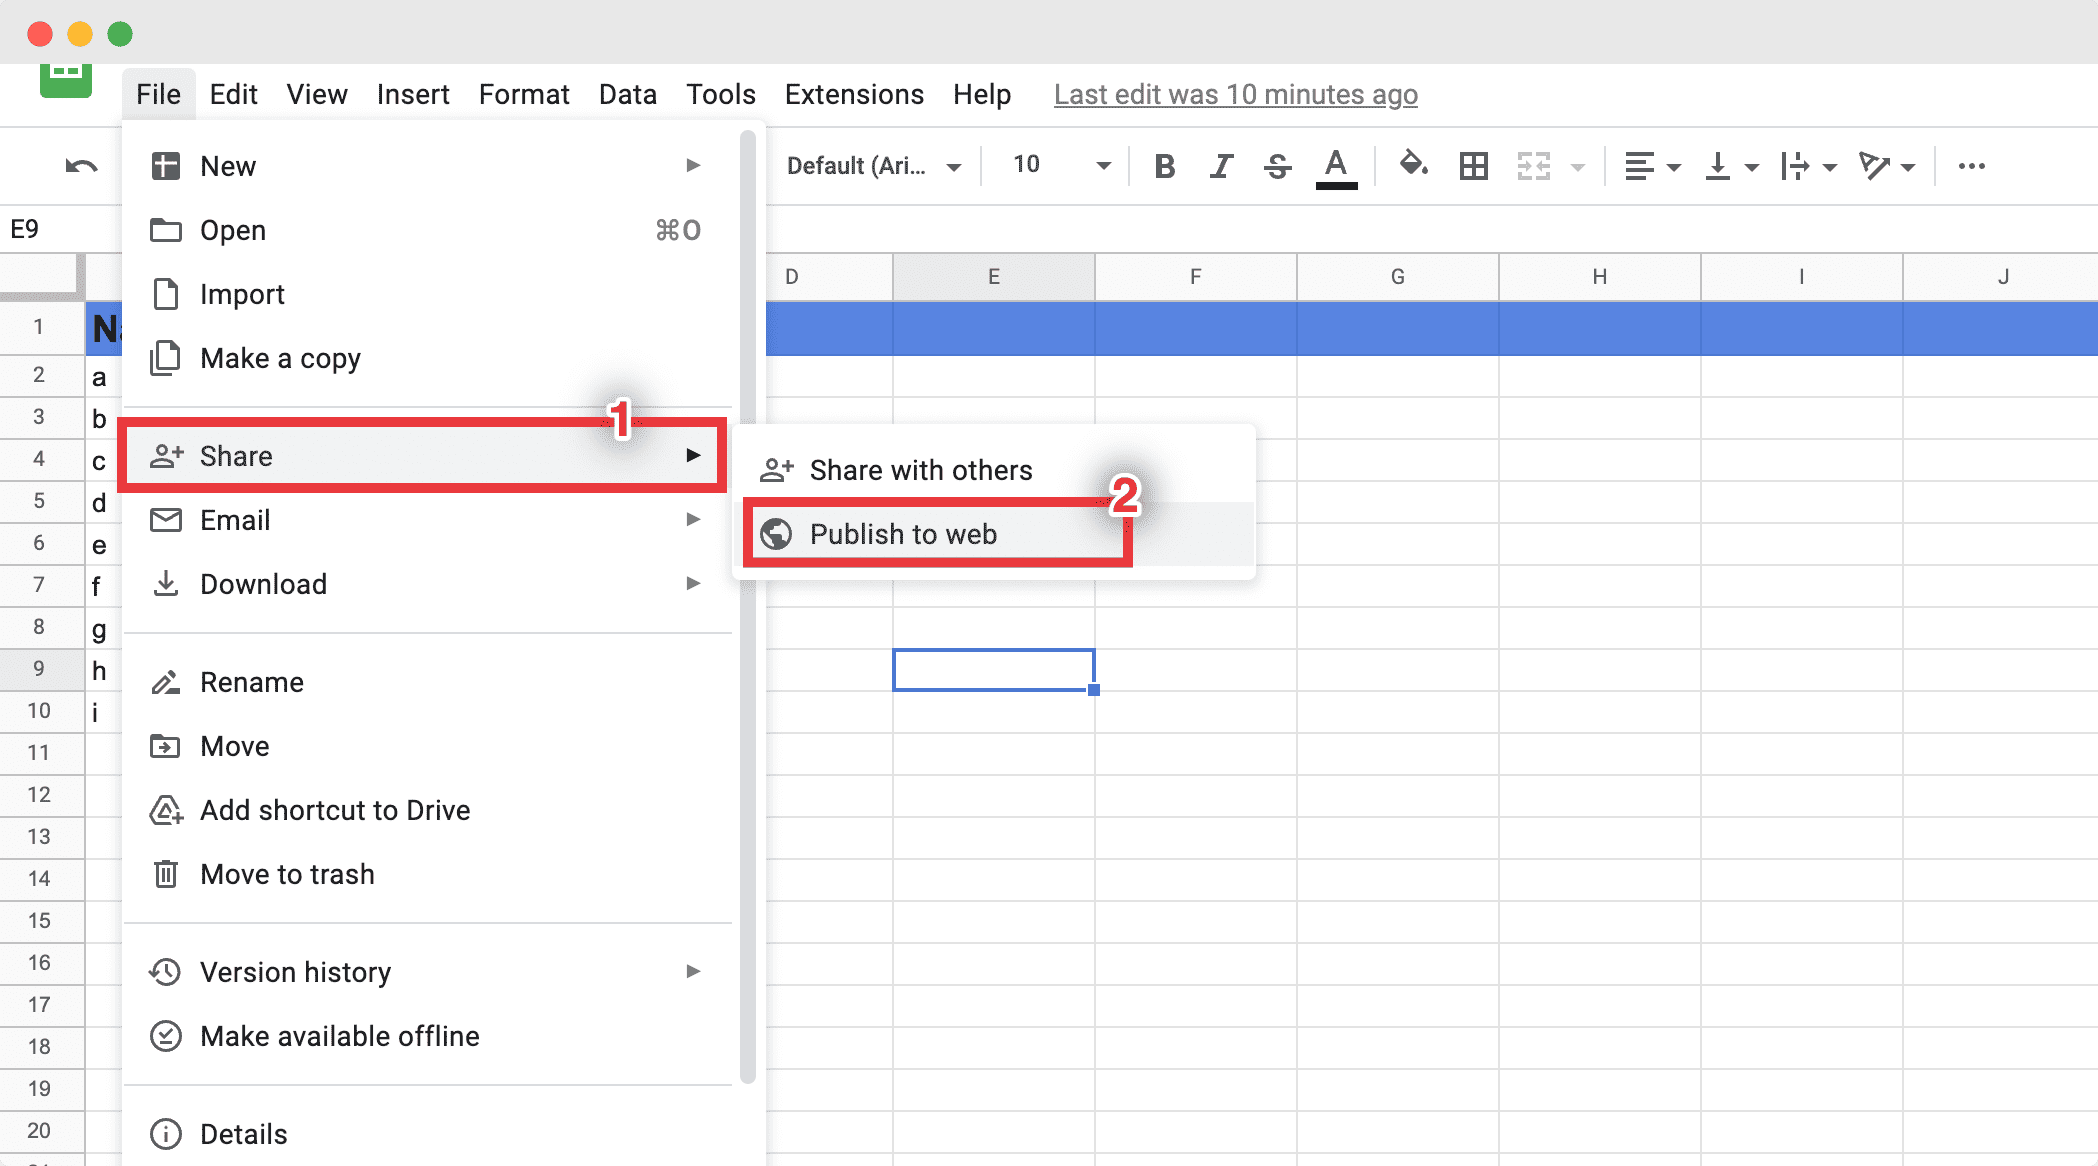
Note: You should share your Google Sheet with the public and make it visible on your website. To do that, you have to go to the Google Sheet>File>Share> Publish On The Web. Click on the ‘Publish’ button to make the sheet live on the web.
Connect Google Sheet with EA Advanced Data Table #
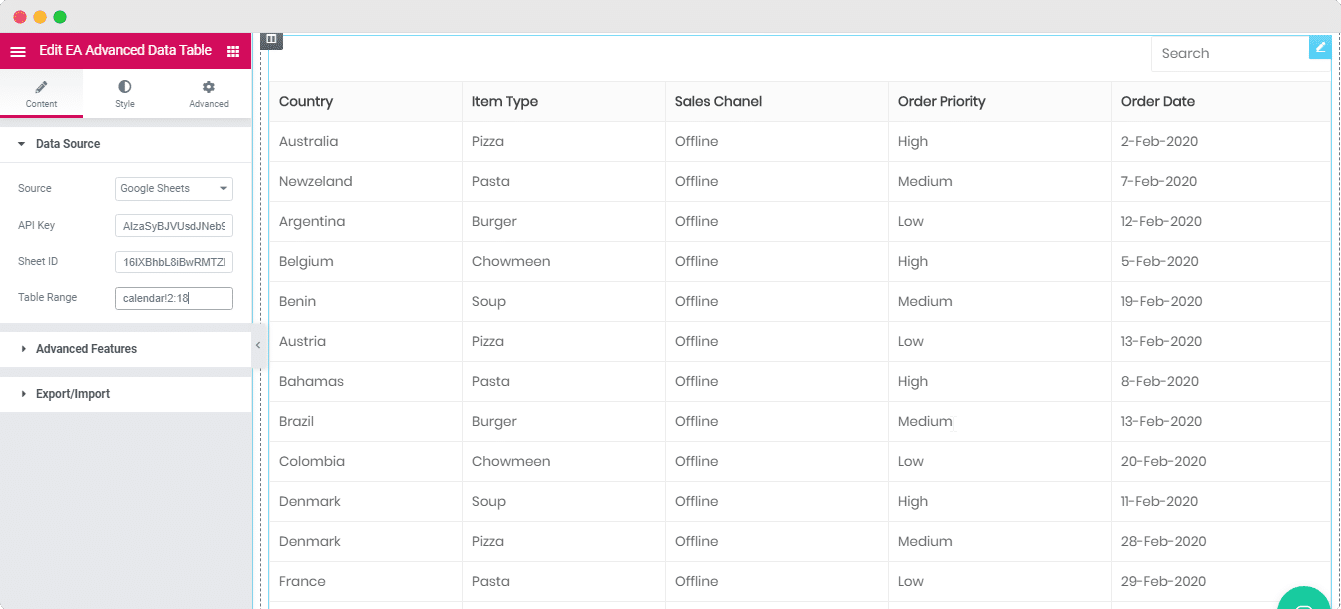
Now, choose the source to ‘Google Sheet’. Then copy and paste the ‘APP Key’, ‘Sheet ID’, and ‘Table Range’ and it will automatically display the table on your EA Advanced Data Table.
How To Integrate EA Advanced Data Table With TablePress? #
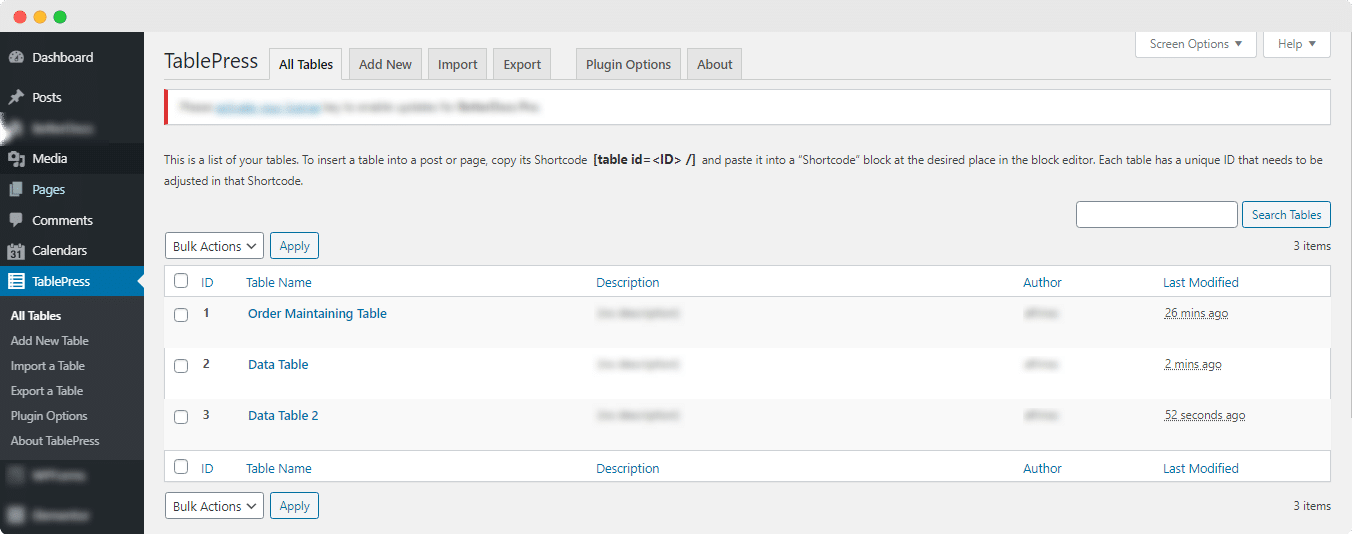
You have to install and activate the TablePress plugin first to display its table on the WordPress site using EA Advanced Data Table. Then just create a table on it. After that, it will automatically be placed in EA Advanced Data Table.
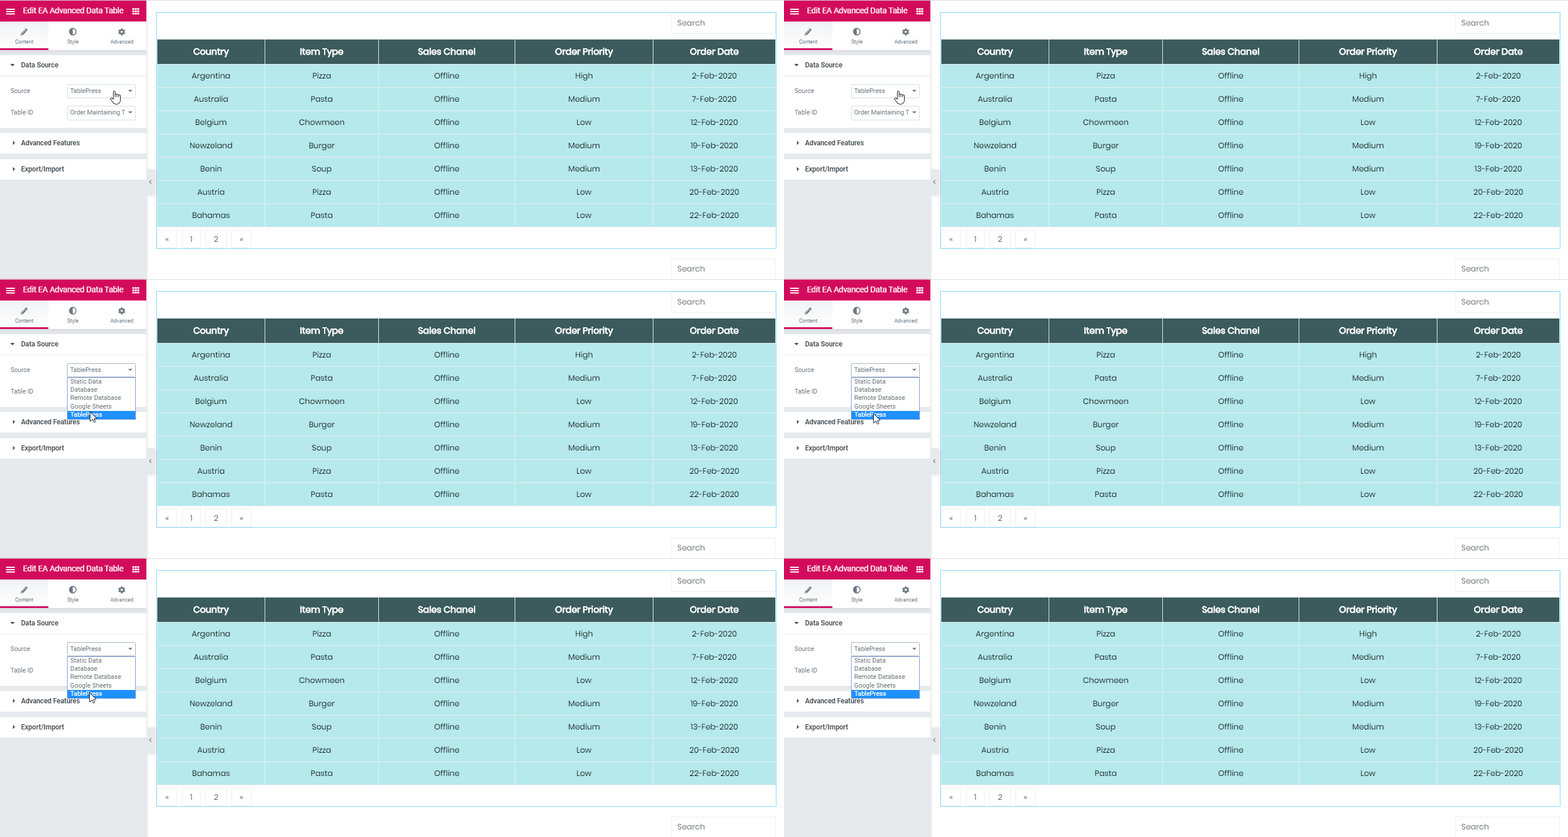
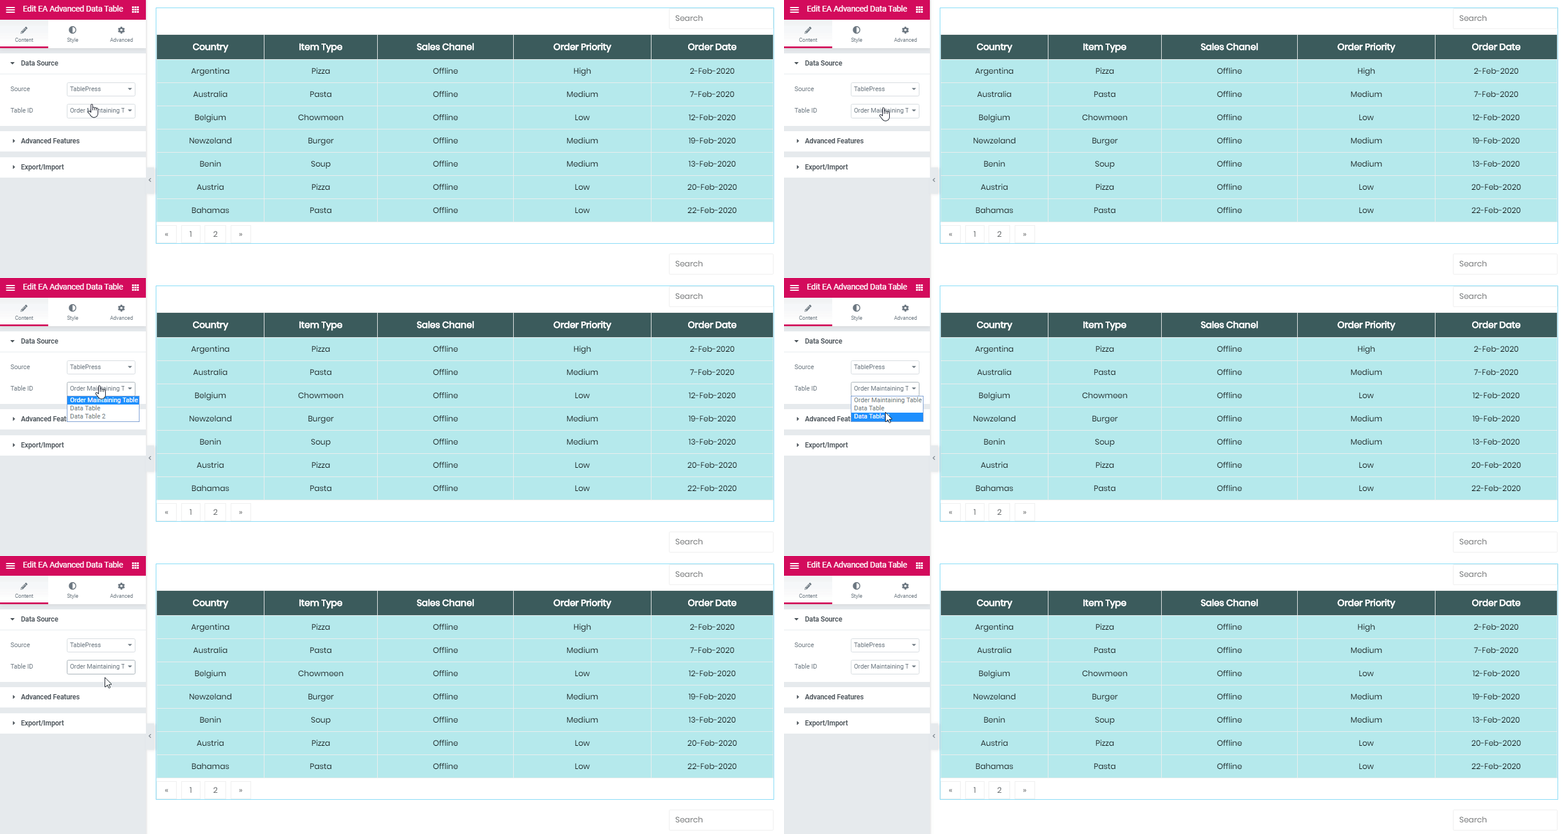
You need to select the Source to TablePress first.
Afterward, you can choose your ‘Table ID’ which you want to show. Just click on a table id and it will display the entire layout.
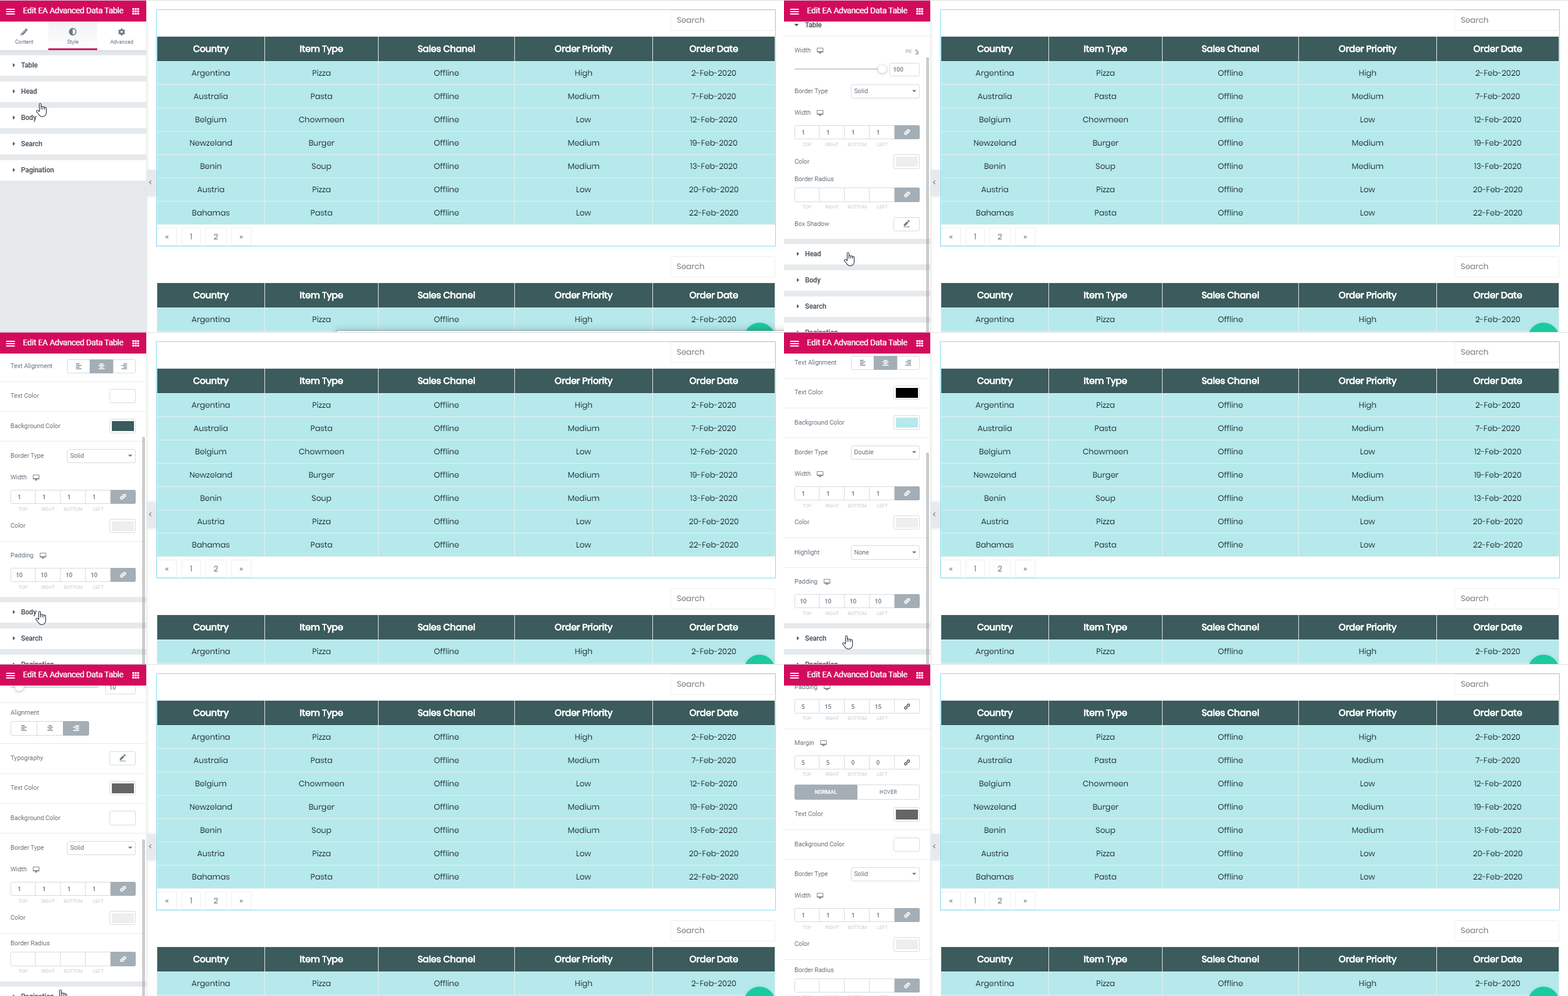
If you want, you can customize your table from the Style section of the EA Advanced Data Table and make it look standout.
How to Integrate NinjaTables With EA Advanced Data Table? #
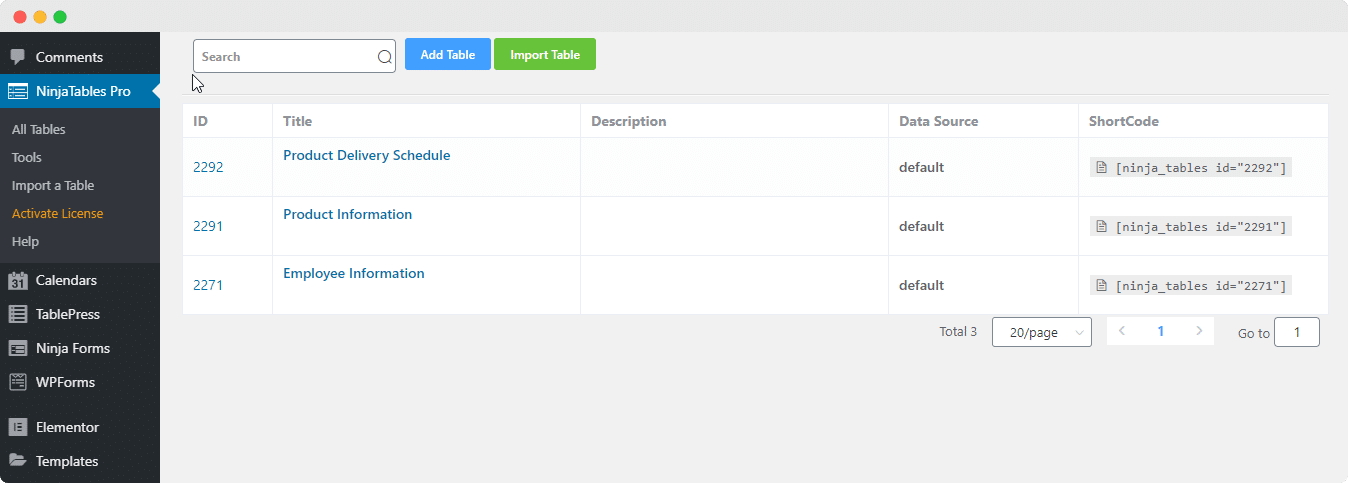
You have to install and activate the NinjaTables plugin first to display its table on the WordPress site using EA Advanced Data Table. Make sure that you have already created a table inside NinjaTables. Afterward, you can easily connect it with EA Advanced Data Table.
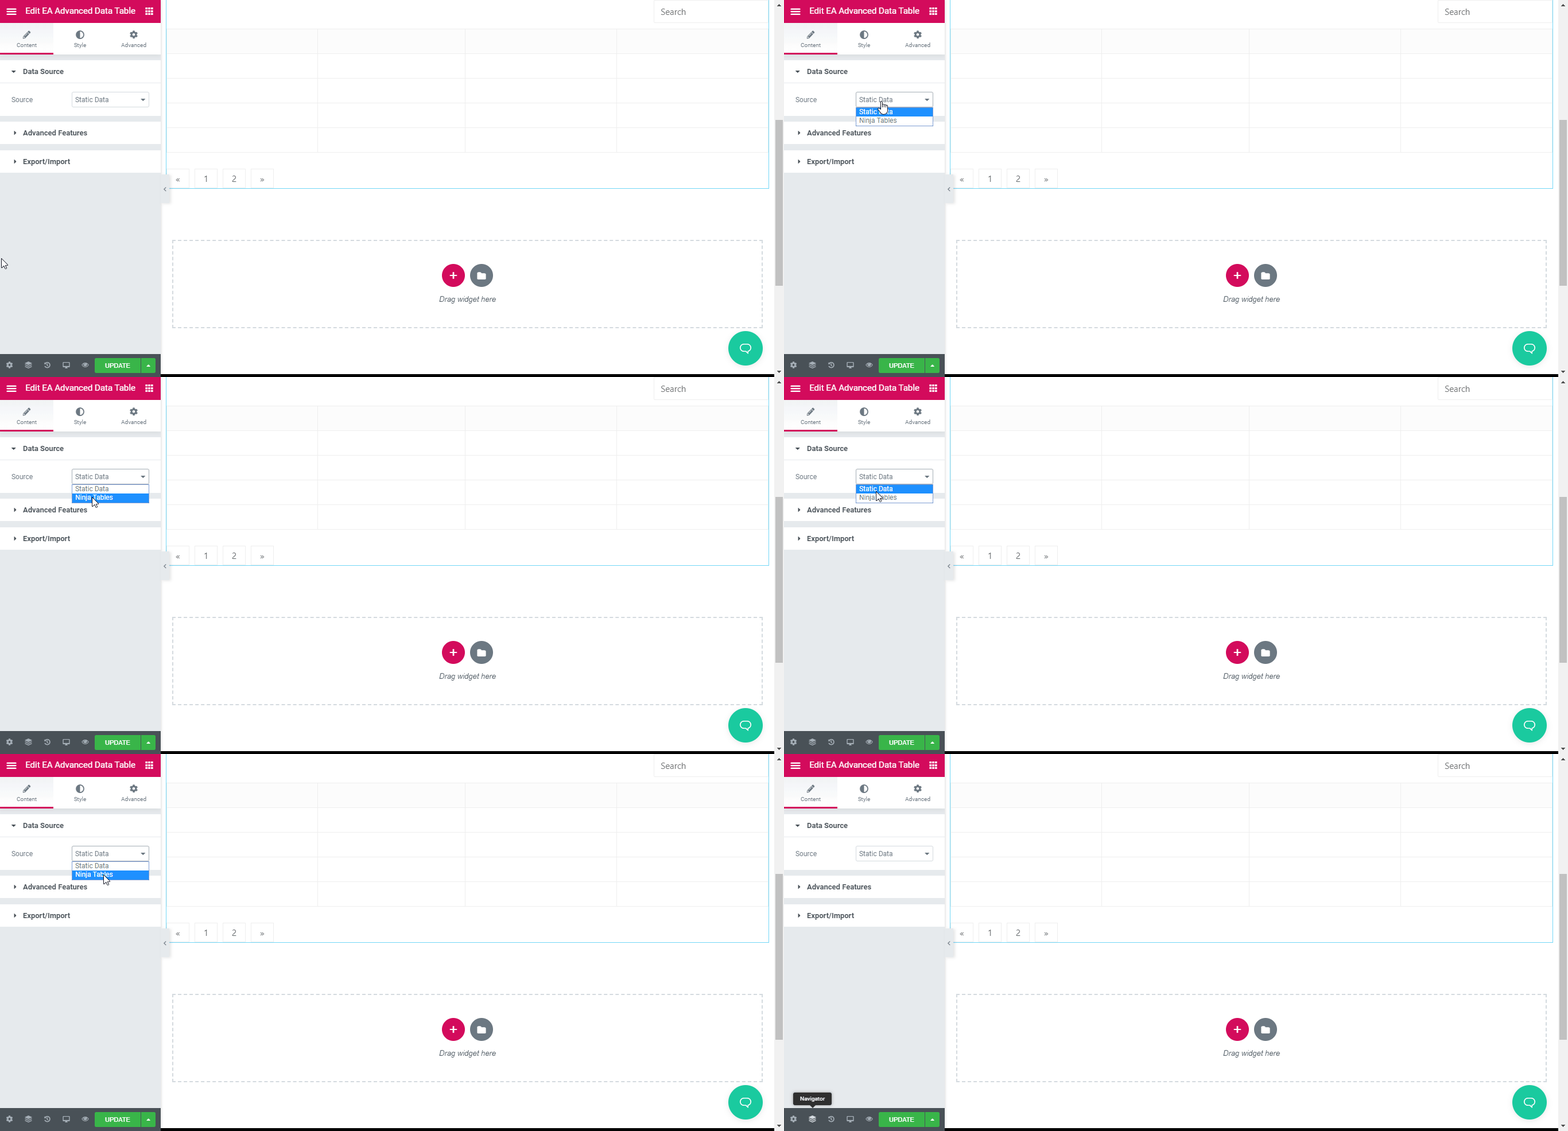
From ‘Data Source’ section of EA Advanced Data Table, you can pick NinjaTables as ‘Source’.
Afterward, you can choose your ‘Table ID’ which you want to show. Just click on a table id and it will display the entire layout.
If you want, you can customize your table from the ‘Style’ section of the EA Advanced Data Table and make it look standout.
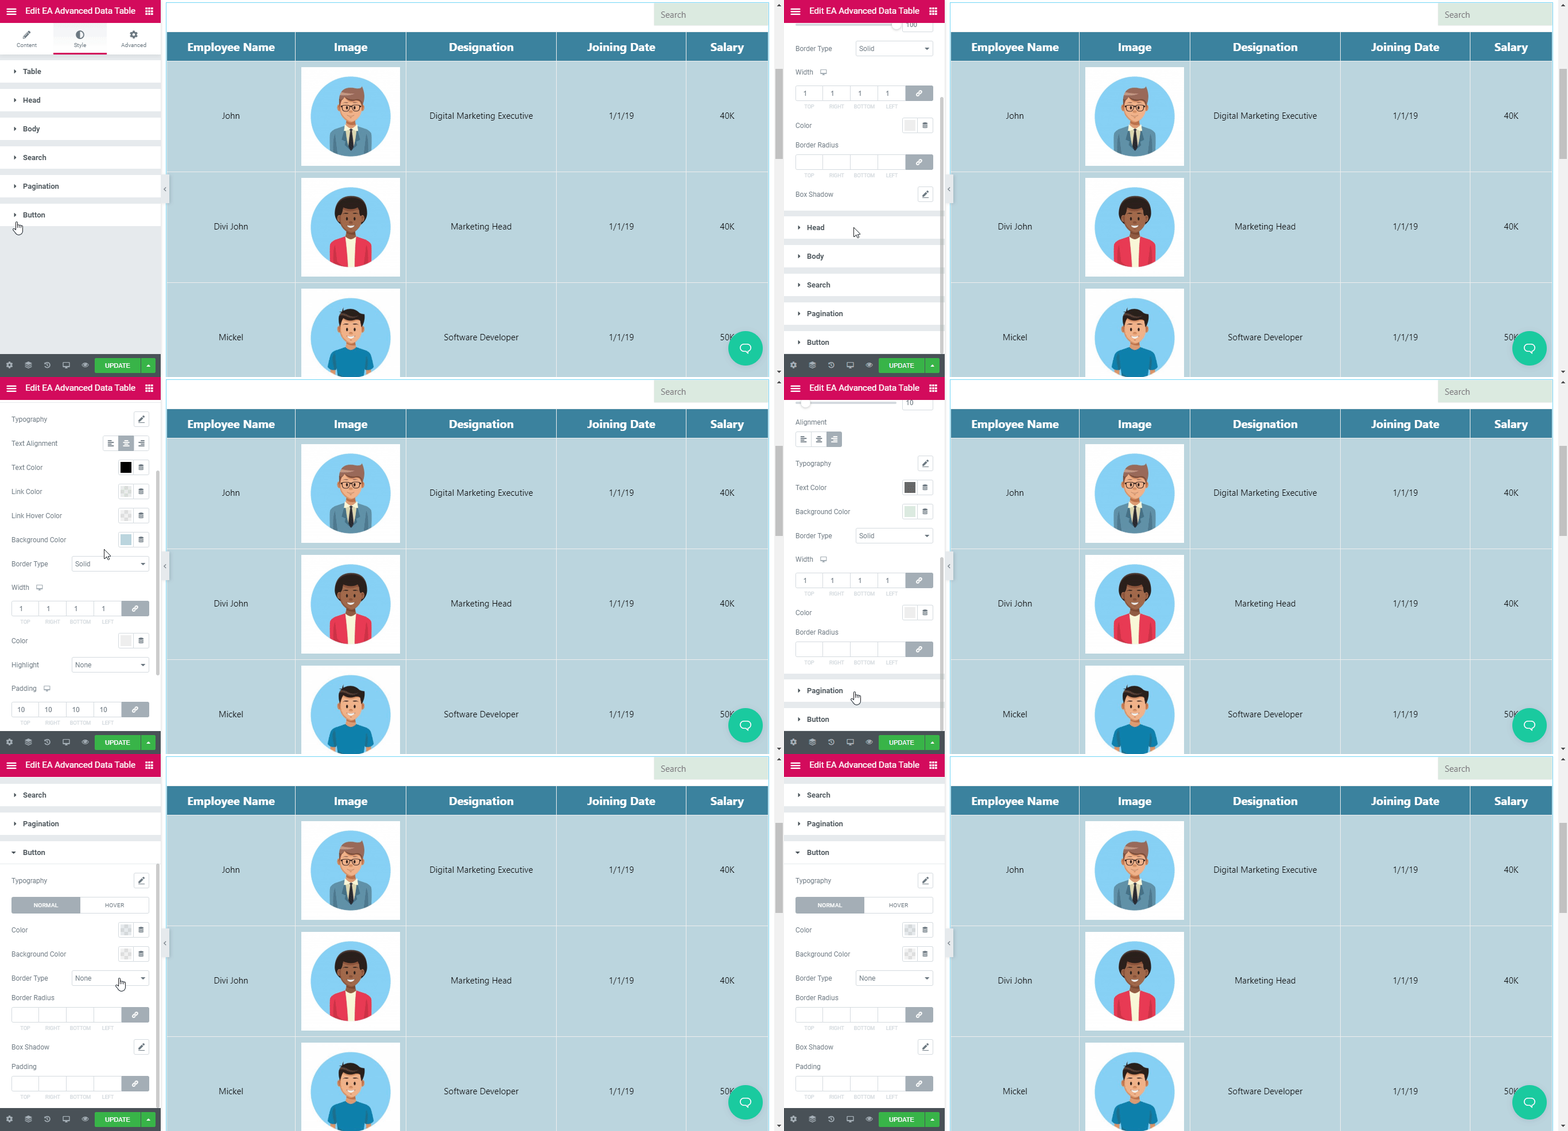
This is how you can easily integrate Ninja Table with EA Advanced Data Table and create a stunning data table with Elementor.


