EA Woo Checkout is a useful element that helps you quickly design beautiful Checkout pages for your WooCommerce Store. It comes with a unique option that lets you style your WooCommerce Checkout page within Elementor. Now, you can create stunning, attractive Checkout pages in three beautiful layouts, including Split and Multi Steps Layout, with just a few clicks.
How to Set Up WooCommerce Checkout Page #
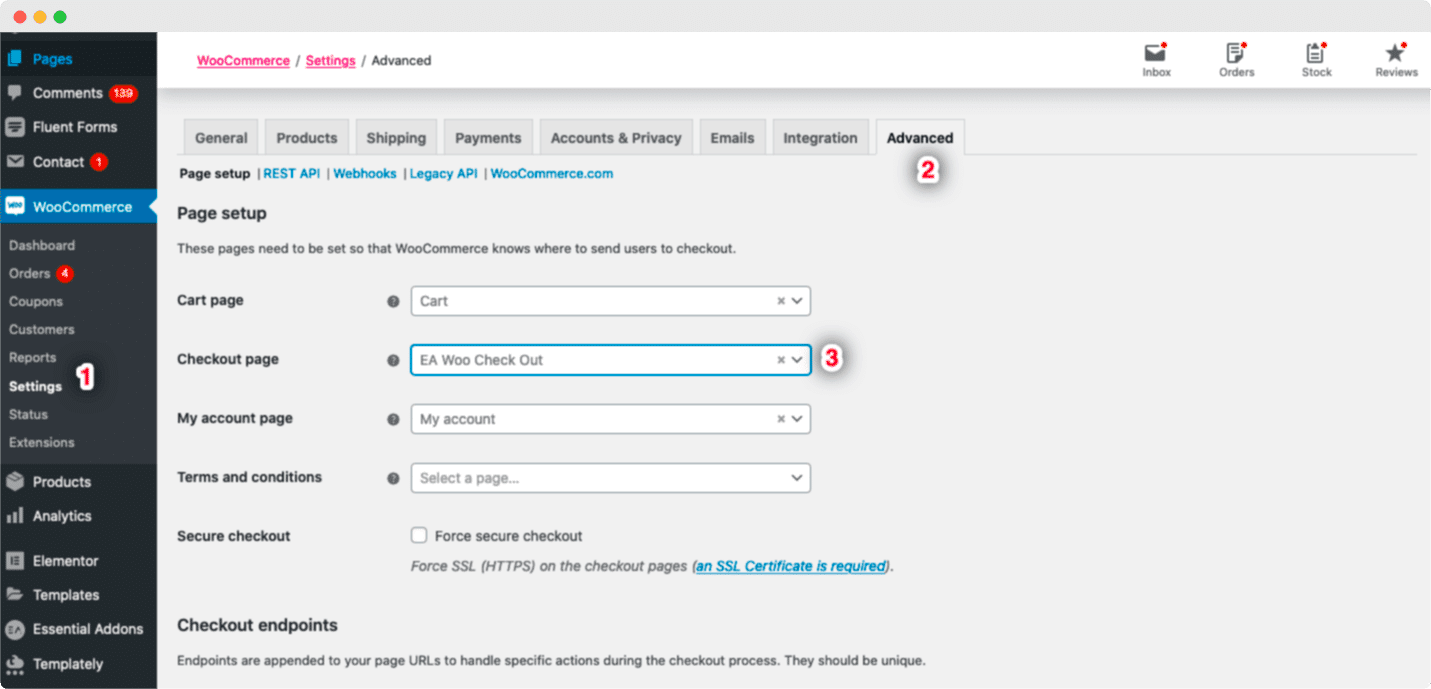
First of all, you must make sure that you already have installed and configured the WooCommerce plugin. To use EA Woo Checkout, you will need to replace the default Checkout page with another page of yours. If you want, you can even create a new page and assign it as WooCommerce Checkout page.
Afterward, navigate to WooCommerce ->Settings from your WordPress Dashboard and click on the ‘Advanced’ tab. From here, you can assign your desired page as your Checkout page. Simply click on the Checkout page option and pick any of the pages from the drop-down menu as your WooCommerce Checkout page. You will be all set to go.
How to Activate EA Woo Checkout #
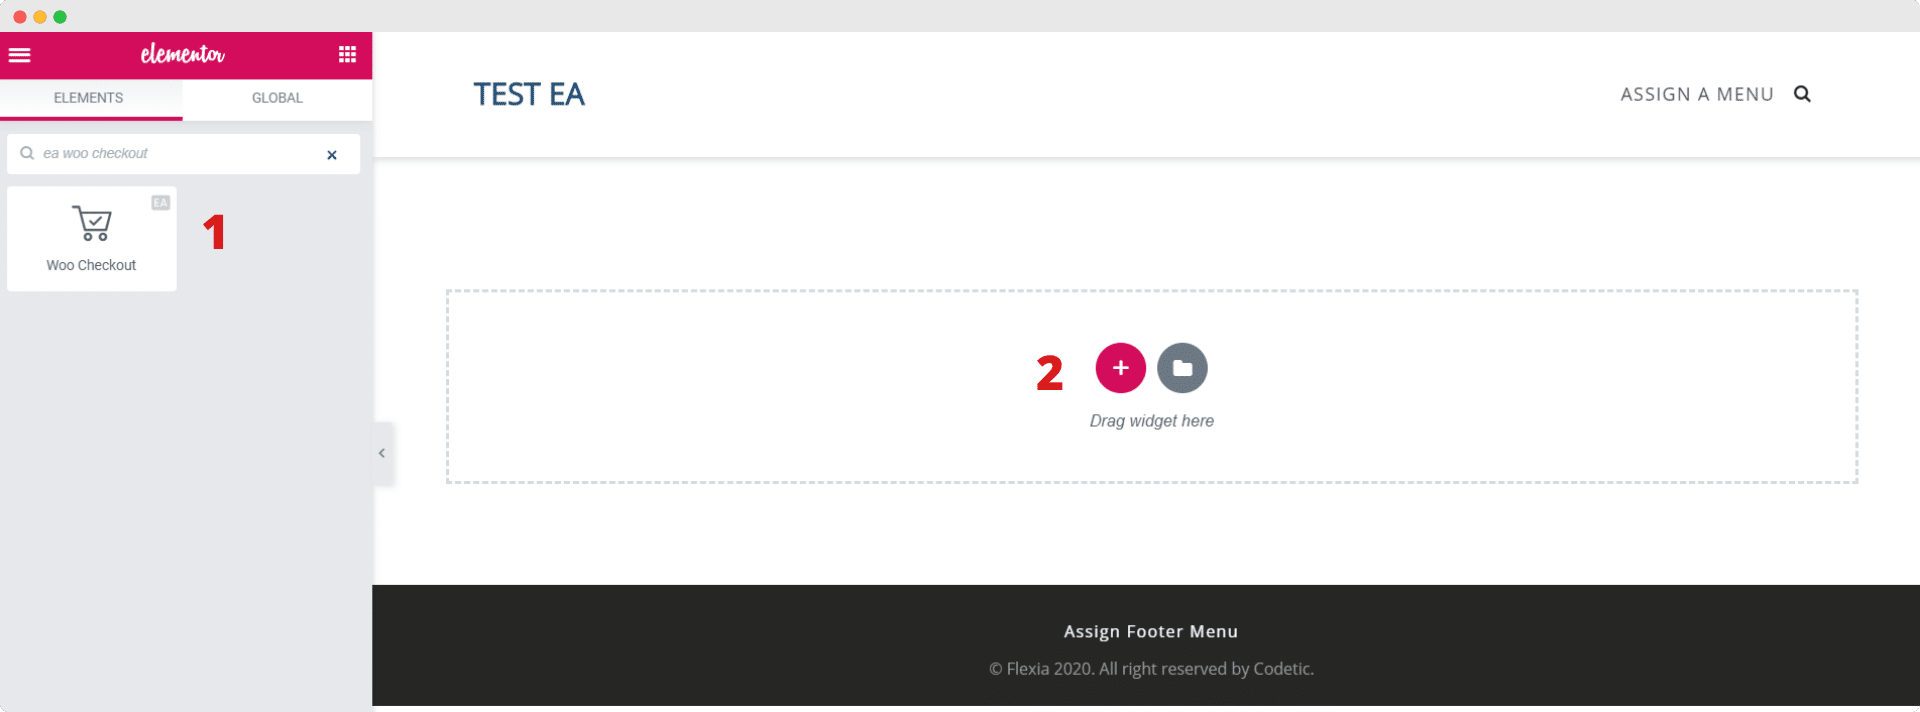
After finishing the previous step, let’s edit your WooCommerce Checkout page using the Elementor Editor. To use this Essential Addons element, find the ‘EA Woo Checkout’ element from the ‘Search’ option under the ‘ELEMENTS’ tab. Simply just Drag & Drop the ‘Woo Checkout’ element into the ‘Drag widget here‘ or the ‘+’ section.
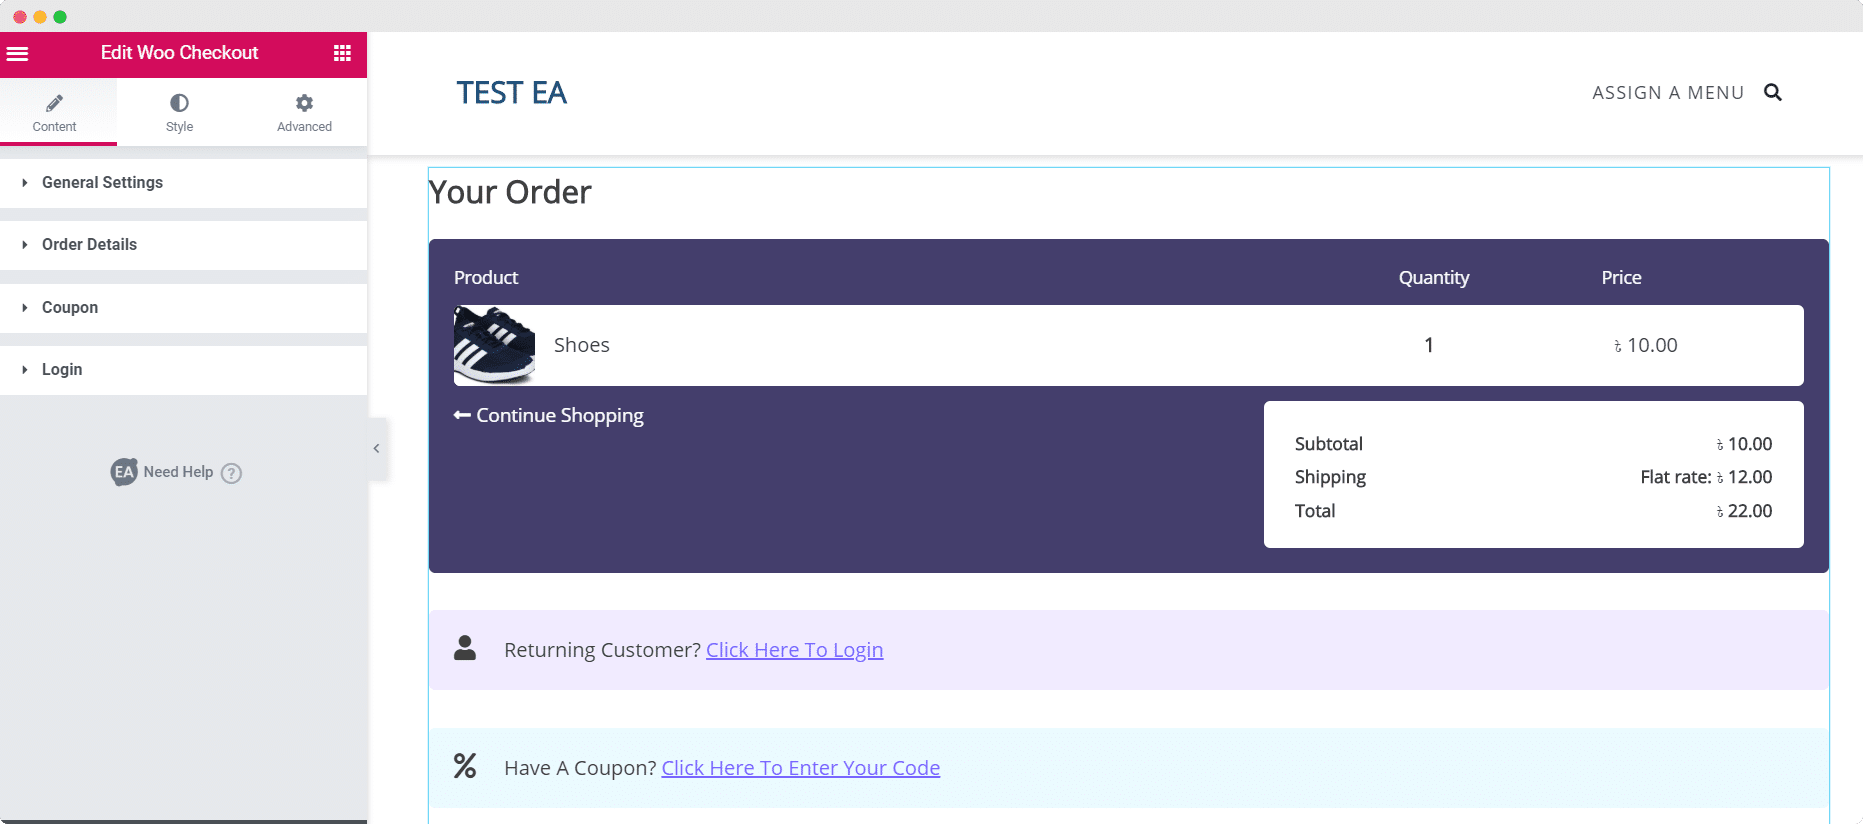
After you have dragged and dropped the element into your page, the element will look like this:
How to Configure the Content Settings #
Under the ‘Content’ tab you will see several options such as General Settings, Order Details, and others. You can configure these settings to customize the content of your Woo Checkout page.
General Settings #
From this section, you can pick your preferred layout for your WooCommerce checkout page.
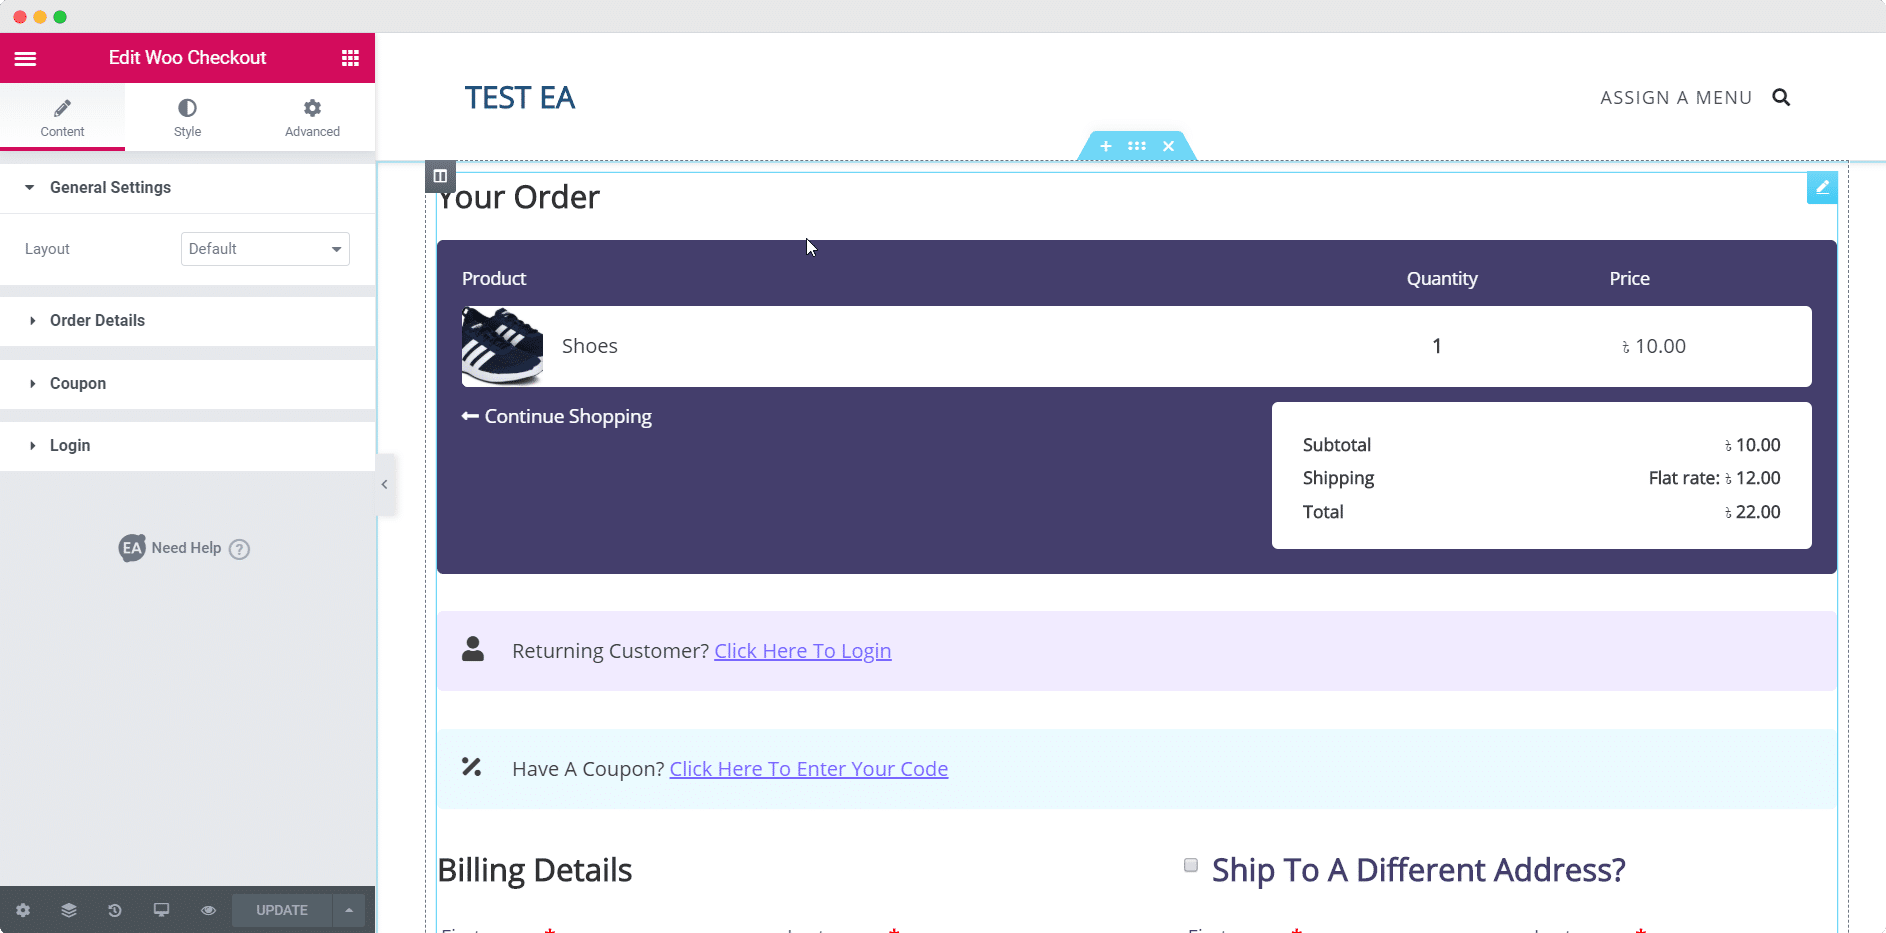
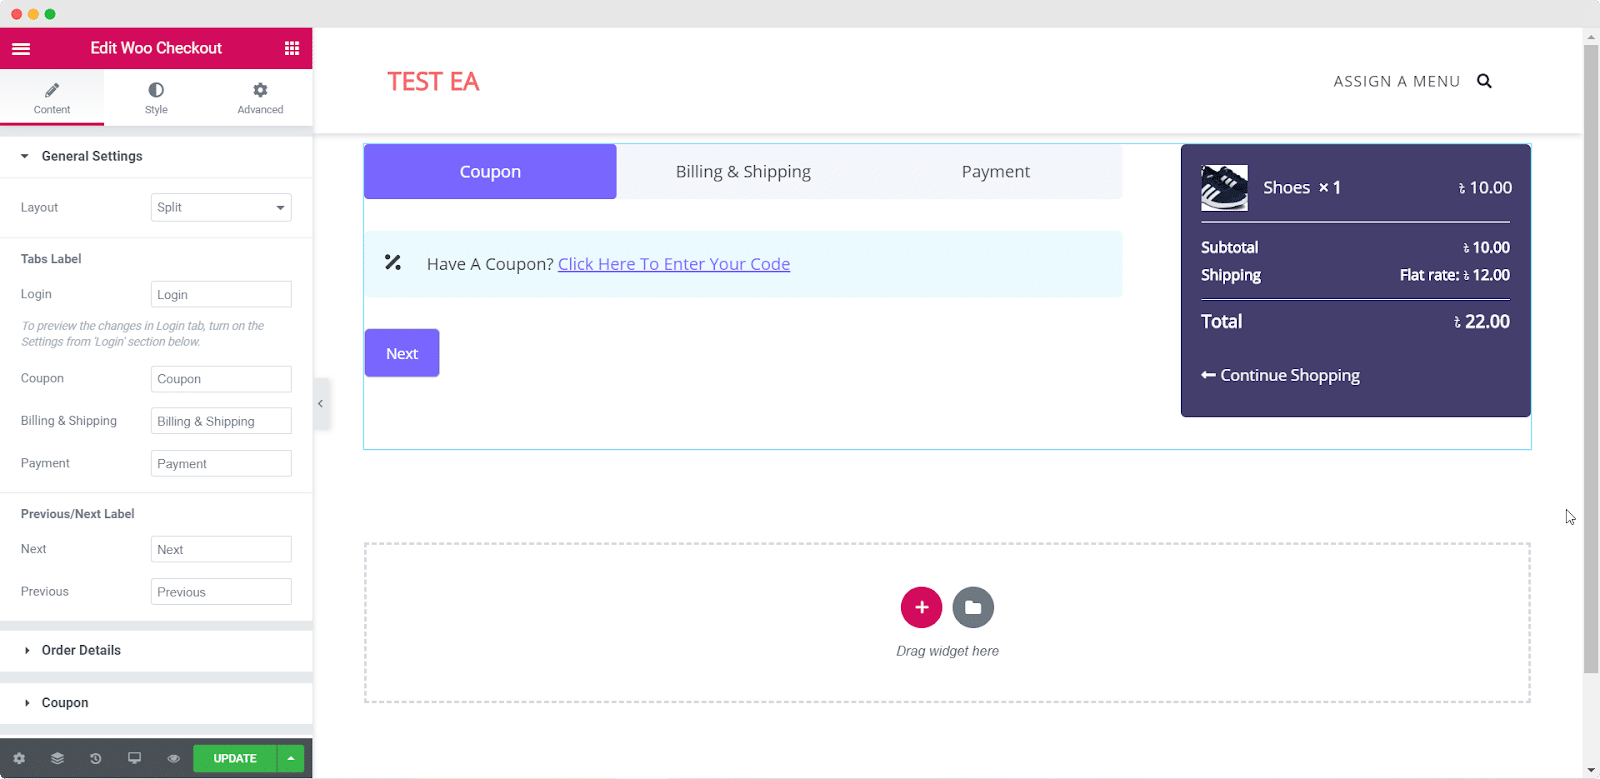
With Essential Addons Pro, you can choose between two more layouts–the Multi Steps Layout and the Split Layout. These layouts let you display multiple steps for your checkout process separately using ‘Tabs’. They also come with ‘Previous/Next’ buttons that are fully customizable.
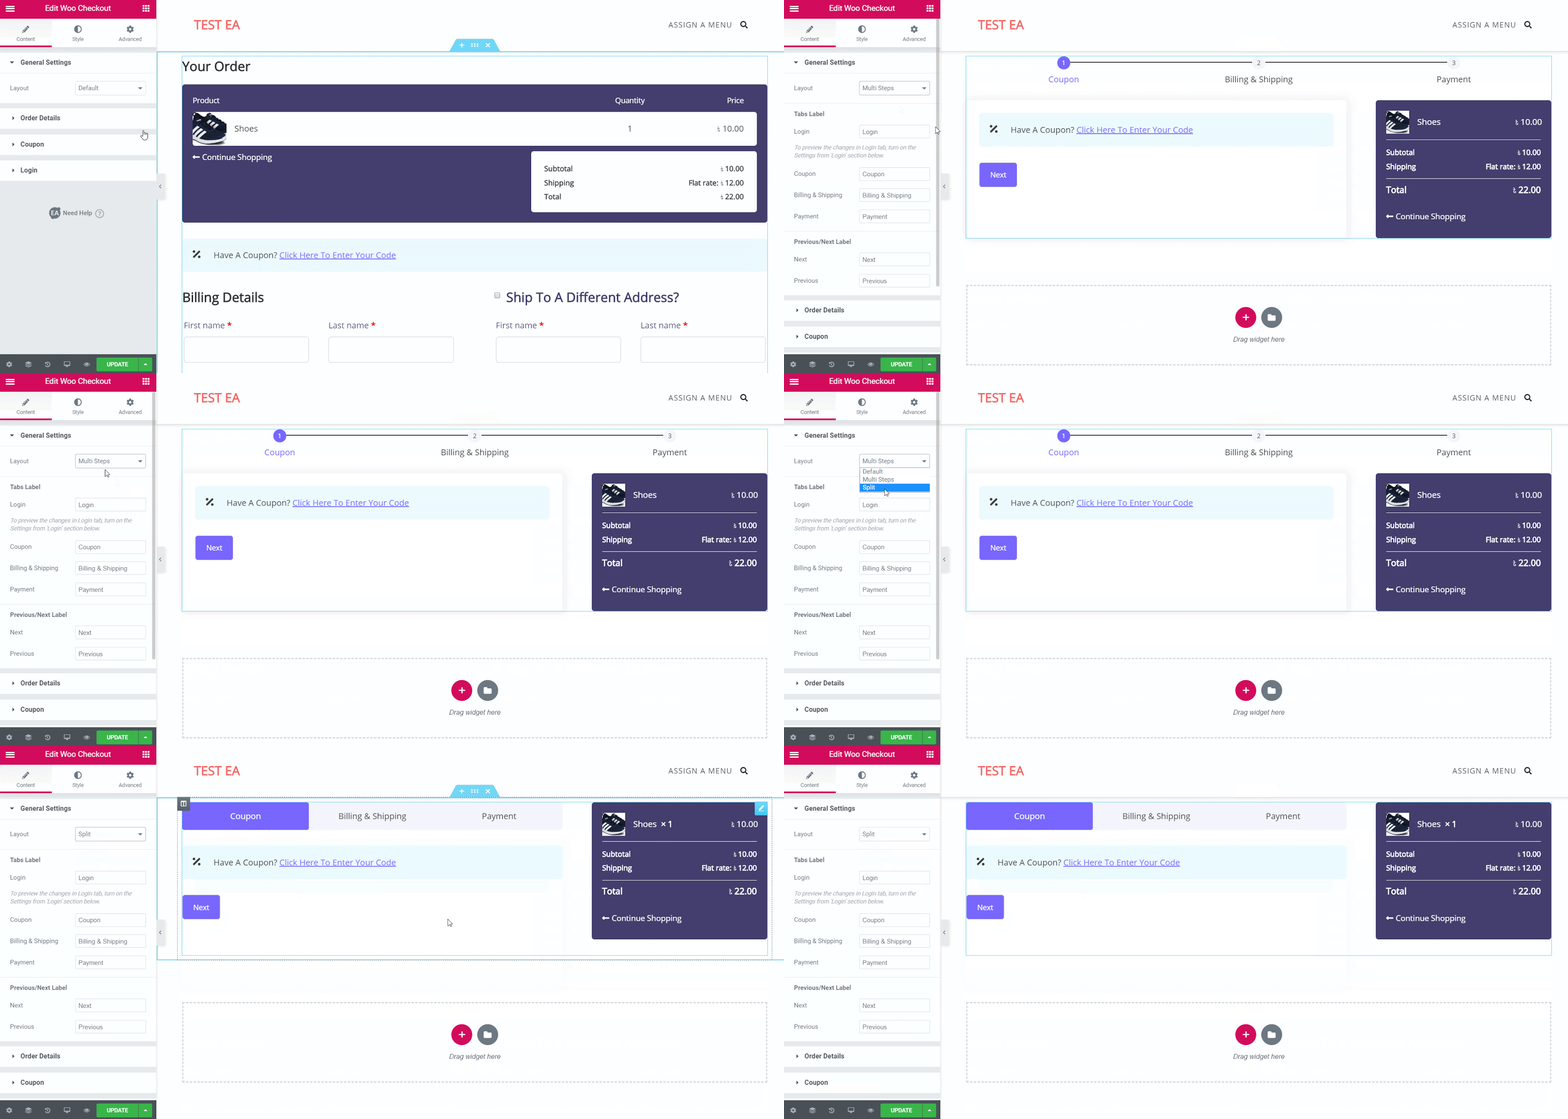
You can change the label for each step as well as the labels for your ‘Previous/Next’ buttons by editing the Tabs Layout option as shown below.
Order Details #
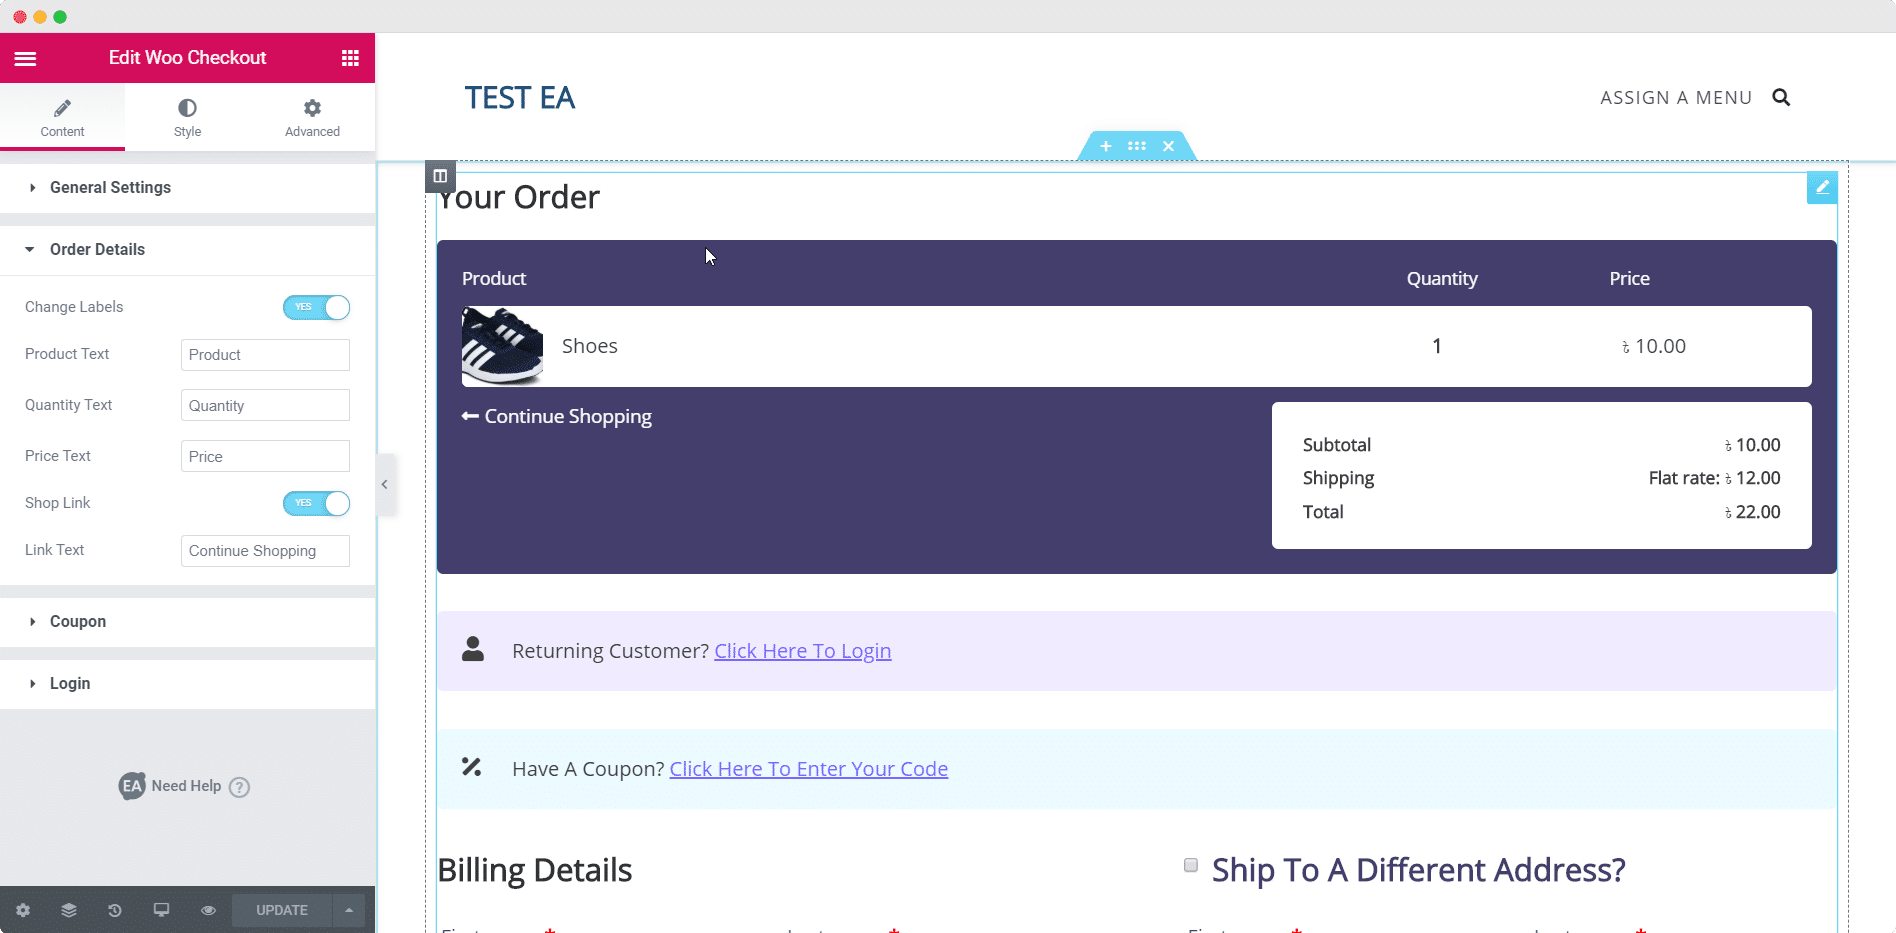
This setting allows you to edit the order details of your WooCommerce Checkout page such as the names for the labels for Products, Quantity, Price, and Shop link.
Coupon #
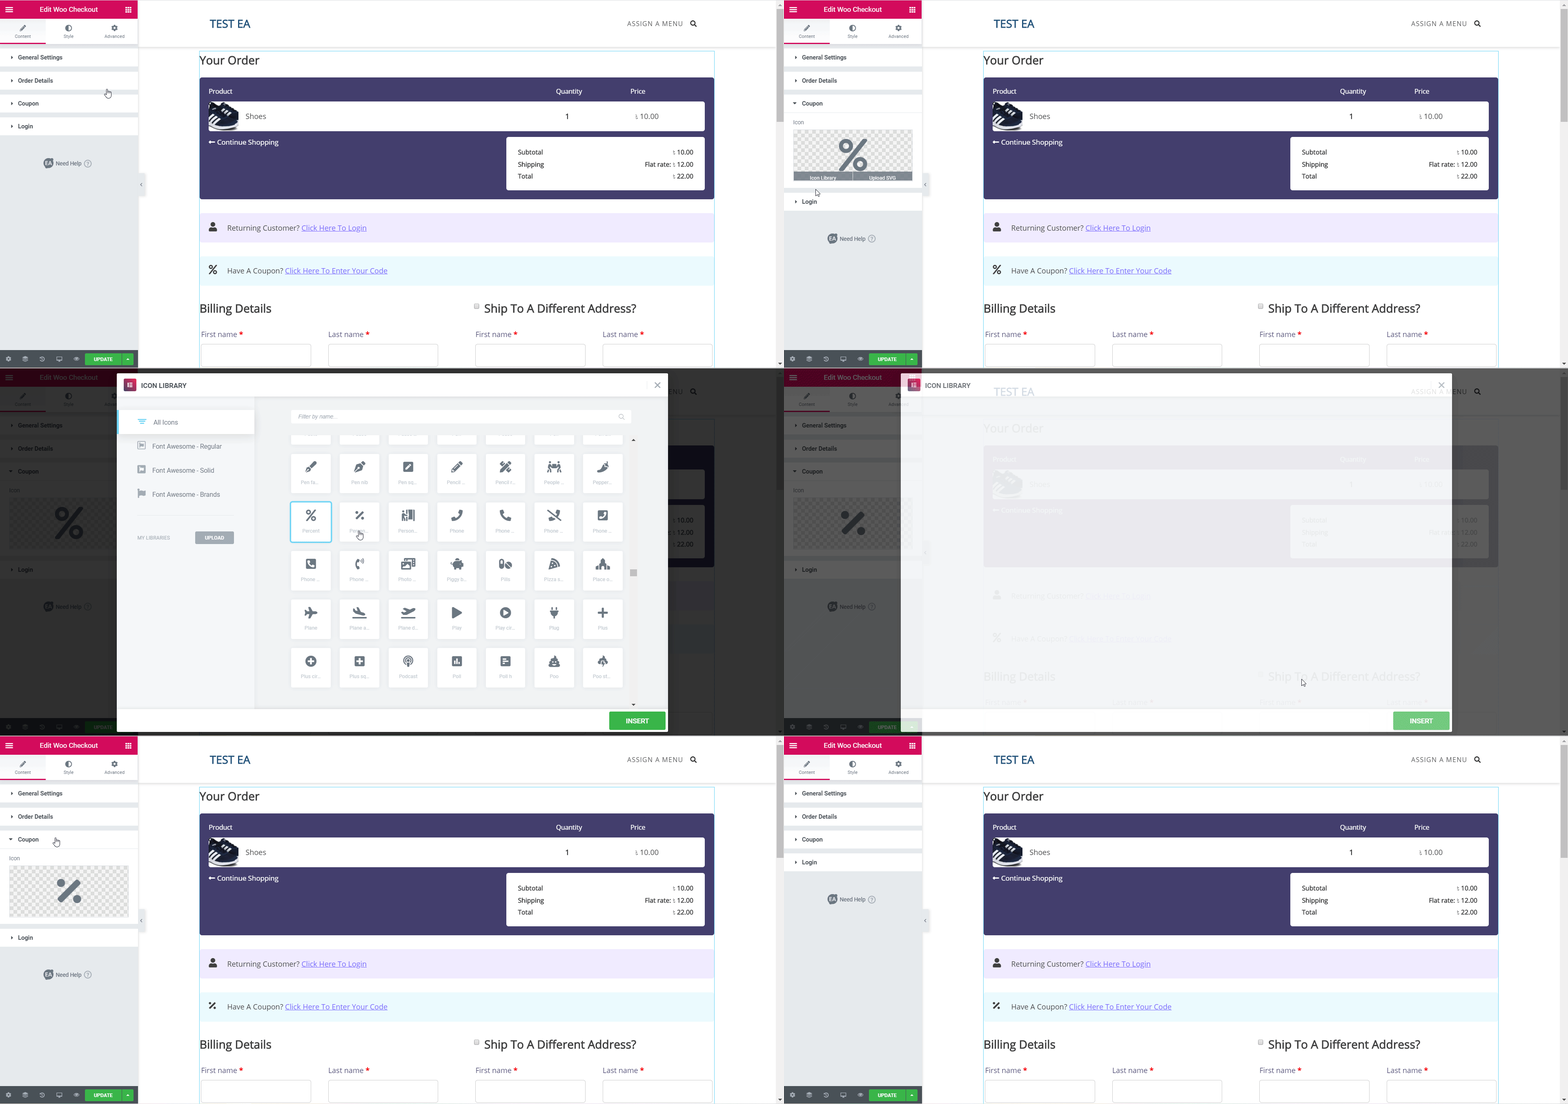
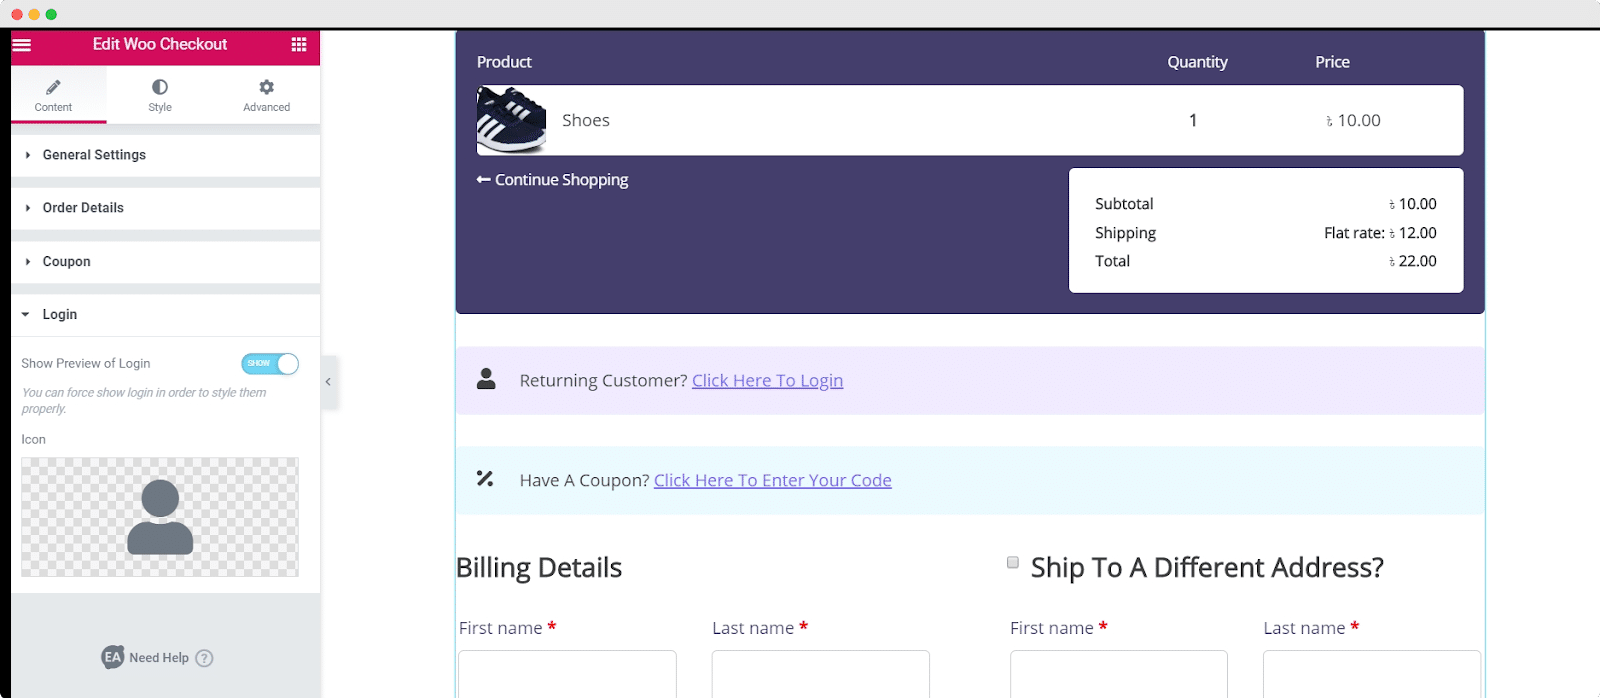
The Coupon section lets you choose icons for your Coupon area where customers can input their coupon codes to avail discounts (if they have any).
Login #
The Login section allows you to set icons for the login area for your customers when they are making a purchase. By enabling the toggle ‘Show Preview of Login’, you can edit the Login Form in real-time.
How to Style EA Woo Checkout #
Once you have configured the content for your WooCommerce Checkout page, it’s time to style it. Click on the ‘Style’ tab to customize different areas of your page.
Tabs #
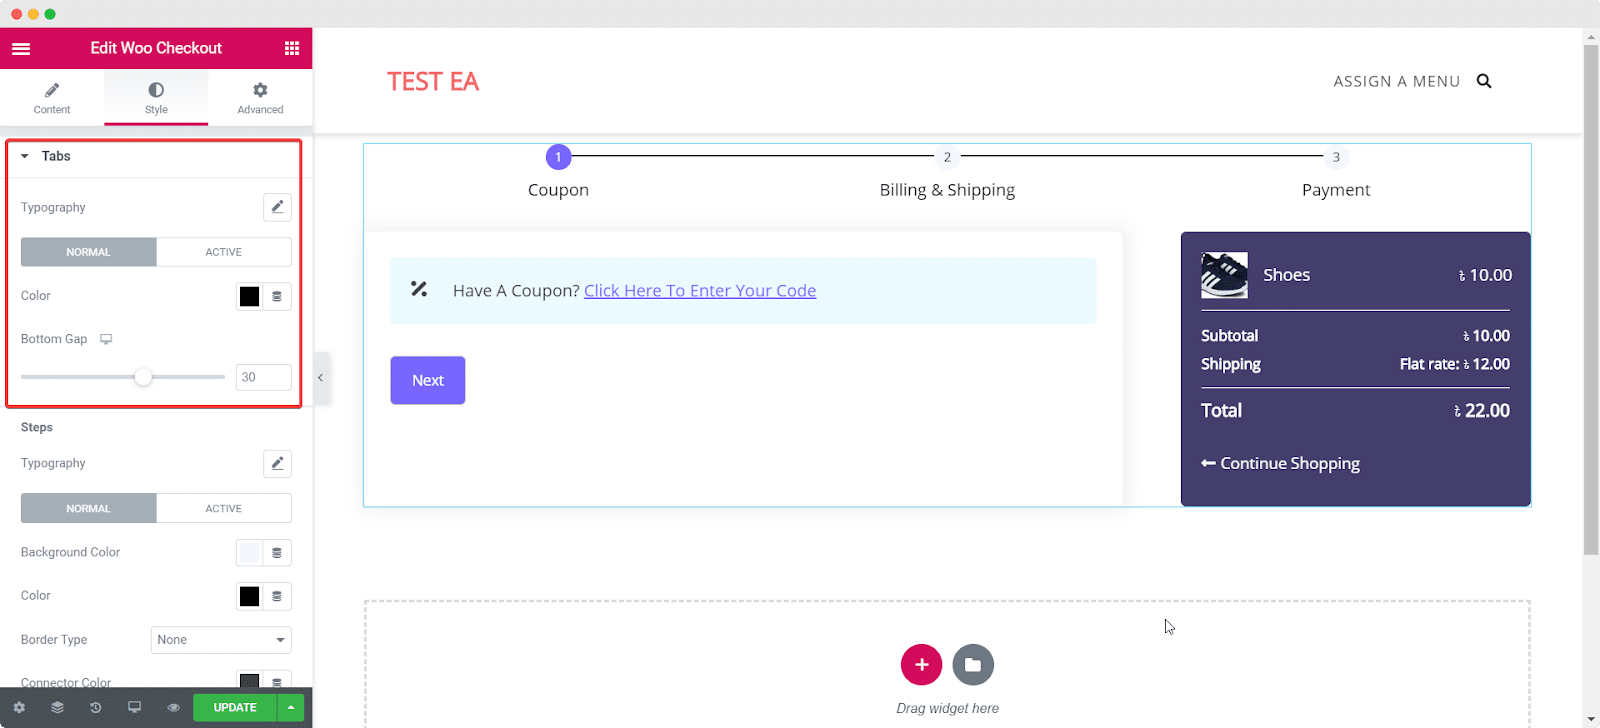
If you choose to use the ‘Multi Steps’ or ‘Split’ layout, you will get an additional option called Tabs under the ‘Style’ tab. This will let you customize the typography, the background colors and the title colors for each step in your checkout process.
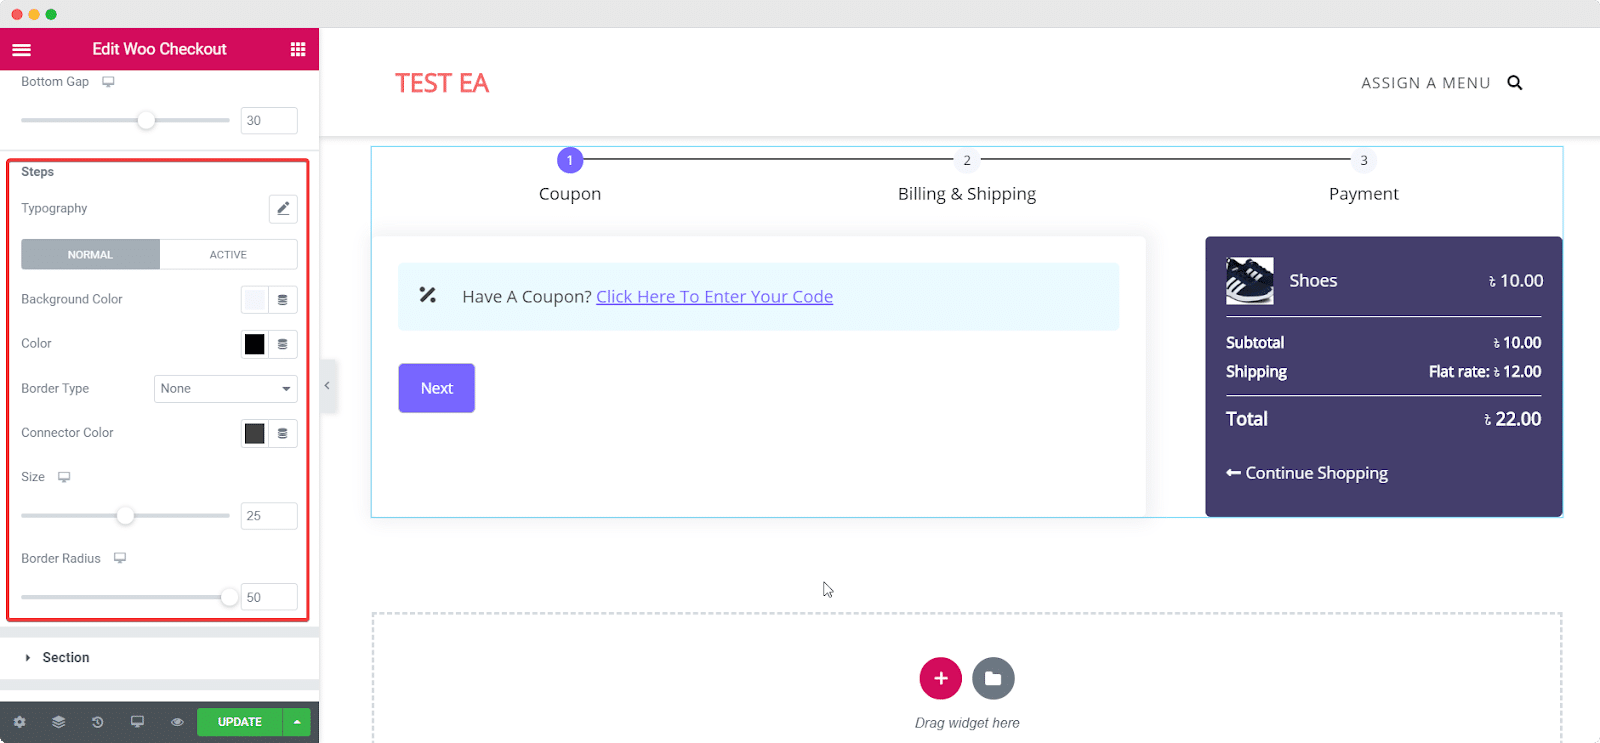
For ‘Multi Steps’ Layout, you will get an additional option called Steps. You can customize its typography, change Connector color, size and many others any way you want.
Section Title #
From here, you can customize the typography and the color of the titles of different sections on your WooCommerce Checkout page. You can also change the bottom gap between your section title and section details.

Others #
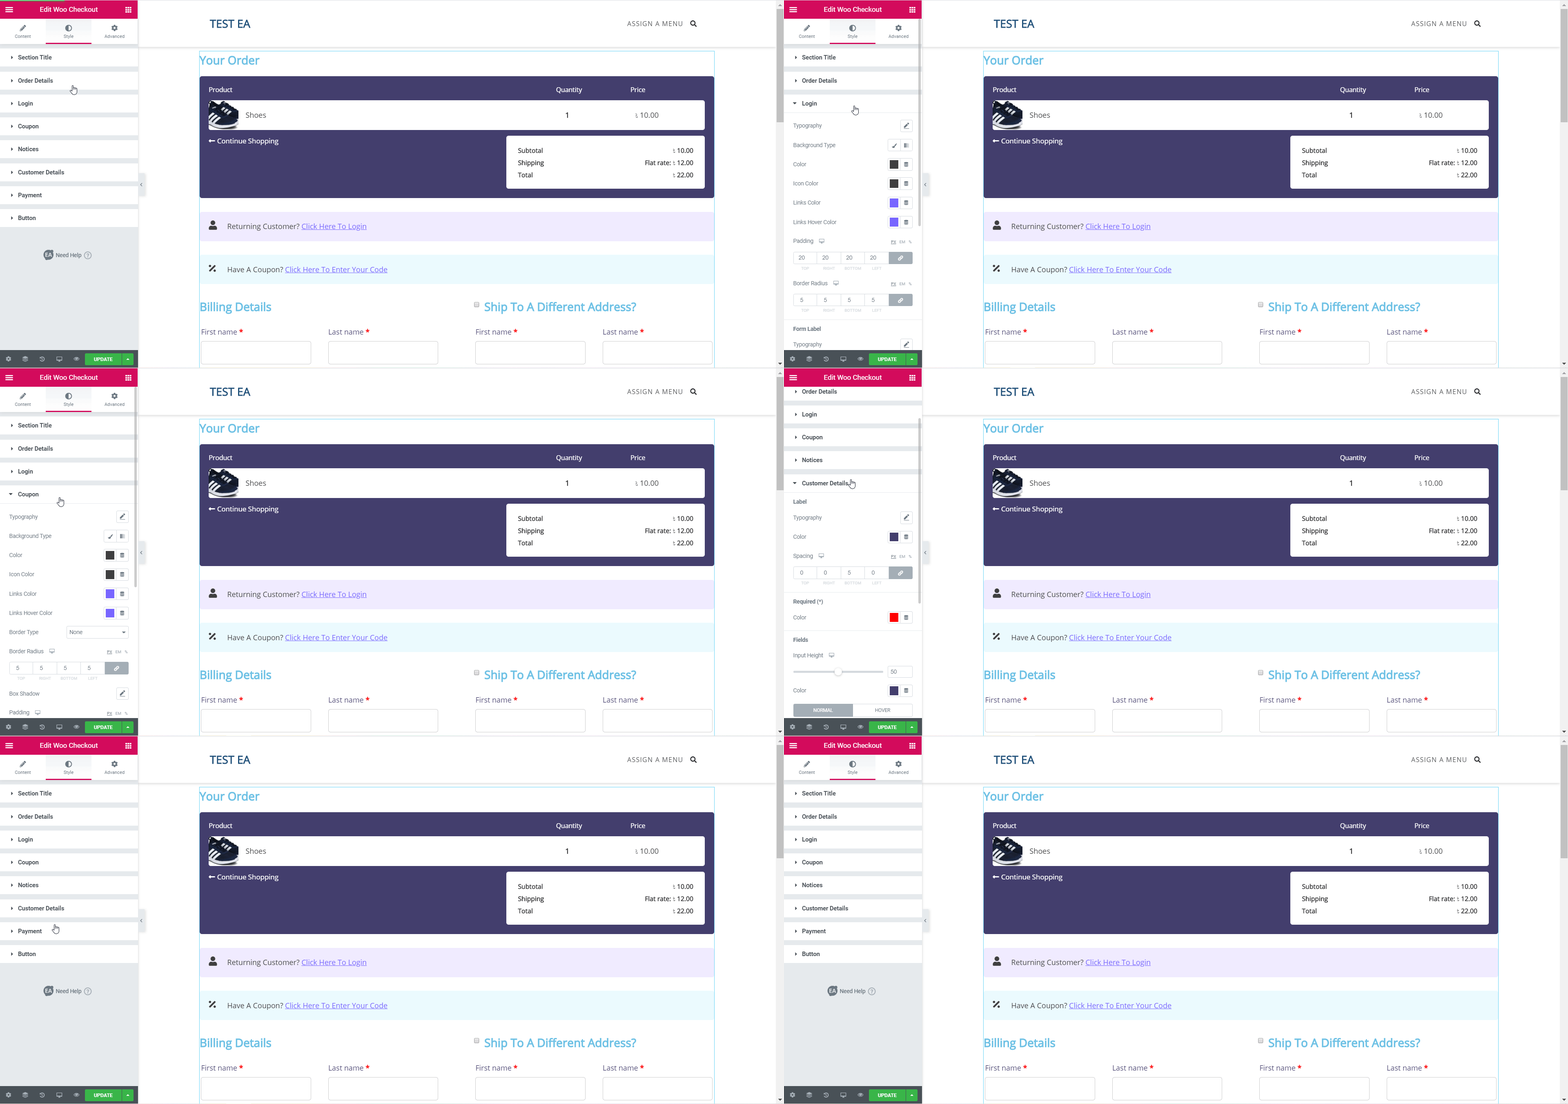
There are several other customization options within the ‘Style’ tab. You can style ‘Order Details’ by customizing the Typography, Background Colors, and many more. You can also choose how to display the Input & Text Area for ‘Coupon’ where customers can enter their coupon codes.
Besides this, you can also choose to customize the way your ‘Notices’ are displayed, as well as your ‘Customer Details’, ‘Payment’ and style the ‘Login’ area for your customers. Moreover, you can style the ‘Button’ any way you want for both normal and views.
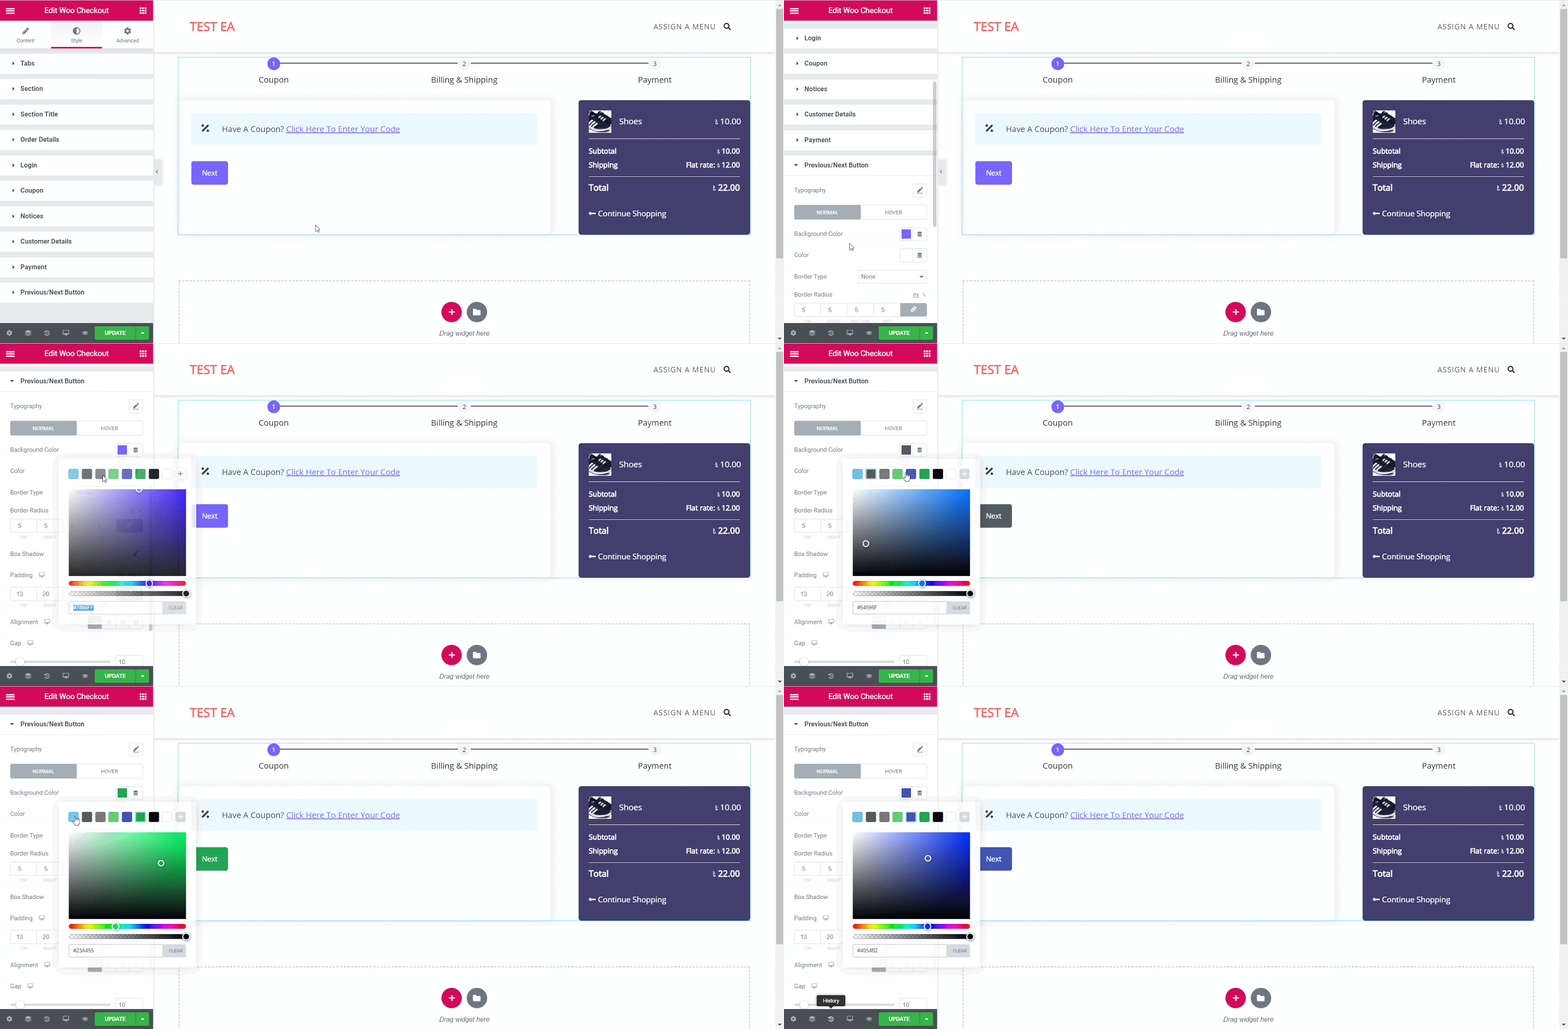
If you are using the ‘Multi-Step’ or ‘Split’ layout, then you can customize the ‘Previous/Next Buttons’ however you want to.
Final Outcome #
By following these simple steps, you can create a stunning WooCommerce Checkout page for your website as per your preference.
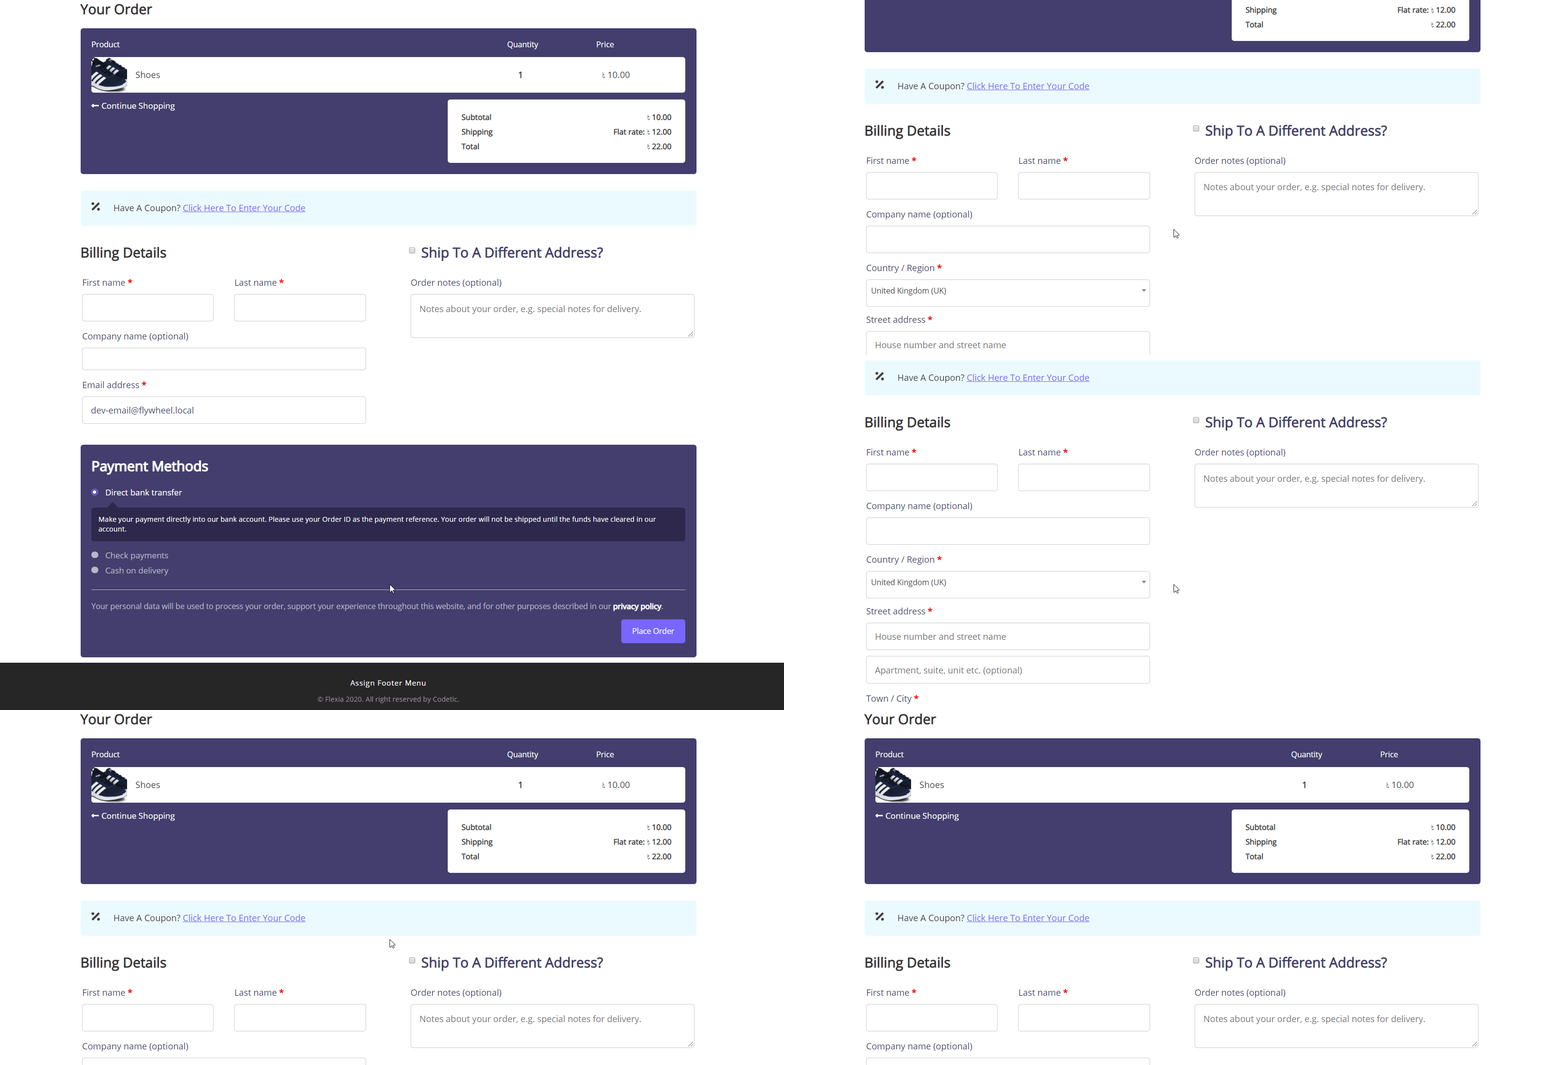
This is how you can quickly create and design an amazing Checkout page for your WooCommerce website by using EA Woo Checkout.
Getting stuck? Feel free to Contact Our Support for further assistance.


