With Essential Addons, now you can easily generate a specific layout, landing page or the entire website from Figma to your Elementor editor. Here, you will know the step-by-step process of how you can do that.
Note: Before getting started, make sure you have installed and activated Essential Addons and Essential Addons PRO on your WordPress dashboard.
Step 1: Enable the Figma to Elementor Element #
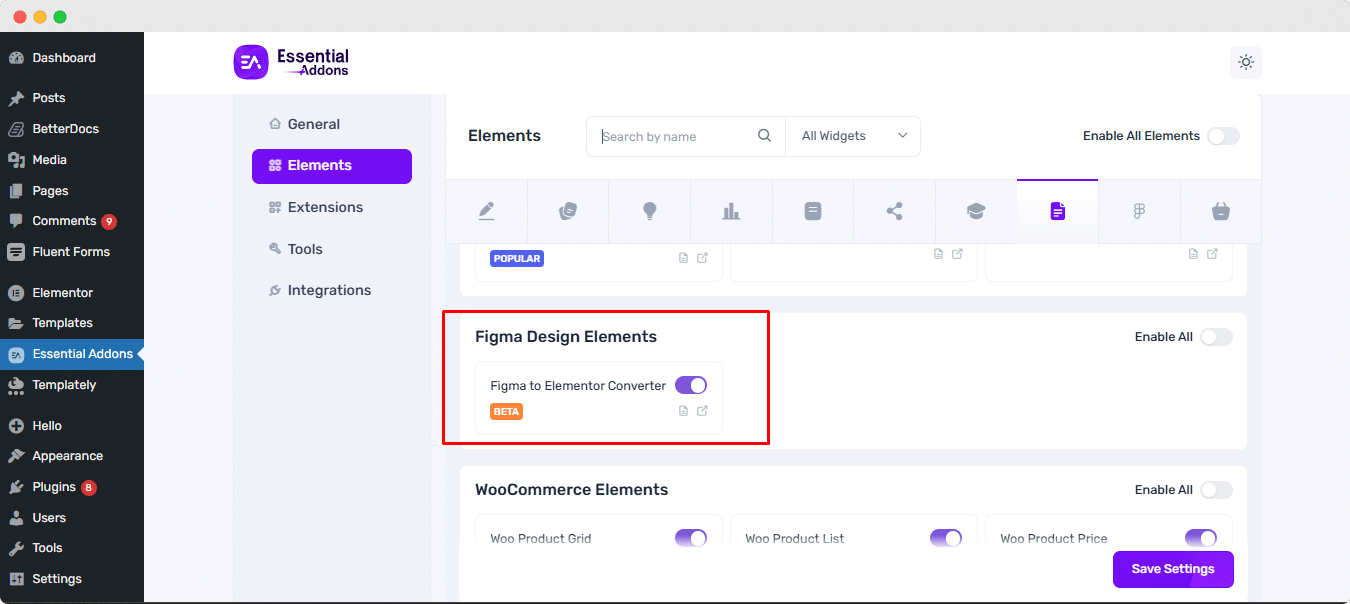
From your dashboard, go to ‘Essential Addons’ from the left sidebar. Then, go to ‘Elements’ and search for the ‘Figma to Elementor’ element. Click on the enable button to enable the element. Then click on ‘Save Settings’ to save the changes.
Step 2: Copy & Paste the JSON Code from Figma #
After that, go to your Elementor editor. From the widget search for ‘Figma to Elementor Converter’. Then click on the element and drop it into your editor. There you will find a field to paste the JSON code. Now it is time to generate the JSON code.
Step 2.1: Navigate to the FigWP Plugin #
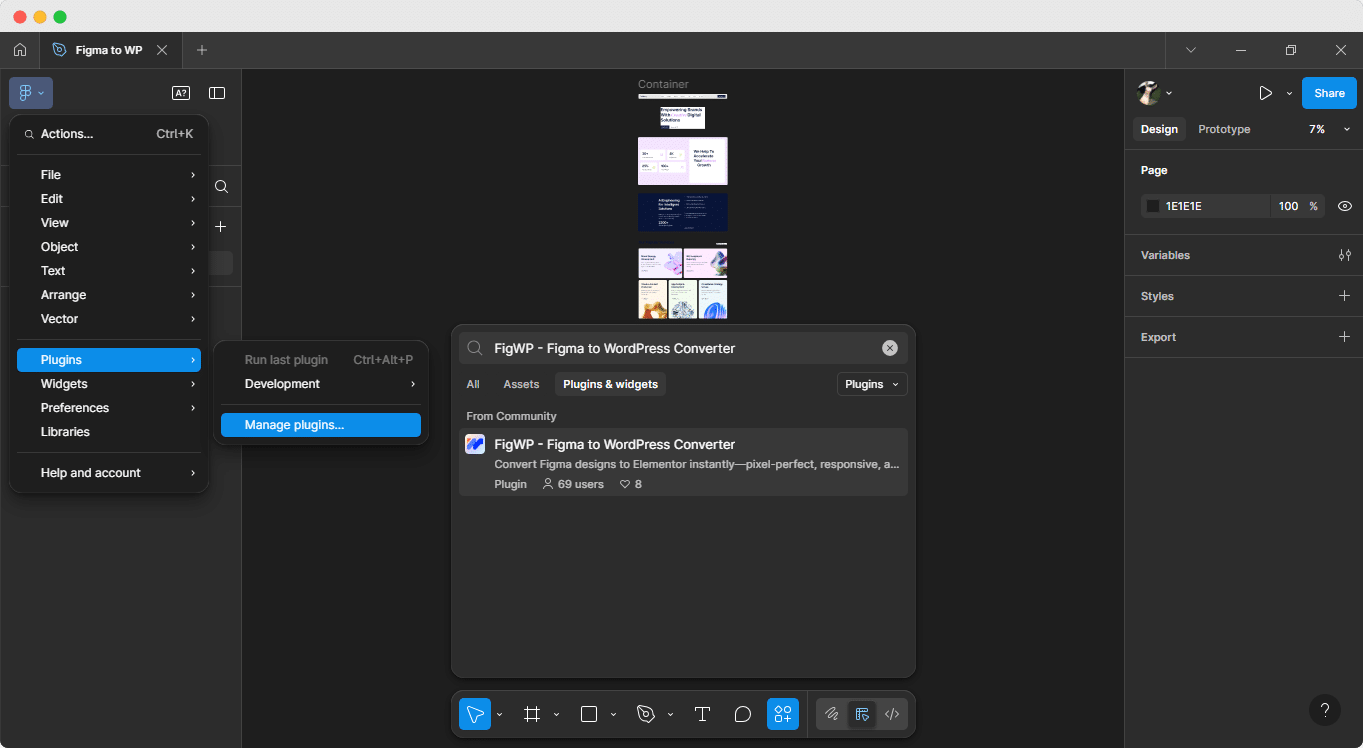
From your Figma app, go to the top icon on the left sidebar. From the dropdown select ‘Plugins’, then click on ‘Manage Plugin’ and from there search for ‘FigWP – Figma to WordPress Converter’ plugin.
Step 2.2: Check out the Guidelines #
Next, go to the ‘Guidelines’ tab to make sure all your elements are managed correctly. These guidelines are mainly for plugin usage, so that every element in your design works properly on the website. Check the box of ‘I have done them properly’ and then click on ‘Continue’.

Step 2.3: Select the Layout #
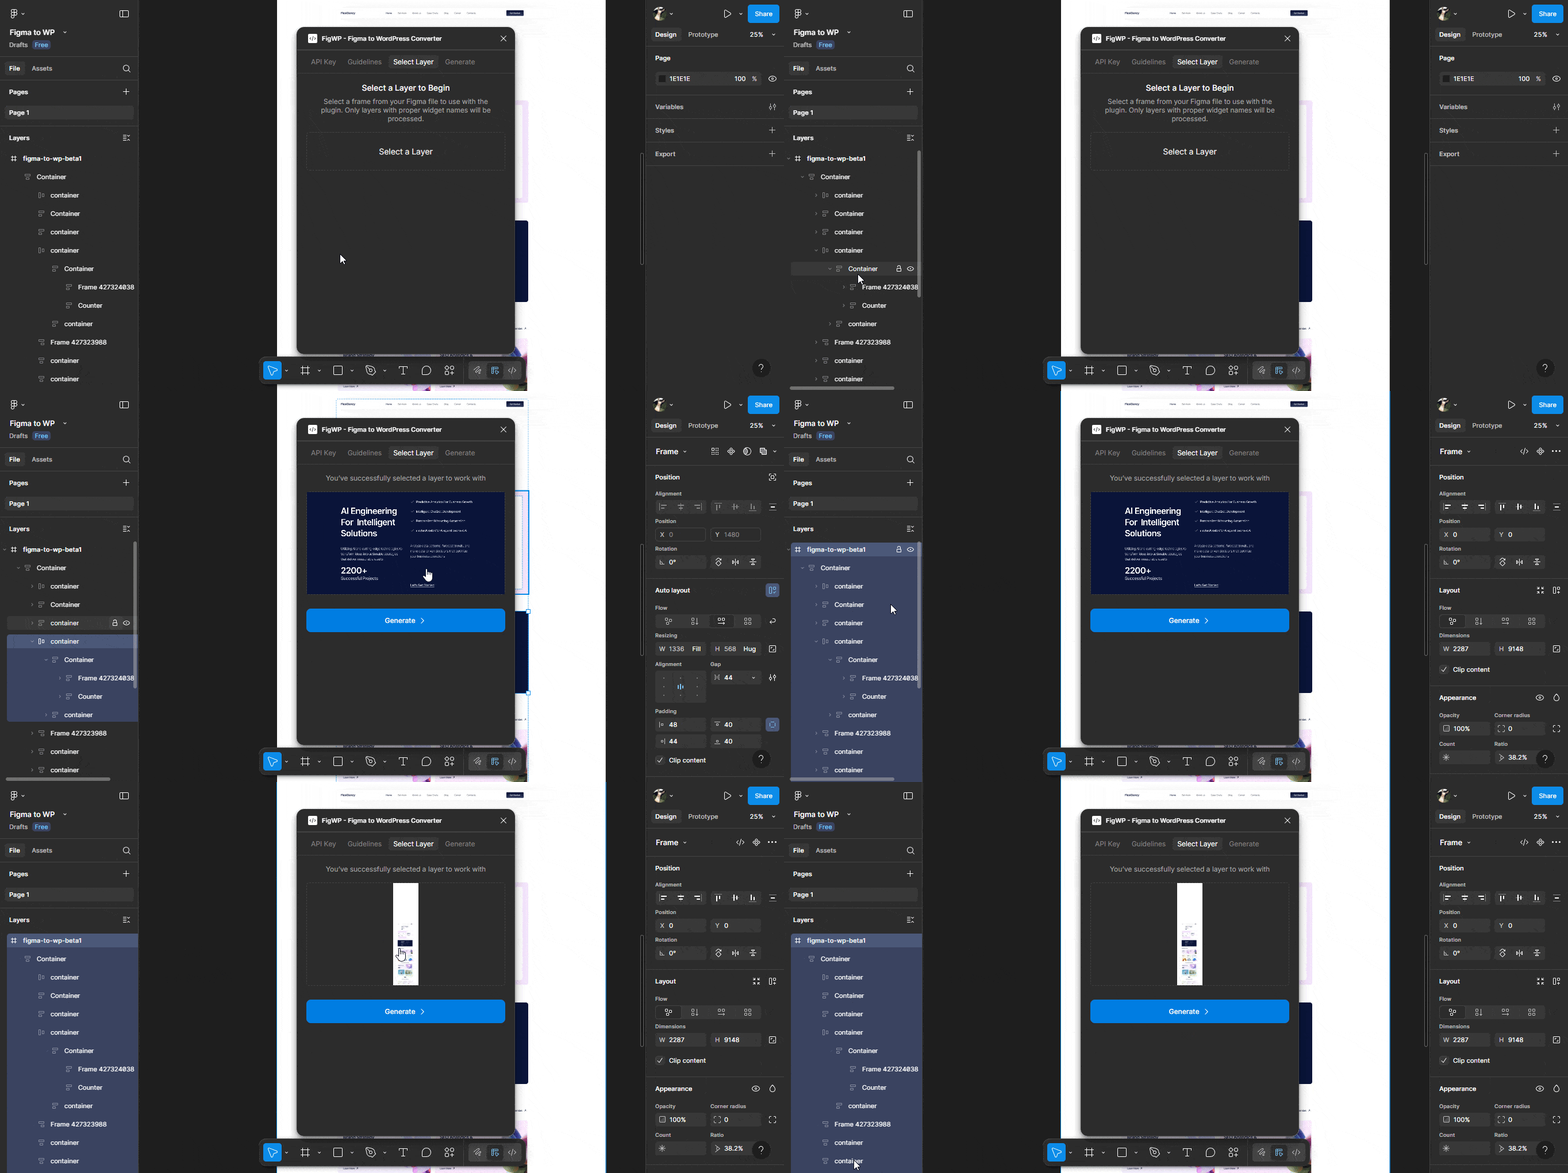
After clicking on ‘Continue’, you can select the layer from the design. You can either choose a specific frame or add the entire website as your web layout. Click on ‘Generate’ to generate the JSON code.
Note: While choosing the layout, make sure your layout is named properly with the widget names of Essential Addons. Because only widgets with proper naming will be processed properly on Elementor.
Step 2.4: Copy And Paste the Code in WordPress #
Next, after clicking the ‘Generate’ button, a JSON code will be generated. Click on the ‘Copy Code’ and then the code will be copied.
Note: If you want to download the JSON code, then click on the download button and then you can upload it to the ‘Figma to Elementor Converter’ widget. Also, if you want to bring changes to the design, then click on ‘Generate Another File’ and it will take you back to the previous stages to bring changes and generate another JSON file.

Note: To quickly explore, here is a sample Figma file designed for you.
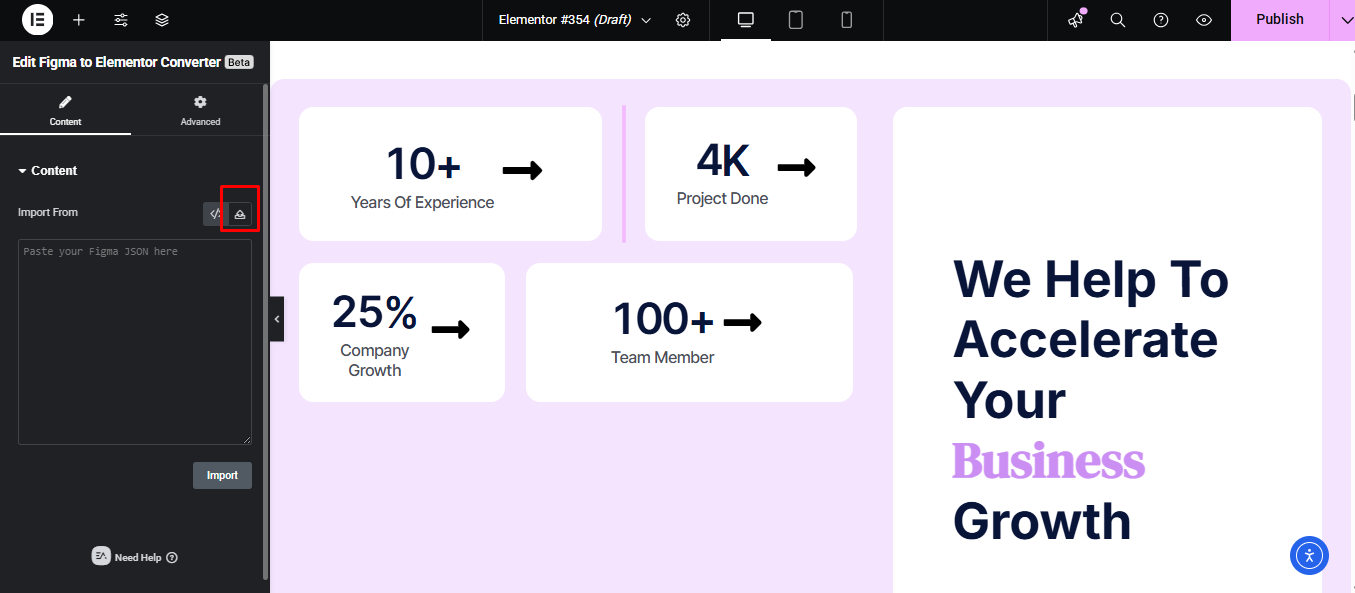
Then, go back to ‘Elementor’ to the ‘Figma to Elementor Converter’ element and paste the code and click on the ‘Import’ button. After that, your website will be automatically added as it was in the Figma design.
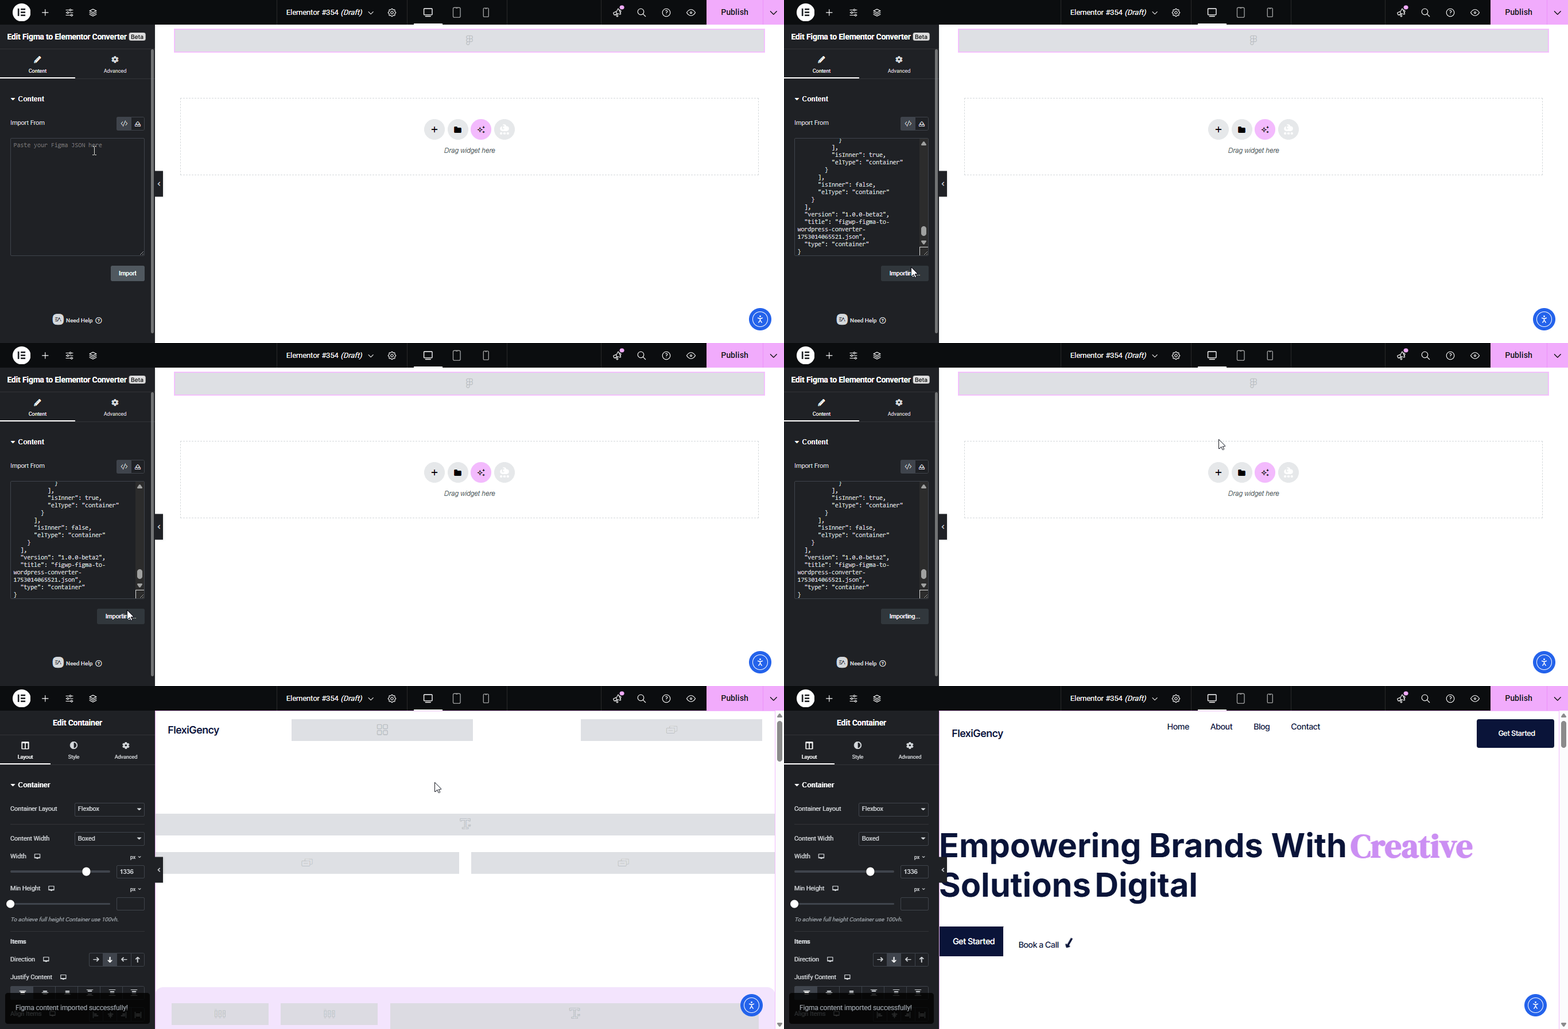
Note: If you want to download and upload the code, then from the widget, click on the ‘Import’ button and upload the code.
Step 2.5: Customize the Landing Page #
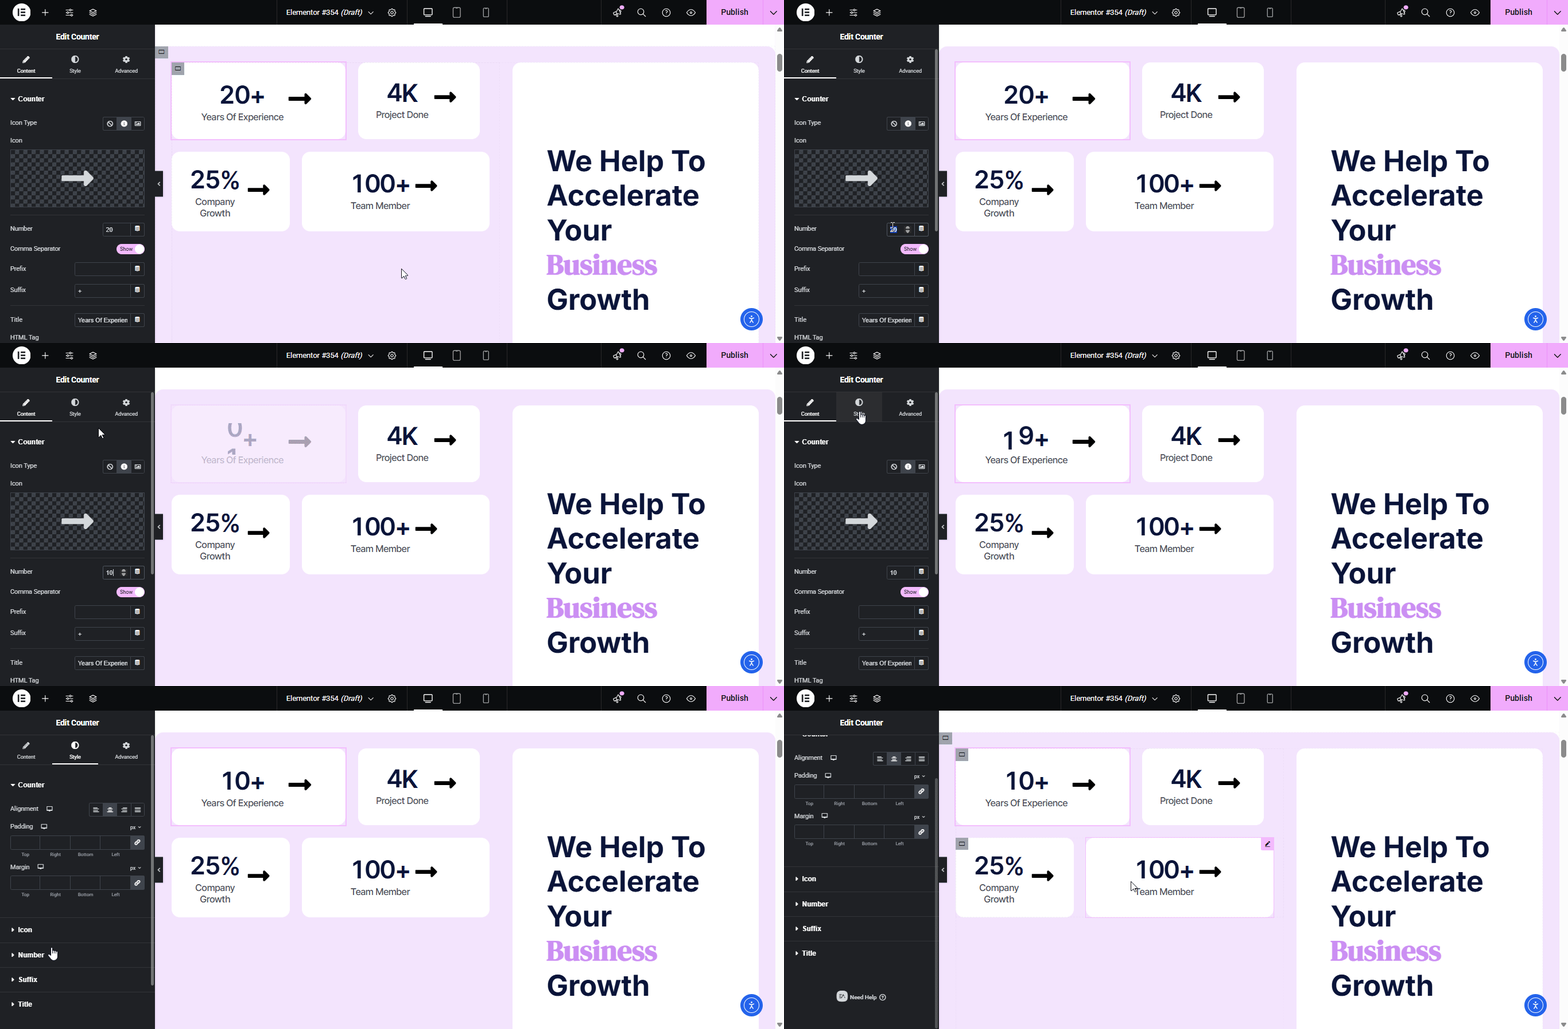
From Elementor, you can customize each element. You can change the style, typography or any other styling option as you want.
Final Outcome #
After completing all the processes, this is how your website will look exactly like how you envisioned your website in Figma.
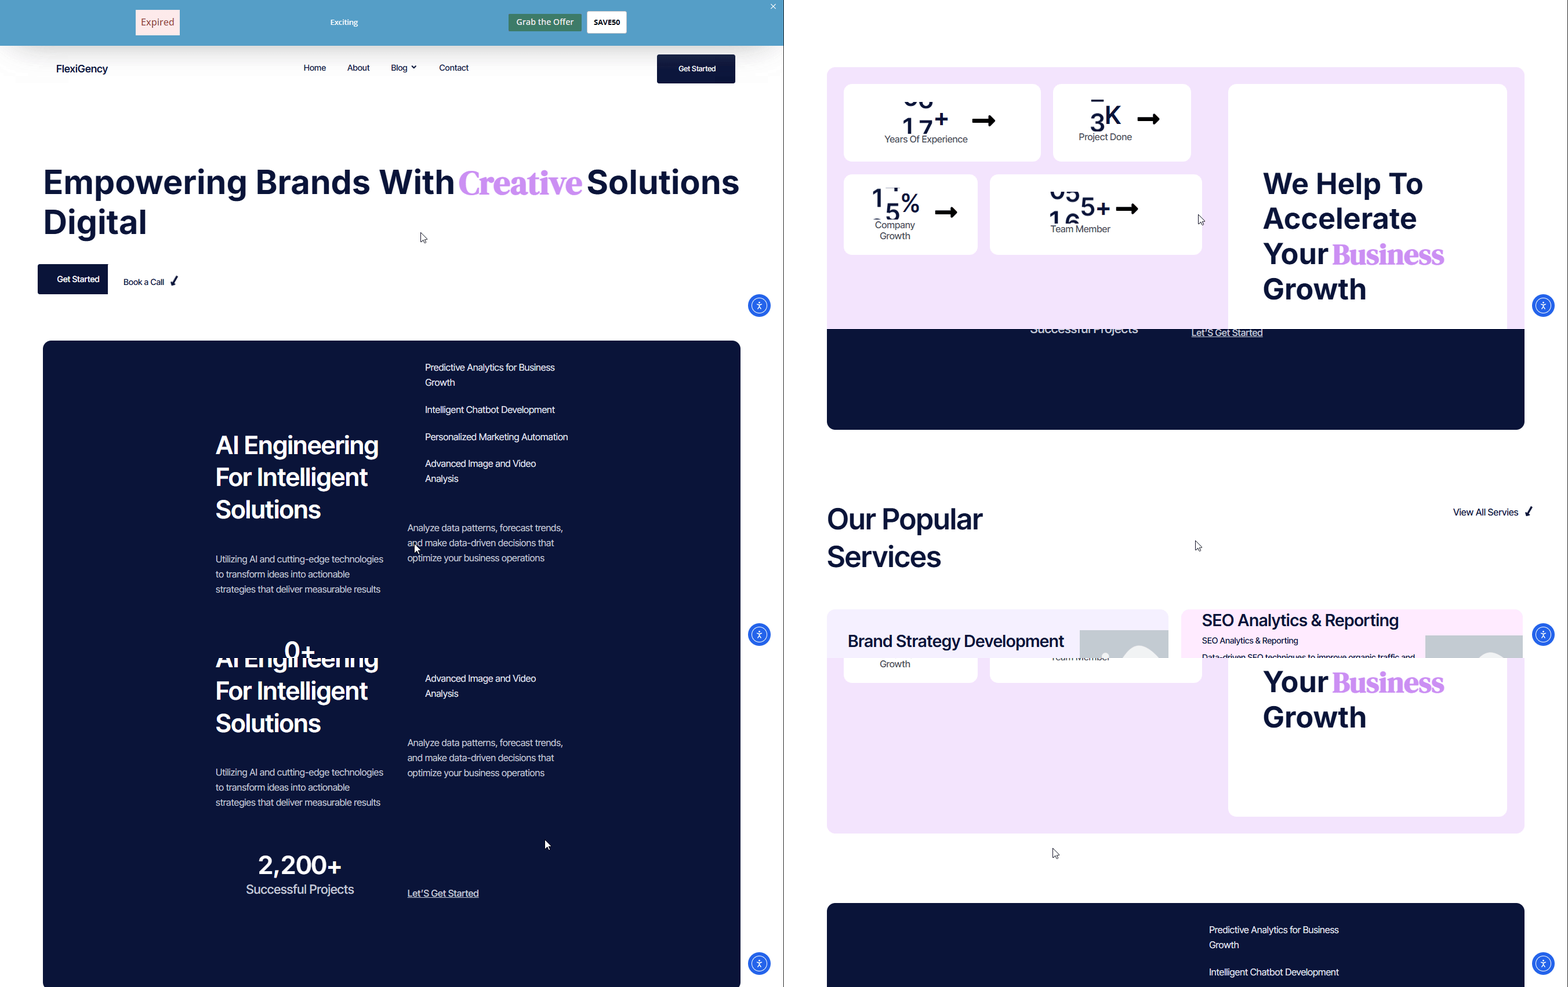
This is how you can easily create a landing page directly from Figma in Elementor.
Getting stuck? Feel free to Contact Our Support for further assistance.


