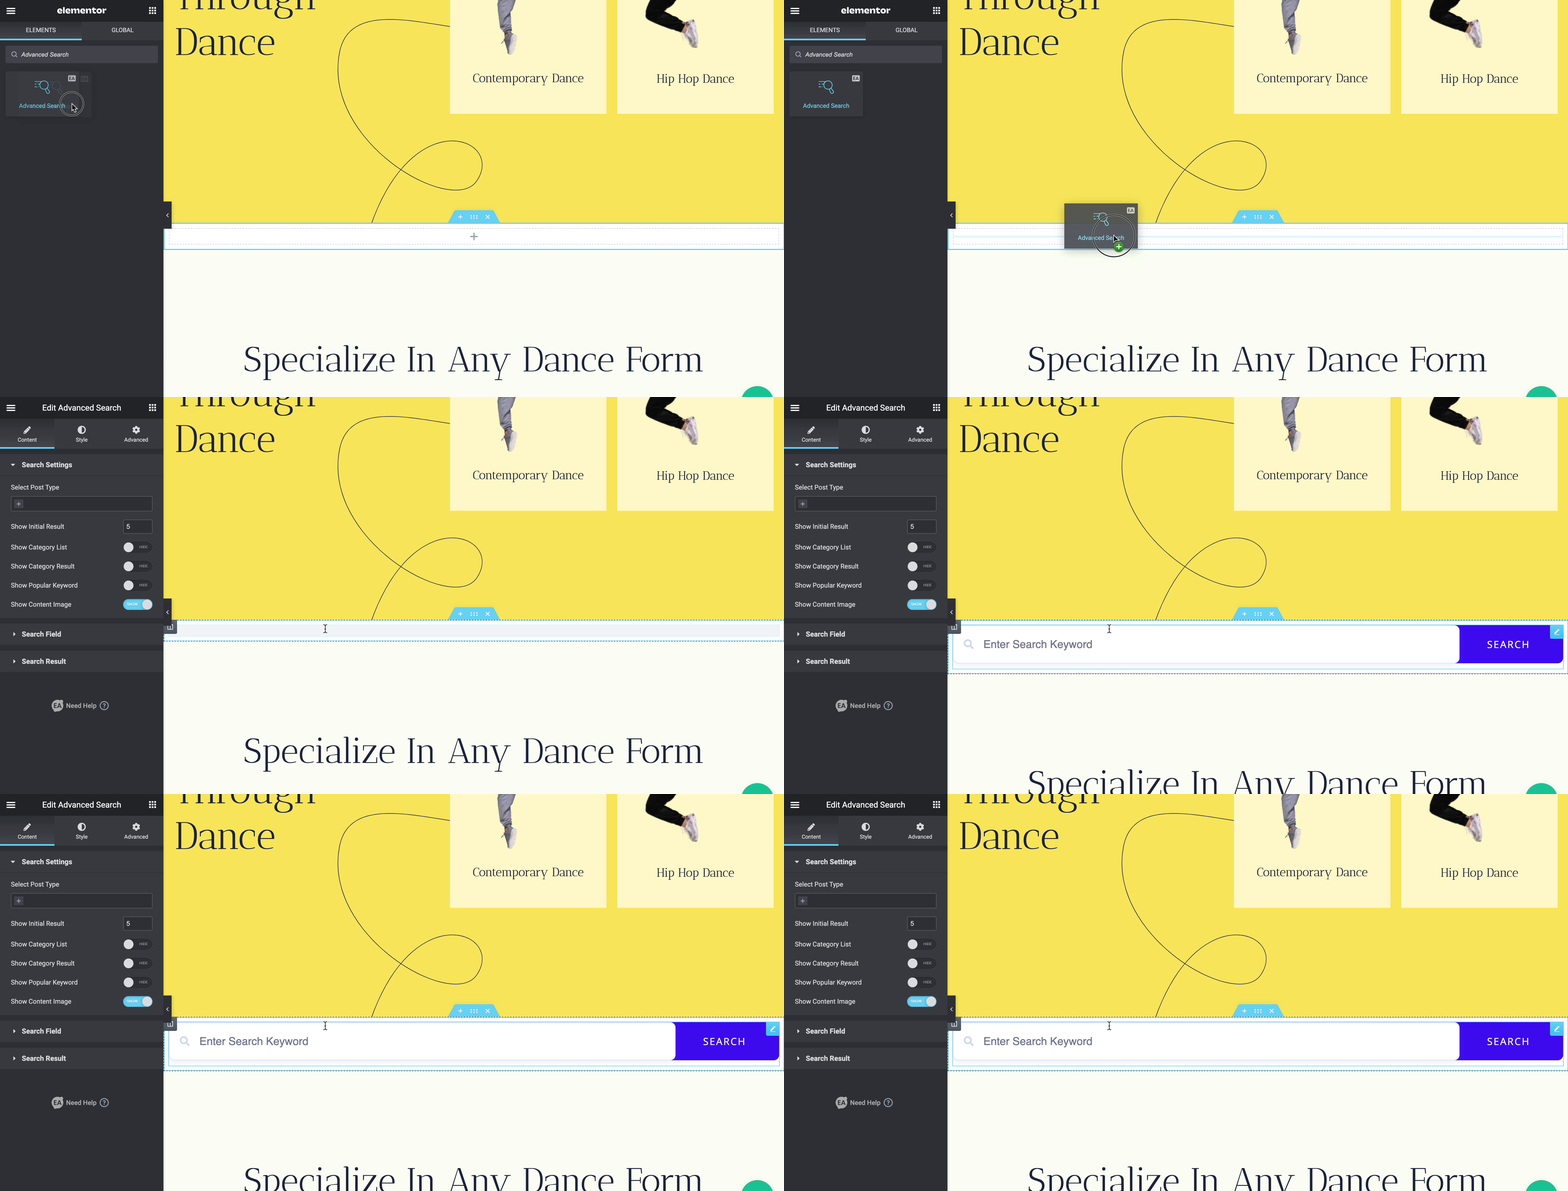
EA Advanced Search allows you to create an advanced search panel in Elementor with plenty of styling options. It helps your visitors to find the right content with popular docs categories, popular keywords, and more. Let’s check out the step-by-step guidelines below to configure and style your Advanced Search element from Essential Addons for Elementor.
How To Activate EA Advanced Search? #
Before you begin, make sure that you have installed & activated Essential Addons Pro plugin to use this EA Advanced Search element.
To use Essential Addons element, find the ‘EA Advanced Search’ element from the Search option under the ‘ELEMENTS’ tab. Simply just drag & drop the ‘EA Advanced Search’ into the ‘Drag widget here‘ or the ‘+’ section.
How To Configure The Content Settings? #
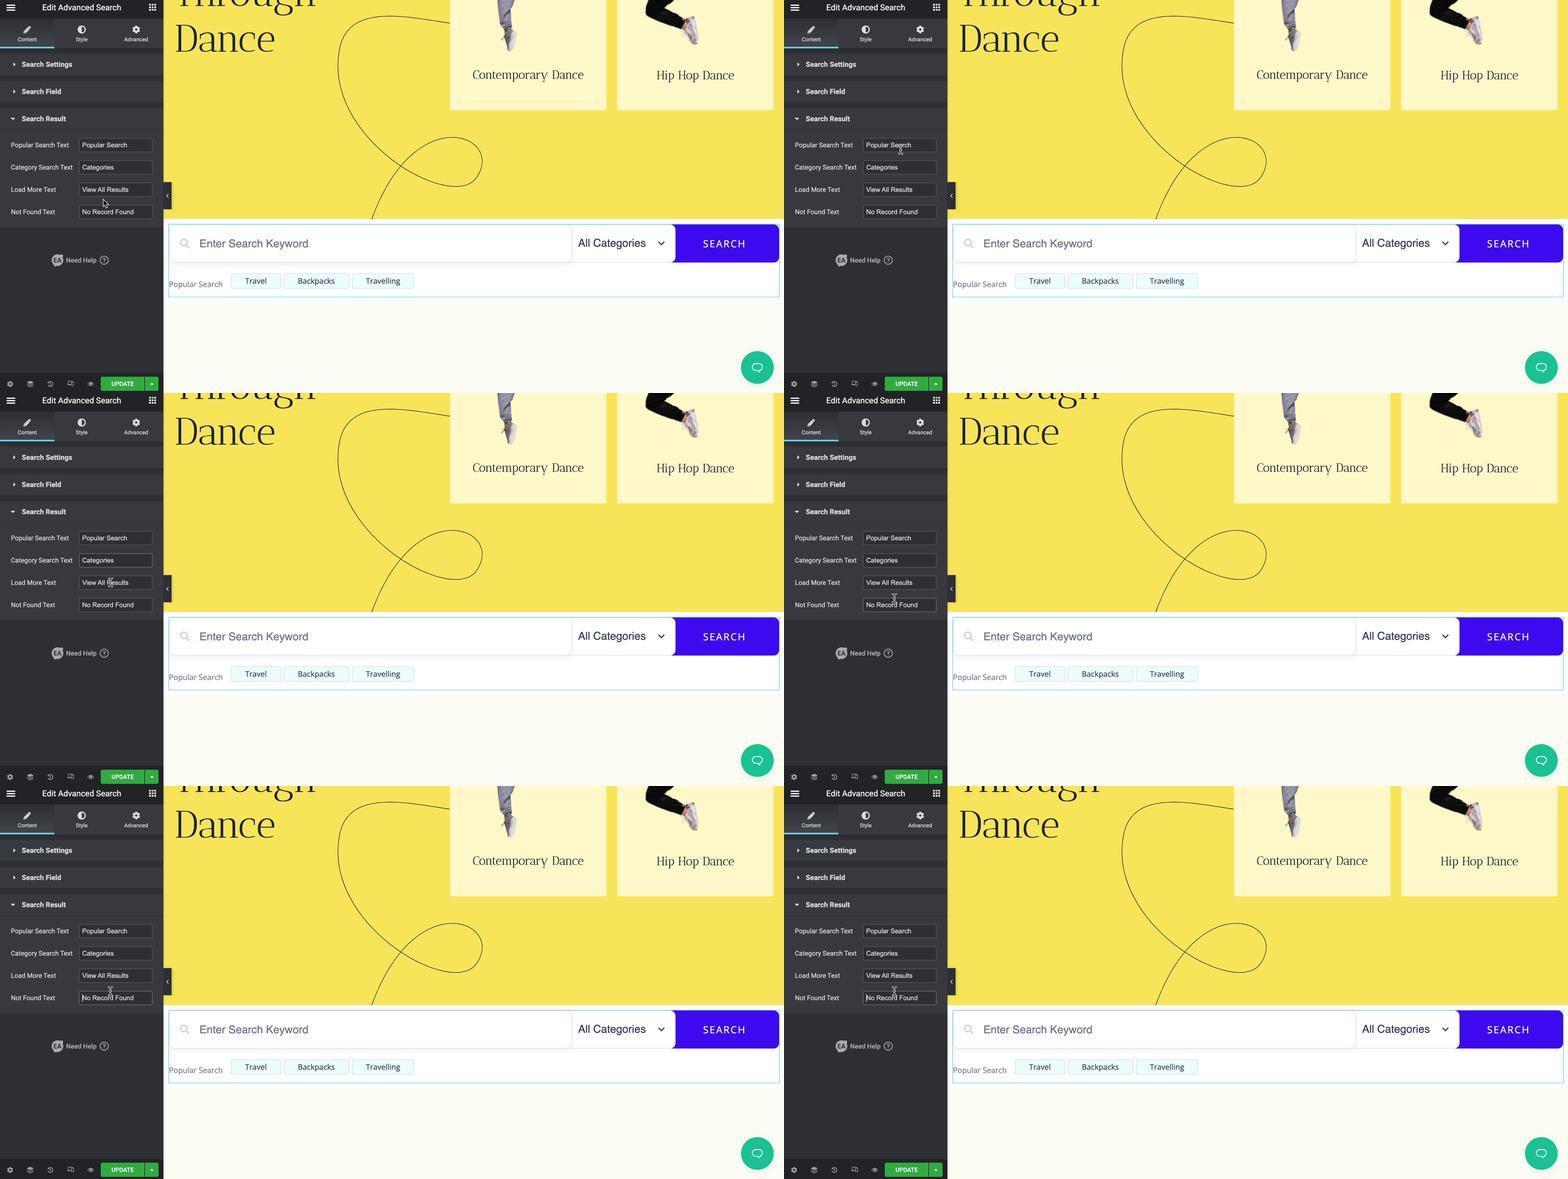
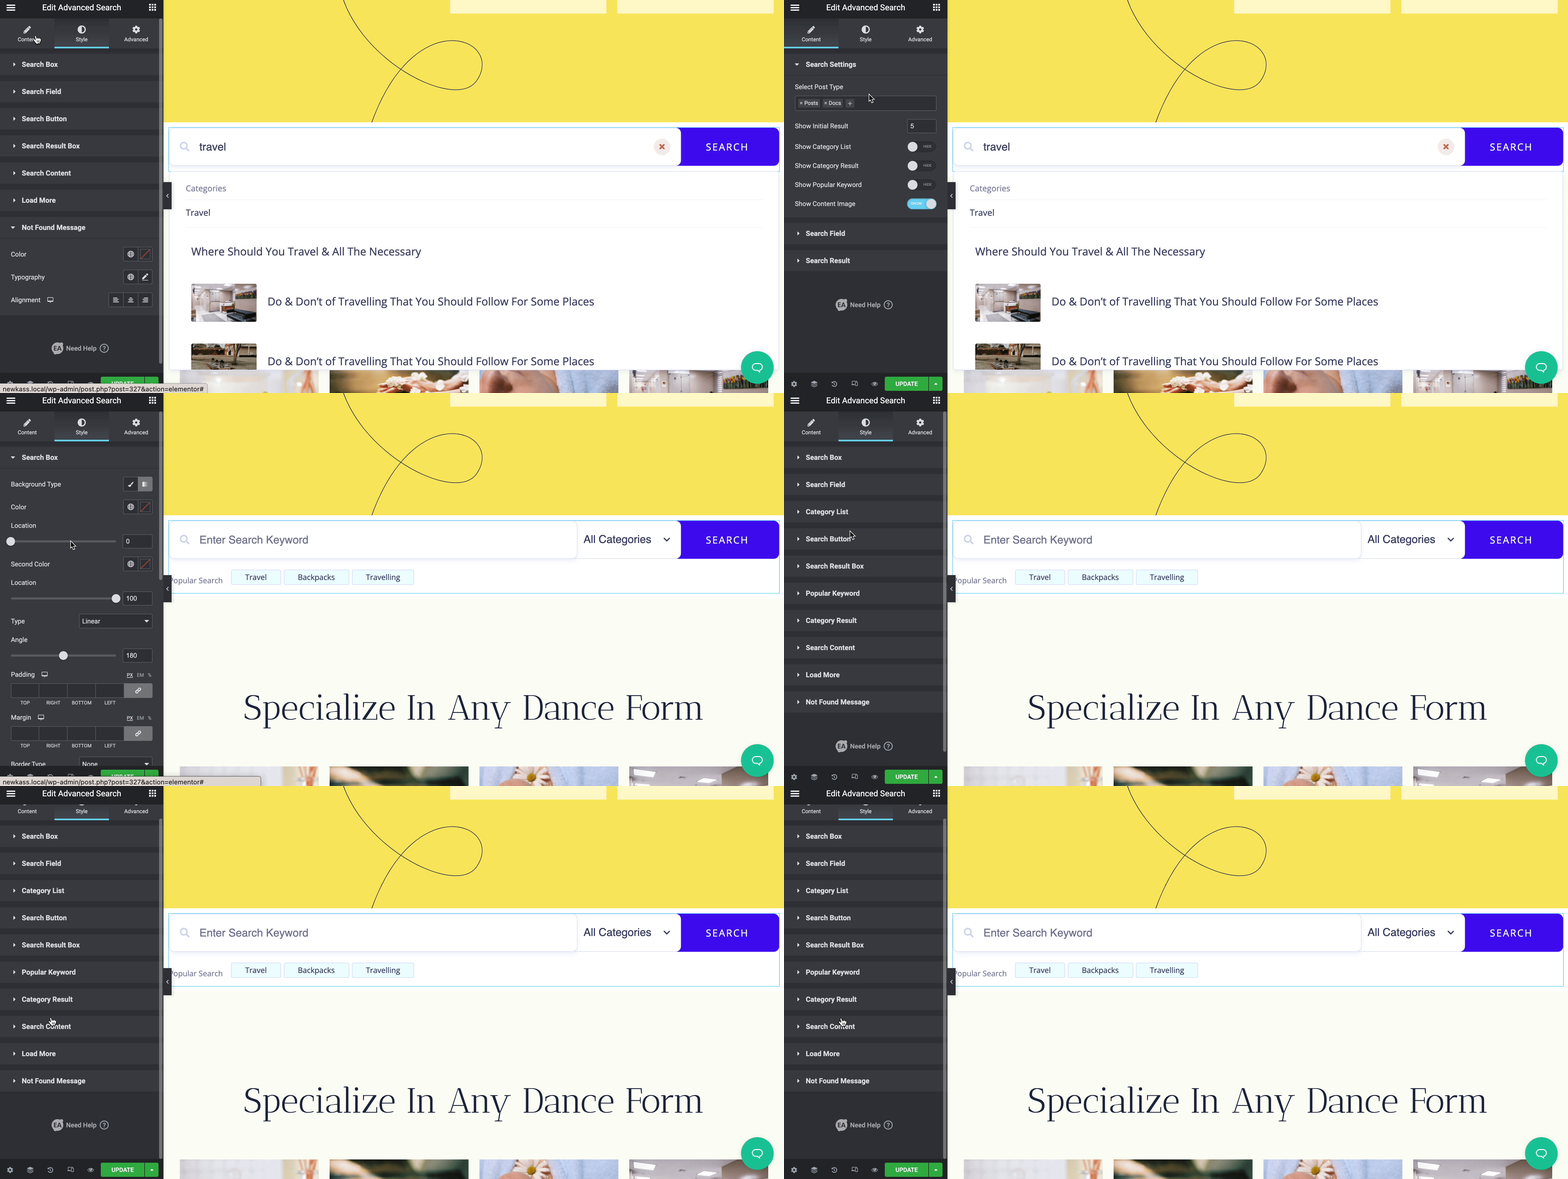
After you have completed adding the EA Advanced Search in your Elementor Editor, now all you need to do is to configure the ‘Content’ tab. Which consists of ‘Search Settings’, ‘Search Field’ & ‘Search Result’ options.
Search Settings #
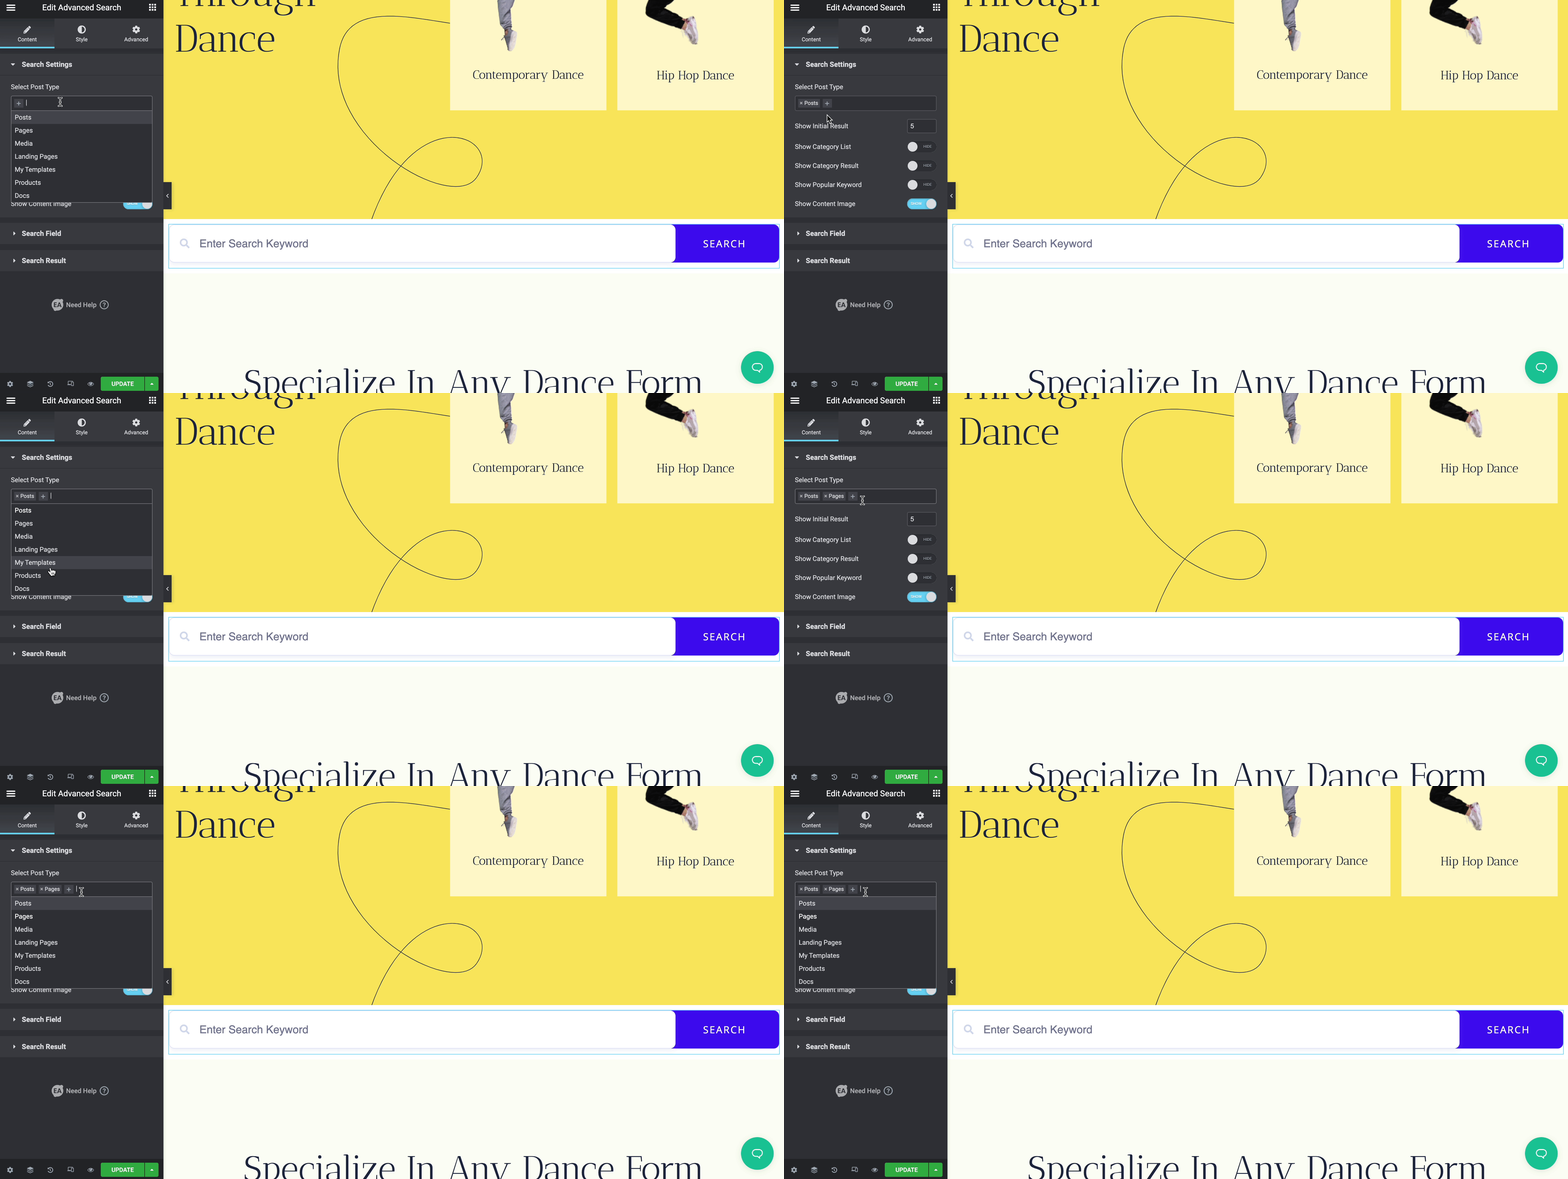
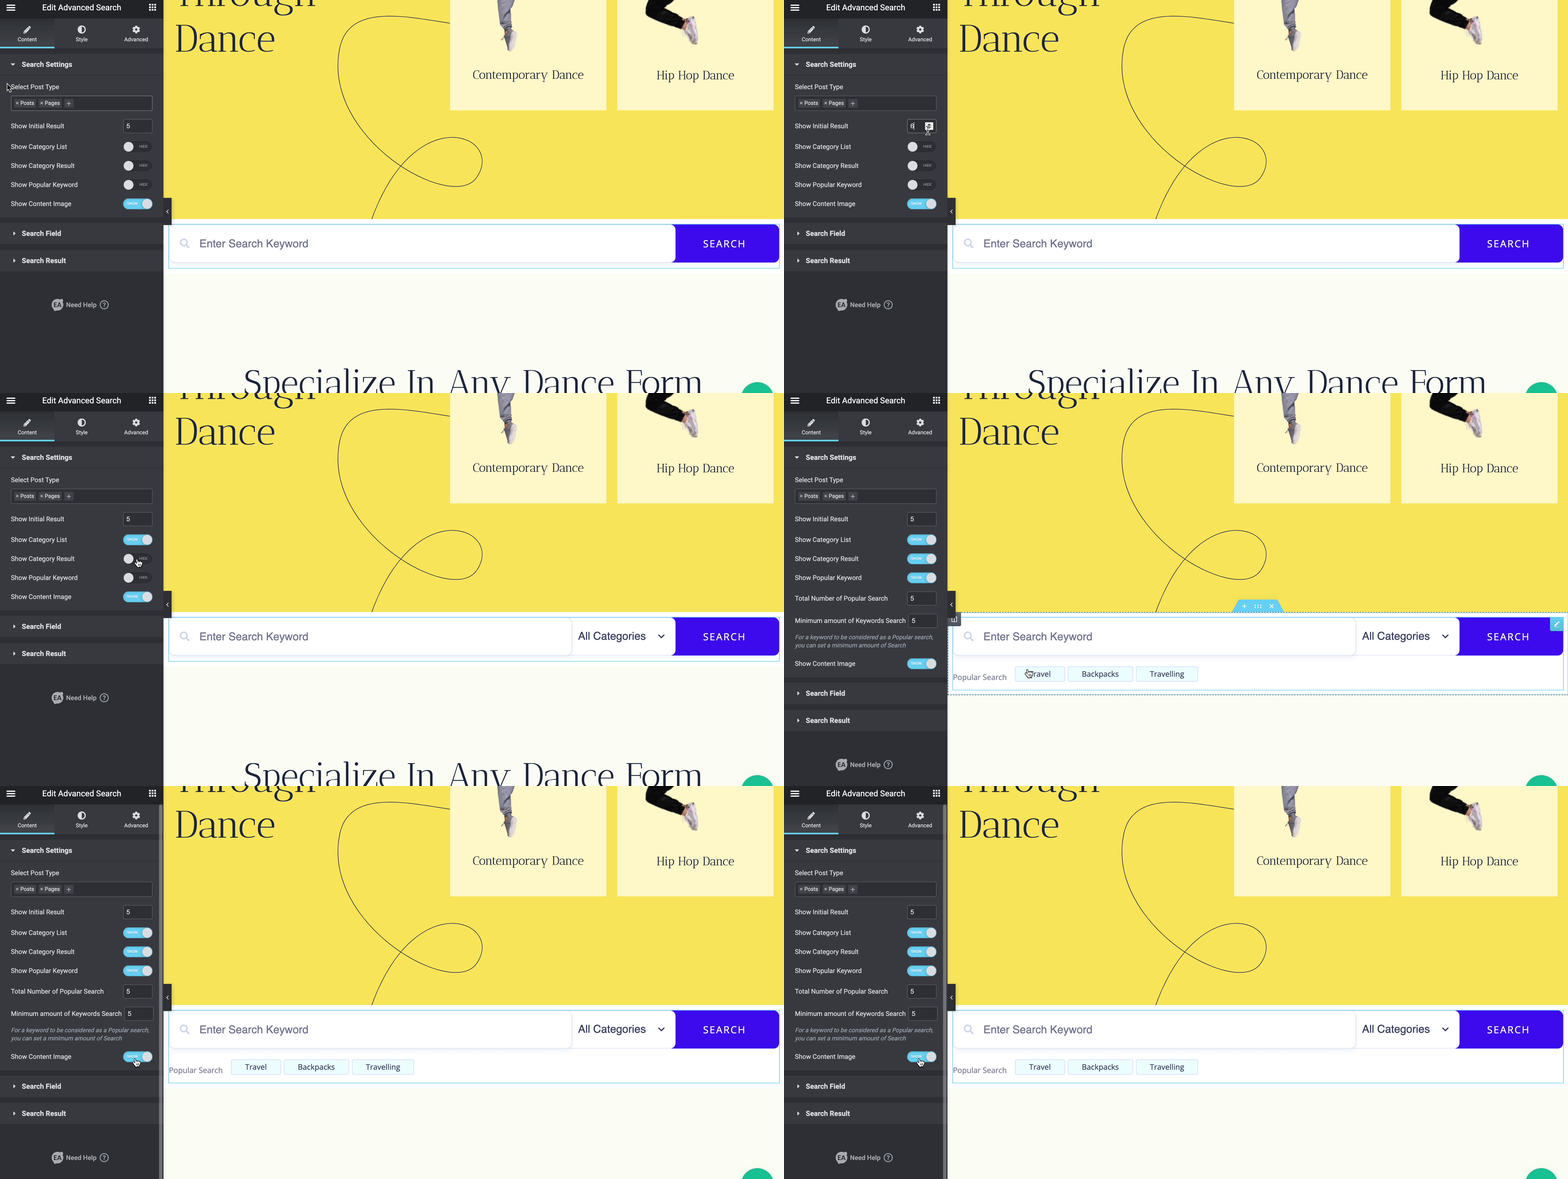
From the ‘Search Settings’ option, you can select post types as you can only showcase blog posts on your search panel or can configure multiple options according to your preference.
Besides you can set the number of initial search results on your advanced search by enabling a category list, result, a popular keyword with or without a content image.
Search Field #
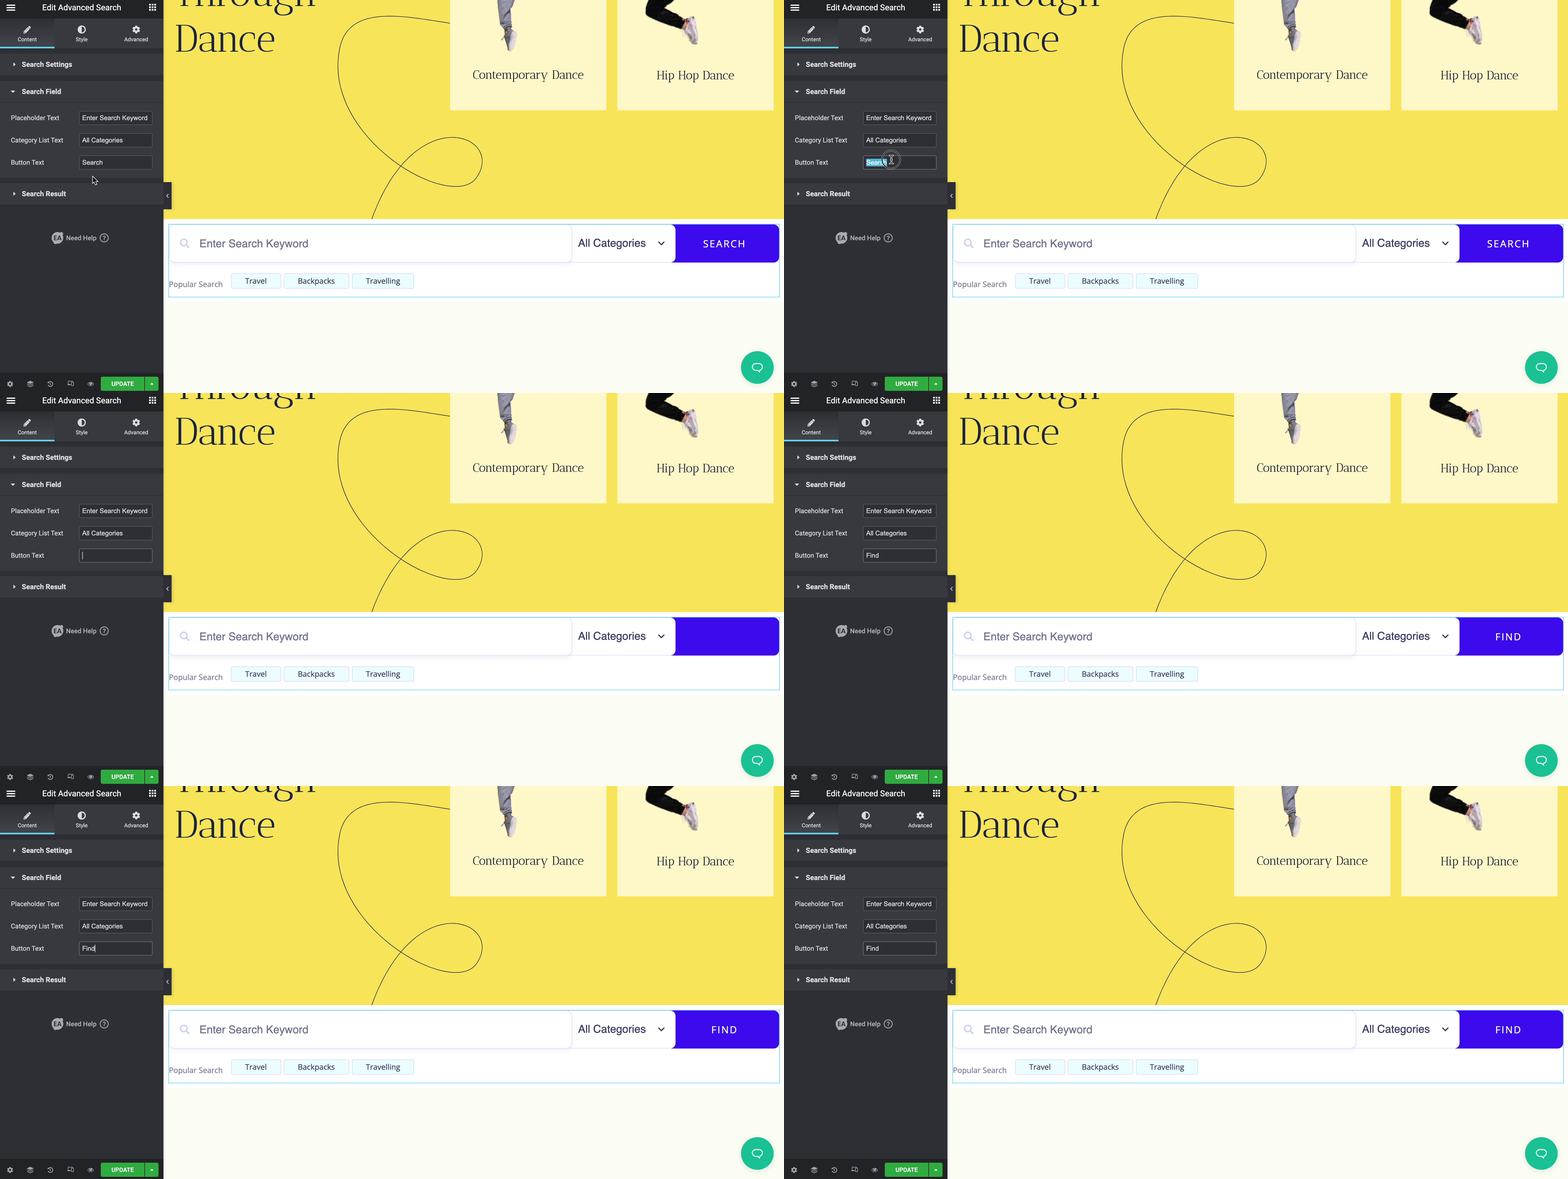
Using this ‘Search Field’, you can change the Placeholder Text, Category List Text & Button Text whenever you feel necessary.
Search Result #
By configuring ‘Search Result’ you can decide what text will be showcasing during your visitors’ search. Like you can change the default ‘Popular Search Text’, ‘Category Search Text’, ‘Load More Text’, ‘Not Found Text’ to make your content search result more interesting.
How To Style Your EA Advanced Search? #
Switch to the ‘Style’ tab to style all the features of EA Woo Product Compare.
Search Box #
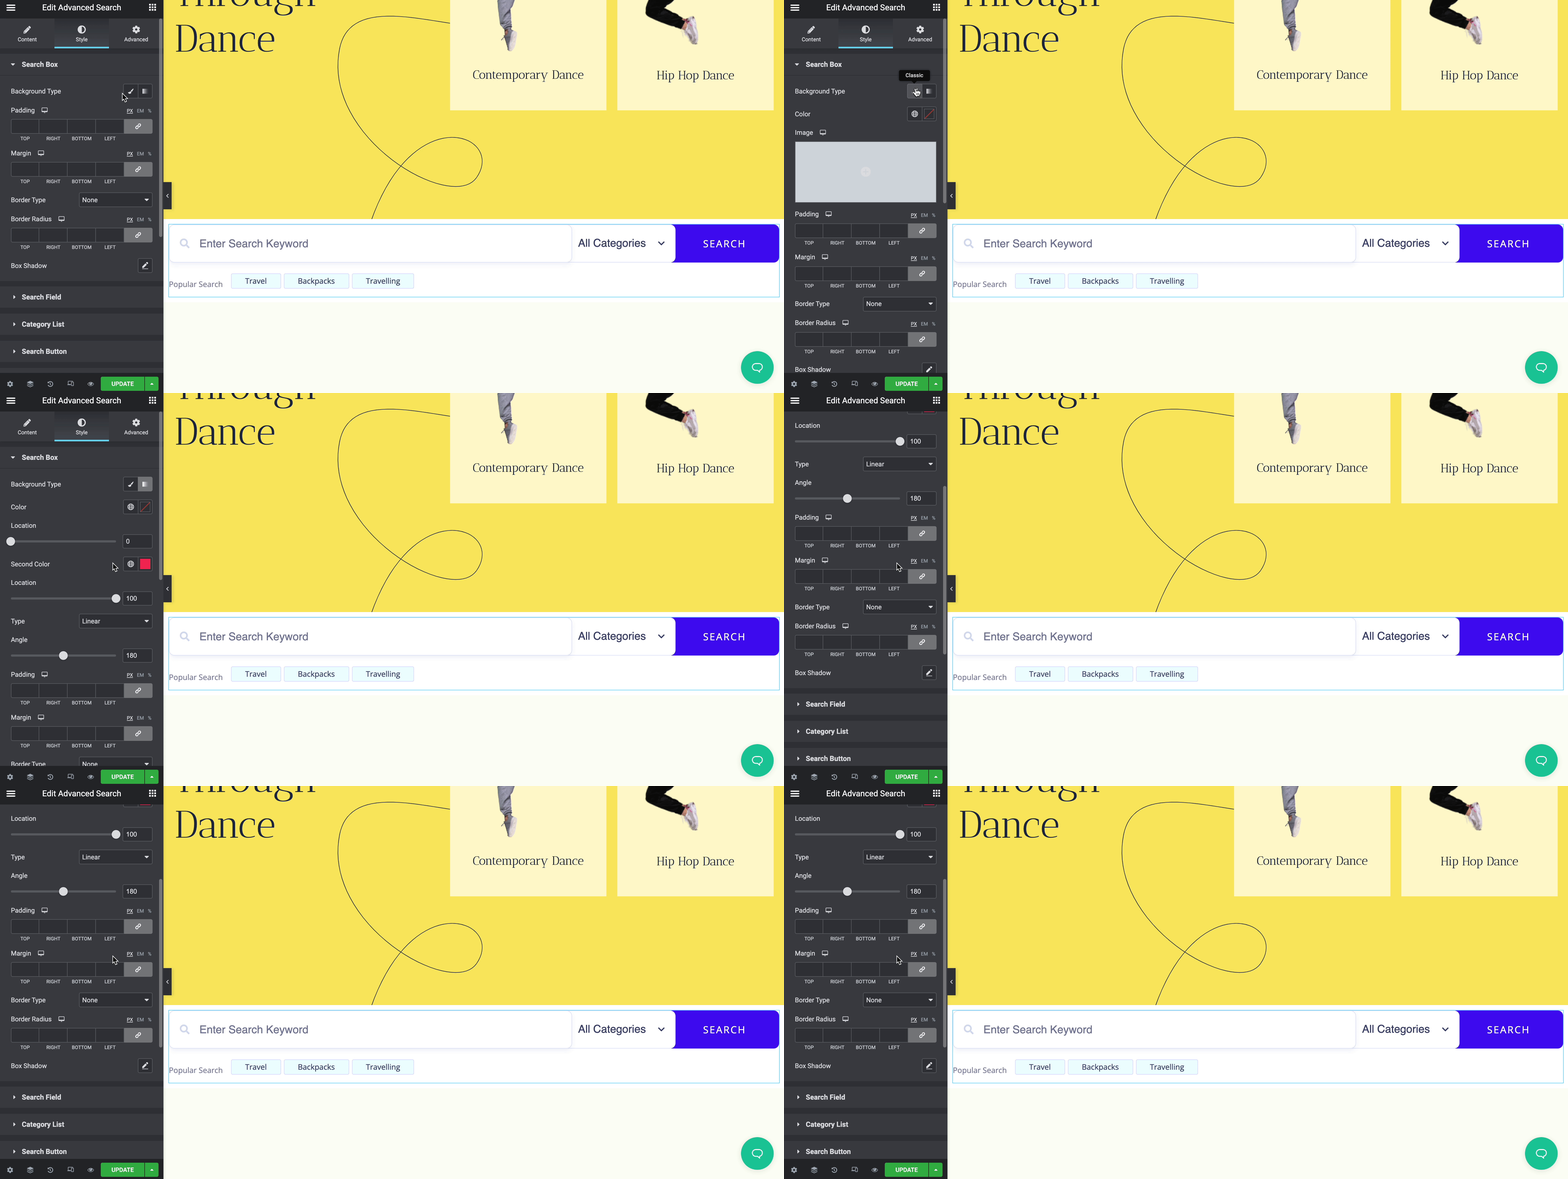
From the ‘Search Box’ section, you can configure ‘Background Type’ in both actions ‘Classic’ & ‘Gradient’. And accordingly set image, background color, type, margin, padding, box-shadow with others to change the outlook of your EA Advanced Search, and style it in advance.
Others #
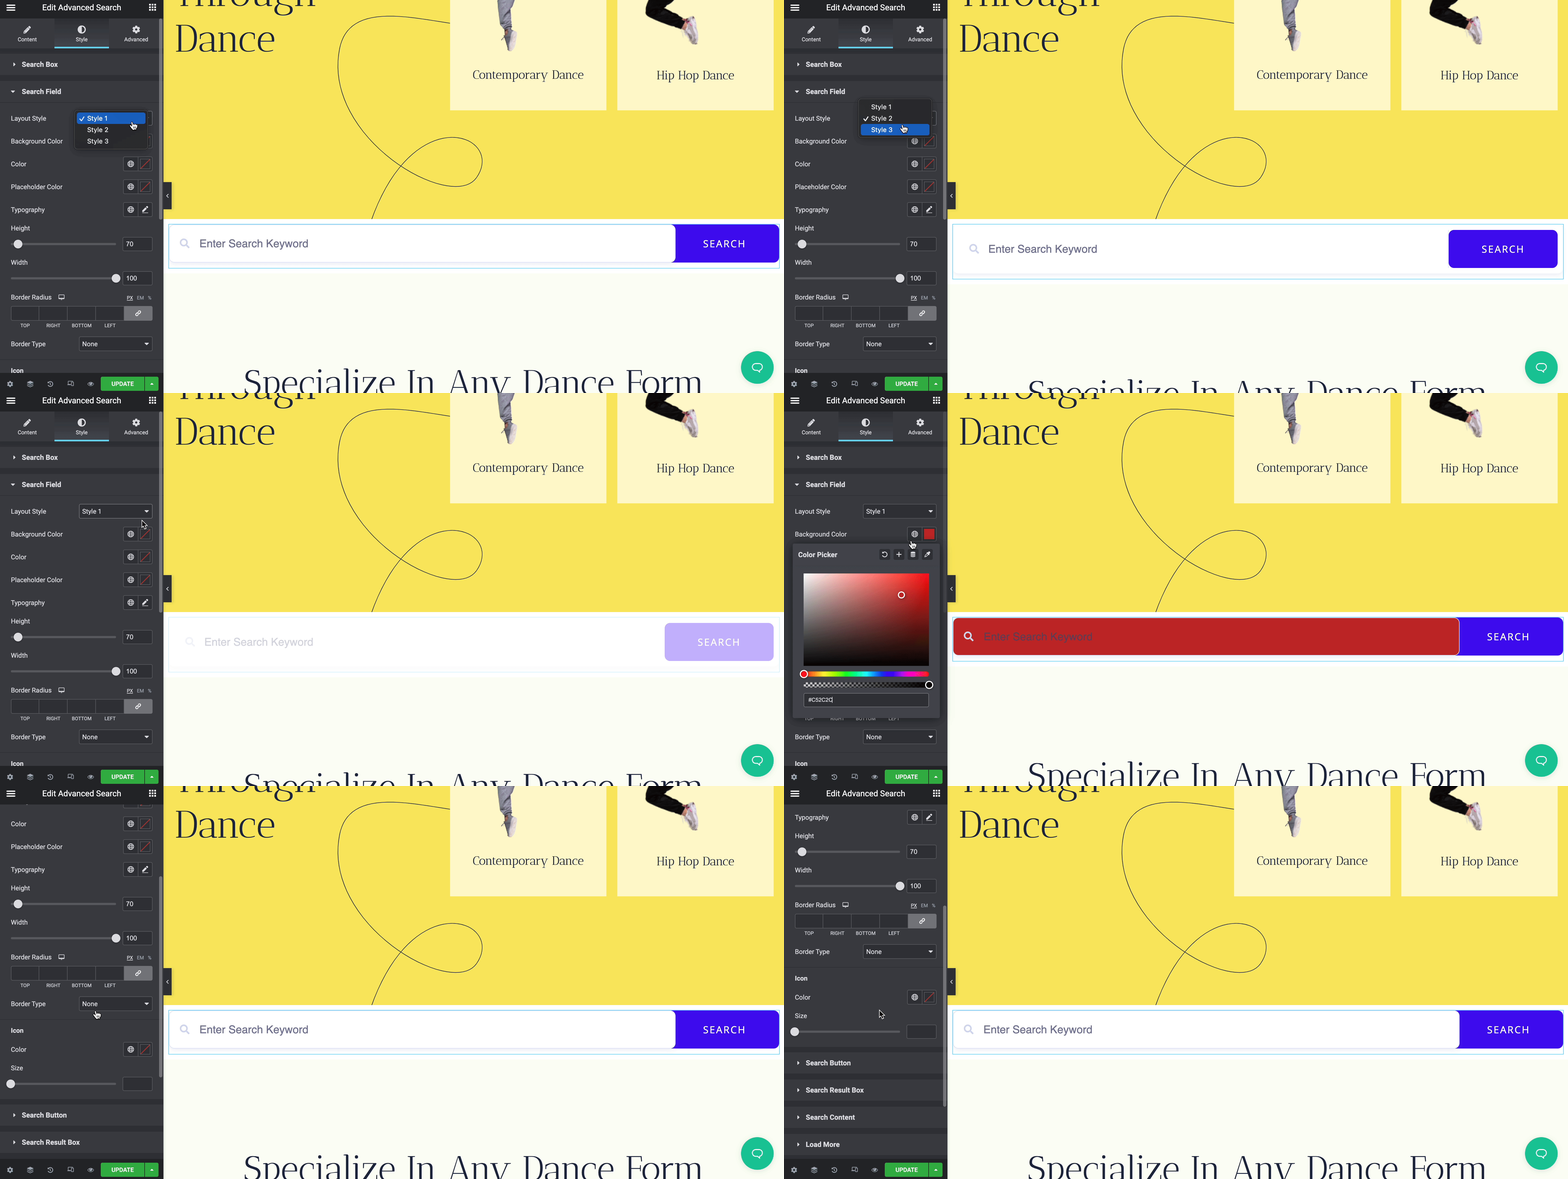
With the ‘Search Field’ section, you can change the style of your search field from using any of these three ready layout styles.
Besides, you can change background color, placeholder color, typography, height, width, search field icon color, size, and more exclusively.
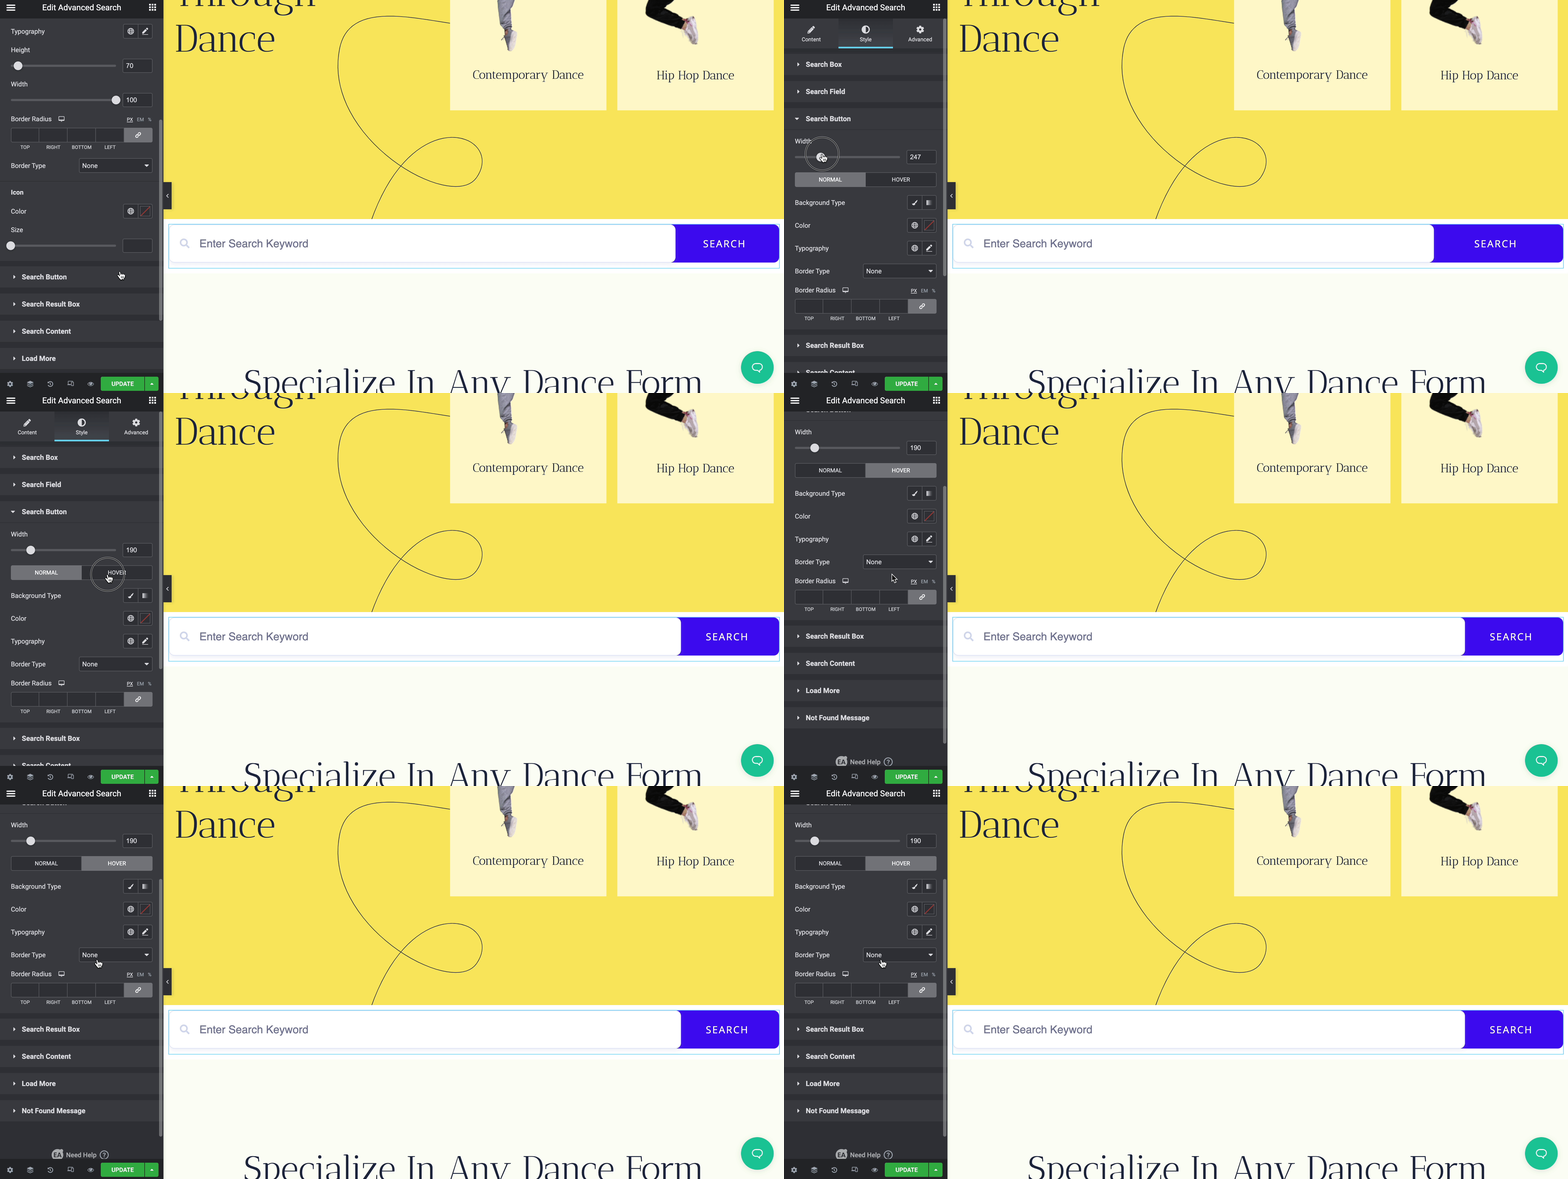
Otherwise, if you go with the ‘Search Button’ section, you can change the button width, and make changes with the available two styling options ‘Normal’ & ‘Hover’. You can change the color, typography, border type, radius for both options accordingly.
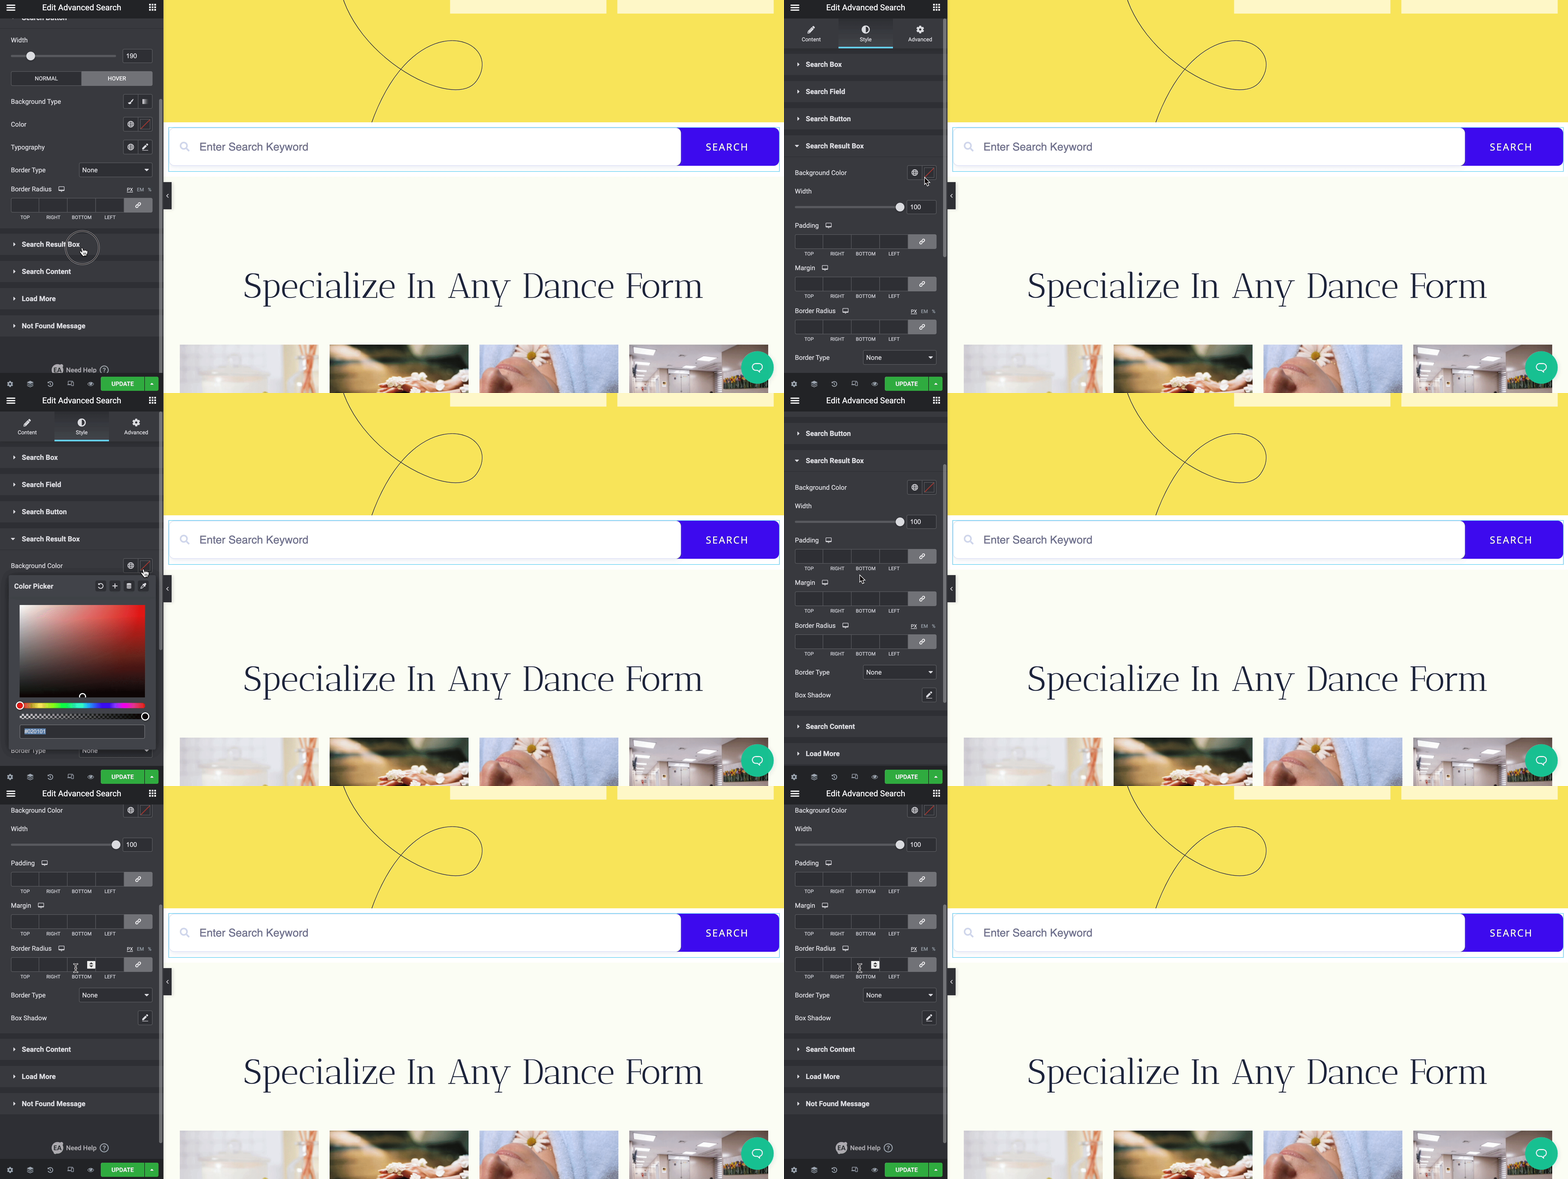
Also, you can make your ‘Search Result Box’ more appealing by changing the background color, width, padding, margin, border type, radius, shadow.
On the other hand, from ‘Search Content’, you can change the default style of your advanced search content to two layouts.
There you can set different styles for your chosen layout by configuring the ‘Normal’ & ‘Hover’ sections. If you want, you can change background color, padding, margin, and more in advance.
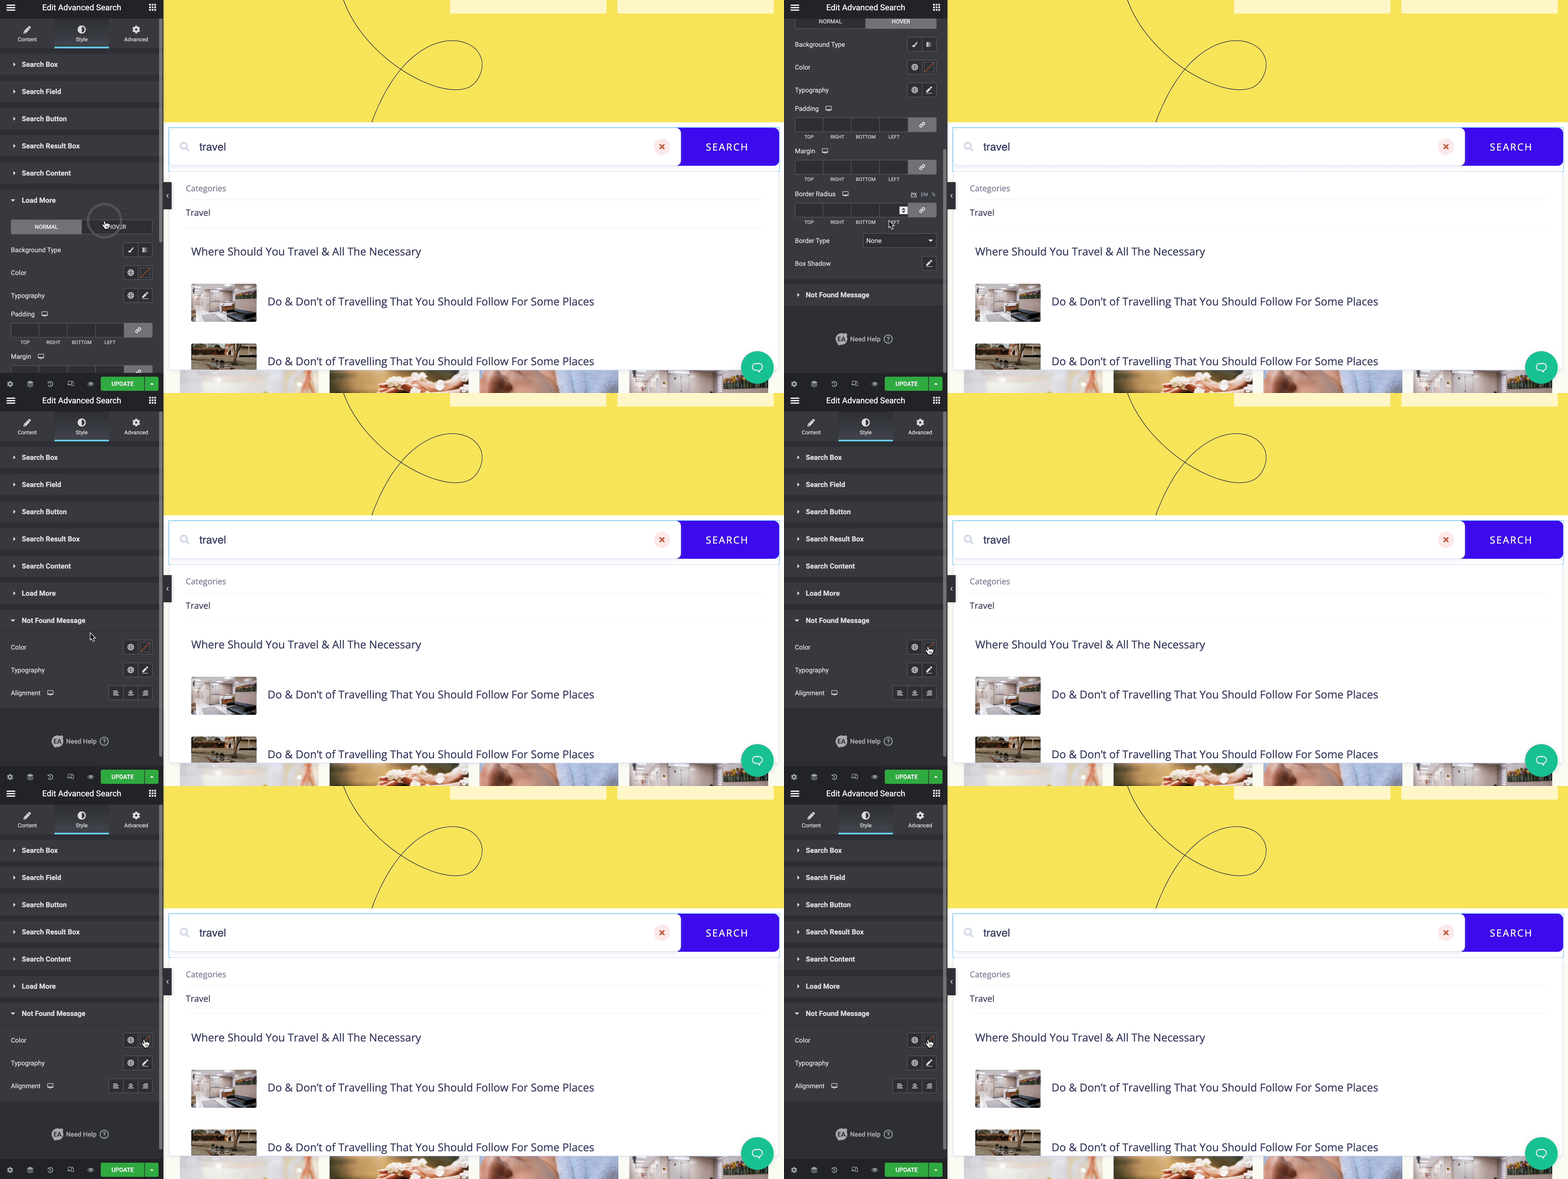
Otherwise, you can also make changes to the ‘Load More’ button style, and the ‘Not Found Message’ section.
Moreover, if you toggle on any option by changing the default content settings, you can then change the style of each as you want.
Final Outcome #
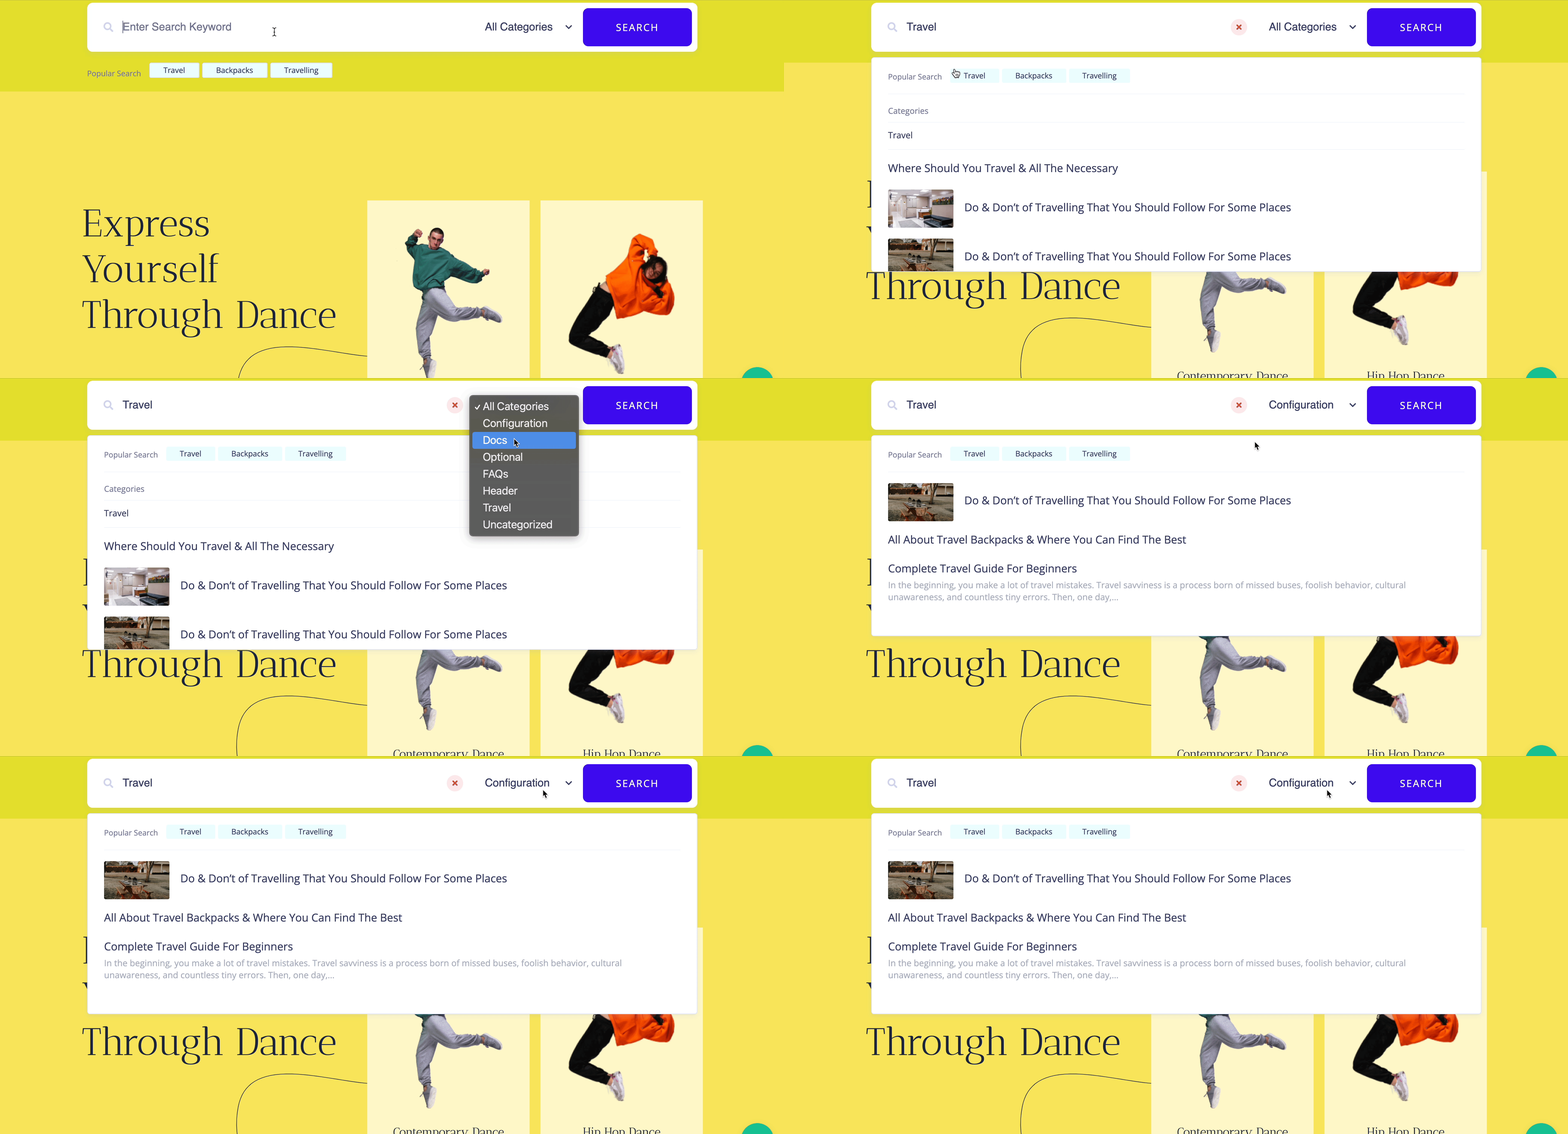
By following the basic steps and a bit more modifying, you can style your EA Advanced Search as per your preference.
This is how simply you can include an interactive search panel on your Elementor site using EA Advanced Search.
Getting stuck? Feel to Contact Our Support for further assistance.
