The EA Image Masking and Morphing is a powerful extension that lets you create seamless transformations and interactive visual effects with your images. It blends precise masking, smooth transitions, and dynamic shape morphing to craft captivating, fluid visuals. Perfect for websites, apps and creative projects, it transforms ordinary graphics into engaging, interactive, and modern designs.
How to Activate EA Image Masking And Morphing #
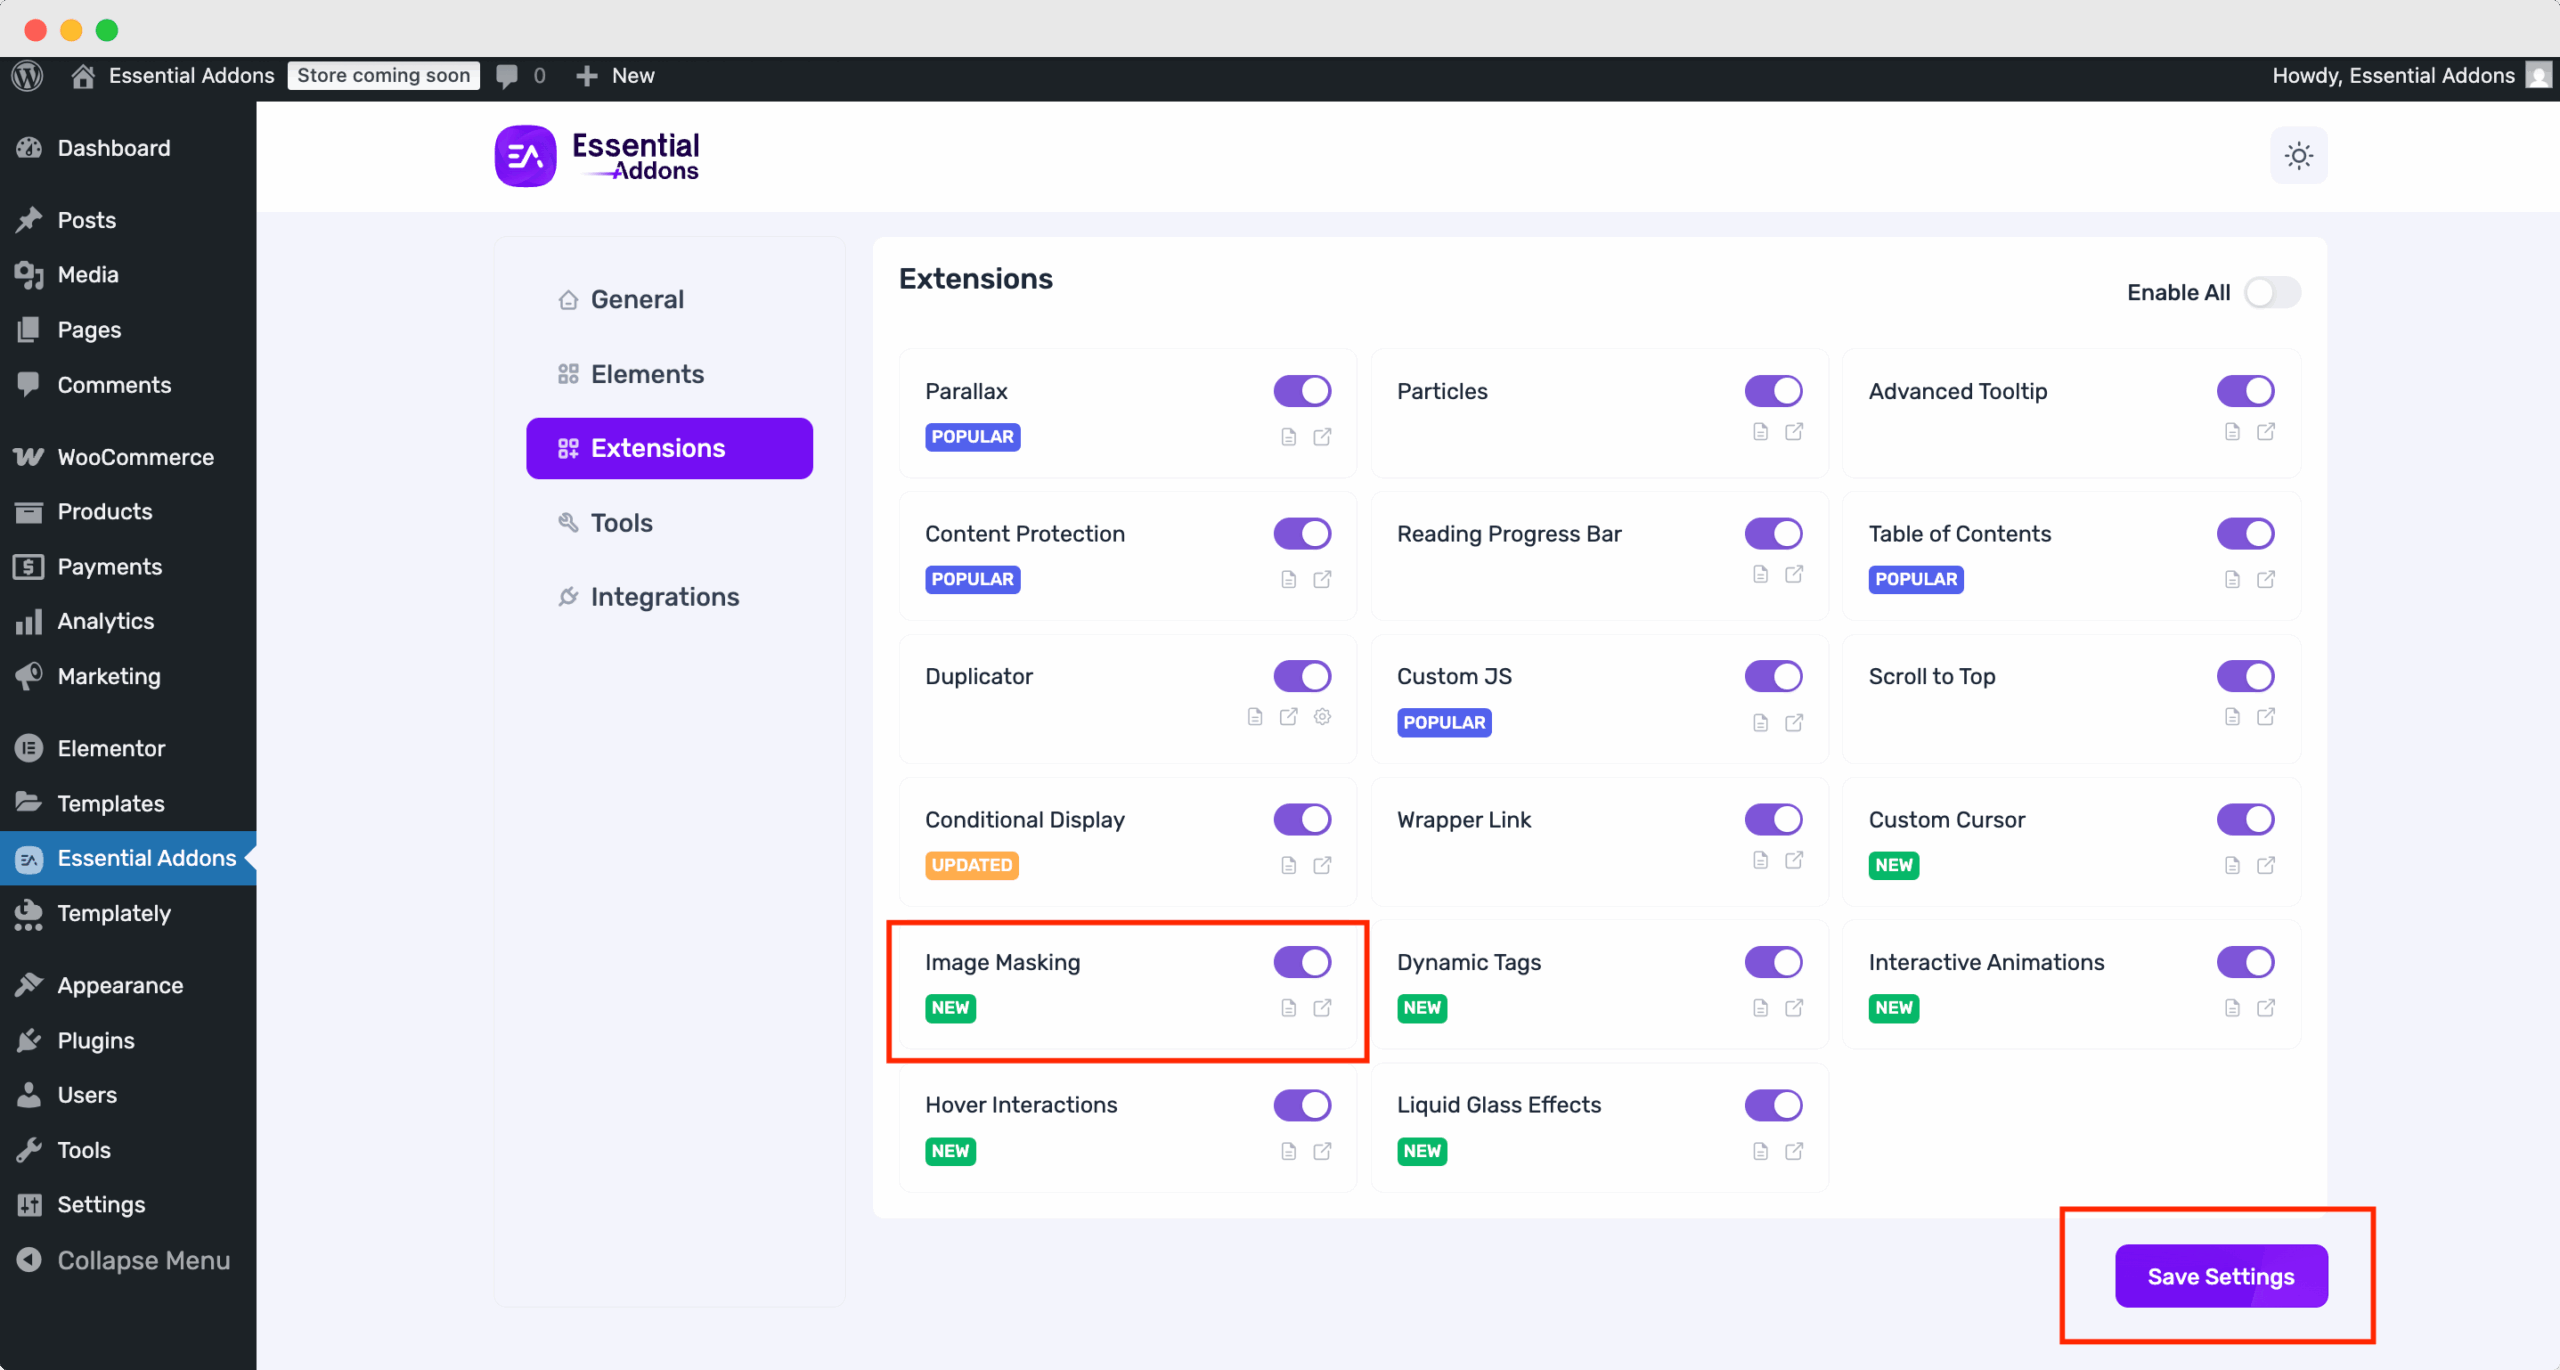
To access the Image Masking and Morphing, first, you need to activate the extension. To activate, go to the Essential Addons tab from your WordPress dashboard, click on ‘Extensions’ and find the ‘Image Masking’. Toggle on to activate and hit the ‘Save’ button to use this extension on your website.
Note: Image Masking is a free extension. And, if you want to implement image morphing, you have to install and activate Essential Addons PRO.
How to Configure the EA Image Masking #
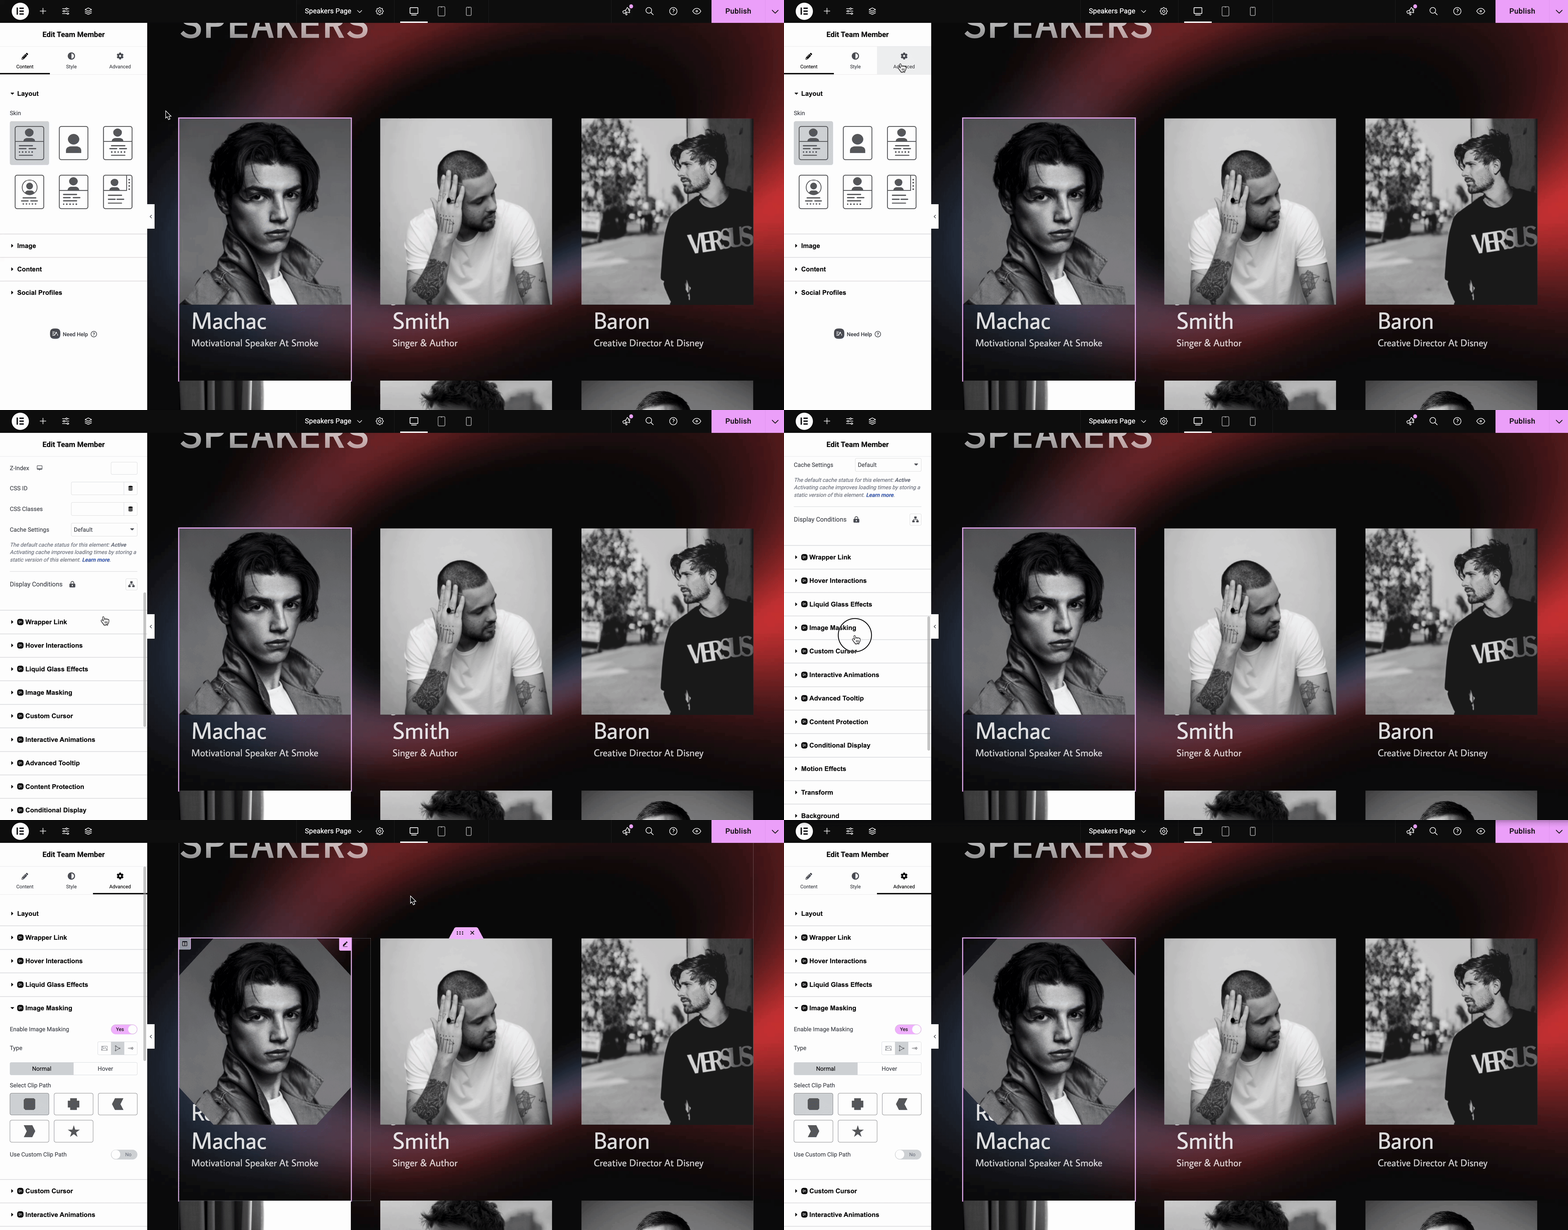
When you have activated the EA Image Masking extension on your element, you will find multiple options to customize it. You can use this effect in all Elementor widgets where it requires images.
First, select the whole section to make changes in all images, or select a specific image to add the masking extension. Then go to the ‘Advanced’ tab, where you will find the ‘Image Masking’ extension. Toggle the button to enable it.
Choose Image/ SVG Masking #
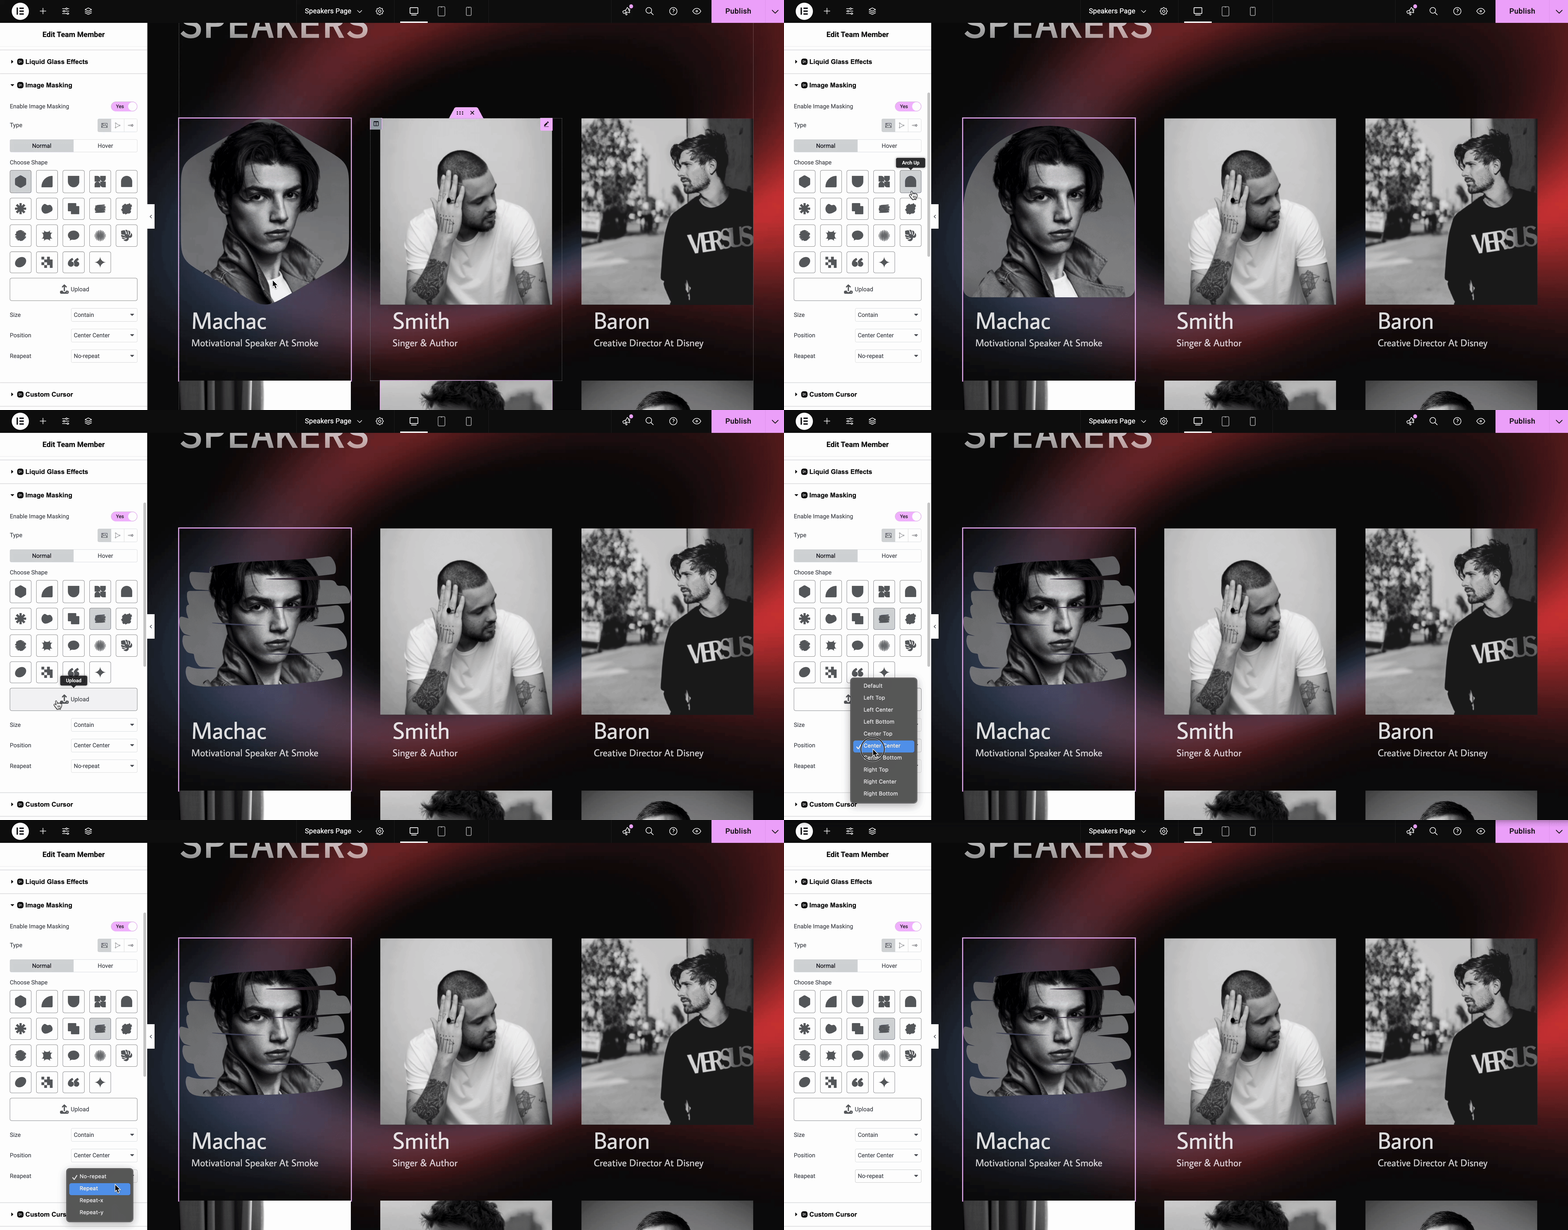
After enabling ‘Image Masking’, you will find an option to choose different shapes in image/ SVG format. There are 19 different shapes available in the extension. You can also upload your preferred shape in SVG format. You can customize the size, position and choose repeat for the shape.
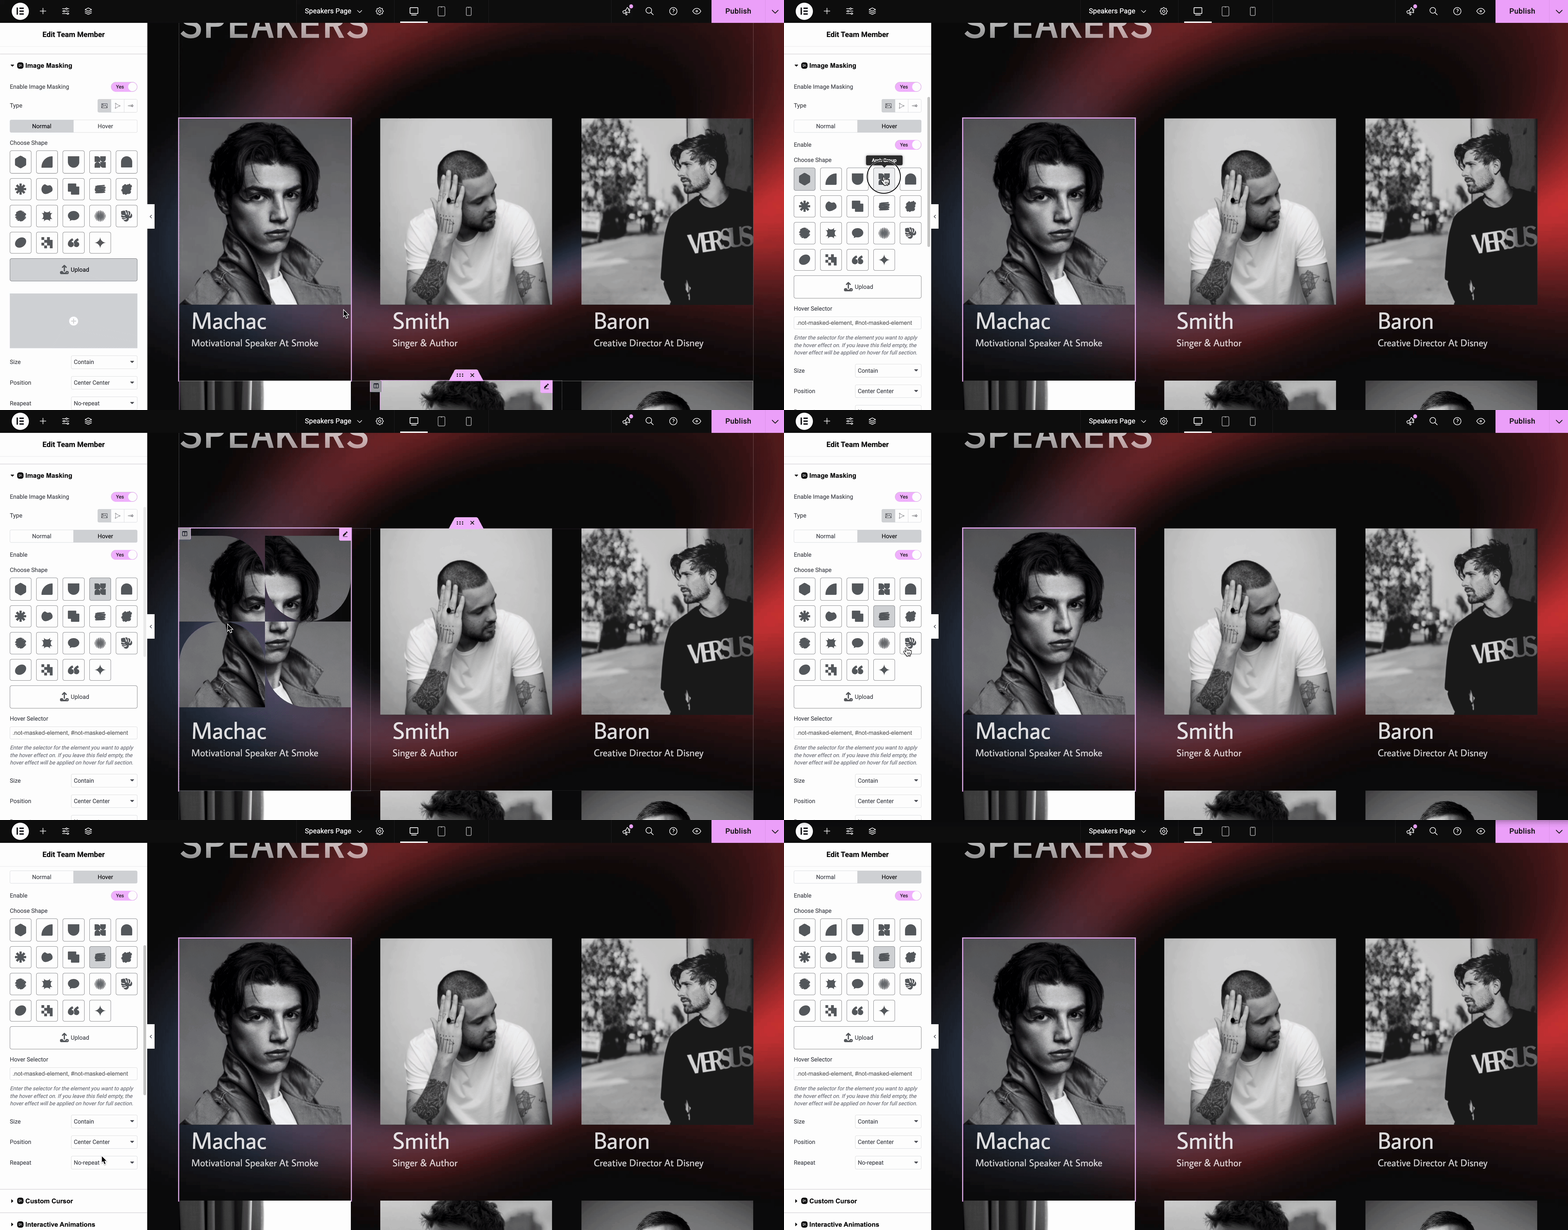
If you want to show a different shape while hovering over the image, go to the ‘Hover’ tab and toggle the button to enable it. There you will find similar options for the effect.
Choose Clip Path #
From the type, you can choose ‘Clip Path’ for masking. You will find 5 different clip path options, or you can customize on your own by enabling the ‘Use Custom Click Path’. To add a custom clip, you can go to Clippy and generate your custom clip path. Copy the path and paste it into the field. The clip will be implemented on your element. To show a different clip path while hovering over the image, go to the ‘Hover’ tab and you will find a similar option there.
Note: If you have multiple images and want to show the effect on only one image, then enter the selector for the element you want to apply the hover effect to.
How to Configure the EA Image Morphing #
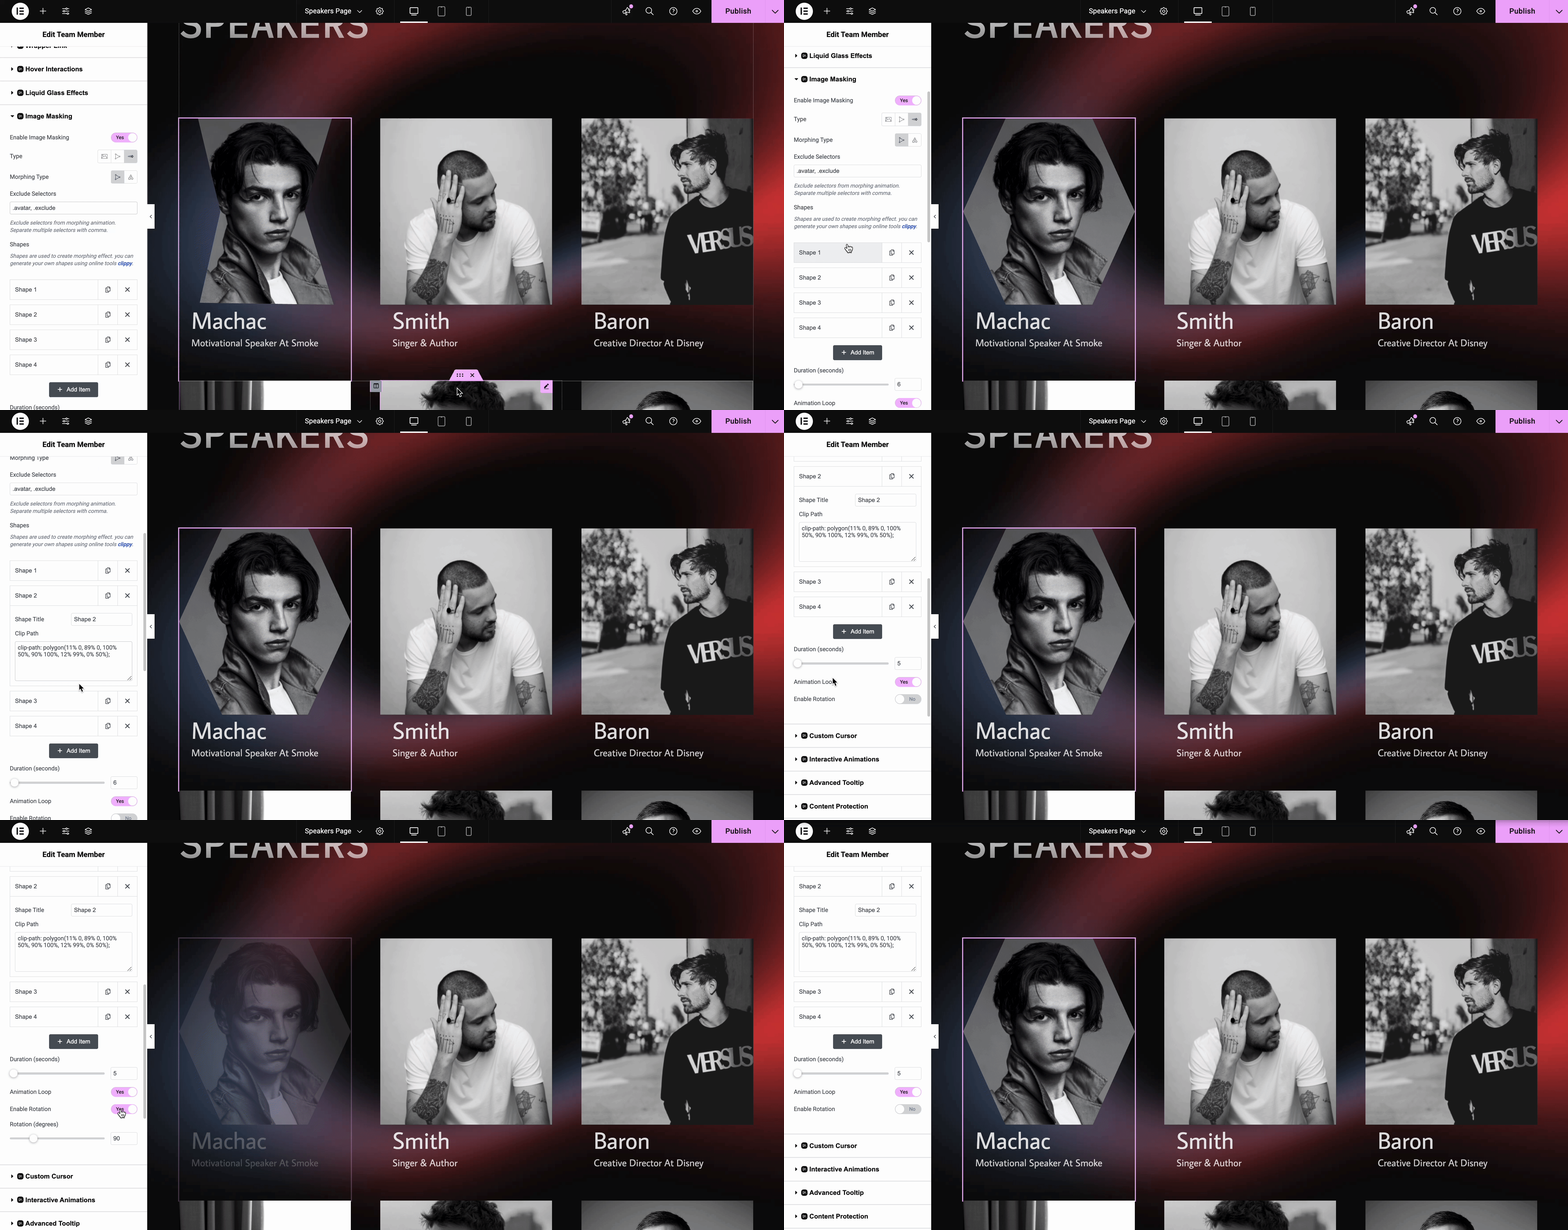
From the ‘Image Masking’ type option, go to the ‘Morphing’ tab. From the ‘Morphing type’, you can select ‘Clip Path’ or ‘SVG’. For clip paths, you can create your own shape by using ‘Clippy’. You will find options to add duration and enable or disable the ‘Animation Loop’ and ‘Rotation’.
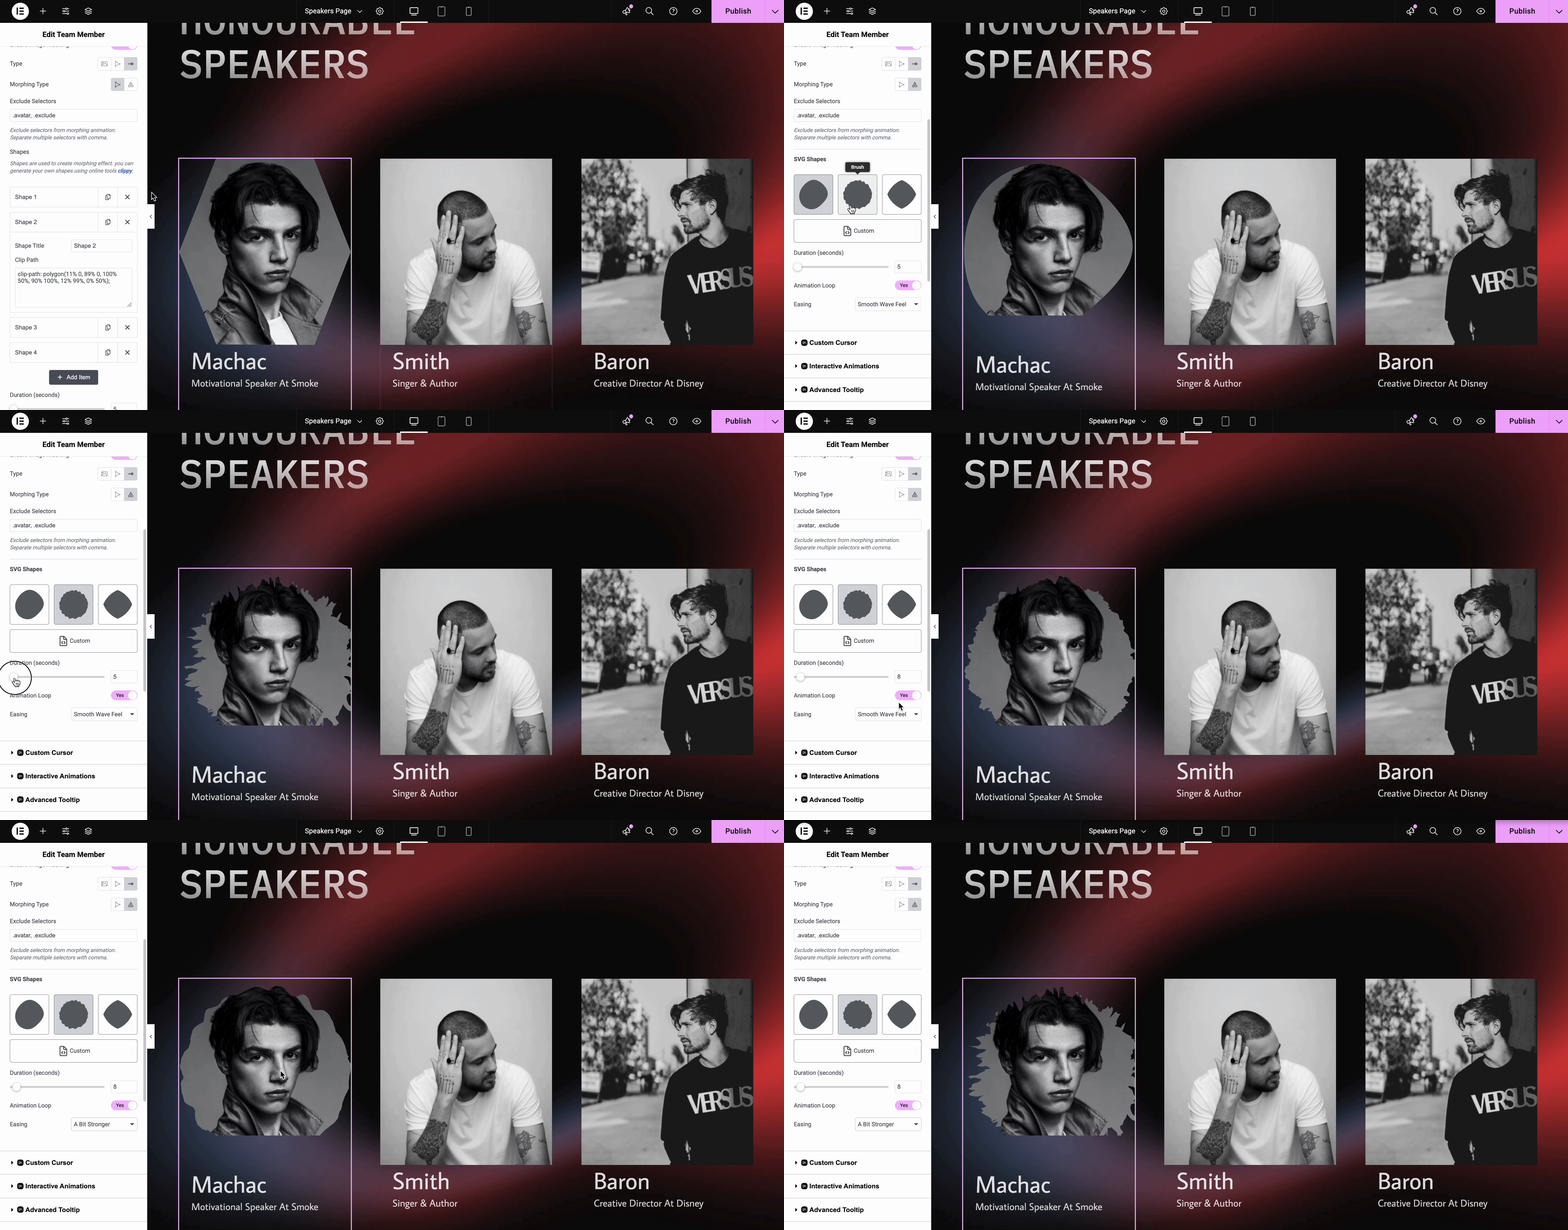
Next, go to the ‘SVG’ shapes, where you will find three different shapes. You can also add a custom shape on your own. Here, you will also find the option to select the ‘Duration’, ‘Animation Loop’, and four different ‘Easing Options’ to showcase the image as you want.
Final Outcome #
This is how you can show your website images beautifully and interactively with Image Masking and Morphing. This effect lets you craft mesmerizing visuals where images seamlessly transform and flow, blending shapes and layers with smooth transitions.
By following these basic steps and modifying them a bit more, you can easily control where you want the EA Image Masking and Morphing to appear and style them as per your preference.
Getting stuck? Feel free to Contact Our Support for further assistance.


