⚠️ Since Protected Content is dynamic, it is not fully compatible with caching. If you choose to use Protected Content, we suggest disabling the element caching in Elementor.
How to Configure And Style Protected Content
EA Protected Content lets you easily restrict your data based on user permissions or a password with plenty of styling options.
How to Activate Protected Content #
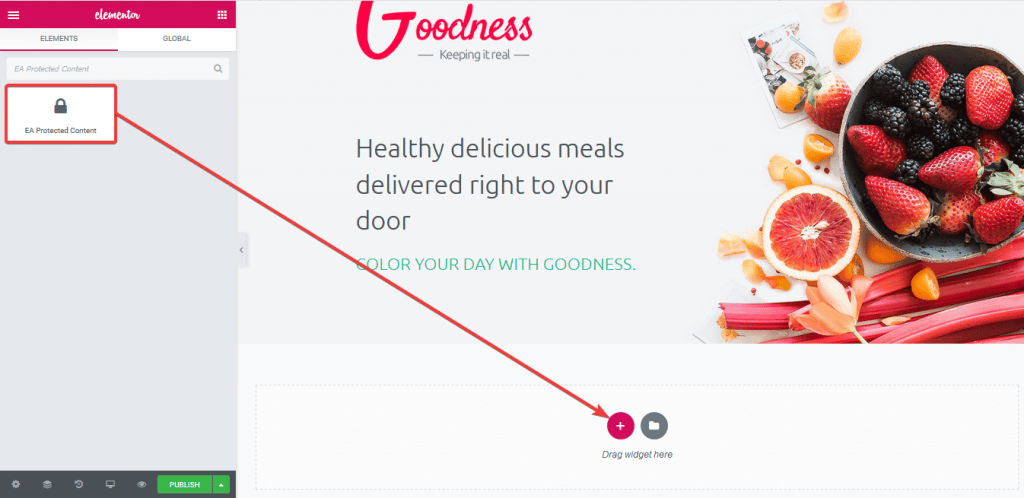
Find the ‘EA Protected Content’ from the Search option under the ‘ELEMENTS’ tab. Simply just Drag & Drop the ‘EA Protected Content’ into the ‘Drag widget here’ or the ‘+ section.
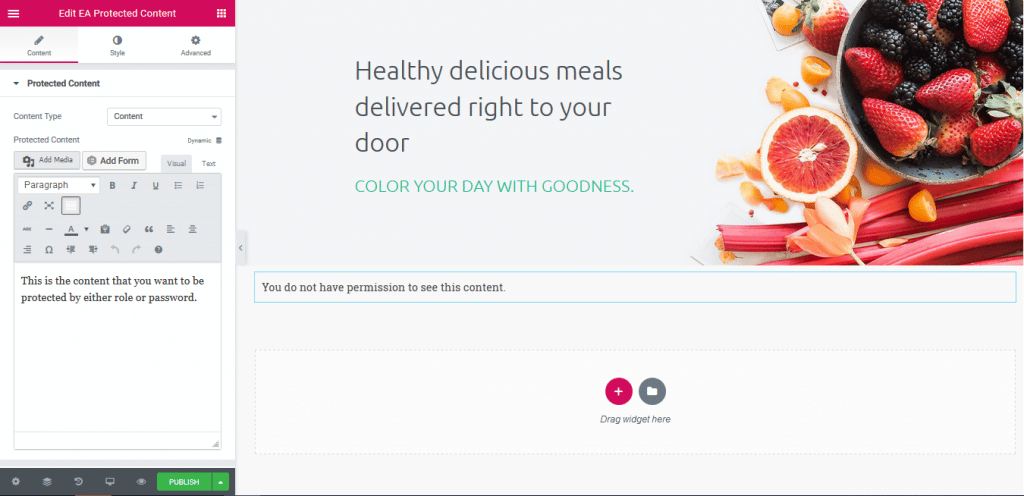
After you are done with Step 1, this is the default layout you are going to see.
How to Configure the Content Settings #
Under the ‘Content’ tab, you will find the ‘Protected Content’ section.
Protected Content
By default, ‘Content Type’ is set as ‘Content’. You can modify your ‘Protected Content’ by adding media, Shortcode or changing the text content.

You can change your ‘Content Type’ to ‘Saved Template’ as well. You can use the drop-down to choose a template of yours preference.
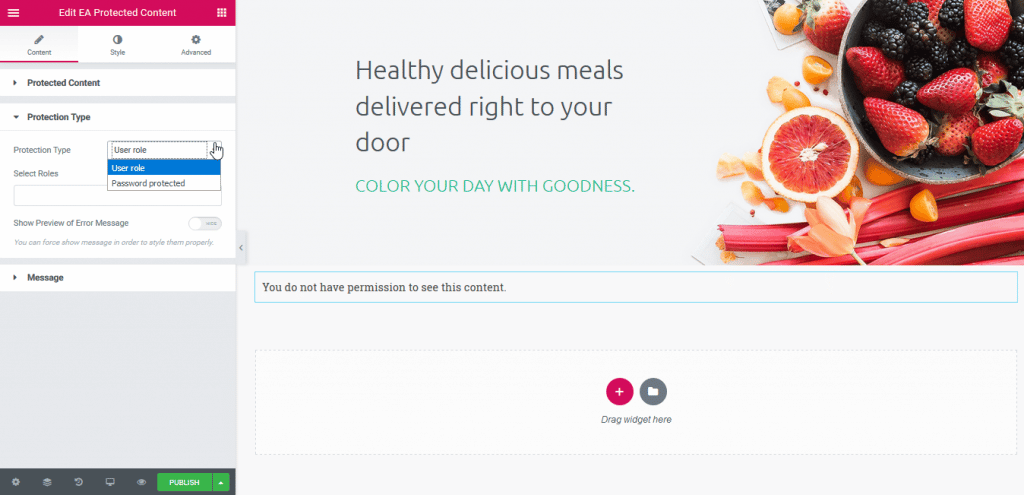
Protection Type
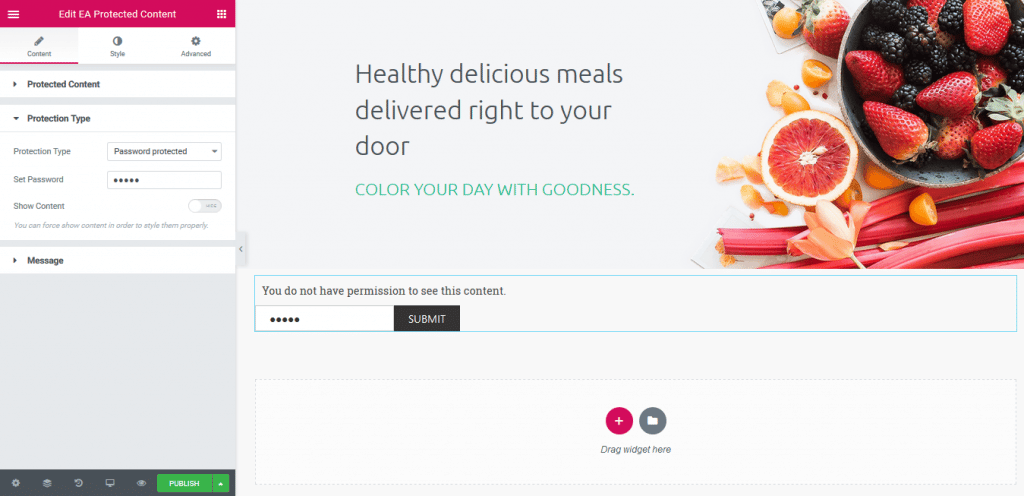
You can use the drop-downn menu to select any of these two protection types: User Role & Password Protect. With ‘User Role’ protection type, you can select the ‘Roles’ of the users who will be able to view the content.

With ‘Password Protected’ type, you will have to set a password which will be required to insert to view the content.
Message
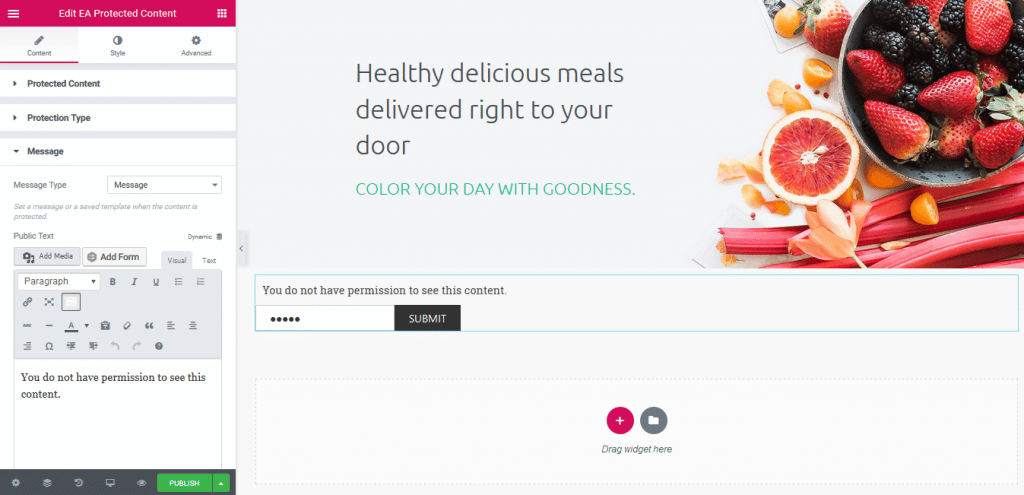
You can set the ‘Message Type’ to any of these three: None, Message and Saved Templates. You can easily modify your message content as per your preference.
How to Style Protected Content #
Switch to the ‘Style’ tab to style all the elements of Protected Content. You can easily add Styling to the ‘Content’, ‘Message’, ‘Password Field’ and ‘Button’ section as per your preference.

Final Outcome #
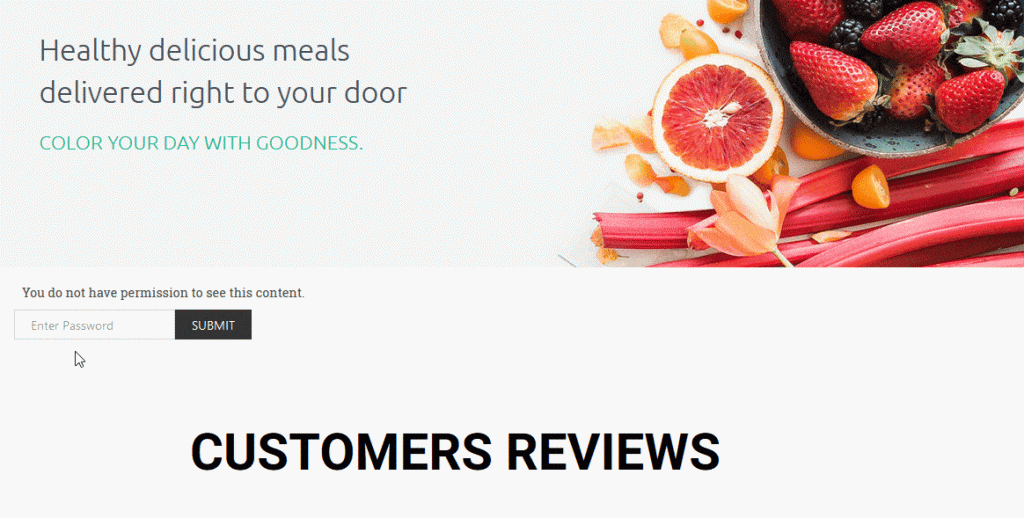
By following the basic steps and a bit more modifying, you can style your Protected Content in however you want. This is how you can easily get started with EA Protected Content element.
