EA Woo Cart element helps you provide a great shopping experience and boost sales by creating an attractive WooCommerce Add To Cart page with Elementor. Now you can create stunning and attractive cart pages in different layouts with just a few clicks with this WooCommerce element from Essential Addons.
How To Set Up WooCommerce Cart Page? #
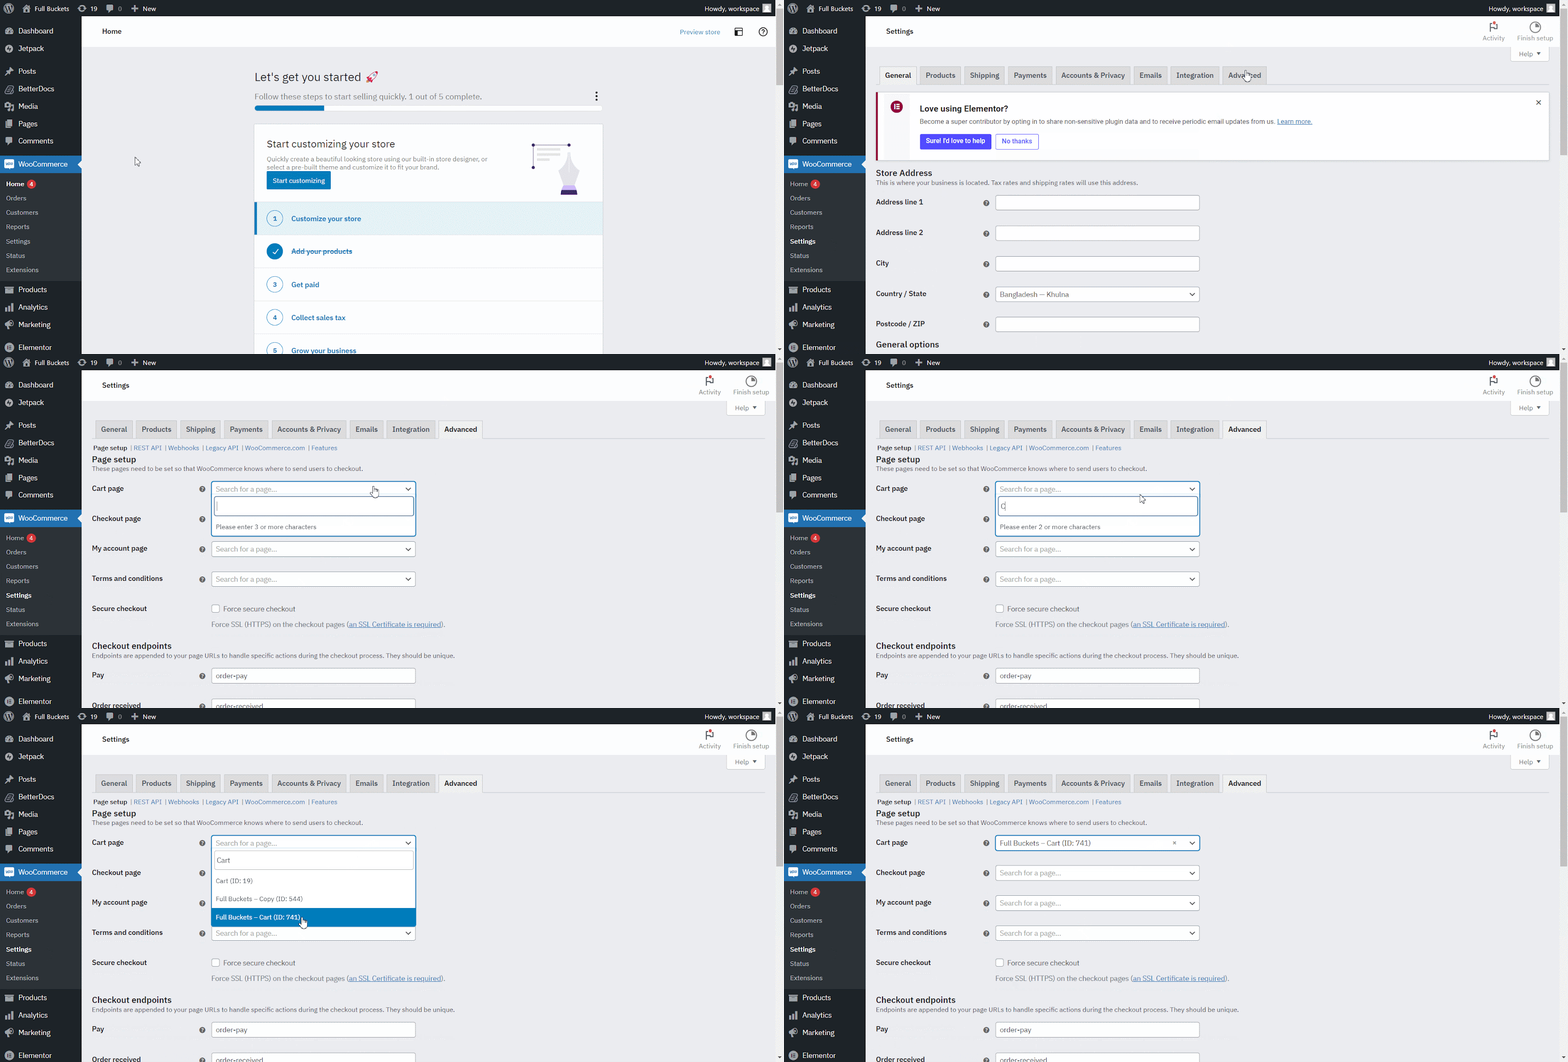
First of all, you must make sure that you already have installed and configured WooCommerce plugin. For this to work inside Elementor Editor, make sure that you already have added some products to your cart. To use EA Woo Cart element, create a new page and assign it as a WooCommerce Cart page.
Navigate to WooCommerce → Settings from your WordPress Dashboard and click on the ‘Advanced’ tab. From here, you can assign your desired page as your cart page. Simply click on the ‘Cart page’ option and pick any page from the drop-down menu as your WooCommerce cart page. You will be all set to go.
How To Activate EA Woo Cart? #
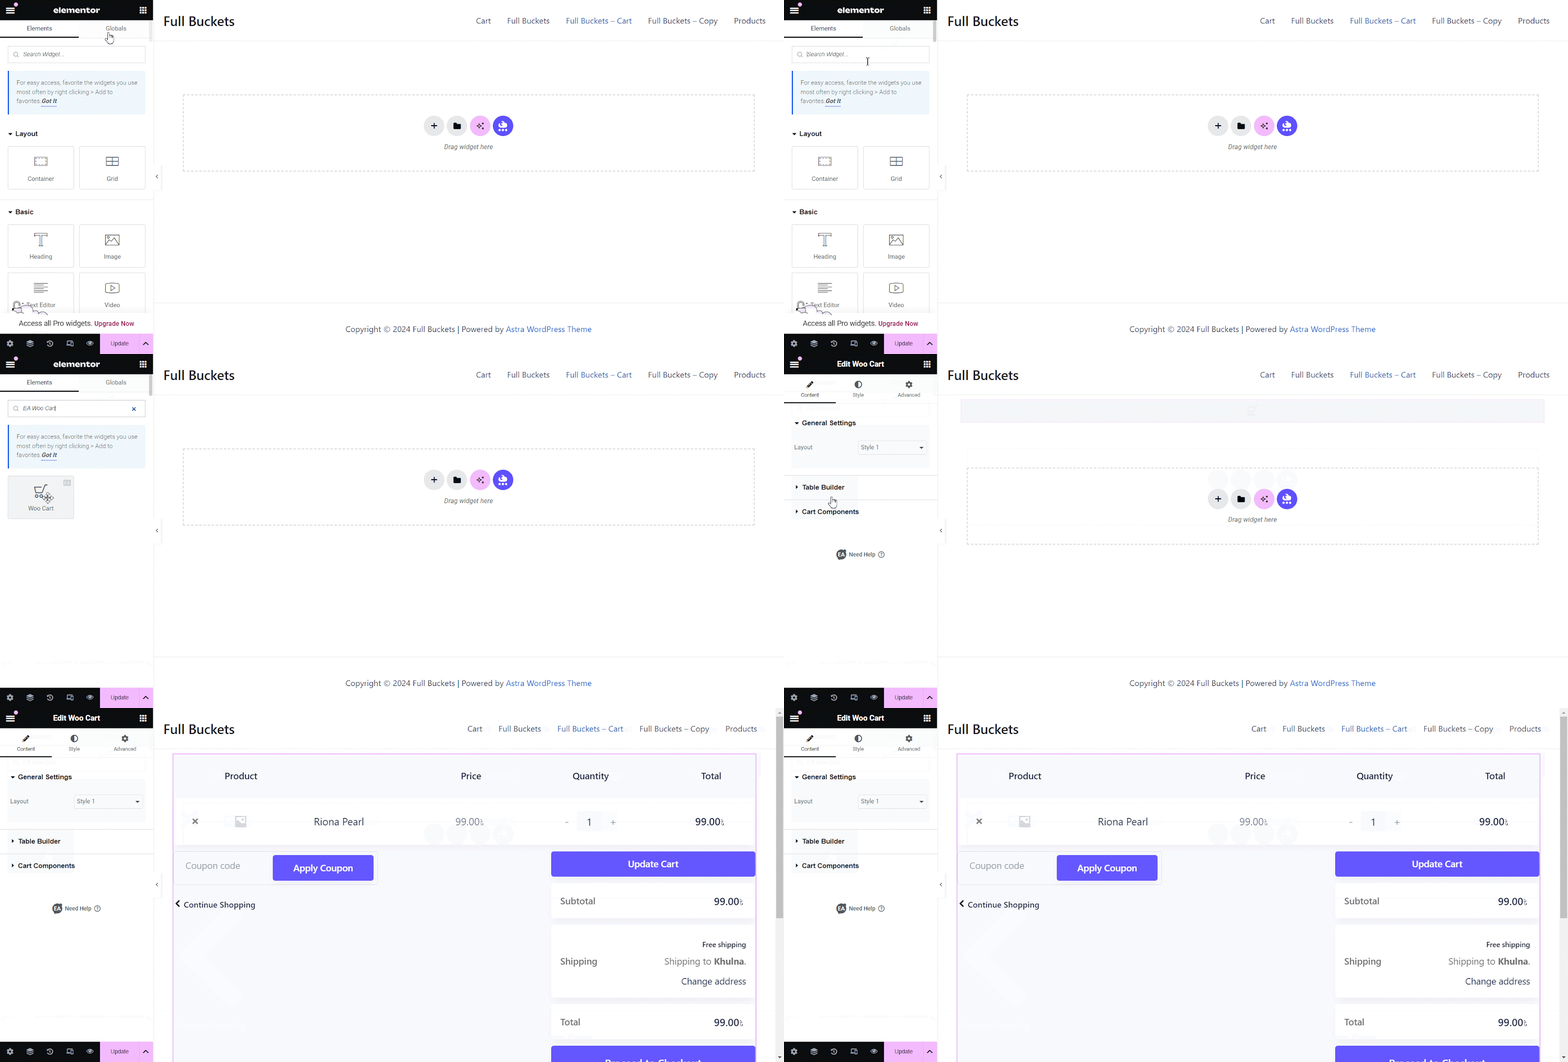
After finishing the previous step, let’s edit your WooCommerce Cart page using the Elementor Editor.
First, navigate to the Essential Addons For Elementor → Elements tab. Toggle the ‘Woo Cart’ option and hit the ‘Save Settings’ button from the bottom.

To use this Essential Addons element, find the ‘EA Woo Cart’ element from the ‘Search’ option under the ‘Elements’ tab. Simply just drag and drop the ‘EA Woo Cart’ element into any section you want in Elementor Editor.
How To Configure The Content Settings? #
Under the content tab, you will see several options like ‘General Settings’, ‘Table Components’, or ‘Cart Components’. You can configure these settings to customize the content of your Woo Cart page.
General Settings #
From the ‘General Settings’, you will find 2 different styles of layouts. You can pick any and customize your Woo cart outlook as per your preferences.
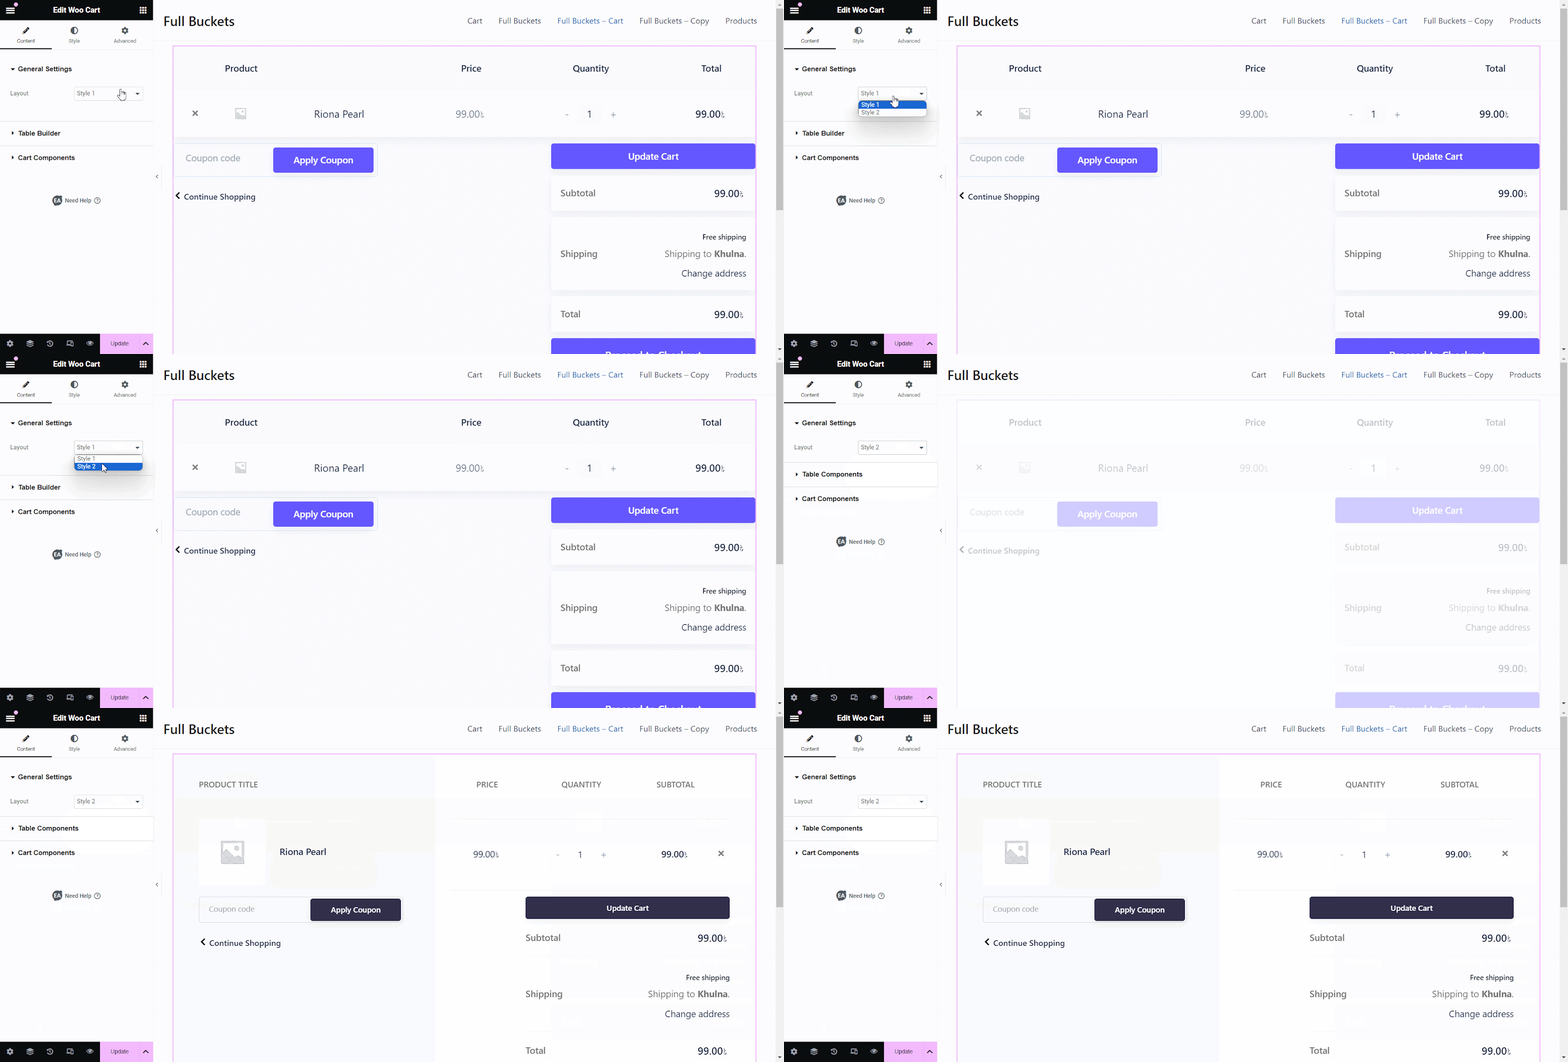
Table Components #
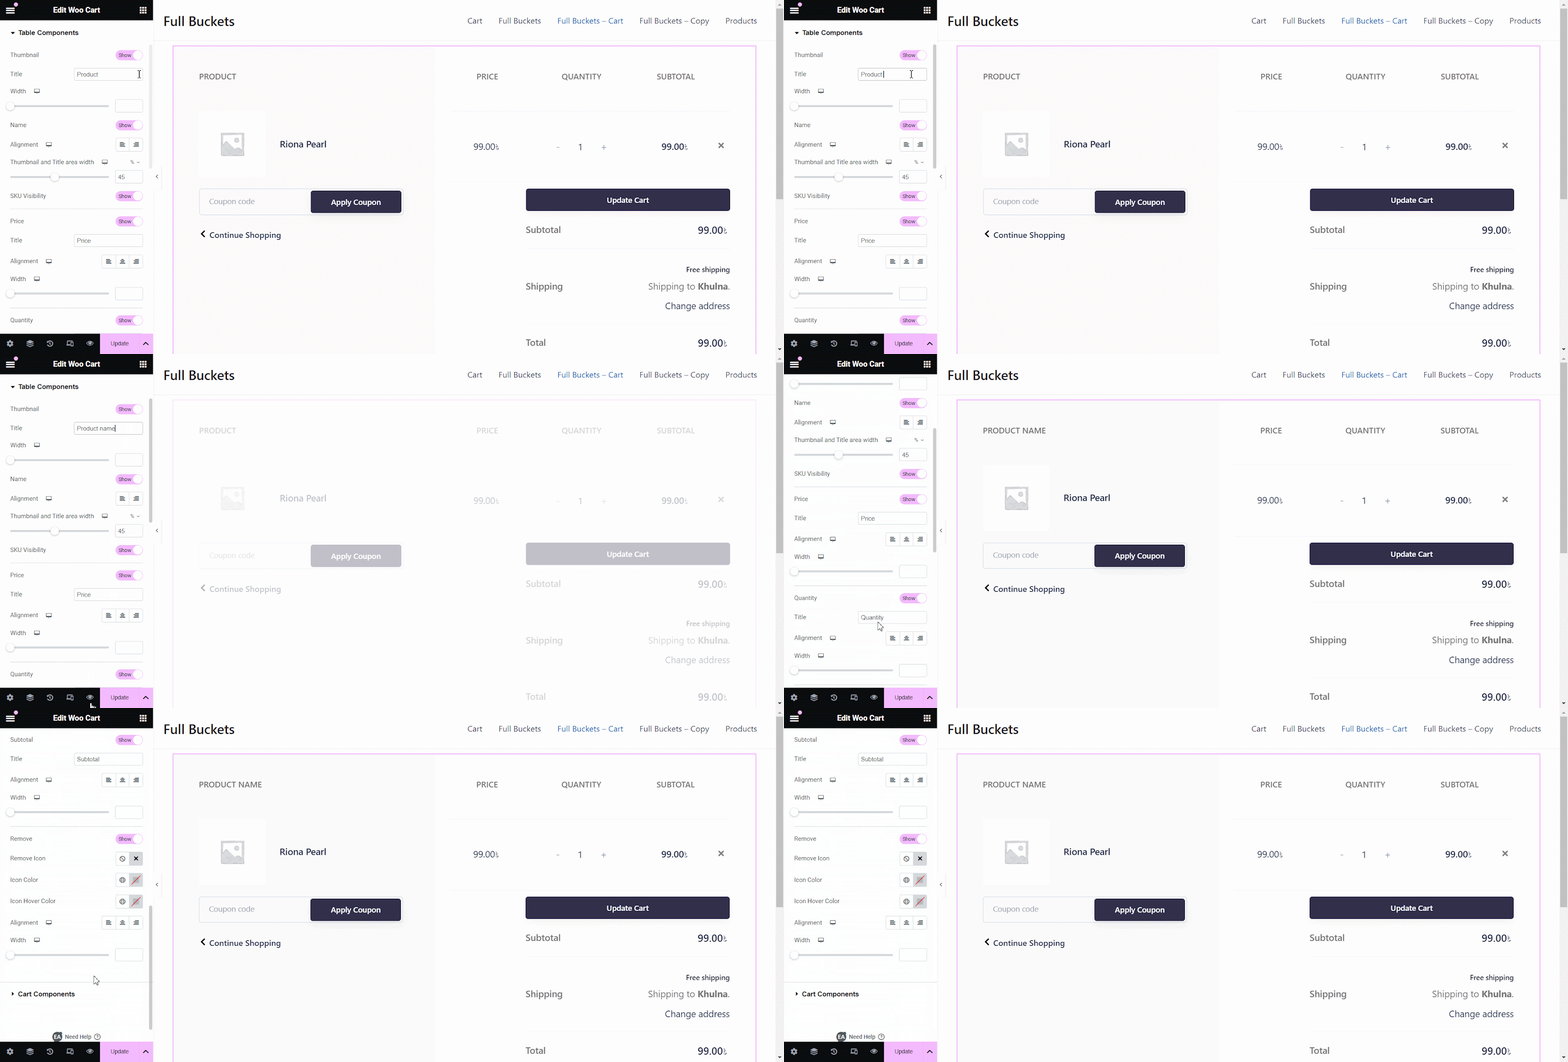
From ‘Table Components, you can change the table labels and dragging sections and more to rearrange your Woo cart price table.
Cart Component #
From the ‘Cart Components’, you can toggle ‘Automatically Cart Update’ to enable your customers to add more products to their cart. By toggling the ‘Coupon form’ you can give the option to add any coupon they want. Besides, you can enable the ‘Continue shopping’ option to help customers return to the shop page again to shop more.
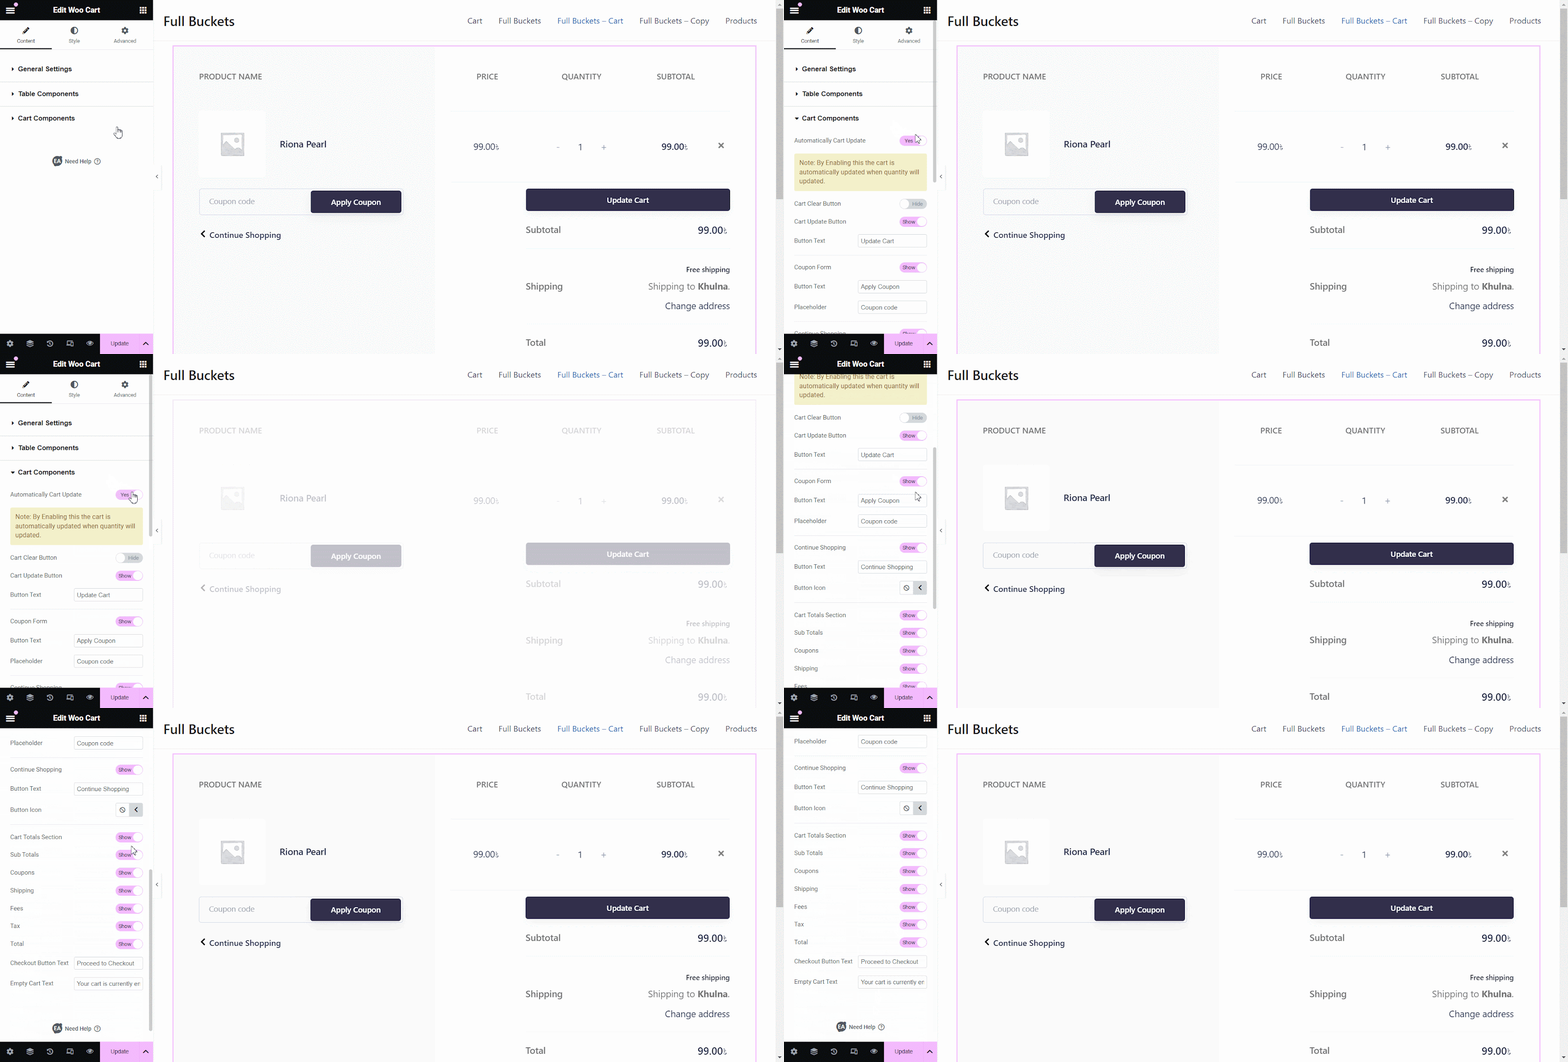
Moreover, you can even change the ‘Checkout Button Text’ from this section and make your call to action more interactive.
How To Configure The Style Settings #
Once you have configured the content for your Woo cart page, it’s time to style it. Click on the ‘Style’ tab to customize different areas of your page.
General #
From the ‘General’ section, you can change the background of your whole EA Woo Cart section. Adjust the color of your background manually or choose global colors.
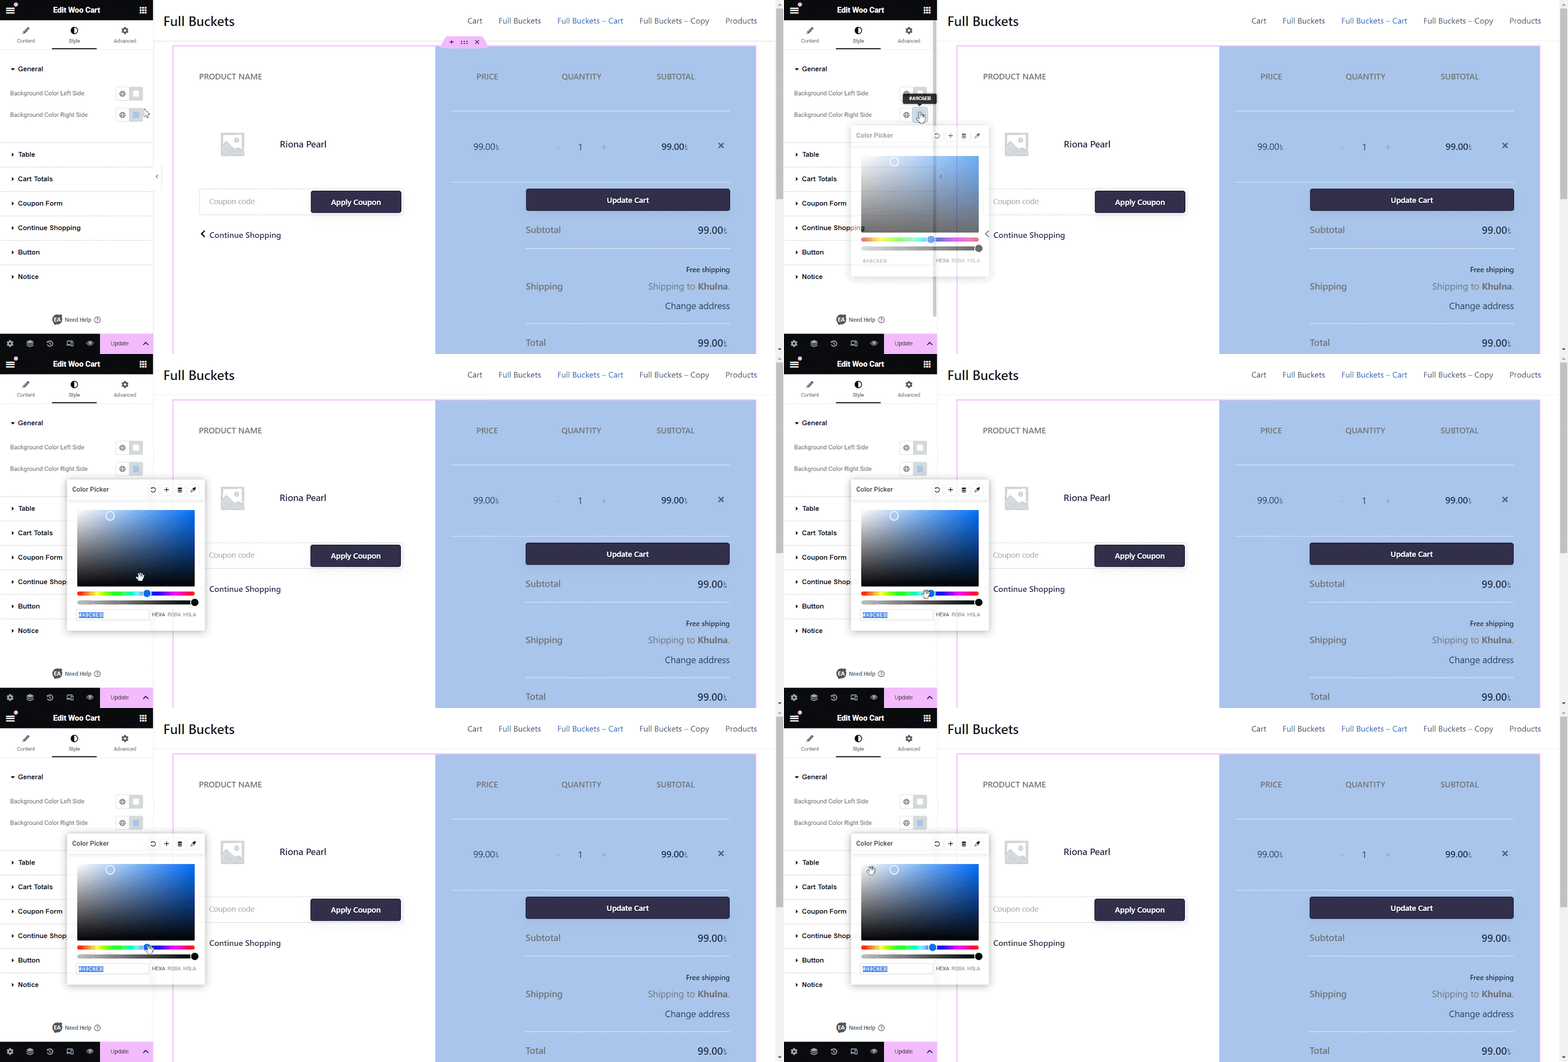
Table #
From this section, you can change the padding, margin, typography, border type, and so on of the whole cart section. It will eventually make your Woo cart page stand out.

Others #
In the same way, you can change the appearance of ‘Cart Total’, ‘Coupon Form’, ‘Continue Shopping’, ‘Button’, and ‘Notice’. You can even change the texts inside as well.
To add more functionality and make your Woo cart page look more interactive and attractive, you can explore the ‘Advanced’ setting options as well.

By following these simple steps, you can easily create a stunning WooCommerce Cart page for your website as per your preference.

This is how you can quickly create and design an amazing Woo Cart page for your WooCommerce website by using EA Woo Cart element.
Getting stuck? Feel free to contact our support for further assistance.


