How to Configure and Style EA Pricing Table
EA Pricing Table lets you easily design an attractive pricing list of your packages with plenty of styling options. Marketing Bundle of Essential Addon includes the Pricing Table element. With its easy interface, you can input the text first. Then sleep over it to come up with the perfect styling consistent with the other parts of your website.
How to Activate Pricing Table #
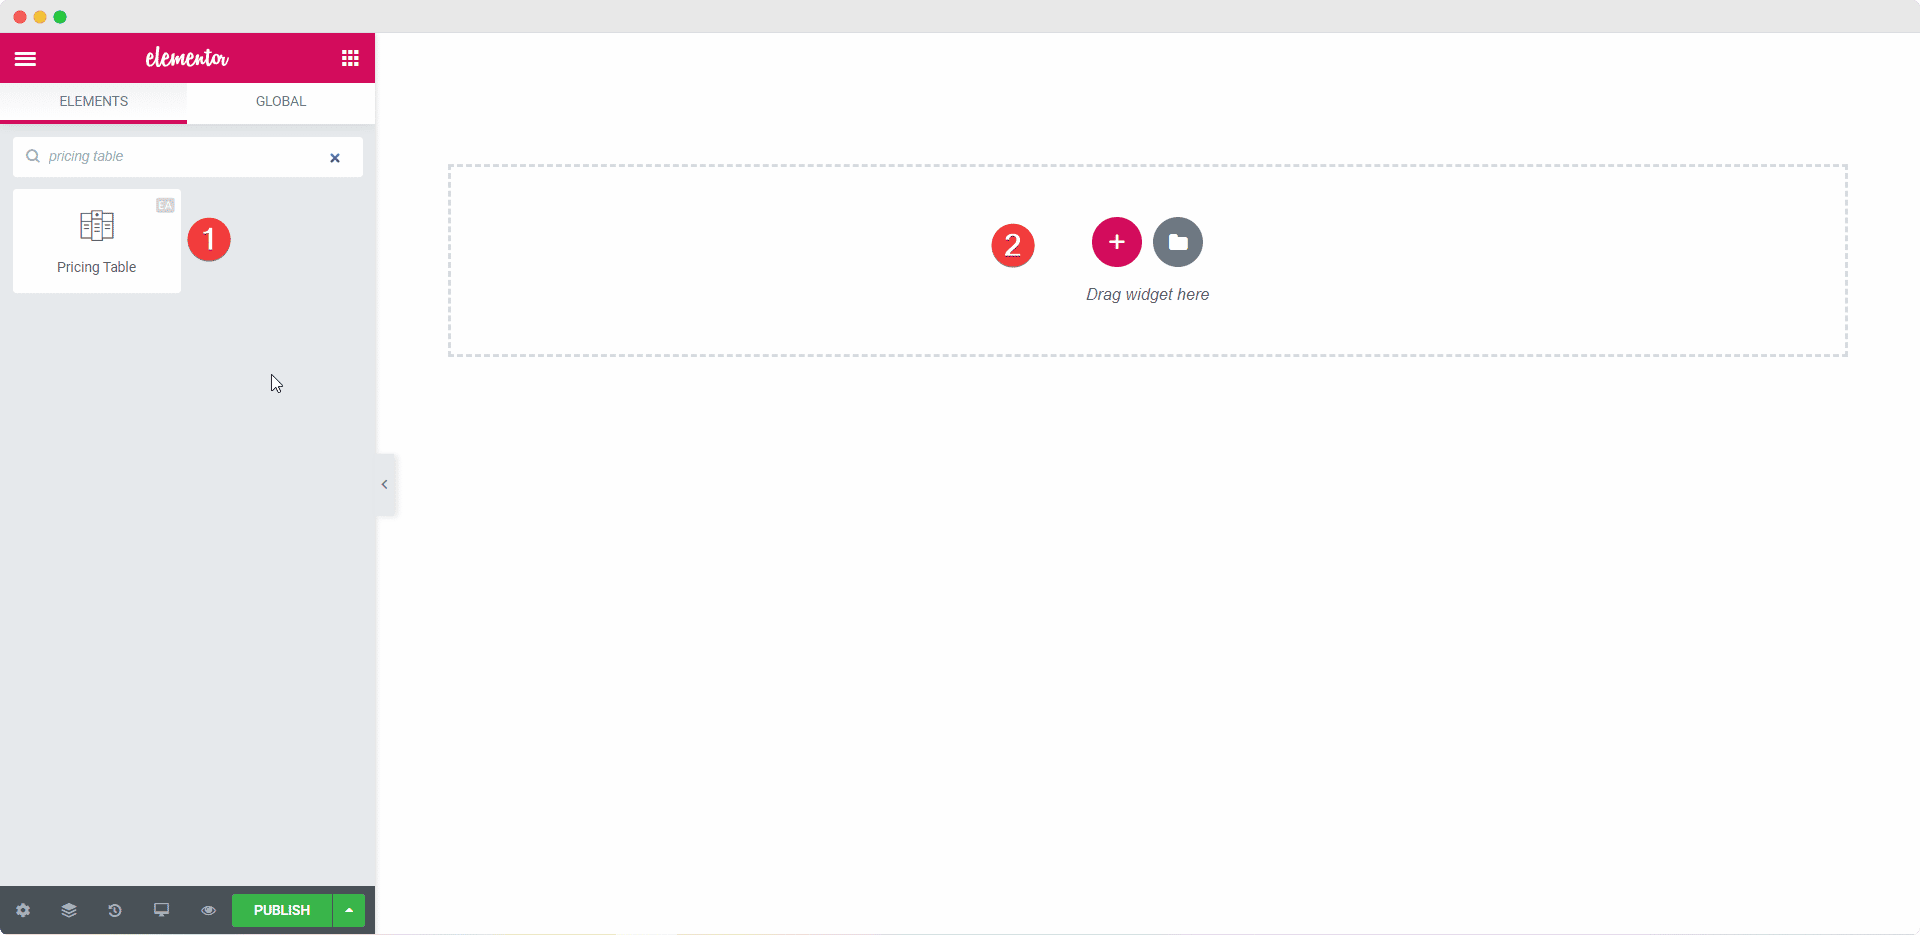
To use this Essential Addons element, find the ‘EA Pricing Table‘ element from the Search option under the ‘ELEMENTS‘ tab. Simply just Drag & Drop the ‘EA Pricing Table’ into the ‘Drag widget here‘ or the ‘+’ section.
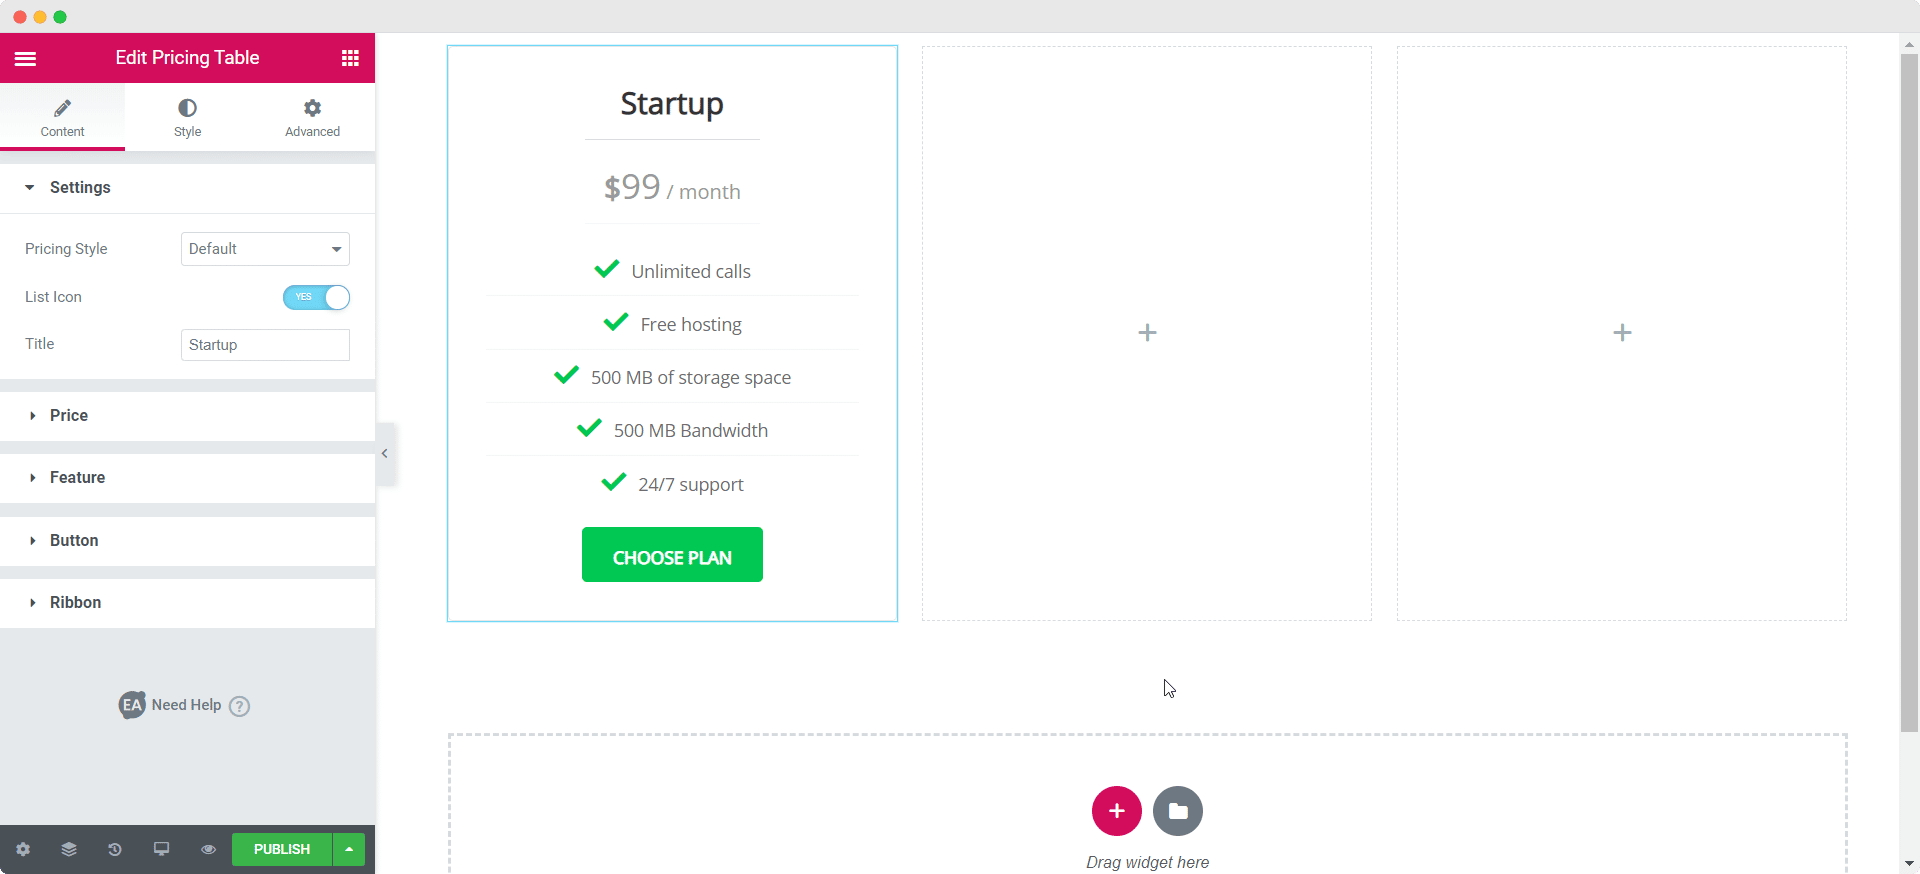
After you are successfully done with step 1, this is how the element is going to look like.
How to Configure the Content Settings #
Under the ‘Content’ tab, you will find the ‘Settings’ section.
Settings #
From the ‘Settings’ section, you can use the drop-down menu to select your preferred ‘Pricing Style’ layout. Besides the default layout, you have the option to choose from five more ‘Pricing Style’ layouts.
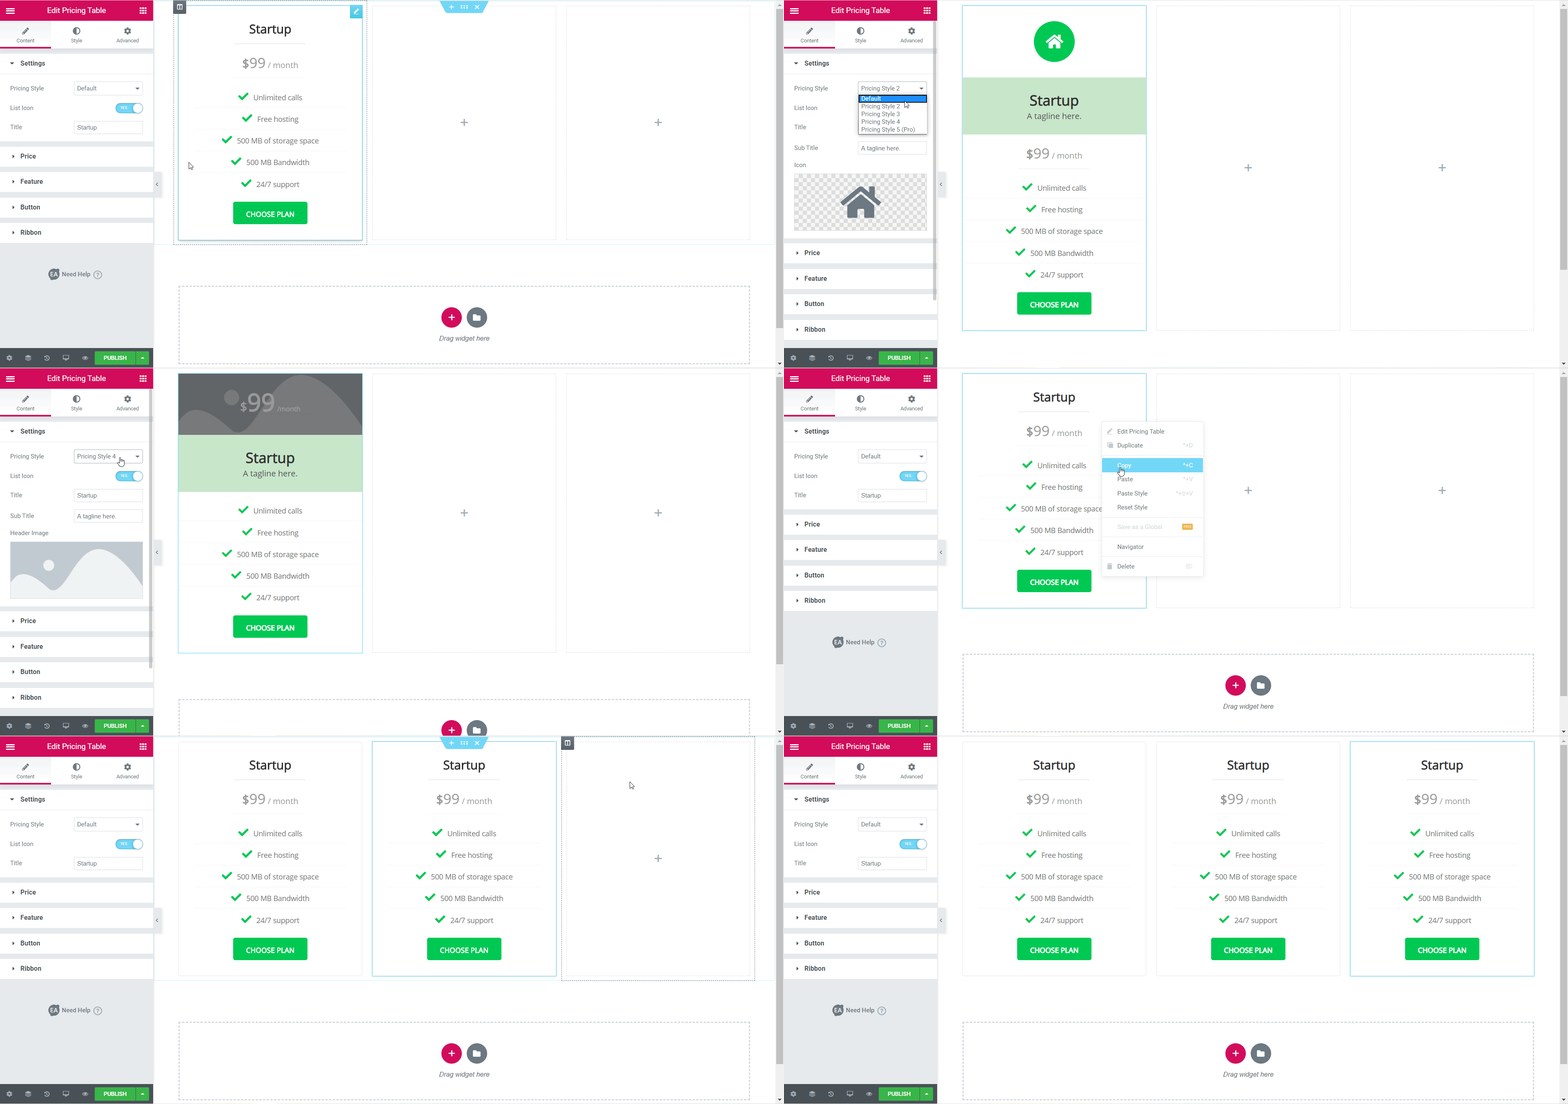
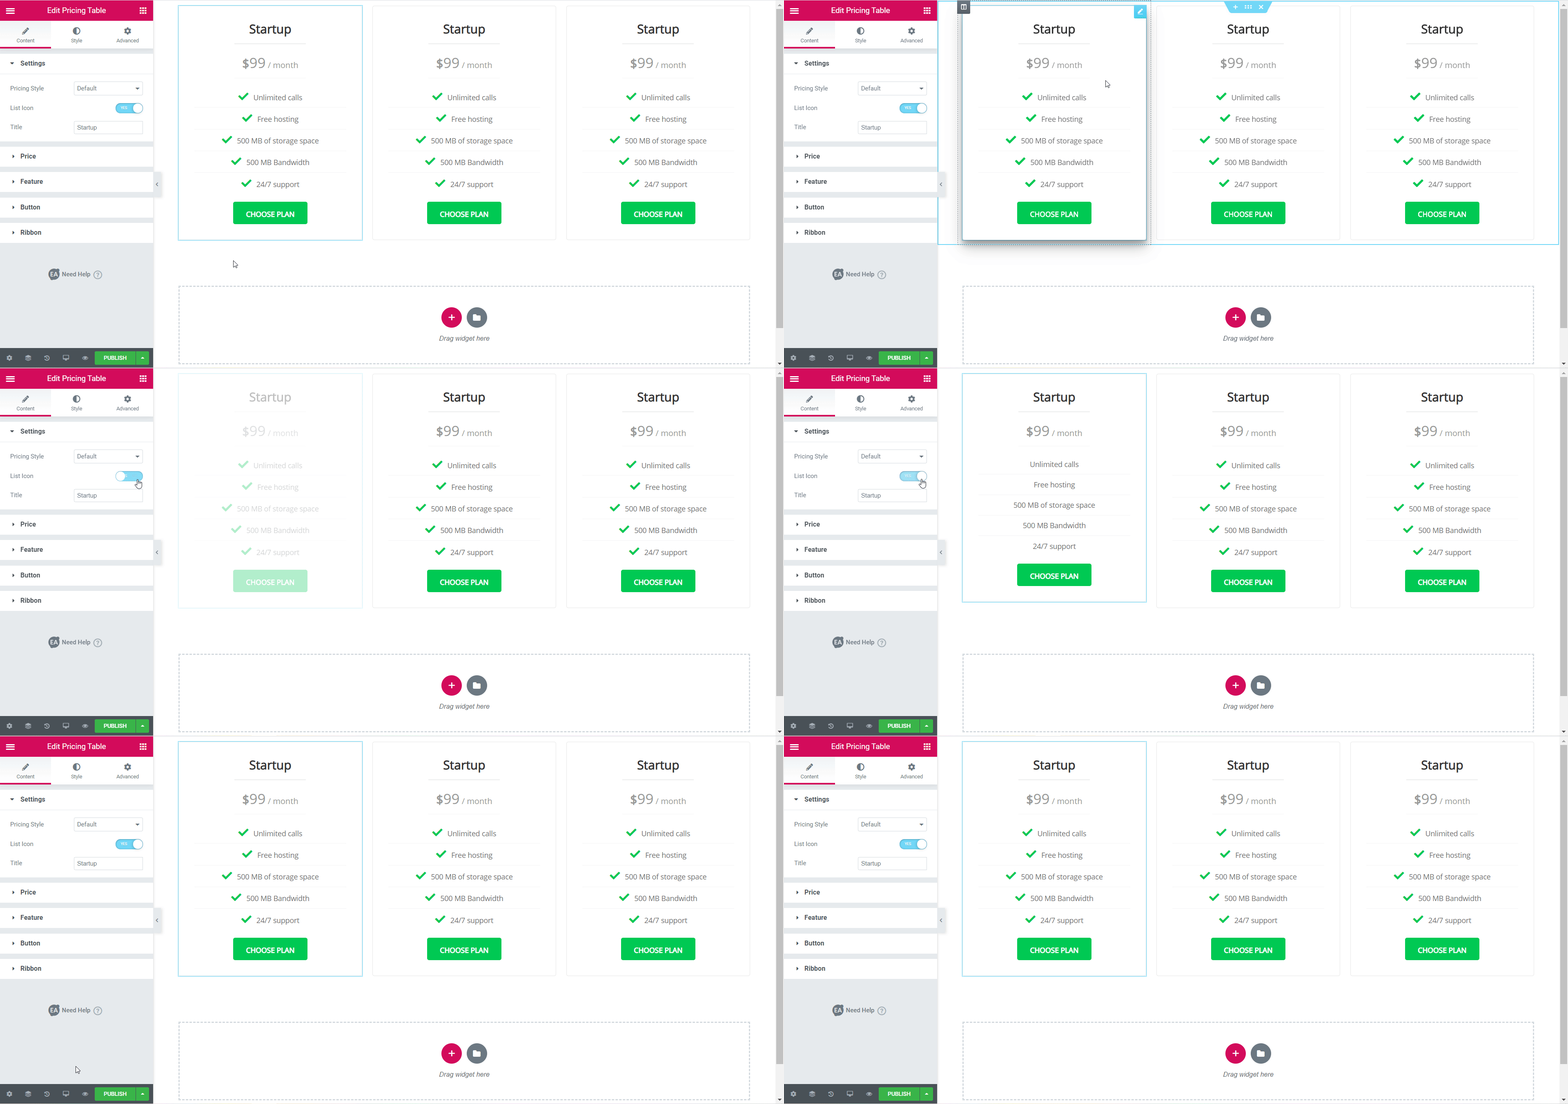
You can use the toggle to enable or disable the ‘List Icon’ option. Besides, you can modify your ‘Title’ &’Sub Title’ and also add a ‘Header Image’ of your choosing. You will have to do this separately for each column.
Price #
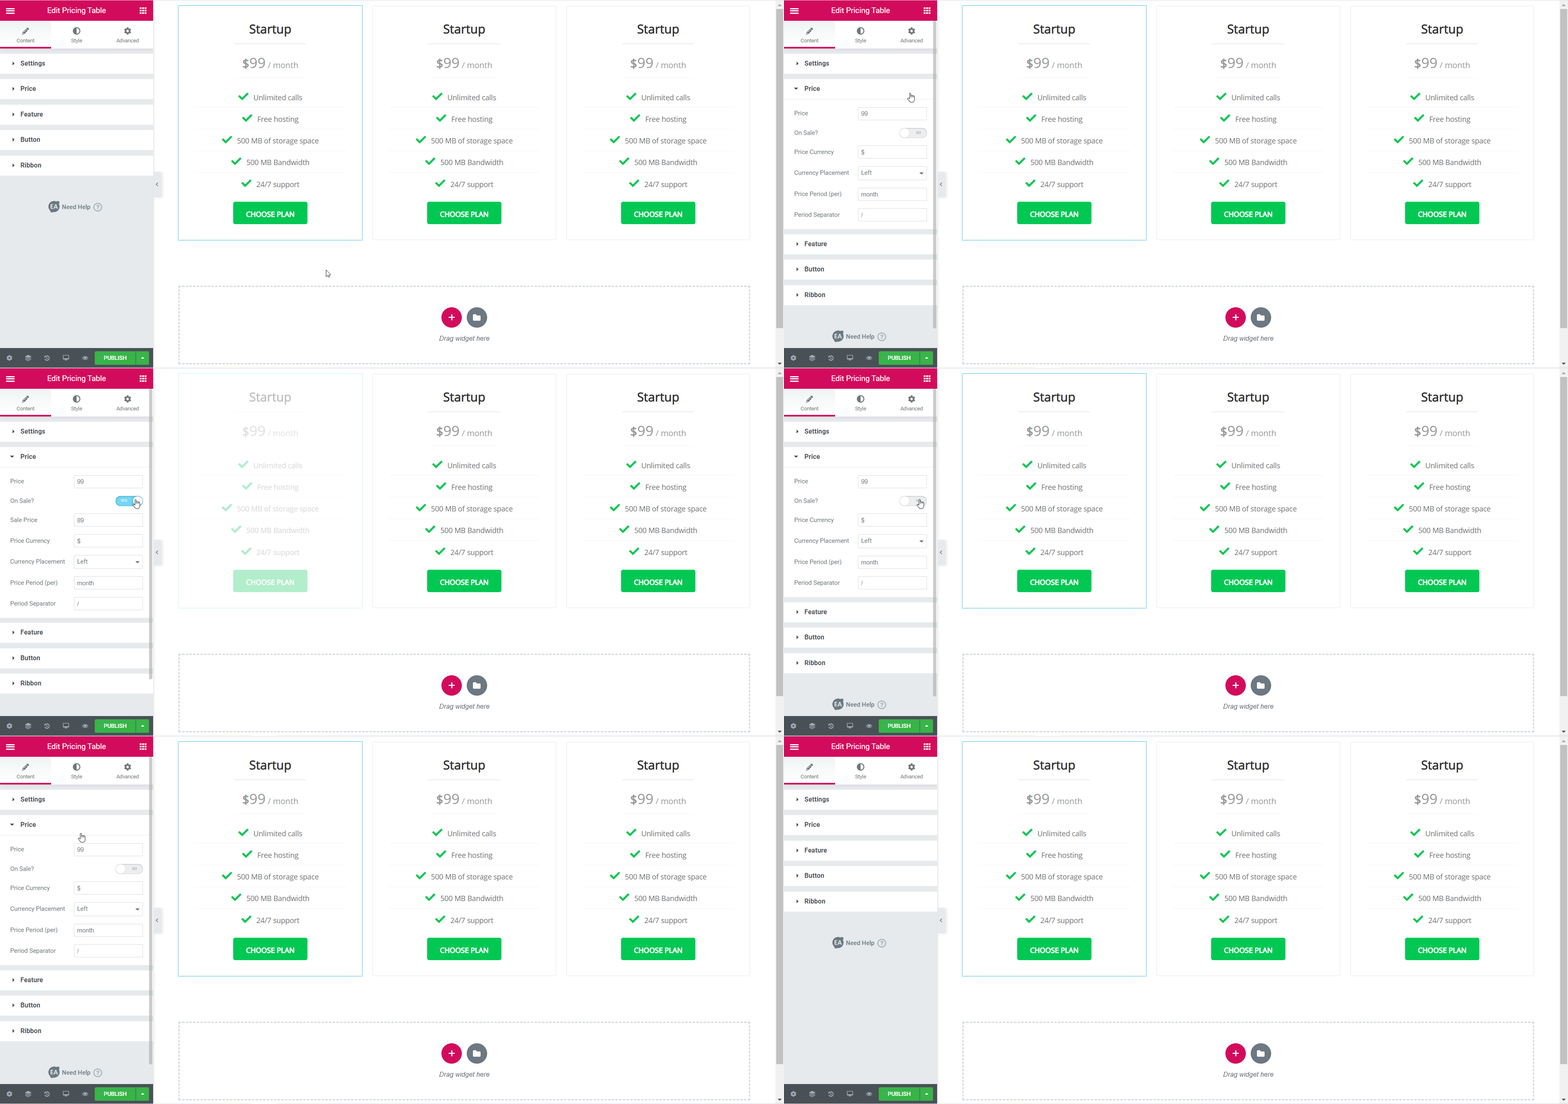
From the ‘Price’ section, you can add Price and use the toggle to turn on or off the ‘On Sale’ feature. If it’s enabled then you can set a ‘Sale Price’ of your choosing.
You will have the flexibility to modify ‘Price Currency’, ‘Currency Placement’ and more from this section.
Feature #
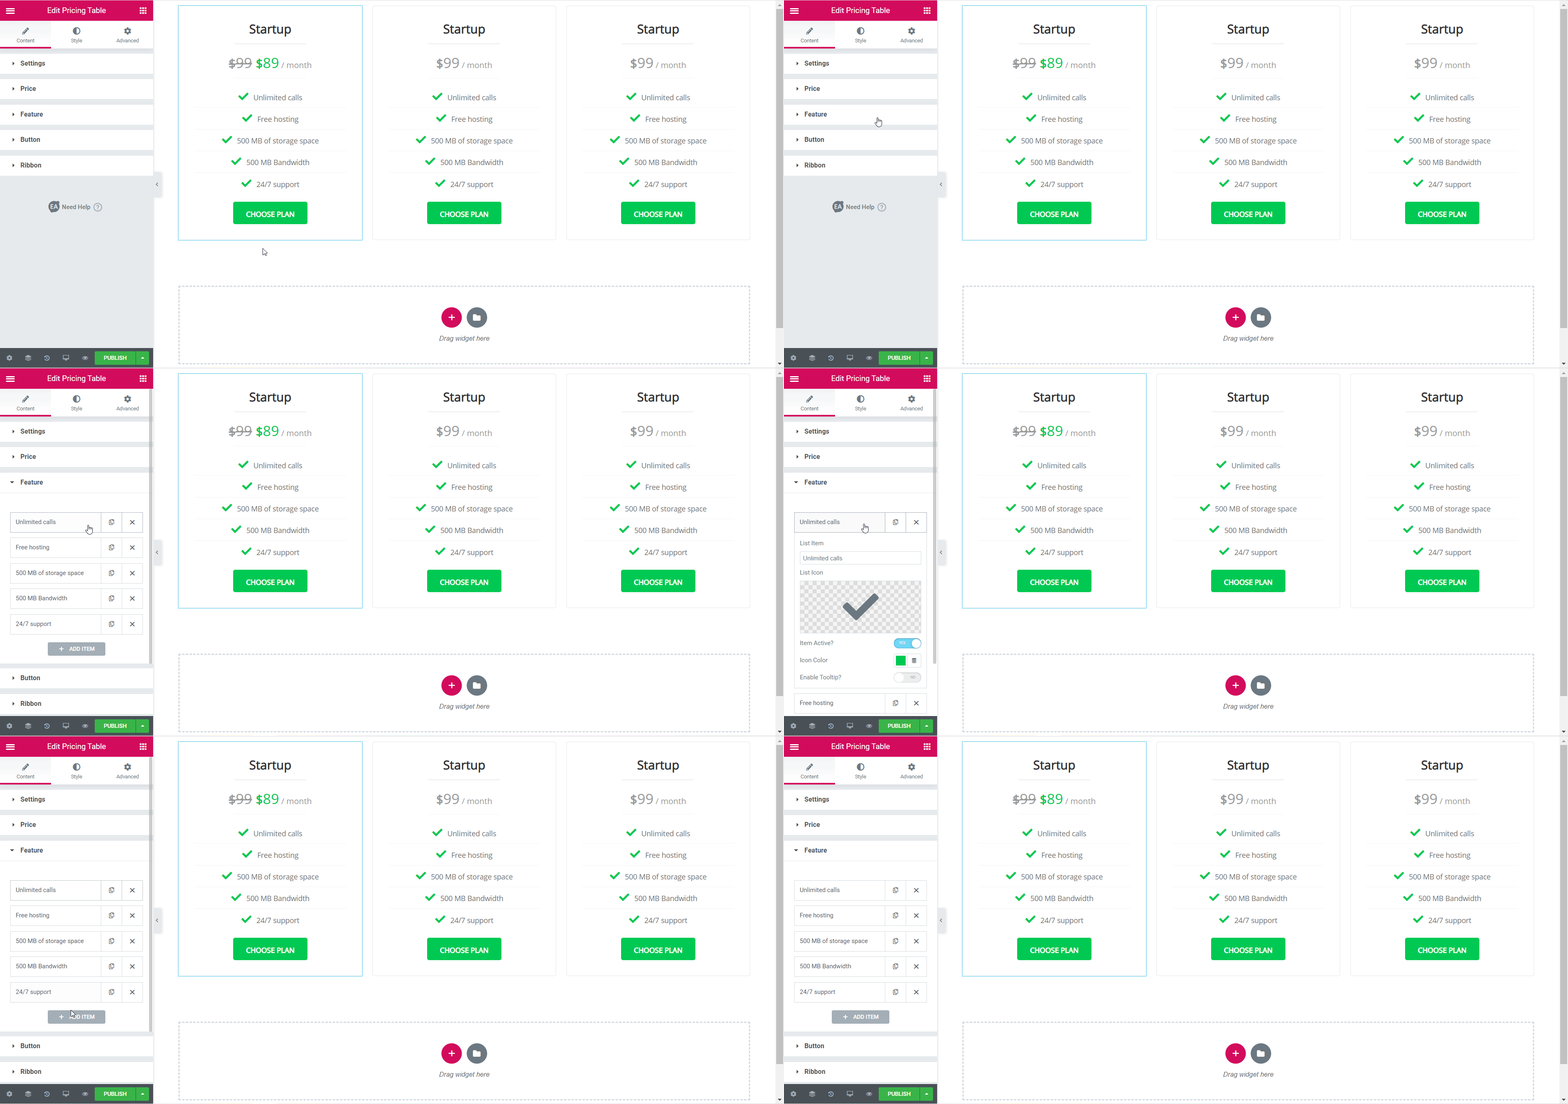
From the ‘Feature’ section, you can add/modify/delete your feature item for a pricing package.
You can change the ‘List Item’, ‘List Icon’ & ‘Icon Color’. Besides, you can use the toggle to enable or disable ‘Item Active’ and ‘Enable Tooltip’ options.
Button #
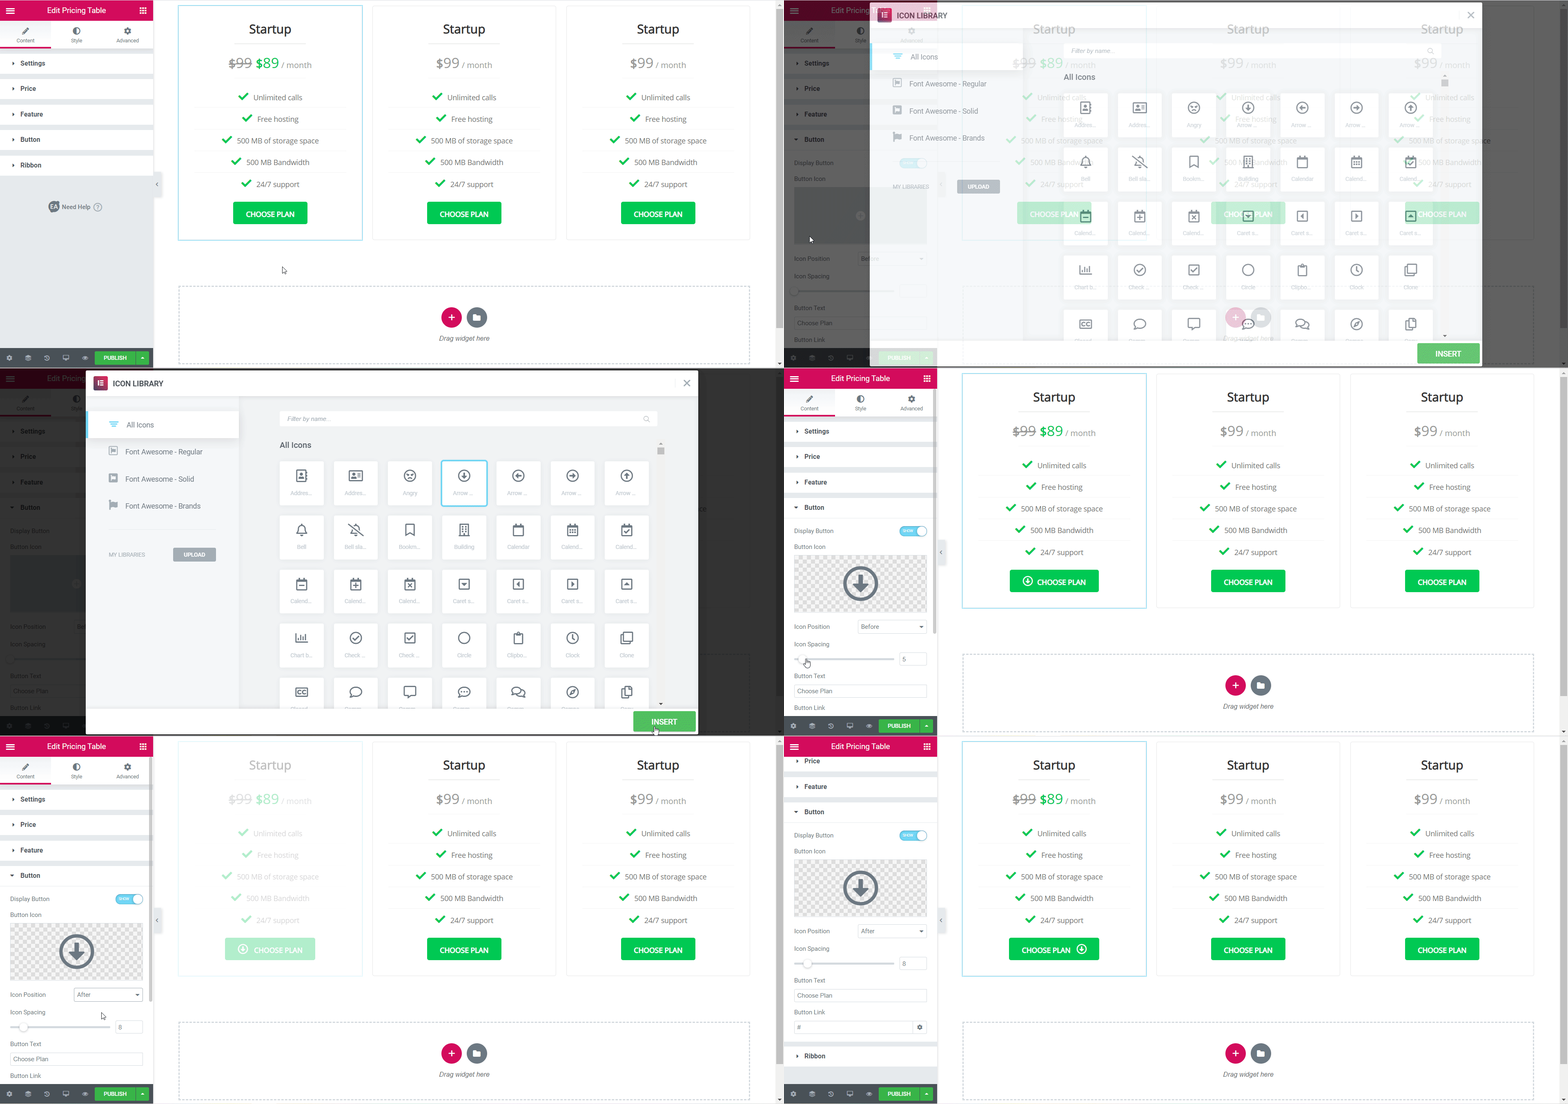
You can add the content for the buttons in your Pricing Table by clicking on the ‘Button’ tab and choosing the options from the drop down menu. You can add an icon next to your button text, adjust the ‘Icon Position’ and also the ‘Icon Spacing’ here.
Ribbon #
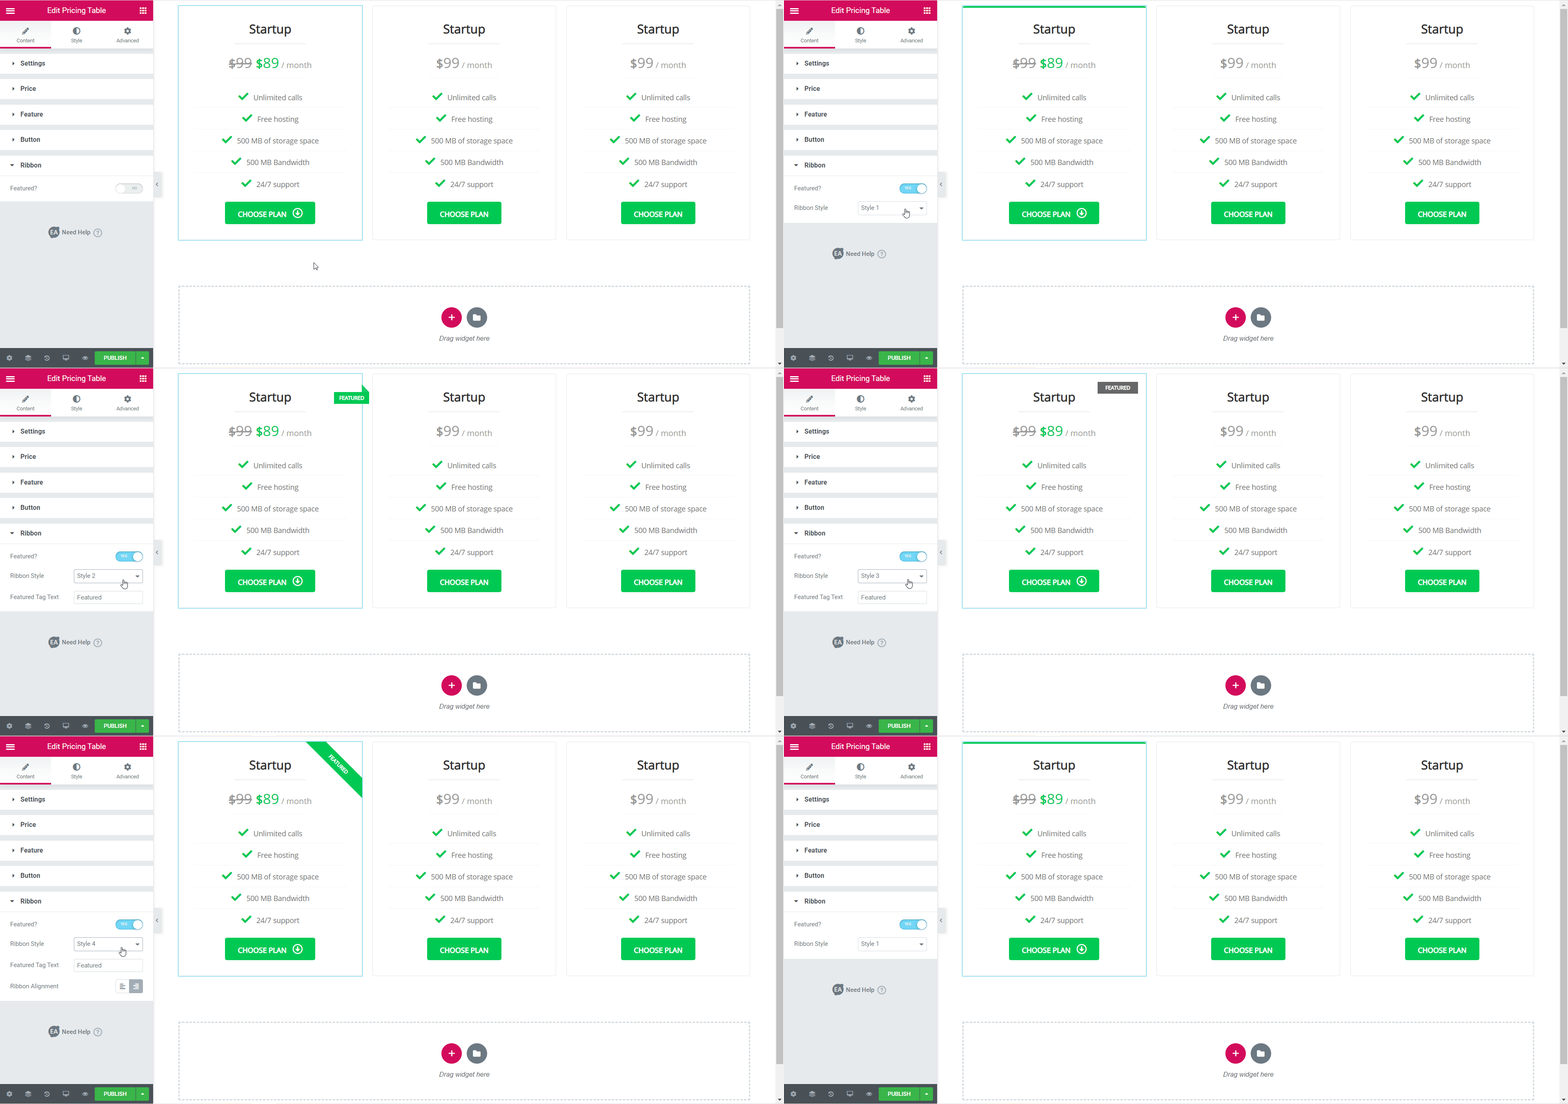
You can simply enable or disable the ‘Featured’ toggle to display/hide the Ribbon. Besides, you can use the drop-down menu to change the ‘Ribbon Style’ and also have the flexibility to change the ‘Featured Tag Text’.
Click to see Live Demo #
How to Style Pricing Table #
Switch to the ‘Style’ tab to style all the features of the Pricing Table.
Pricing Table Style #
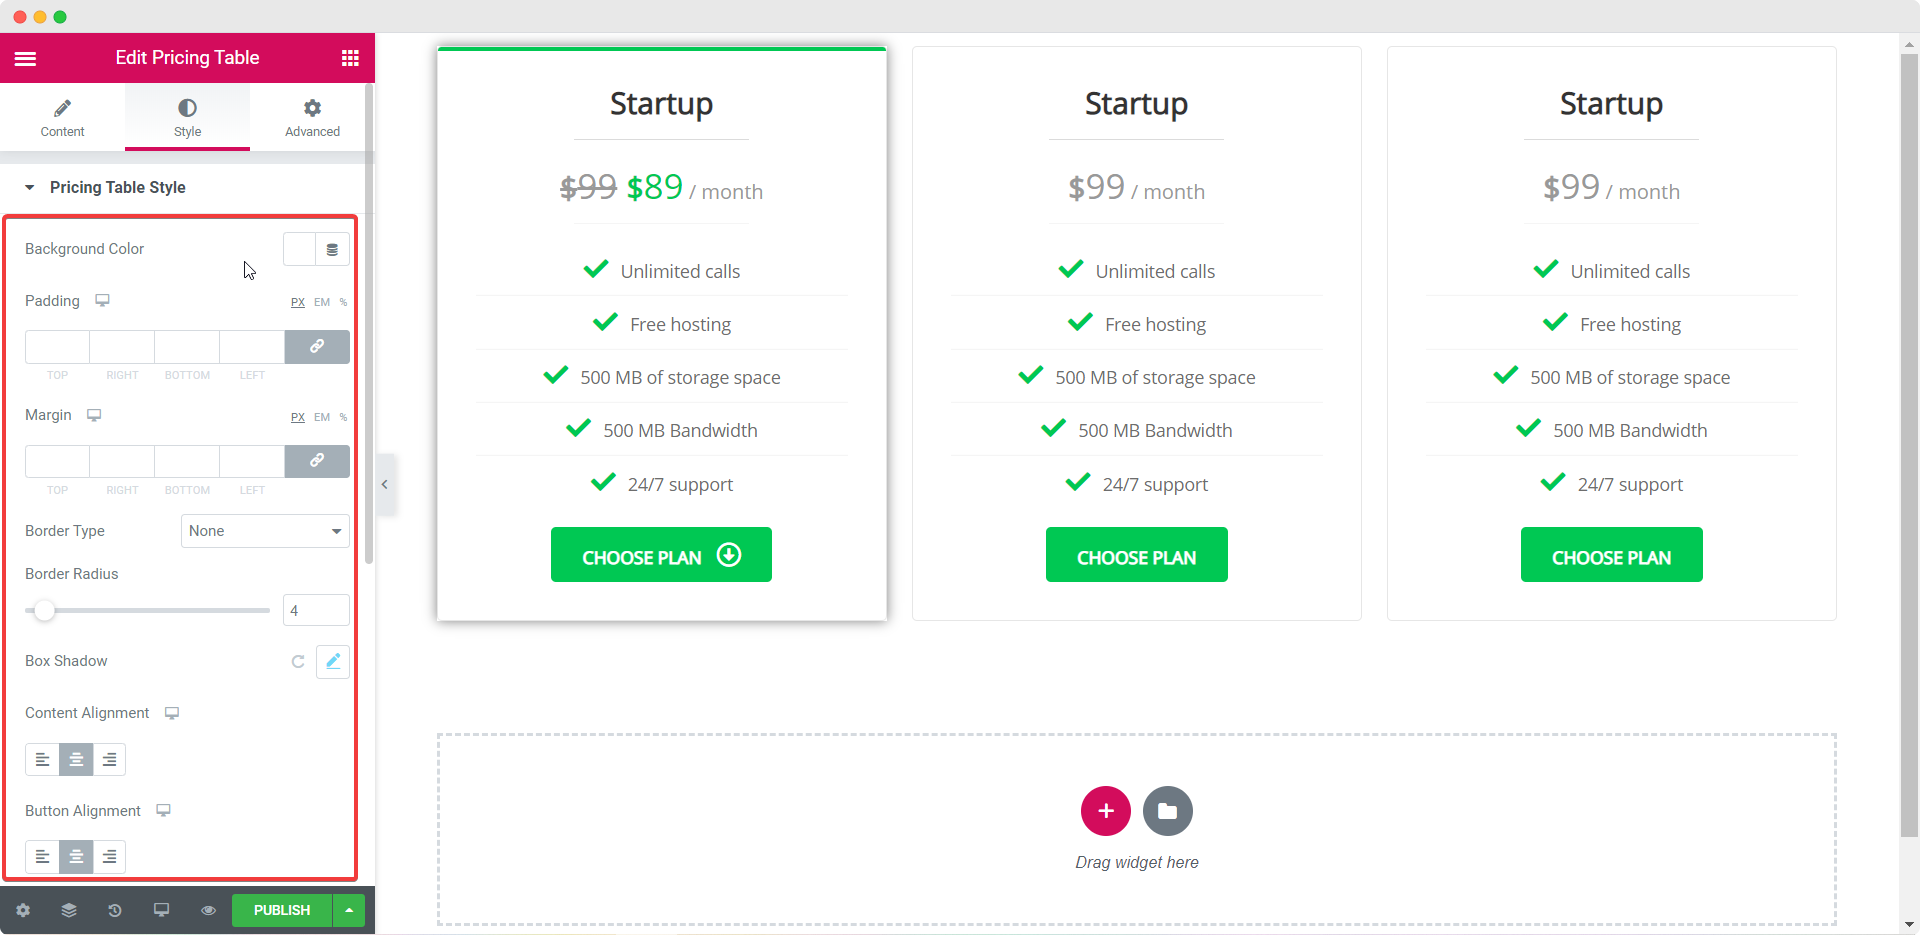
From the ‘Pricing Table Style’ section, you can change the ‘Background Color’, ‘Featured Background Color’ and many more styling options. You also have the option to modify the content & button alignment.
Others #
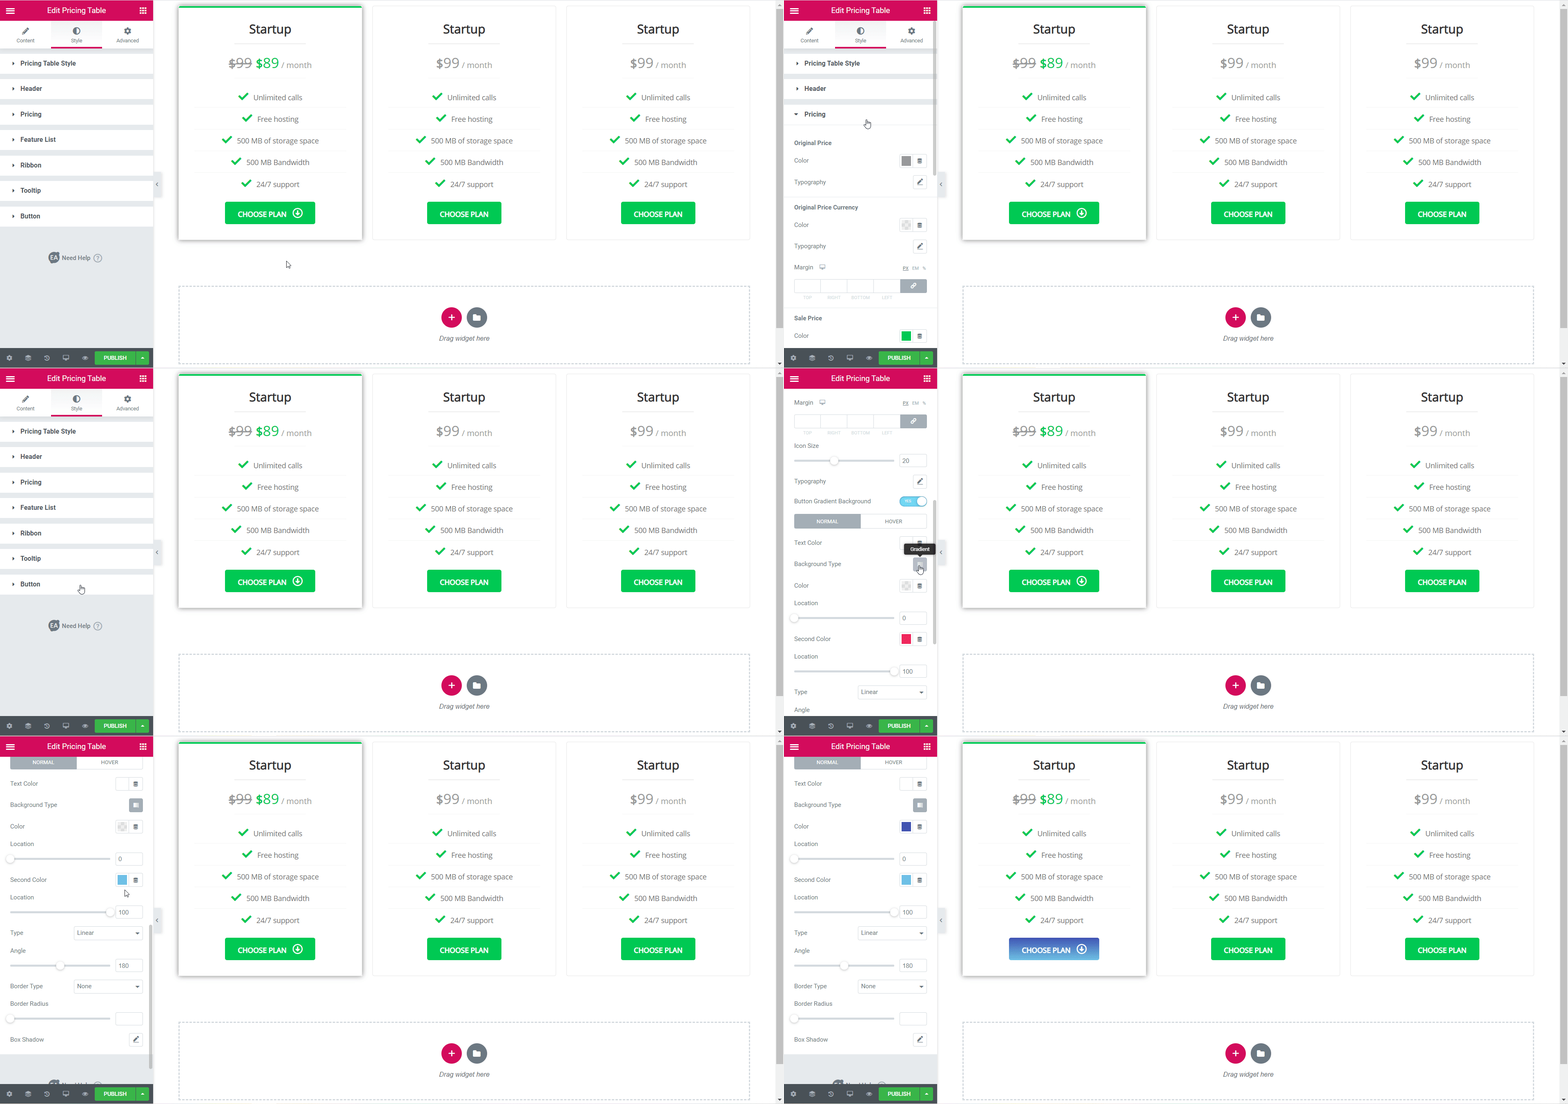
You can also add styling to ‘Header’, ‘Pricing’, ‘Feature List’, ‘Ribbon’, ‘Button’ & ‘Tooltip’ by changing the color, typography & many more as per your preference.
Final Outcome #
By following the basic steps and a bit more modifying, you can style your Pricing Table as per your preference.

This is how you can easily display all the pricing packages of your products using EA Pricing Table.
Getting stuck? Feel to Contact Our Support for further assistance.


