With the EA Login | Register Form element, you can now design stunning login or registration forms in Elementor without any coding. However, to enable social login & reCAPTCHA for your login registration forms, you need to get the respective API keys first.
LOGIN | REGISTER FORM: SOCIAL LOGIN & RECAPTCHA
With the EA Login | Register Form element, you can now design stunning login or registration forms in Elementor without any coding. However, to enable social login & reCAPTCHA for your login registration forms, you need to get the respective API keys first.
How To Configure reCAPTCHA For Your Login Register Form #
To enable reCAPTCHA for your login register form, you will need to sign up for an API pair key for your site. The key pair includes a site key and a secret key.
Step 1: Register A New Site #
Go to the Google reCAPTCHA landing page and then click on the ‘v3 Admin Console’ to get started with reCAPTCHA enabled forms. It will directly take you to the reCAPTCHA admin dashboard.

To register a new site, first, enter the site name in the input field under the ‘Label’ section and then choose reCAPTCHA v3 as your reCAPTCHA type. Next, add the domain link and the email addresses of the domain owners.

Afterward, simply check to accept the ‘Terms of Service’ and click on ‘Submit’.

Step 2: Configure EA Login | Register Form Settings #
After completing the above step you will be redirected to a new page where you will be able to see your site key and secret key. Copy both of these keys and head back to your WordPress dashboard.

From your WordPress dashboard, navigate to Essential Addons→ Elements and scroll down until you find the ‘Form Styler Elements’. Toggle on to Enable this element and click on the ‘Save Settings’ button.
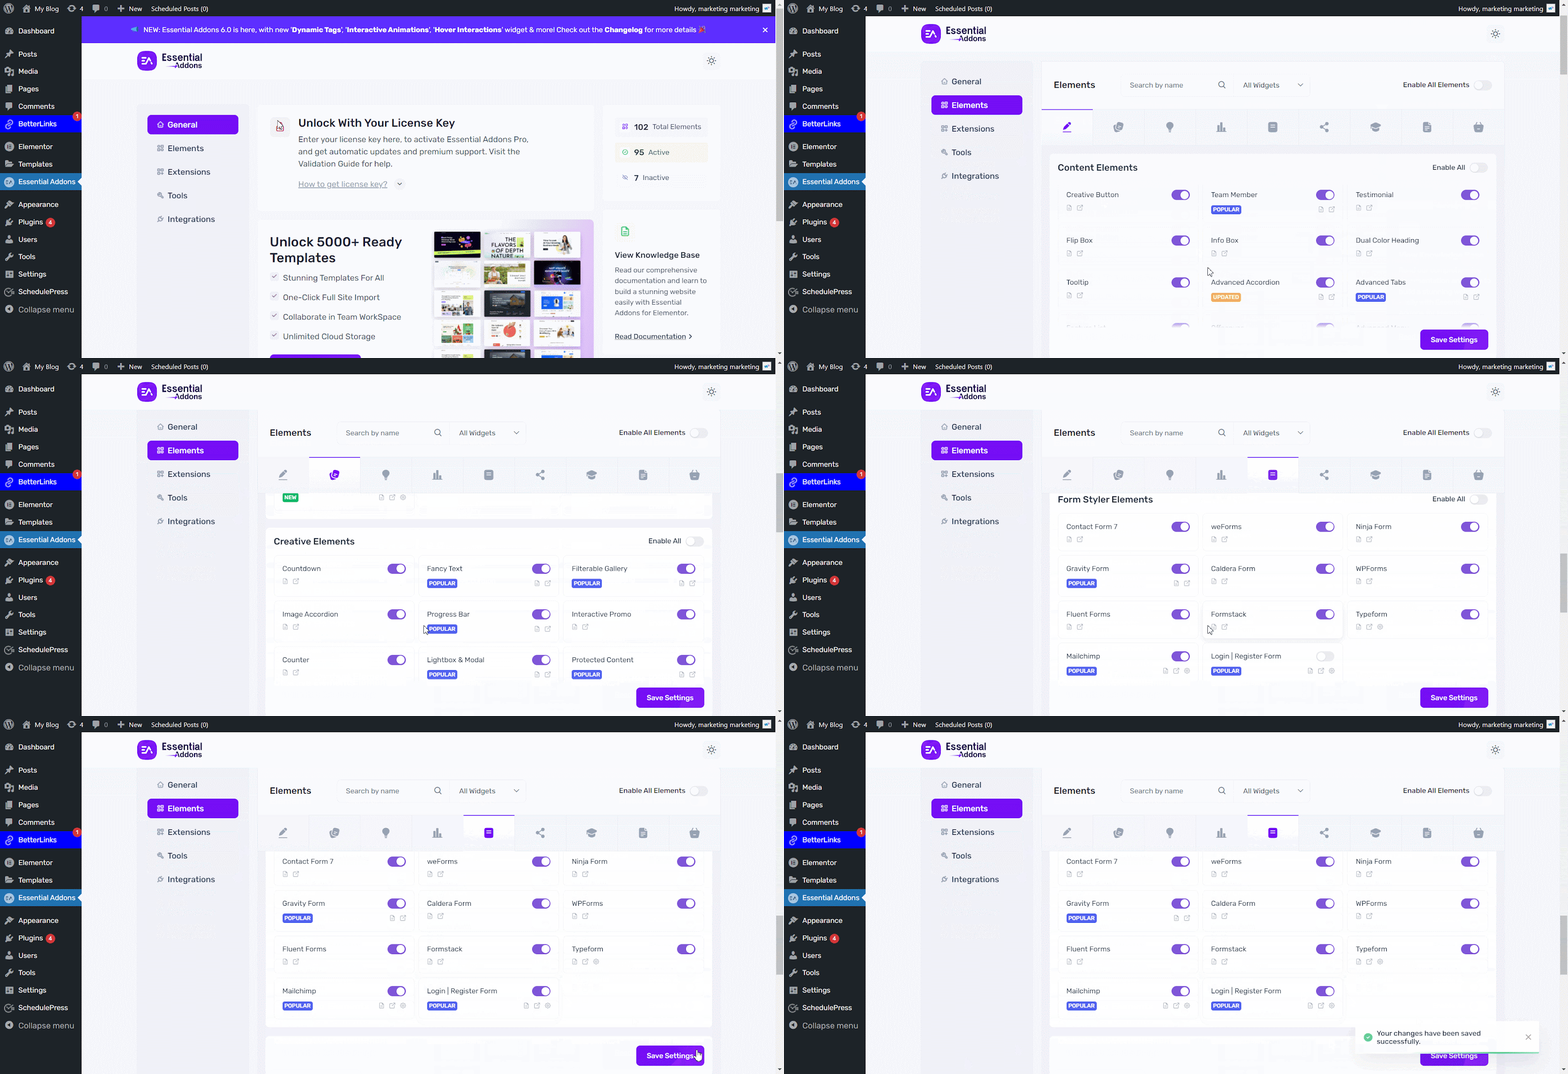
Step 3: Insert Your Site Key And Secret Key To Enable reCAPTCHA #
Now click on the ‘Settings’ icon. When you click on the settings for Login Register Form, a popup window will appear. Simply paste the site key and secret key that you had copied earlier to enable reCAPTCHA on your website.
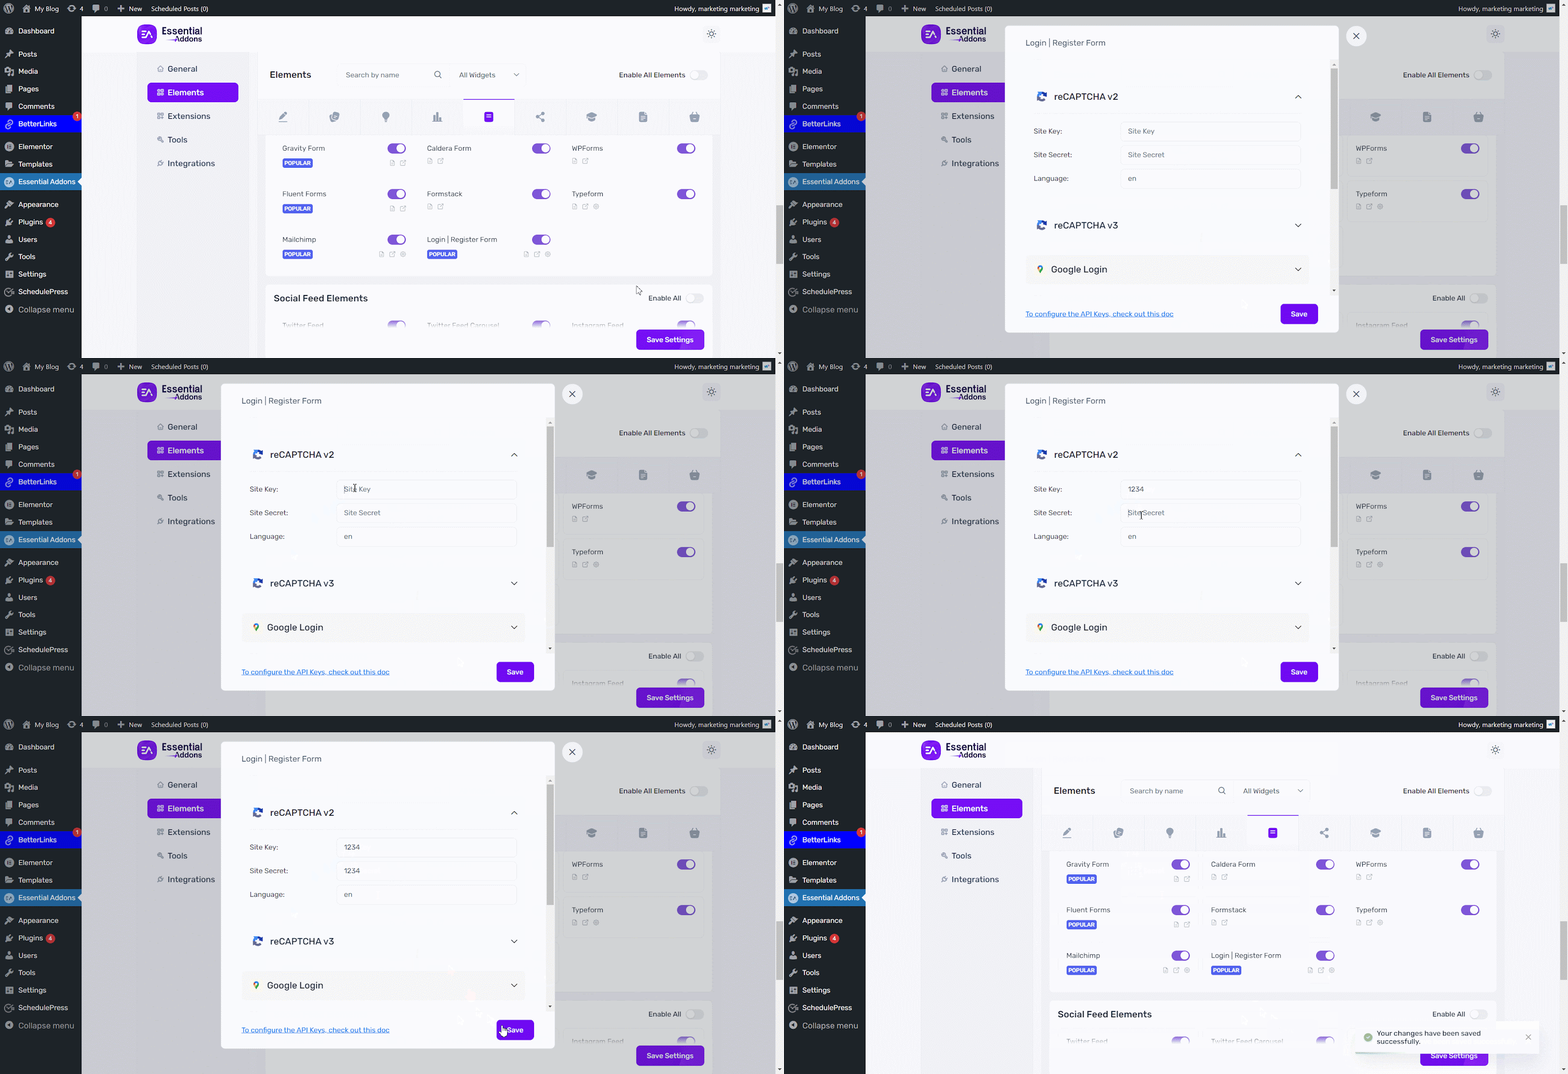
If you want to use the English language, then add the English language value ‘en’ in the Language field. To get other languages’ value to add, check out this from Language value documentation from Google. Then, make sure to hit the ‘Save Settings’ button.

Step 4: How To Configure The Content & Style your reCAPTCHA #
First of all, to enable Google reCAPTCHA for ‘Login’, go to ‘General’ section and click on ‘Login from General’ option. Simply go ahead and enable Google reCAPTCHA option.

In the meantime, to enable Google reCAPTCHA for ‘Registration’, go to ‘General’ section and click on ‘Register from General’ option. Simply go ahead and enable Google reCAPTCHA option.

You can style your reCAPTCHA by going to the ‘Style’ tab and changing the options under the ‘Login Form reCAPTCHA’ section. From here, you can change the margins for your reCAPTCHA, choose between a light or dark theme and change the size to compact. For more information follow this documentation here.
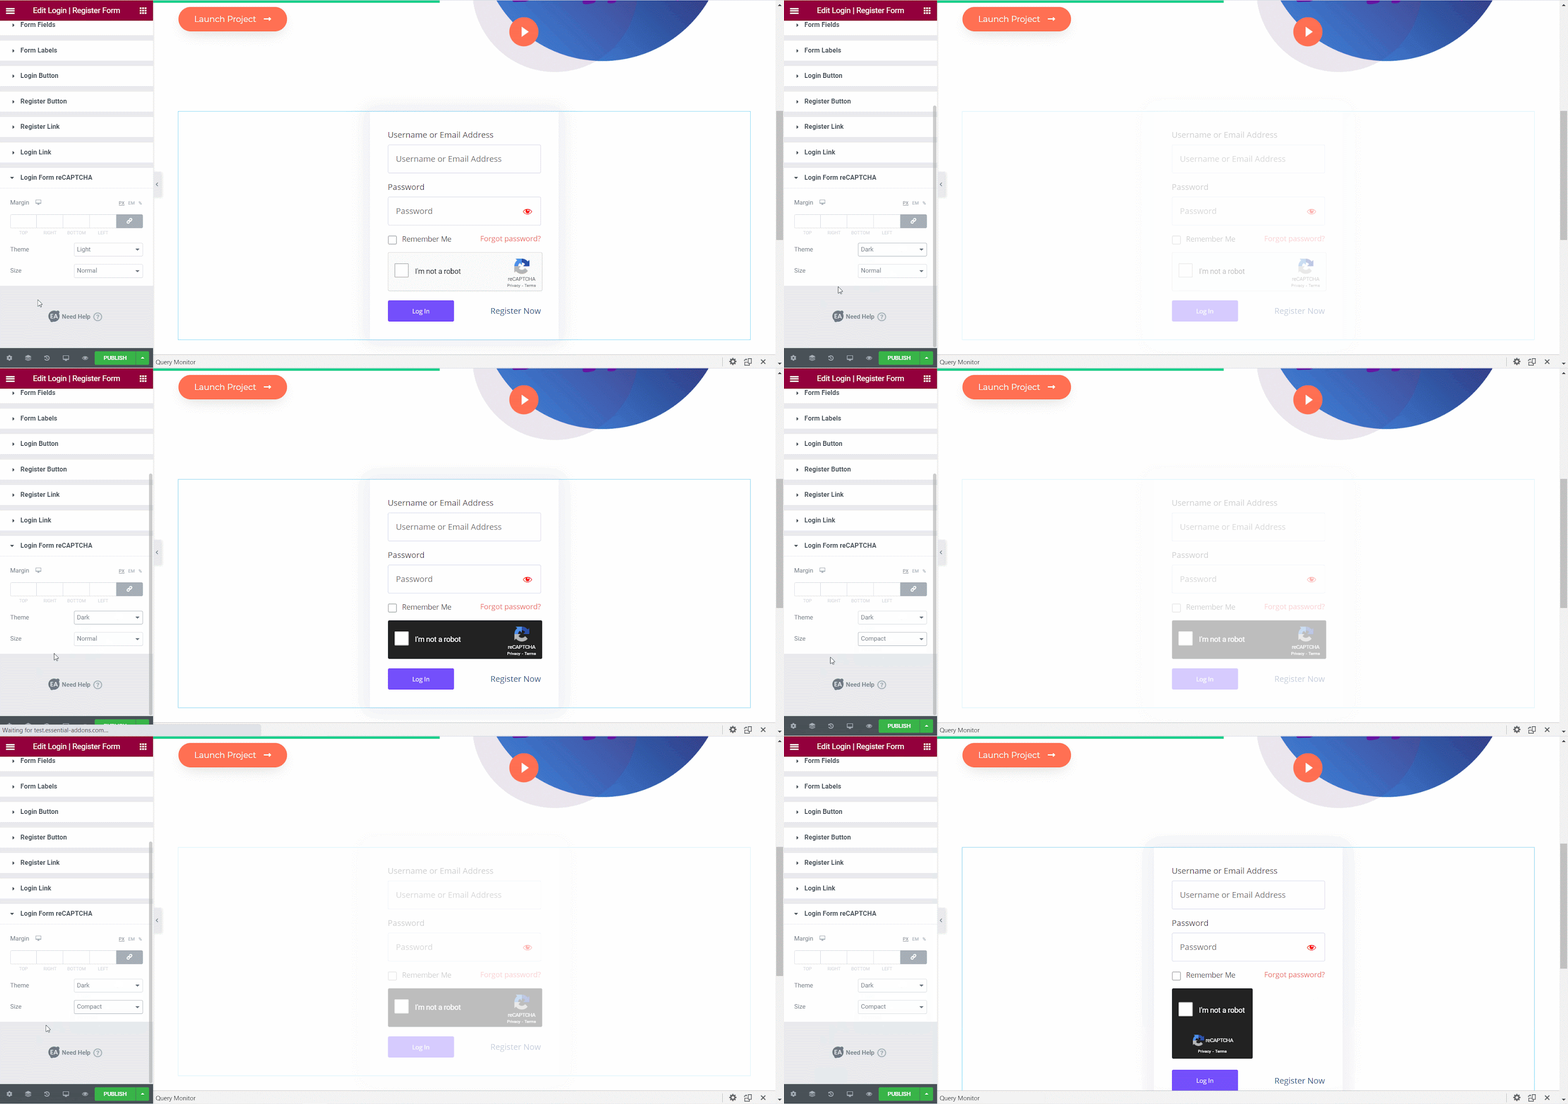
By following these basic steps you will be able to enable reCAPTCHA for your login registration forms on your website.
How To Configure Social Login For Your Login Register Form #
You can enable social login for your login register form using Google and Facebook. Follow this below guideline to configure Social Login with Google and Facebook:
Step 1: How To Configure Social Login With Google #
Head over to developers.google.com and sign in to your account. Afterward, you need to add a new project. Click on the project dropdown and hit the ‘New Project’ button.

From the notifications, you need to select the project that you have just made.

A new page will appear where you need to put the project name and location. Click on the ‘Create’ button to create a new project.

Now click on the navigation hamburger from the top left side and select the ‘API and Services‘ option. Now hit the ‘Credentials‘ option.
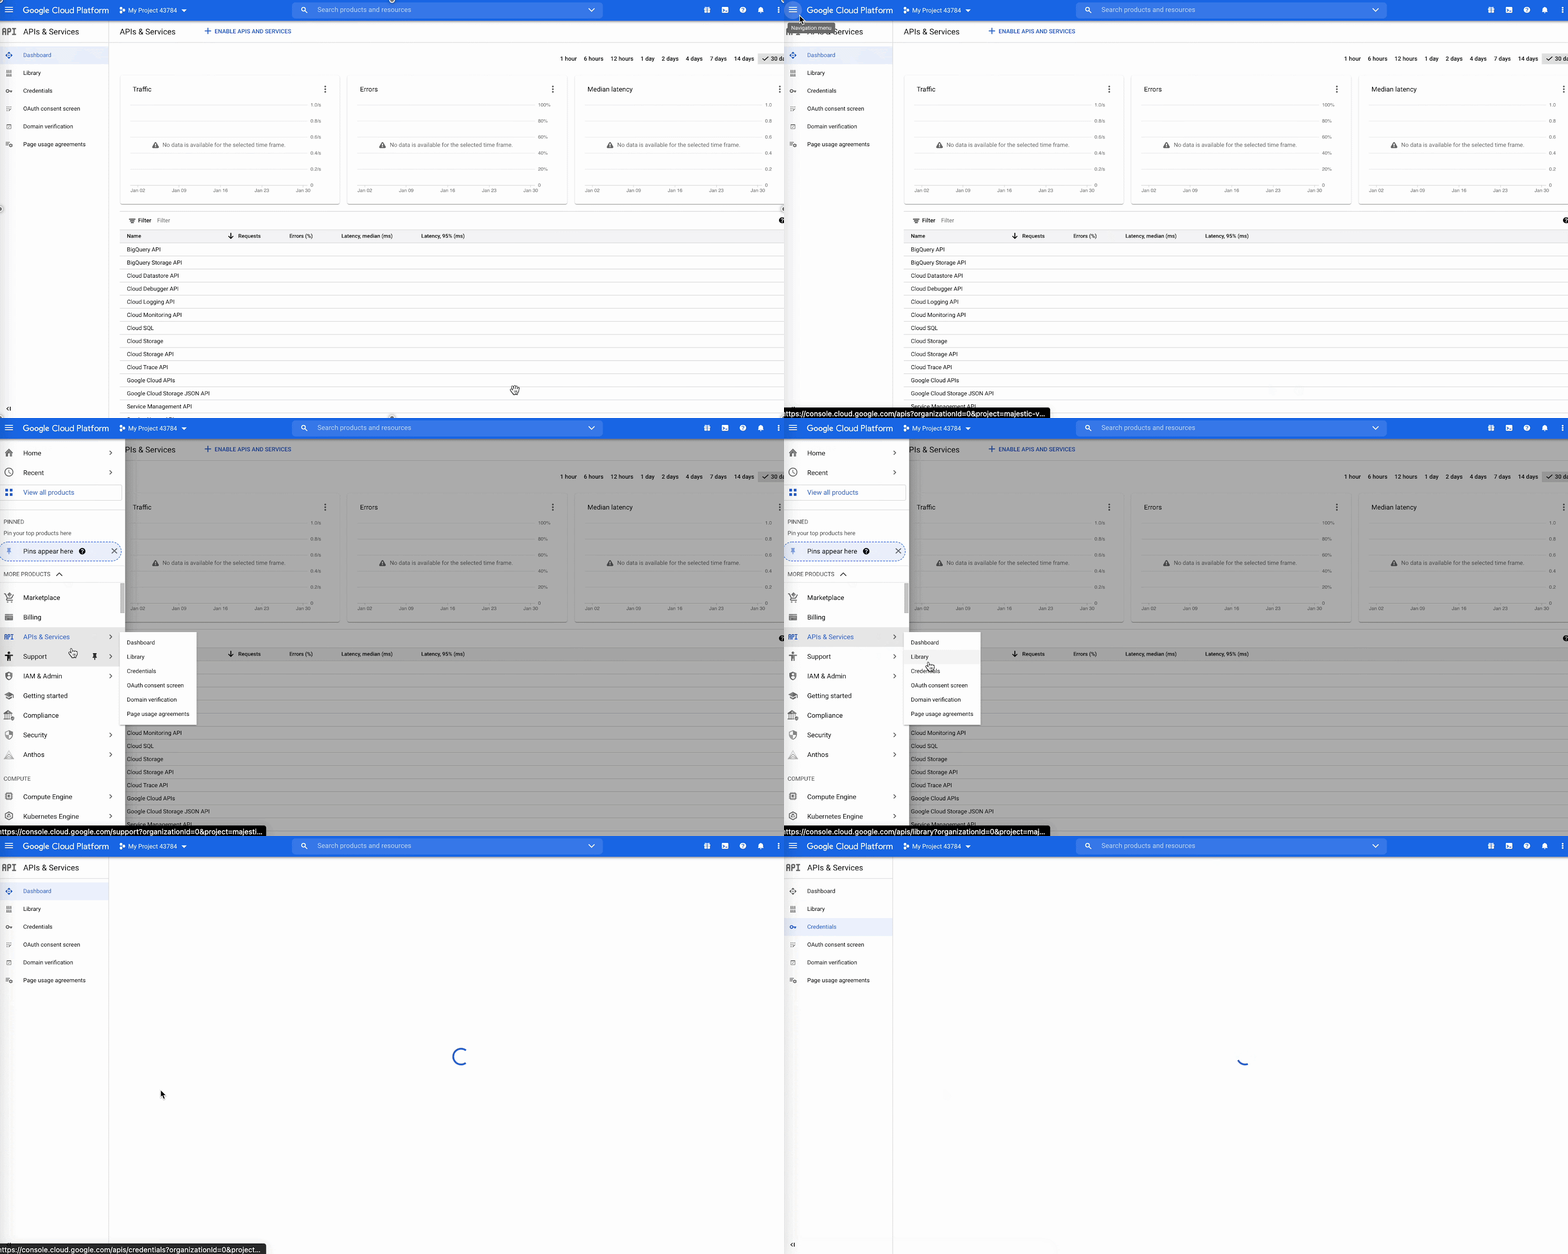
Enter in your project and click on the ‘Create Credentials’ option. From the dropdown you need to select the ‘OAuth Client ID’ option.

From the new window, you need to click on the ‘Configure Consent Screen’ button.

From the OAuth Consent Screen page, you need to select the ‘External’ option and hit the ‘Create’ button.

Now provide App information, and App domain information in the form. Providing your ‘Developer Contact Information’, hit the ‘Save and Continue’ button. From the ‘Scopes’ tab, you need to add scopes for your app.

From the ‘Updated Selected Scopes’ list, you need to select options as shown below. Click on the ‘Update’ button from the bottom. Hit the ‘Save and Continue’ button when you are done with it.

From the ‘Test User’ tab, you need to click on the ‘Save and Continue’ button to save the progress.

After that you can review the OAuth Consent details and click on the ‘Back to Dashboard’ button from the bottom. Open the Google API Console Credentials page by clicking on the Credentials tab from your dashboard and click on the ‘Create Credentials’ button at the top to get started.
When you click on the ‘Create Credentials’ button a drop-down menu will appear. Select OAuth Client ID from the options available as shown below.

Next, set your application type to ‘Web application’ and give it a name. You must provide the ‘Authorised JavaScript Origins‘ and ‘Authorised Redirect URLs‘. You need to provide your site URL in the Authorised JavaScript Origins blank box. This is called the root url of your site. In the ‘Authorised Redirect URLs’ you need to provide the link to the login registration form page. Now click on the ‘Create’ button.

Once this step is completed, a pop-up will appear displaying your Google client ID. Copy it as you will need it to enable Google Login on your website.

Head over to Essential Addons→ Elements from your WordPress dashboard and scroll down until you find the ‘Form Styler Elements’. Click on the Login Register Form settings and enter your Google Client ID. Make sure to hit the ‘Save Settings’ button once you are done.

By following these basic steps you will be able to enable social login with Google for your login registration forms on your website.
Step 2: How To Enable Social Login With Facebook #
To enable social login with Facebook for your website using the EA Login | Register element, you need to get your Facebook App ID and App Secret.
Head over to developers.facebook.com and sign in to your account by clicking on ‘My Apps’ to register your app. You will be redirected to your dashboard where you have to click on the ‘Create App’ button to get started.

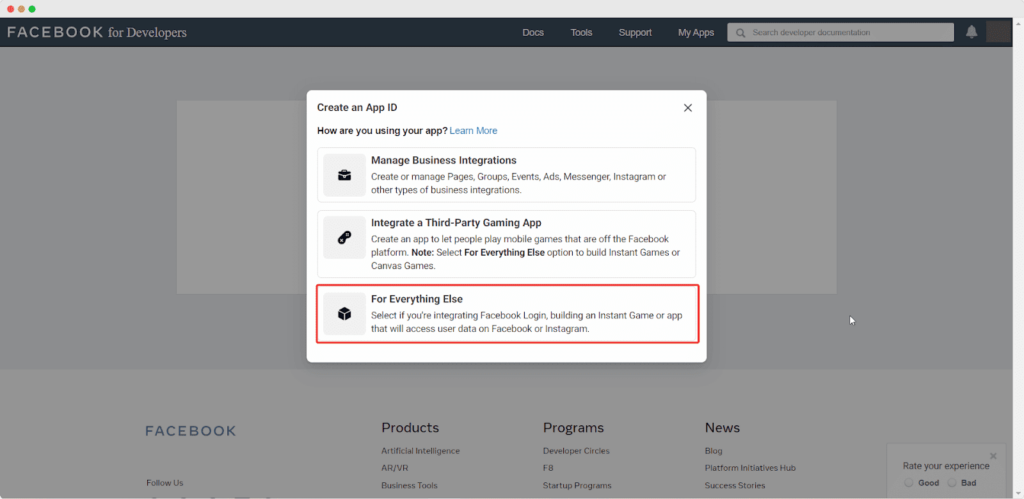
A popup window will appear asking you how you want to use your app. Click on the ‘For Everything Else’ option since you will be using this app to enable Facebook Login on your website.
Next, create your App ID by giving a display name for your app, enter your email address, and then click on the ‘Create App ID’ button as shown below.

After this step is done, you can get your app ID and app secret by navigating to Settings→ Basic from your Facebook Developers dashboard as shown below. Copy your App ID and App Secret as you will need it later.

From your WordPress dashboard, head over to Essential Addons→ Elements and scroll down until you find the ‘Form Styler Elements’. Click on the Login | Register Form settings and enter your Facebook App ID and App Secret. Then, make sure to hit the ‘Save Settings’ button.

Step 3: How To Configure The Content for Social Login #
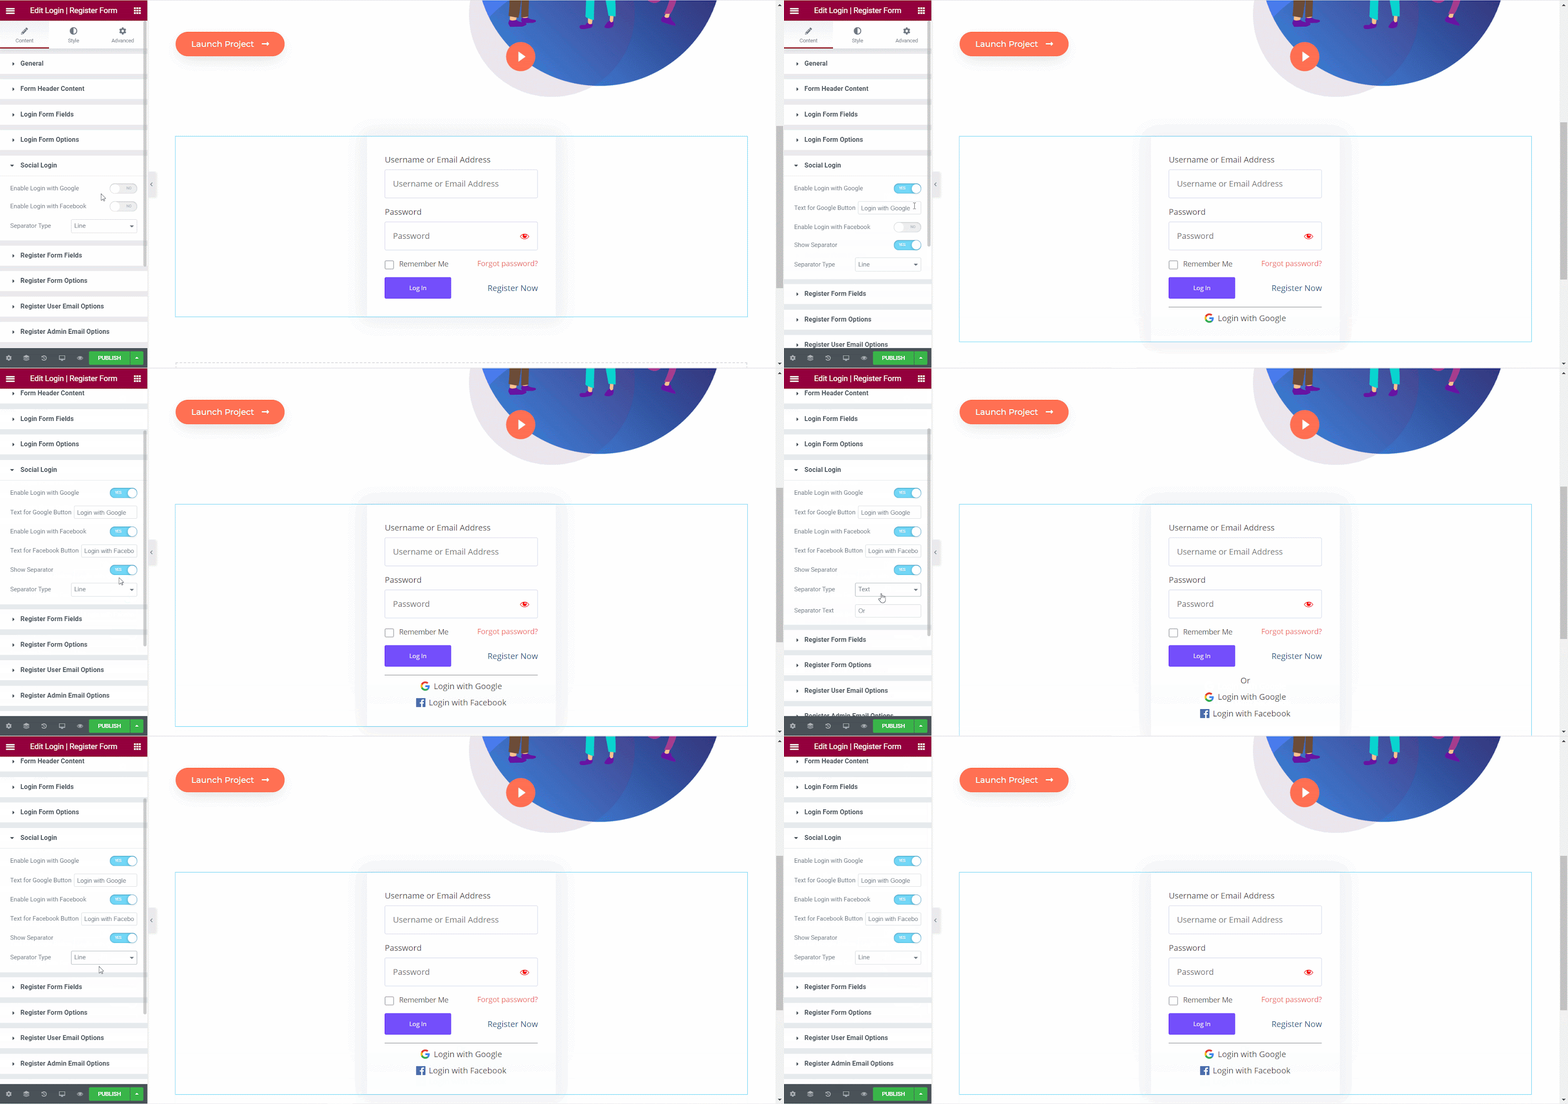
Switch to the ‘Content’ tab and from the ‘Social Login’ section, you have the option to enable both Facebook login and Google login. You can toggle these options to allow site visitors to sign in with their Facebook or Google accounts. If you want, you can display both social login options and separate them with a line or a text by toggling the ‘Show Separator’ option.
Step 4: How To Style Your Social Login #
Under the ‘Style’ tab, you can change the options from ‘Social Login Style’ section to style your social login. You can change the Social Container by adjusting the width and height and changing the text and background colors. You can also style your Google Login and Facebook Login options by changing the typography, icon width and height, background colors, and much more. For more details, refer to this documentation here.

By following these basic steps, you can enable social login for your login registration forms on your WordPress website.If you face any difficulties, feel free to contact our support team for further assistance.
If you face any difficulties, feel free to contact our support team for further assistance.


