How to Configure and Style EA Product Grid
EA Product Grid lets you easily display your WooCommerce products anywhere on the page with plenty of styling options. With the help of this element, you can create your Product Launch page in a few minutes. Let’s check out the step-by-step guidelines below to configure and style your EA Product Grid:
How to Activate Product Grid #
Before you begin, make sure that you have the ‘WooCommerce‘ Plugin activated.
To use this Essential Addons element, find the ‘EA Product Grid‘ element from the Search option under the ‘ELEMENTS‘ tab. Simply just Drag & Drop the ‘EA Product Grid’ into the ‘Drag widget here‘ or the ‘+’ section.

After you have successfully done with step 1, this is how the element is going to look like.

How to Configure the Content Settings #
Under the ‘Content’ tab, you will find the ‘Layouts’, ‘Product Settings’, ‘Sale/Stock Badge ‘Add To Cart’ etc. According to your preferable layouts, you will get separate options like the ‘Pagination’, and ‘Load More’ options
Layouts #
From the ‘Layouts’ section, you can set your WooCommerce product layout into ‘Grid’, ‘List’, and ‘Masonry’. You can choose your preferred layout under the ‘Style Preset’ different predesigned styles and ensure the layout ‘Columns’. You can have a maximum of 6 Columns. You will also get ‘WooCommerce Loop Hooks.’ Turn the toggle on to enable WooCommerce loop before and after hooks.
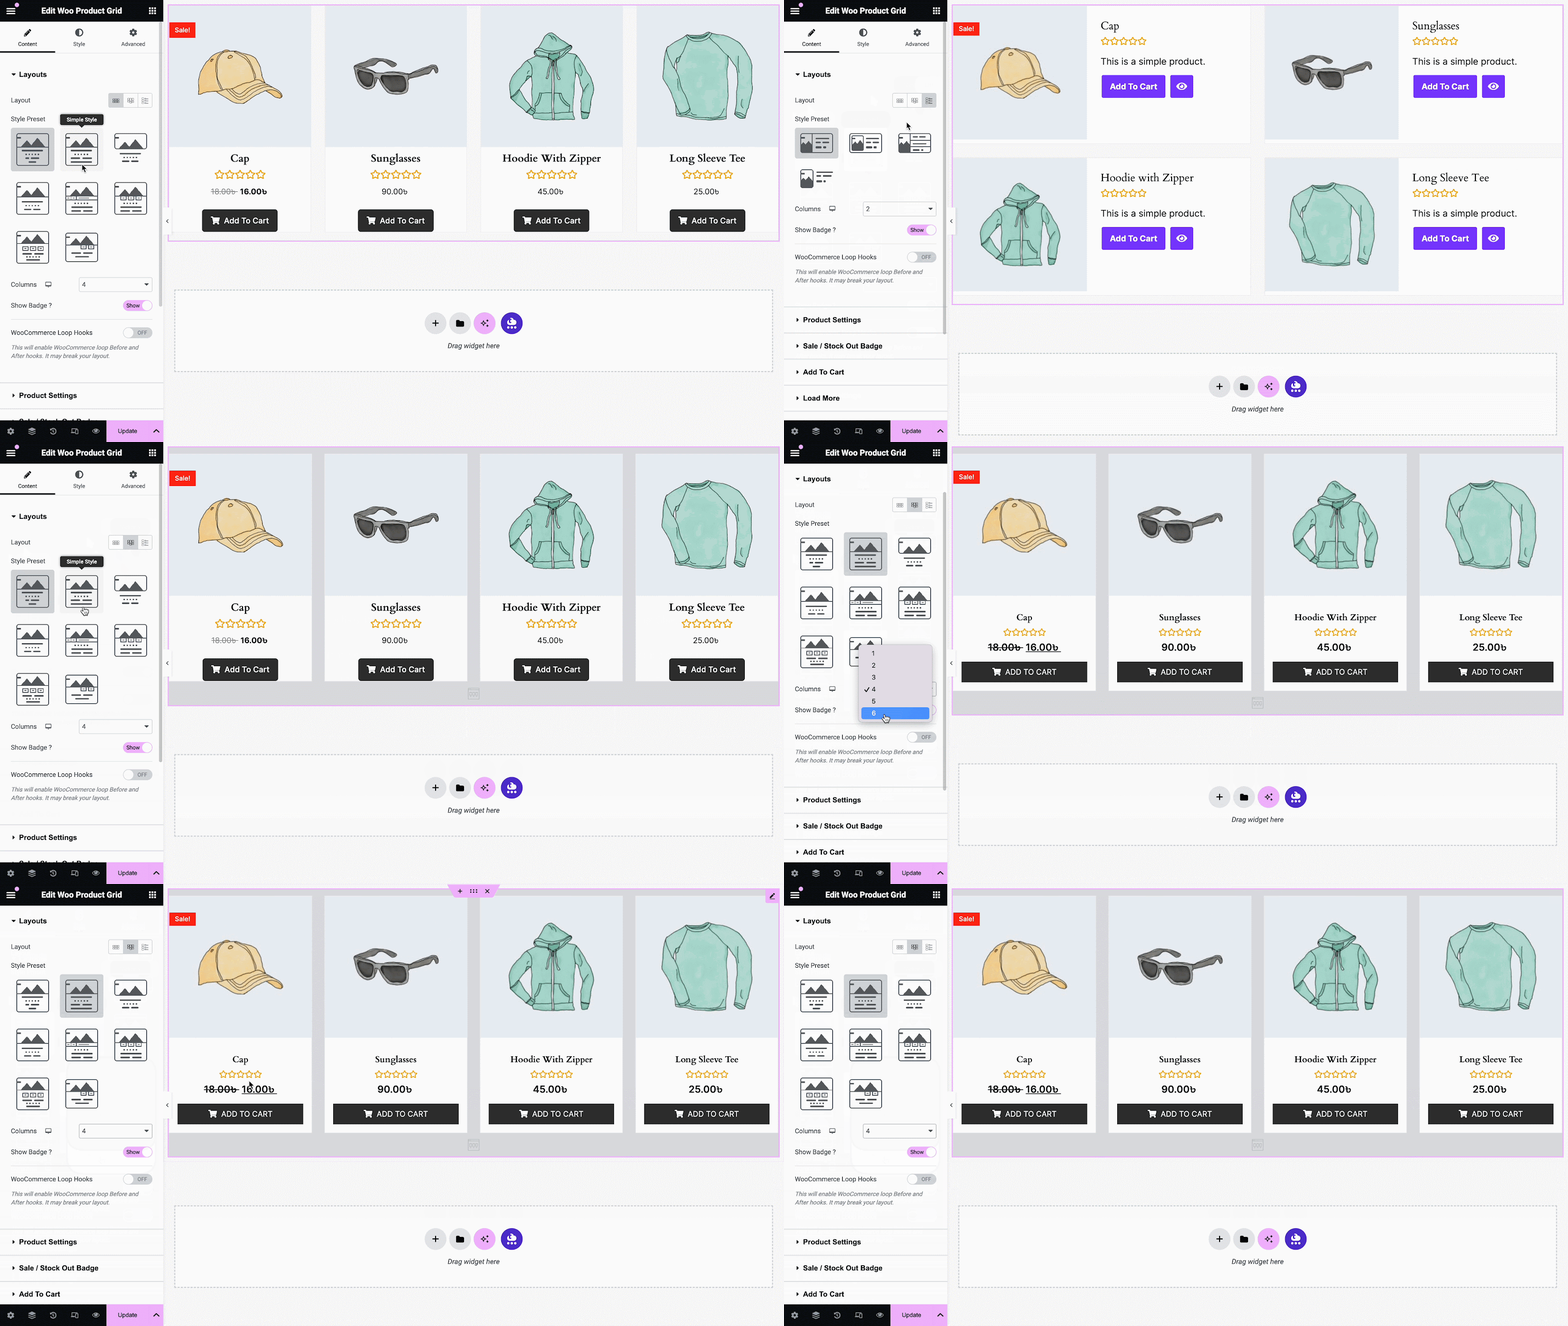
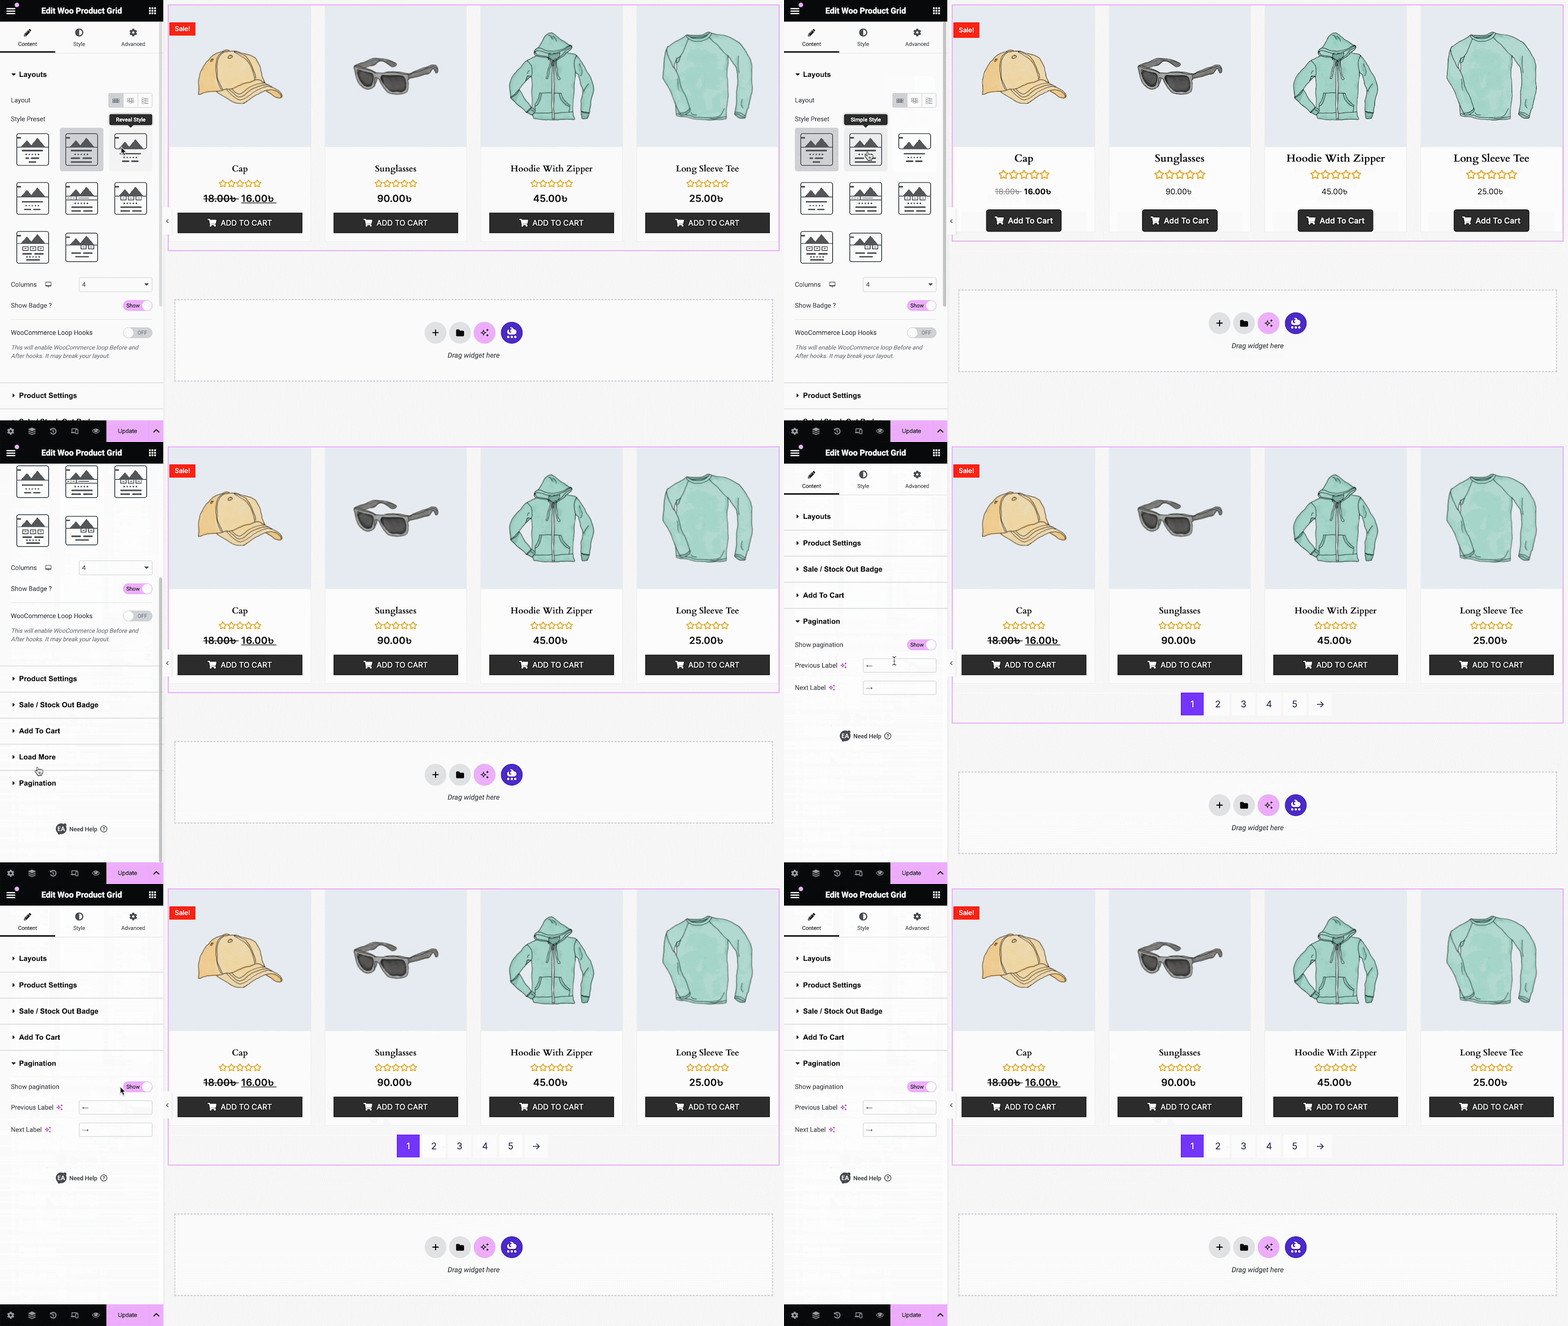
If you choose the Grid layout, you will get the ‘Pagination’ section that can direct your customers to see all your next and previous products. That is also available for the ‘List’ view of your product layout.
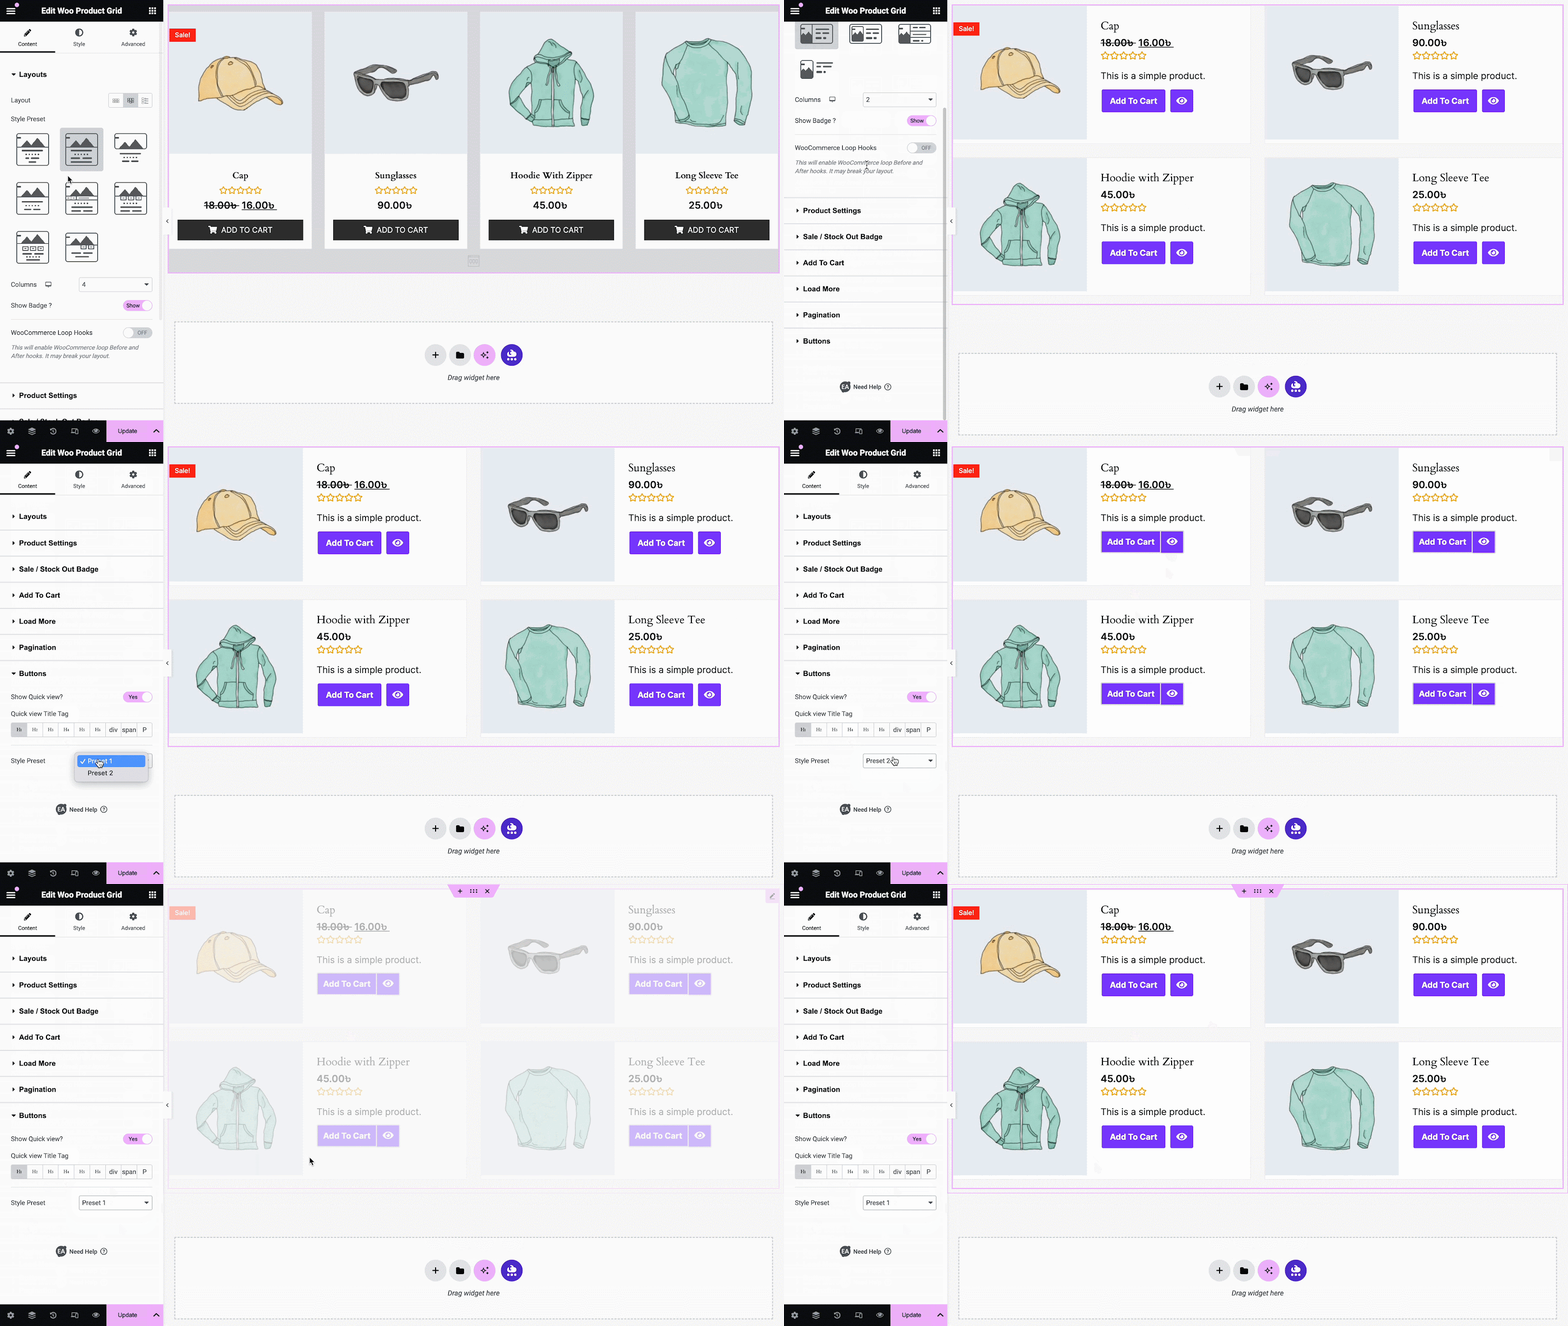
From the ‘List’ layout, you will get a separate section that comes with ‘Buttons’, enabling the ‘Quick View’ option with a ‘Style Preset’ to be used to design this section. It will provide an ‘Eye’ icon in the layout to give your visitors the opportunity to look at your products with a close view.
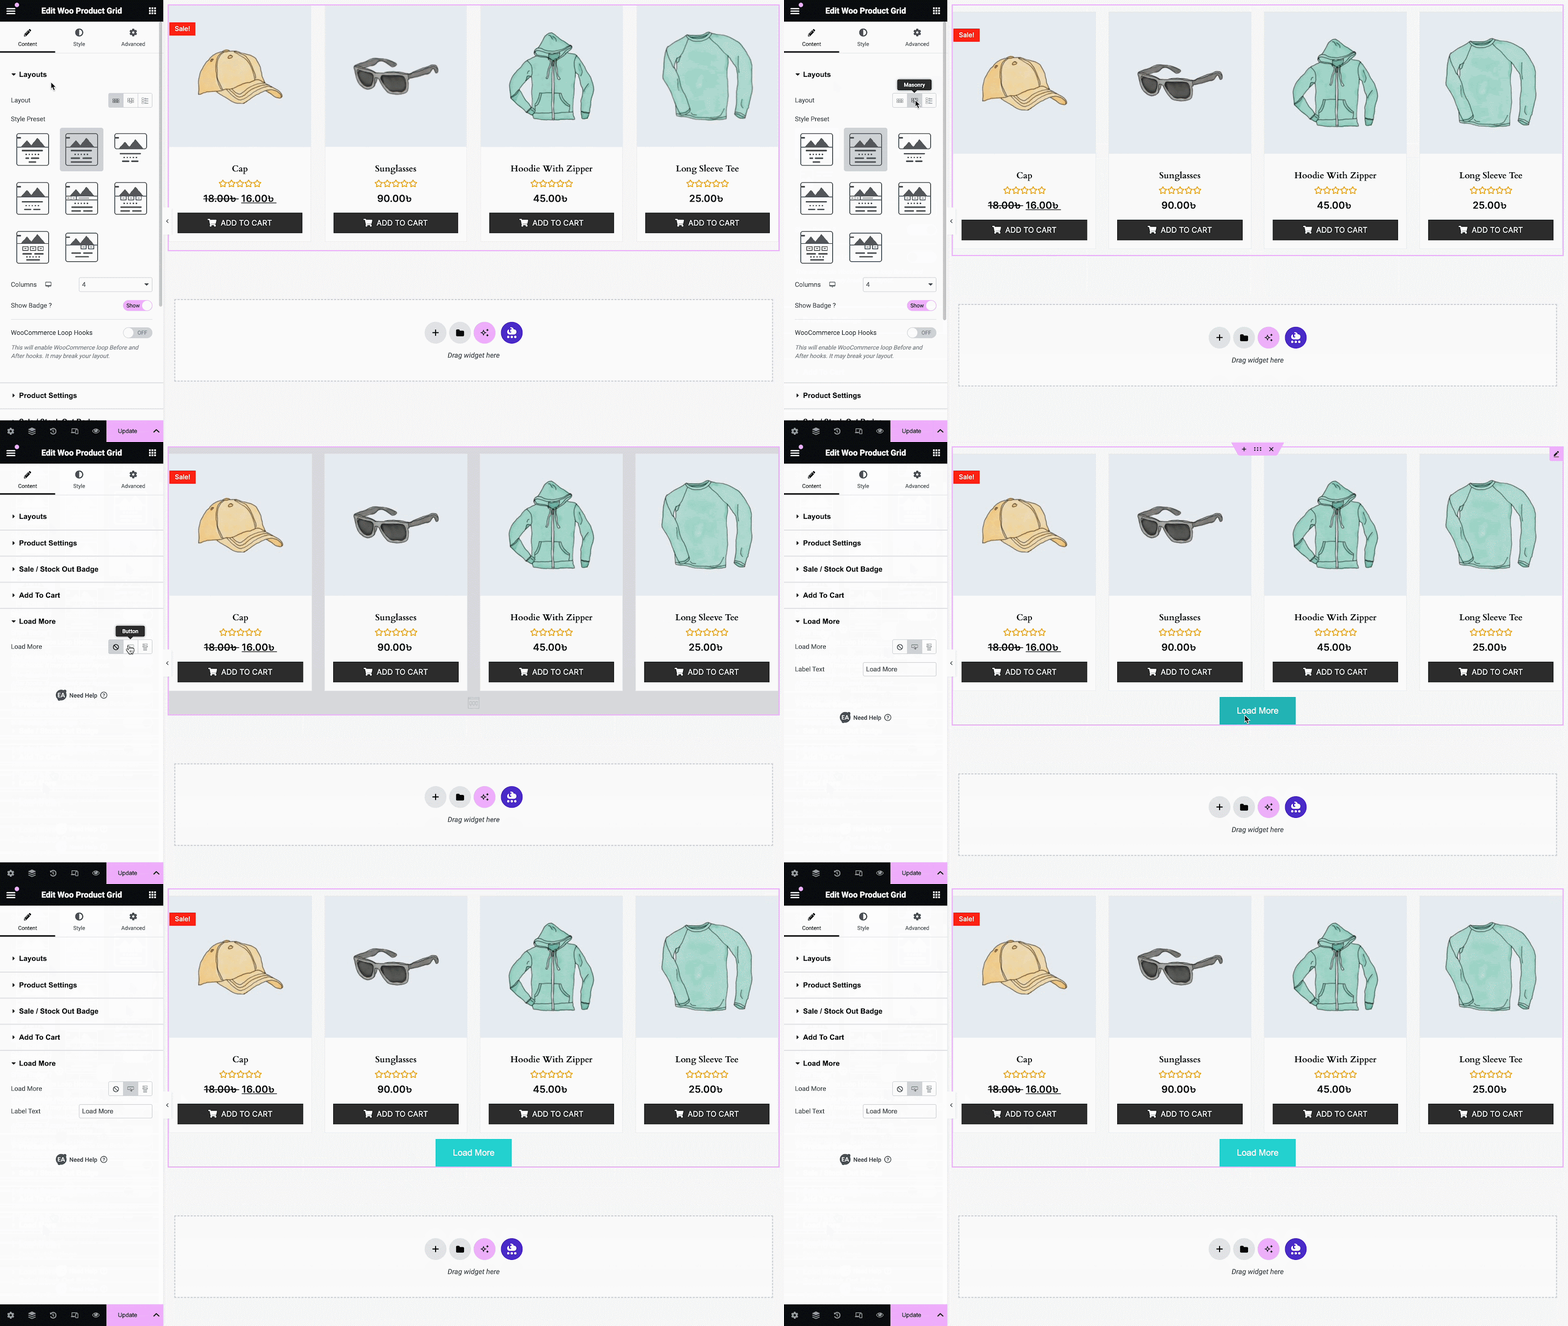
Other than that, the ‘Masonry’ view will come up with a ‘Load More’ button section where you can change the button text as per your preference.
Product Settings #
You can use the drop-down menu to choose your preferred Products Filtering. By default, the Product Grid is filtered by ‘Recent Products’. You can even use the ‘Order By’ and sort products by date, price, or others, also can set products by ascending or descending order with the ‘Order’ option. There are other options like ‘Product Counts’& ‘Offset’ to organize the view of your products.
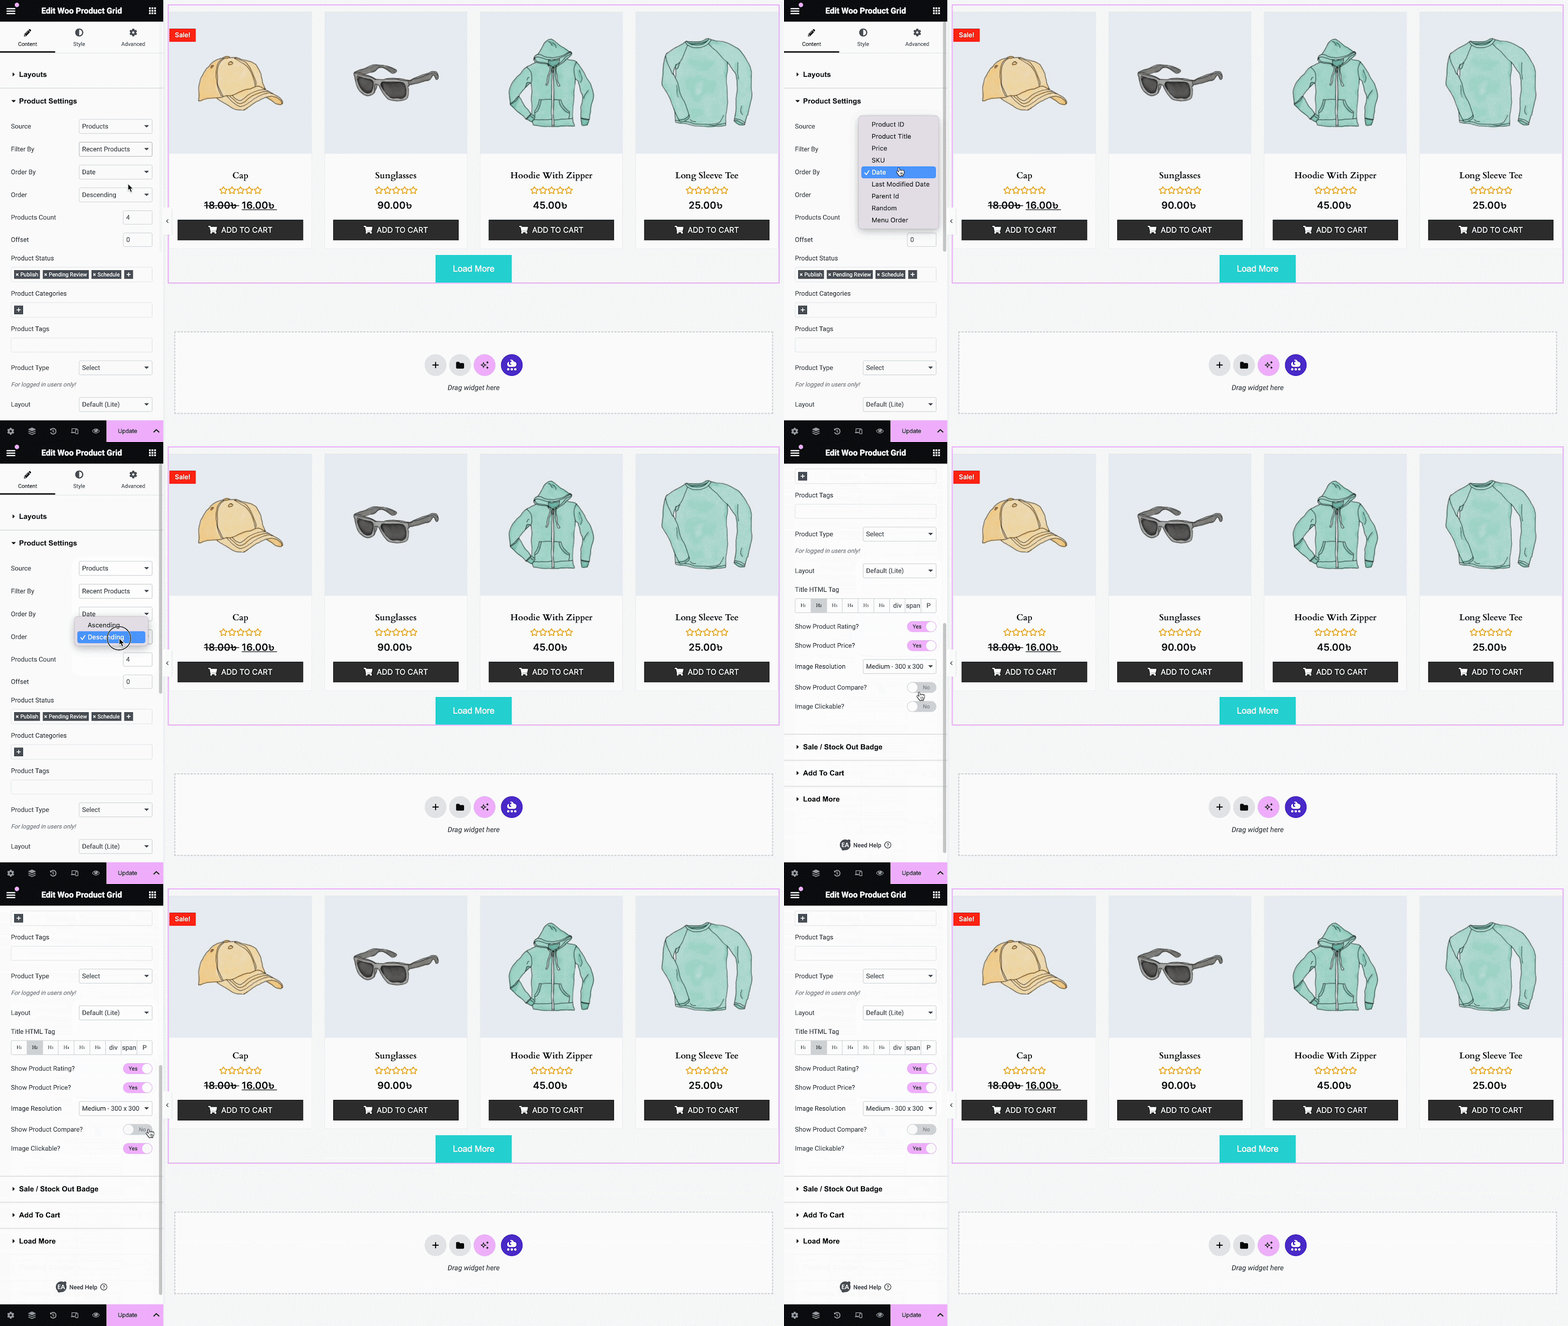
You can also add the ‘Product Categories’ to display the products in those respective categories. Use the toggle to enable or disable the ‘Show Product Rating’ and pick your preferred image size from the ‘Image Size’ option. Also, by enabling the toggle ‘Show Product Compare?’ ‘Image Clickable’, you can show product comparison, and make your image clickable as well.
Sale/Stock Out Badge #
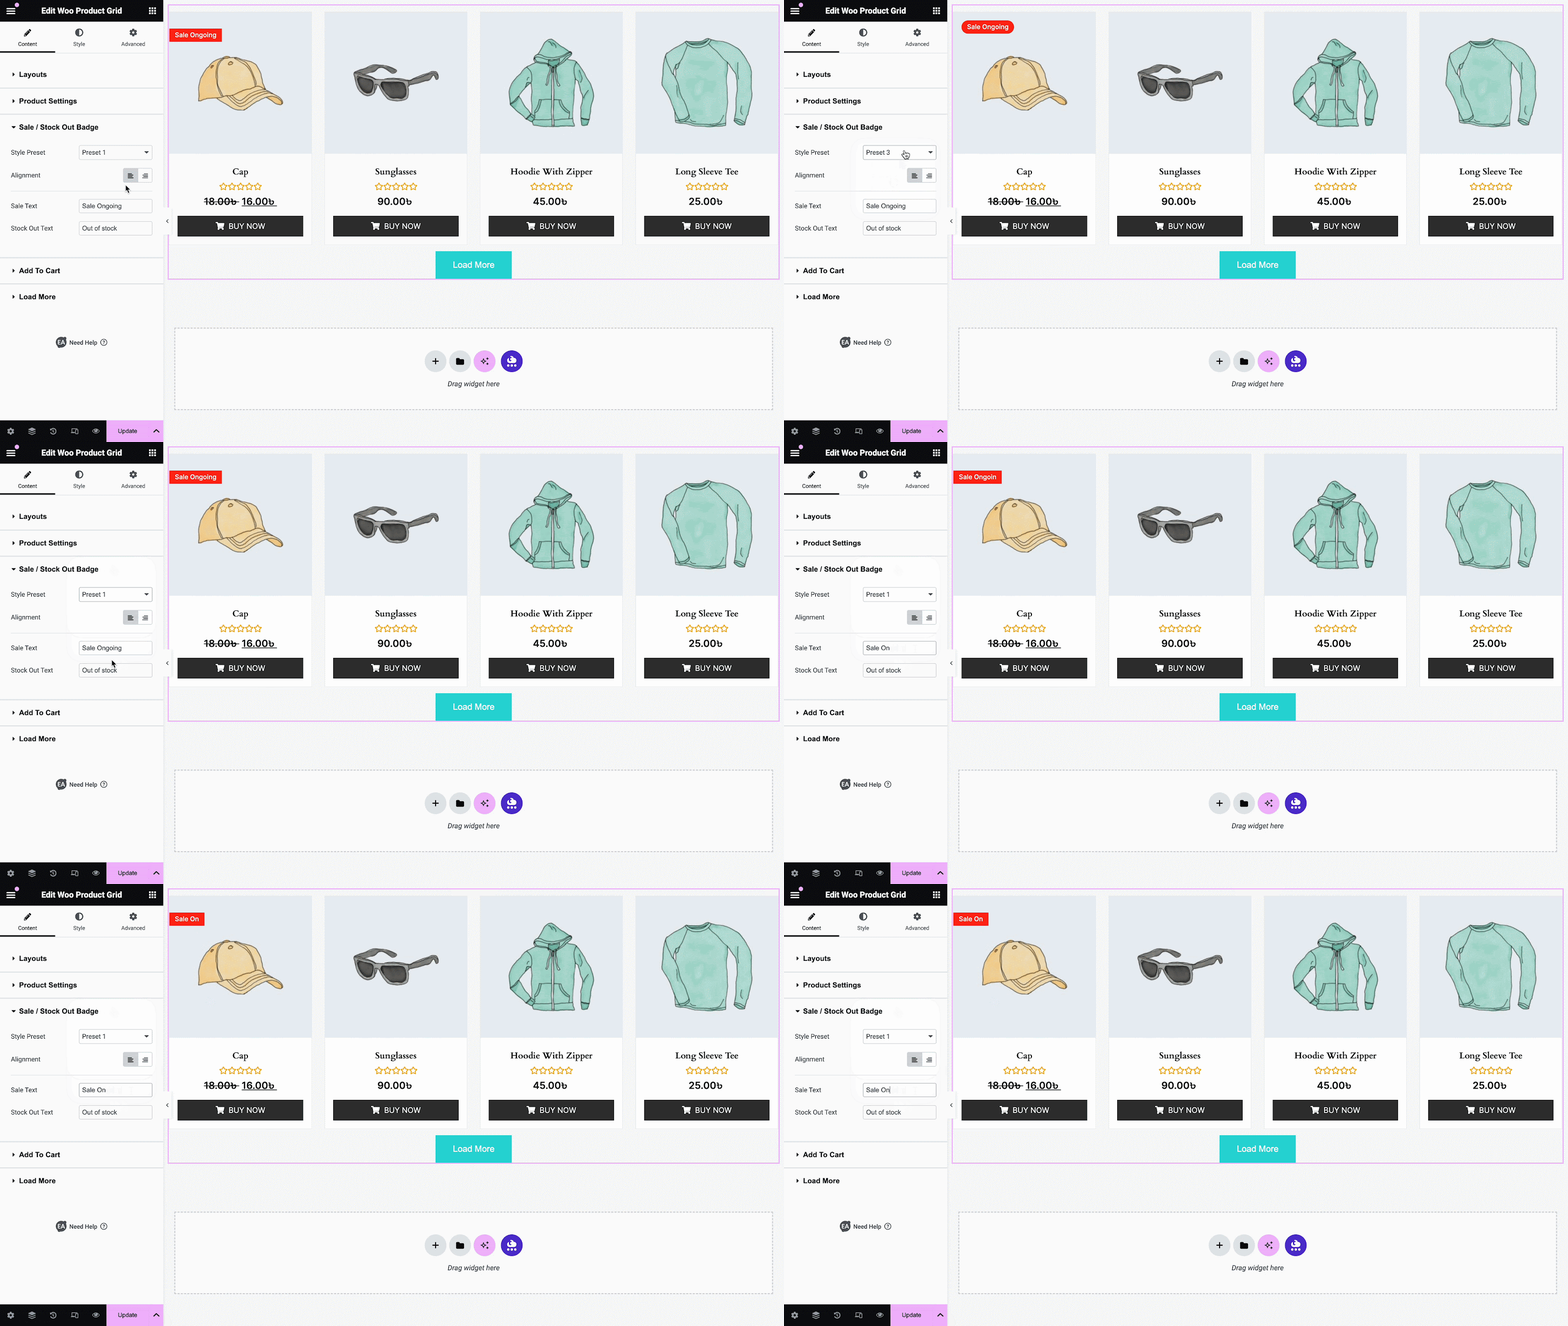
From this section, you can display if sales are ongoing on your products or if any products are stocked out. For this, 5 style presets are available to choose from. Plus, you can customize the Sale text and Stock out text as you want.
Add To Cart #
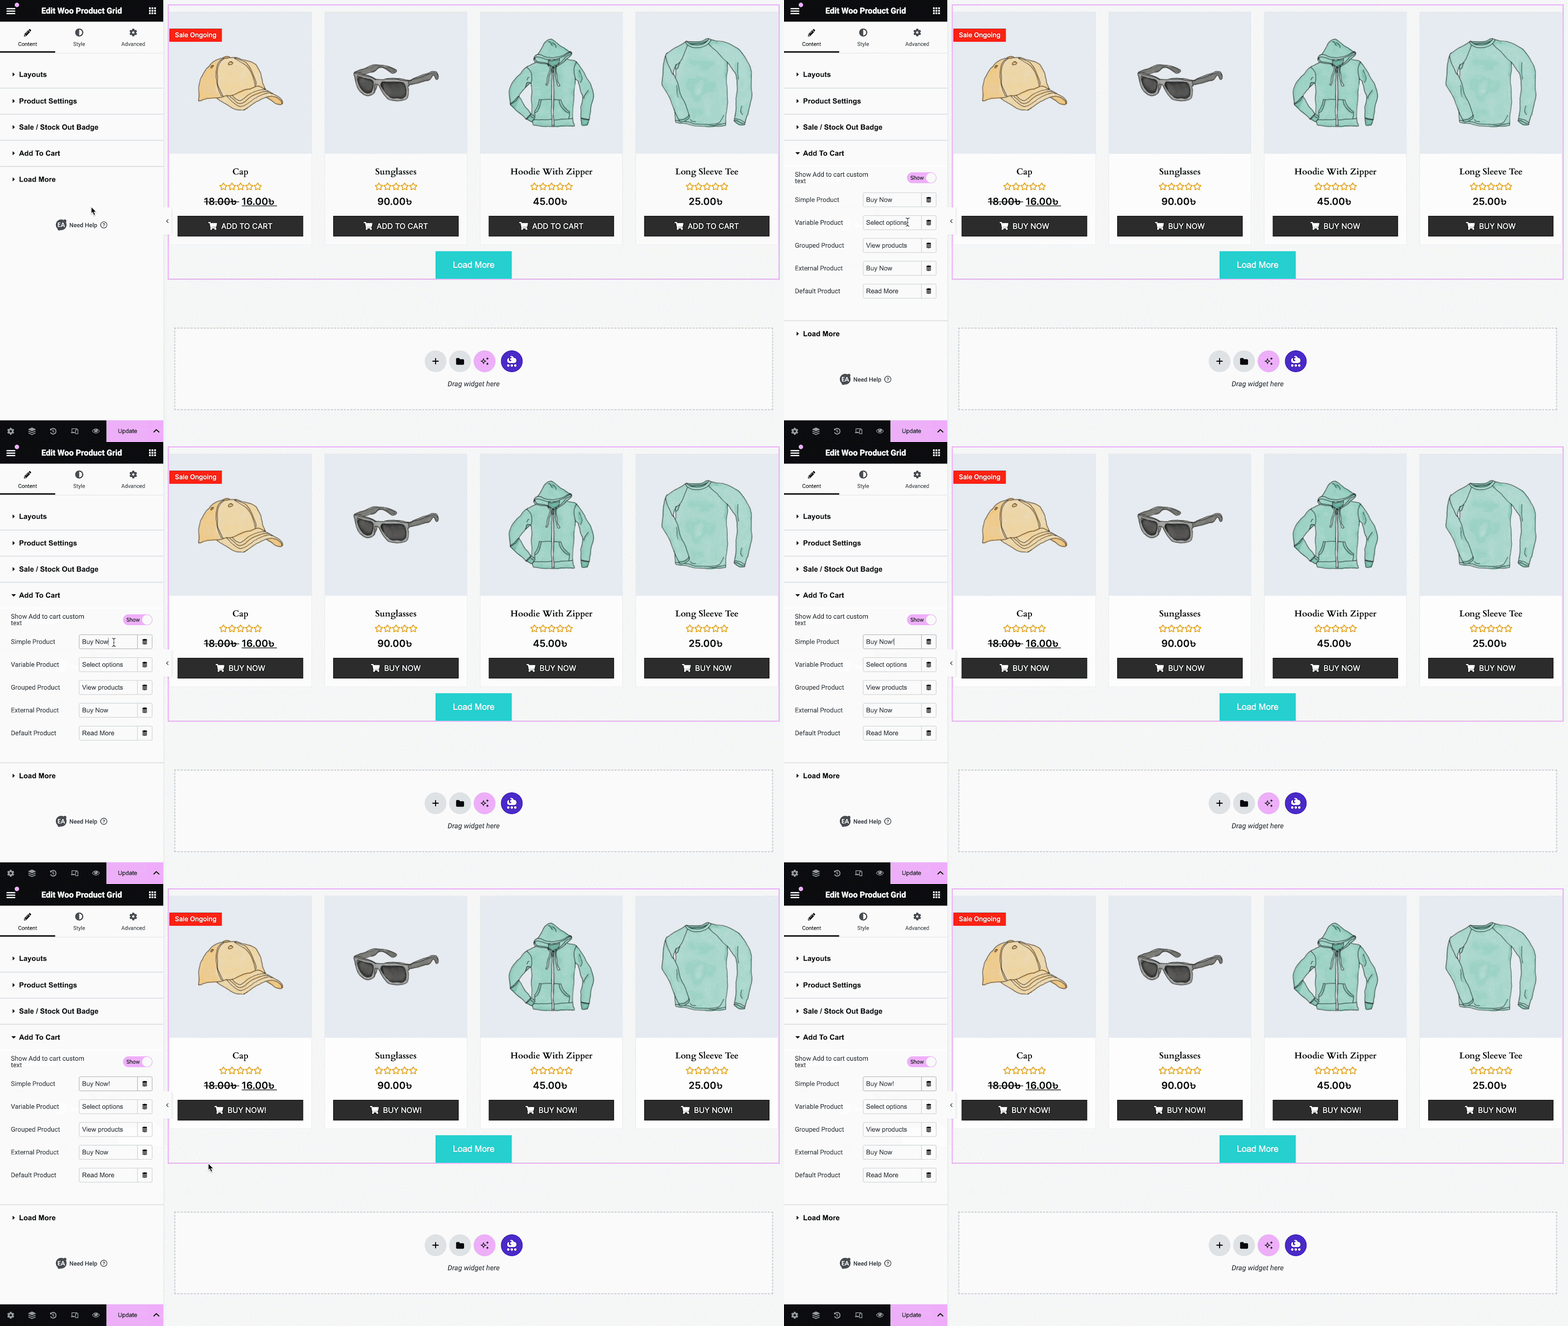
If you enable the ‘Add To Cart’ option, you will get the default cart text adding in your add to cart button, or even if you want, you can customize the text according to your preference.
Click to See Live Demo #
How to Style Product Grid #
Switch to the ‘Style’ tab to style all the features of the Product Grid. Here, you can make your widgets…..to style your product grid.
Products #
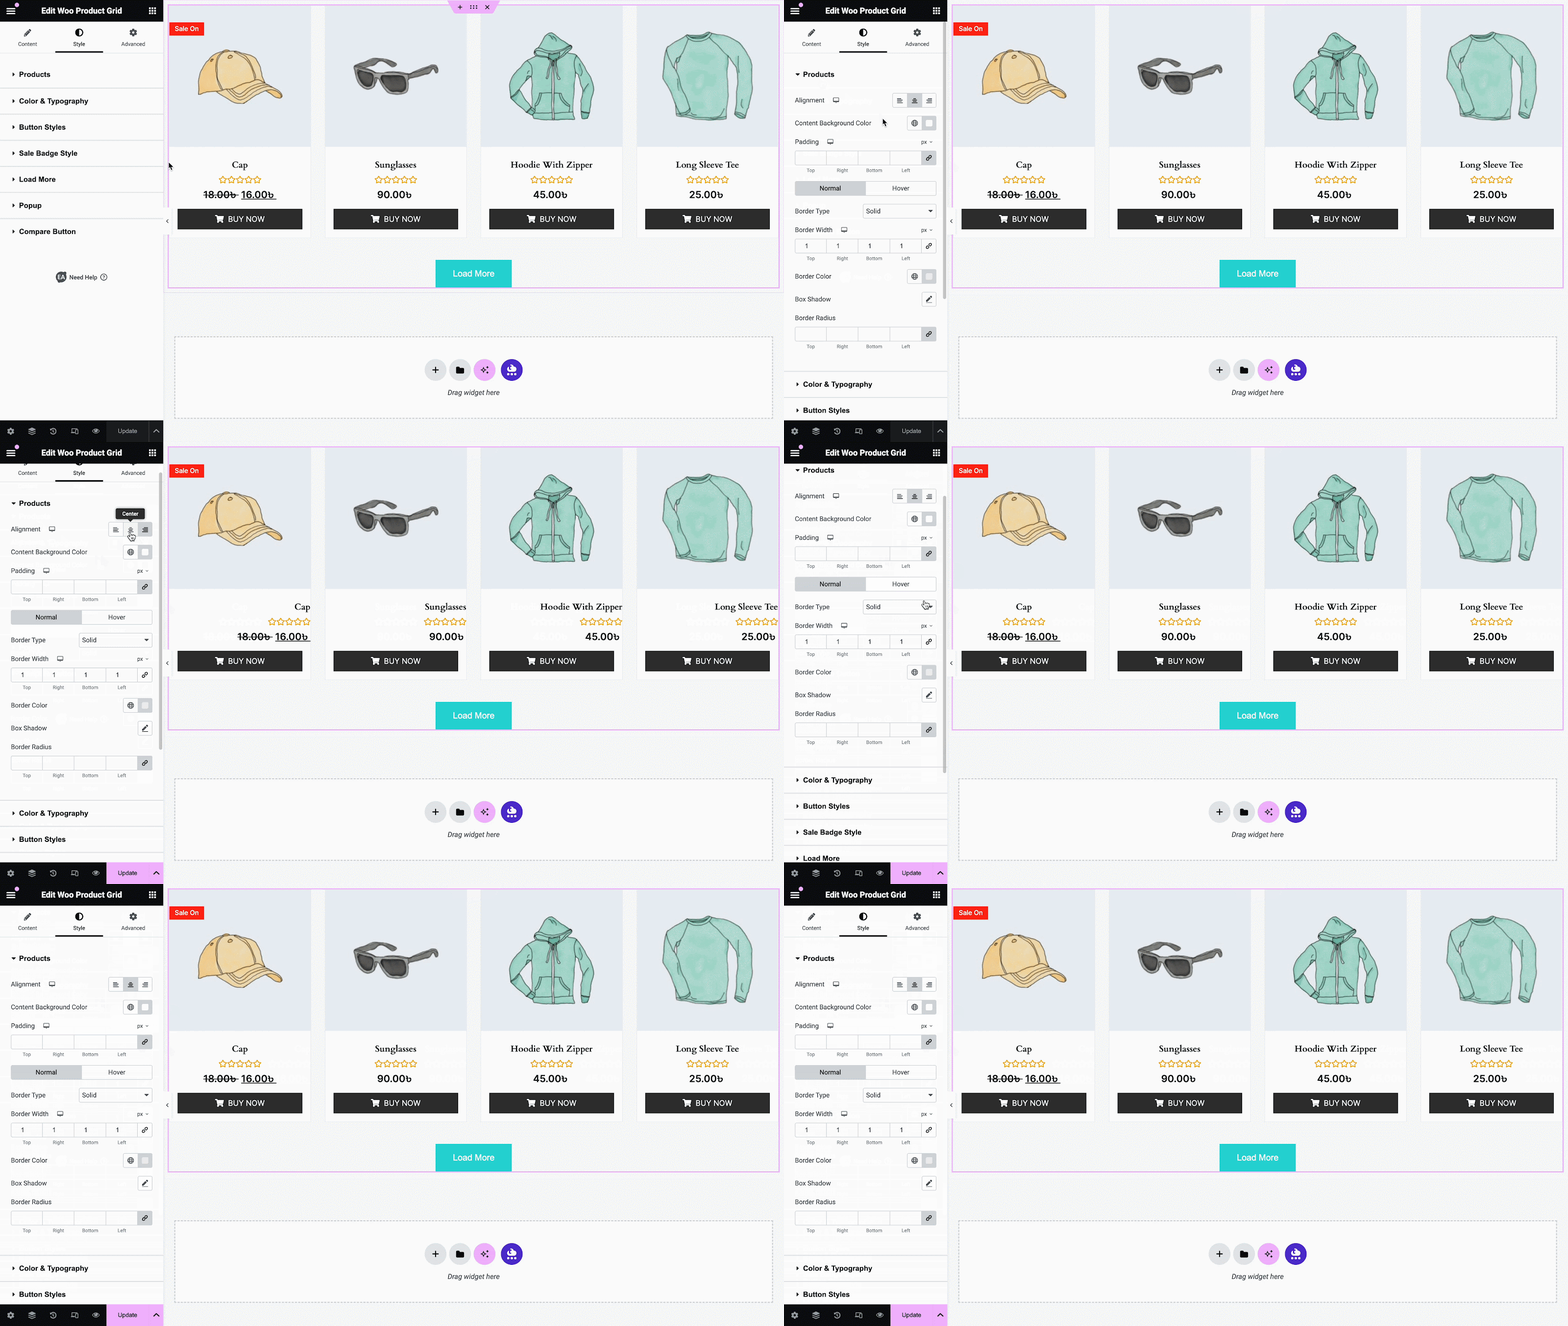
From the ‘Products’ section, you can set the alignment and choose a ‘Content Background Color’, and configure both actions ‘Normal’ & ‘Hover’ of your product layout to style it in advance.
Others #
From the ‘Color & Typography’ section, you can change the color & typography of your Product Title, Price, Star Rating, Sale Badge & Stock Out Badge. You can add styling to the ‘Button’, Load More Style, ’, Pagination, and Popup styles according to your need.
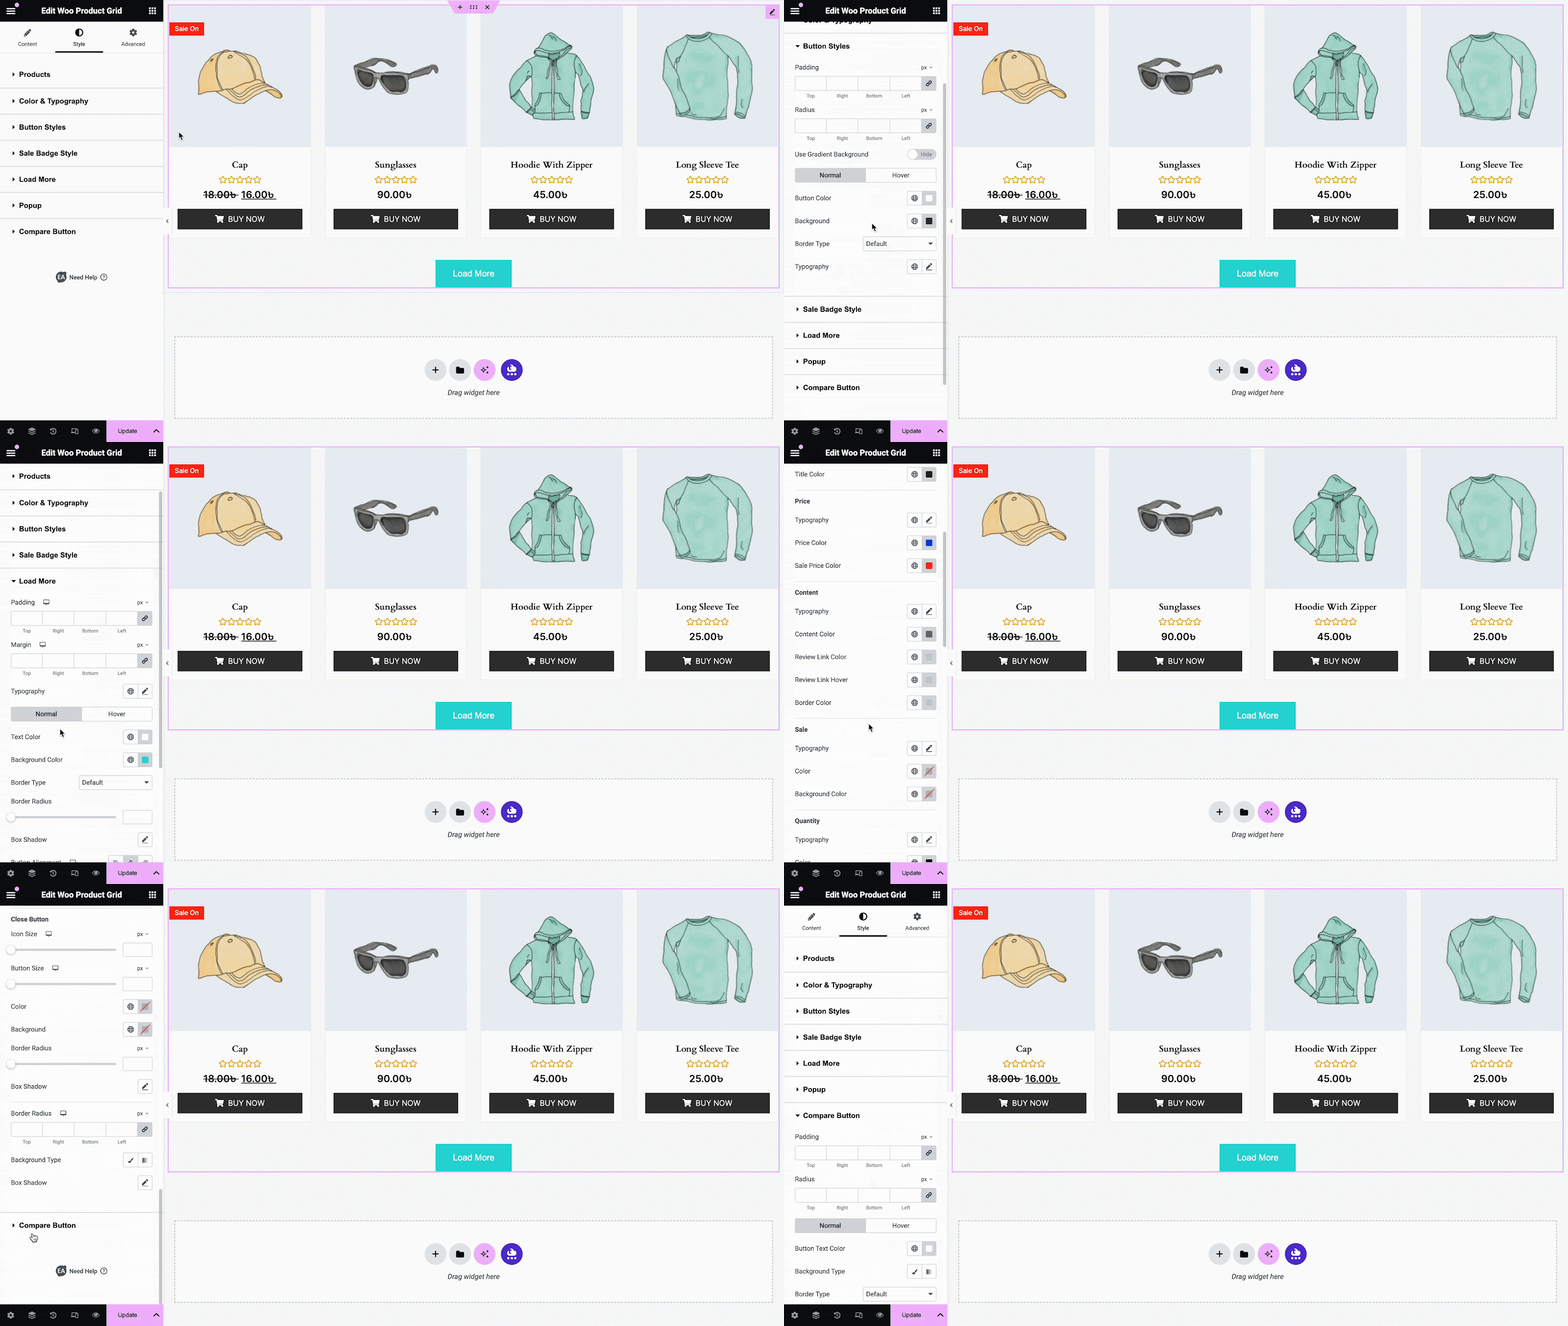
Each style section will change a bit consisting of new sections according to the ‘Layout’ you pick from the Content settings like Grid, List, or Masonry, and change the outlook as per your preference.
Final Outcome #
By following the basic steps and a bit more modifying, you can style your Product Grid as per your preference.
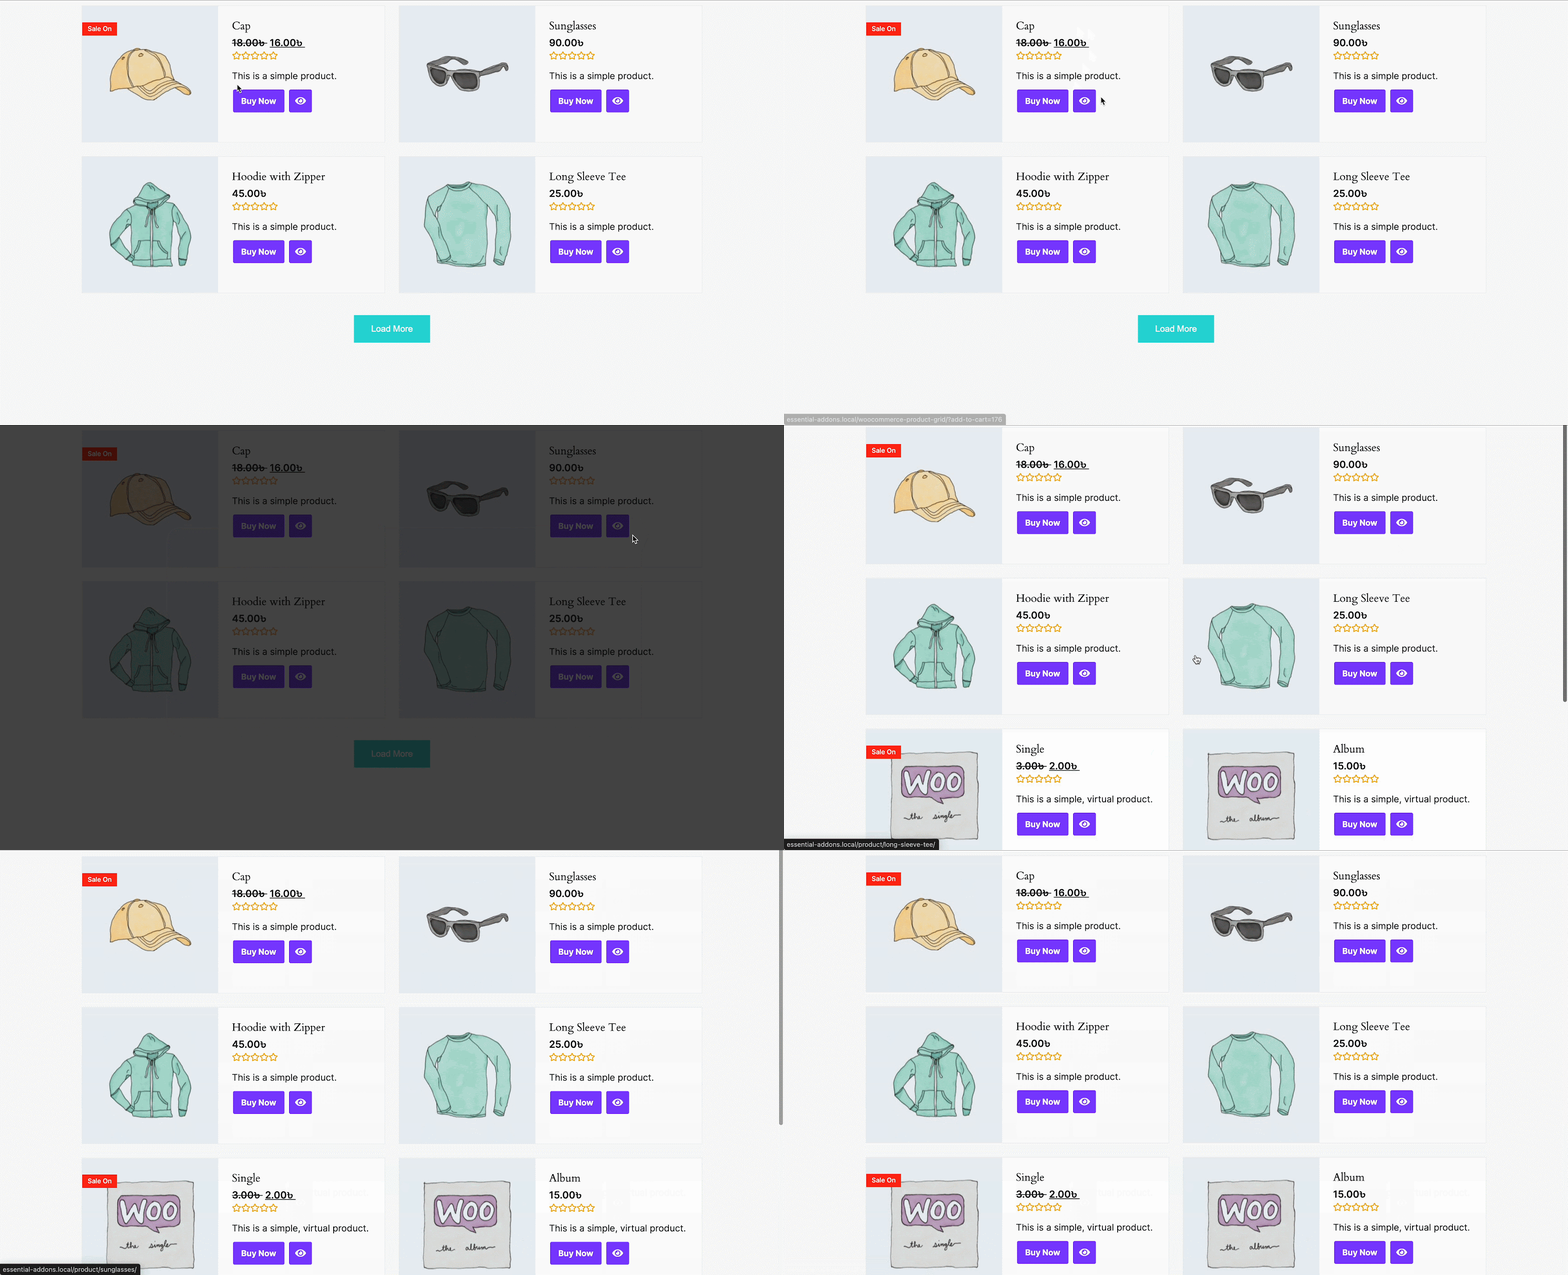
This is how simply you can display all your WooCommerce Products using EA Product Grid.
Getting stuck? Feel free to Contact Our Support for further assistance.


