How to Configure & Style EA Countdown #
EA Countdown helps you bring your Elementor website to life with a dynamic, animated countdown with an evergreen timer. This element is perfect for creating hype about a new product launching, or for Coming Soon pages. It comes with tons of cool customization options so you can add your own unique touch, and even lets you choose an Expiry Action for when your countdown is over.
How to Activate EA Countdown #
To activate this Essential Addons element, find the ‘EA Countdown’ element from the ‘Search’ option under the ‘ELEMENTS’ tab. Drag and drop the element anywhere on the page.
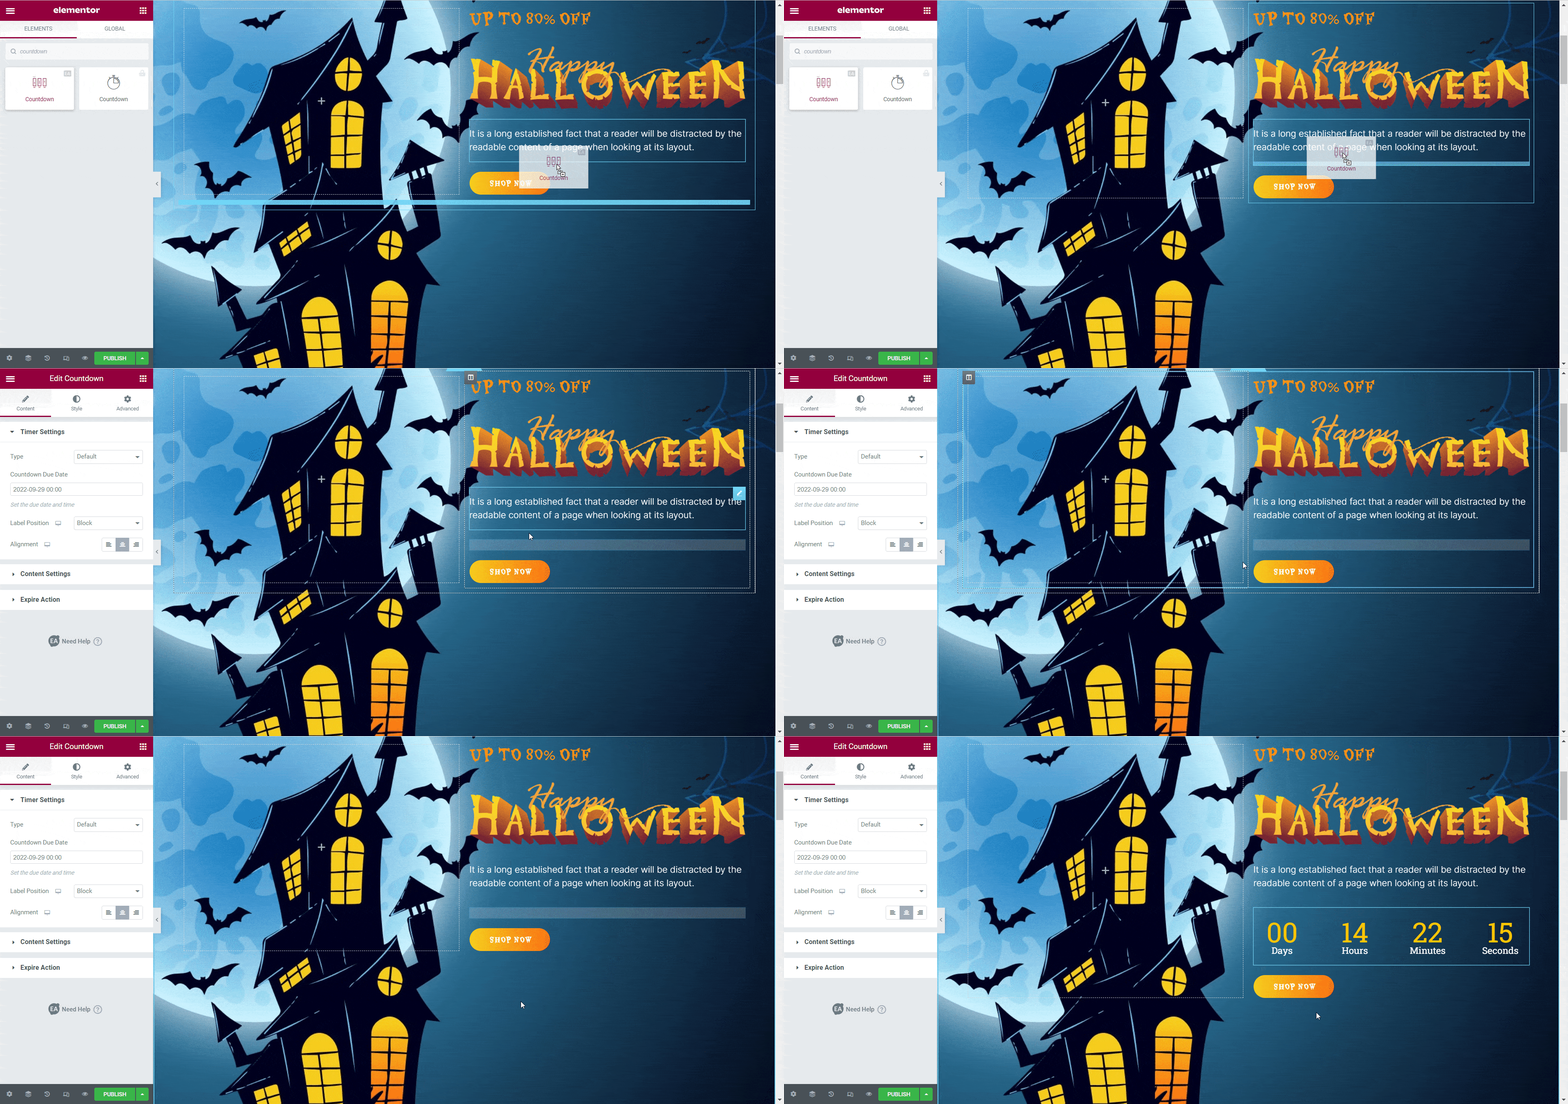
After you have dragged and dropped the element into any empty section of your page, you should be able to see it on your site like this by default.
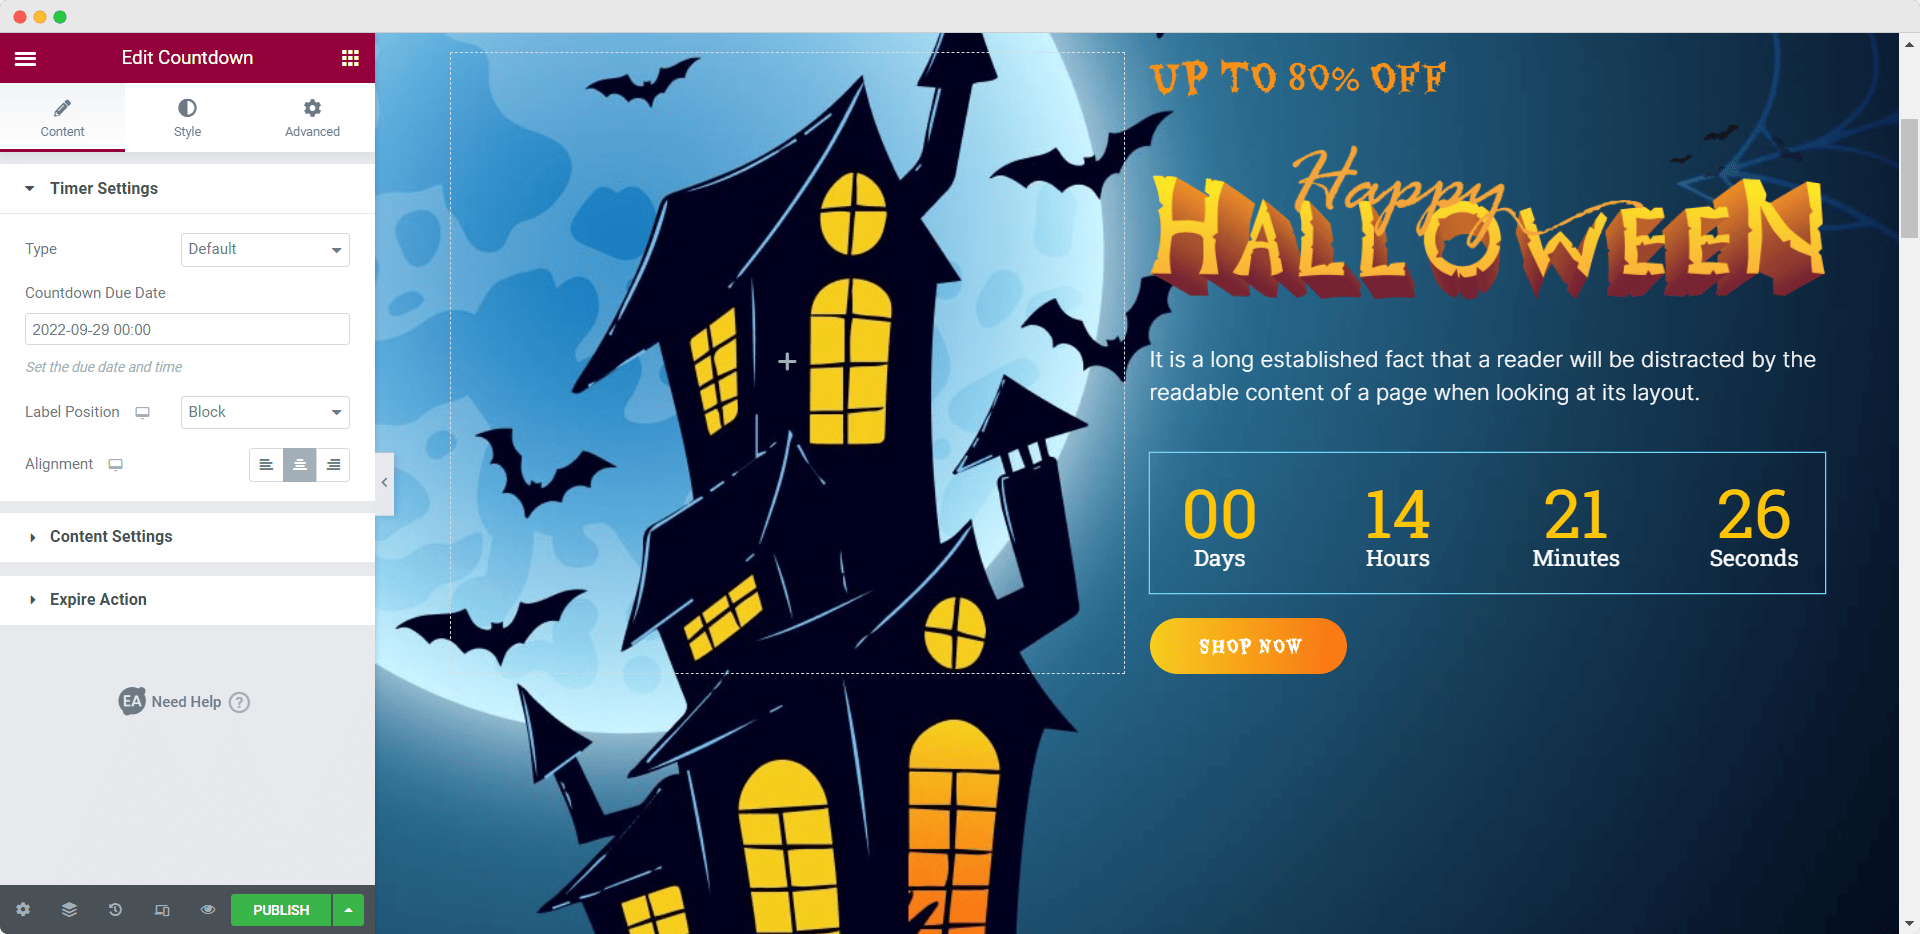
How to Configure the Content Settings #
After activating the EA Countdown element, switch to the ‘Content’ tab and you will see several options like ‘Timer Settings’, ‘Content Settings’, and ‘Expiry Action’.
Timer Settings #
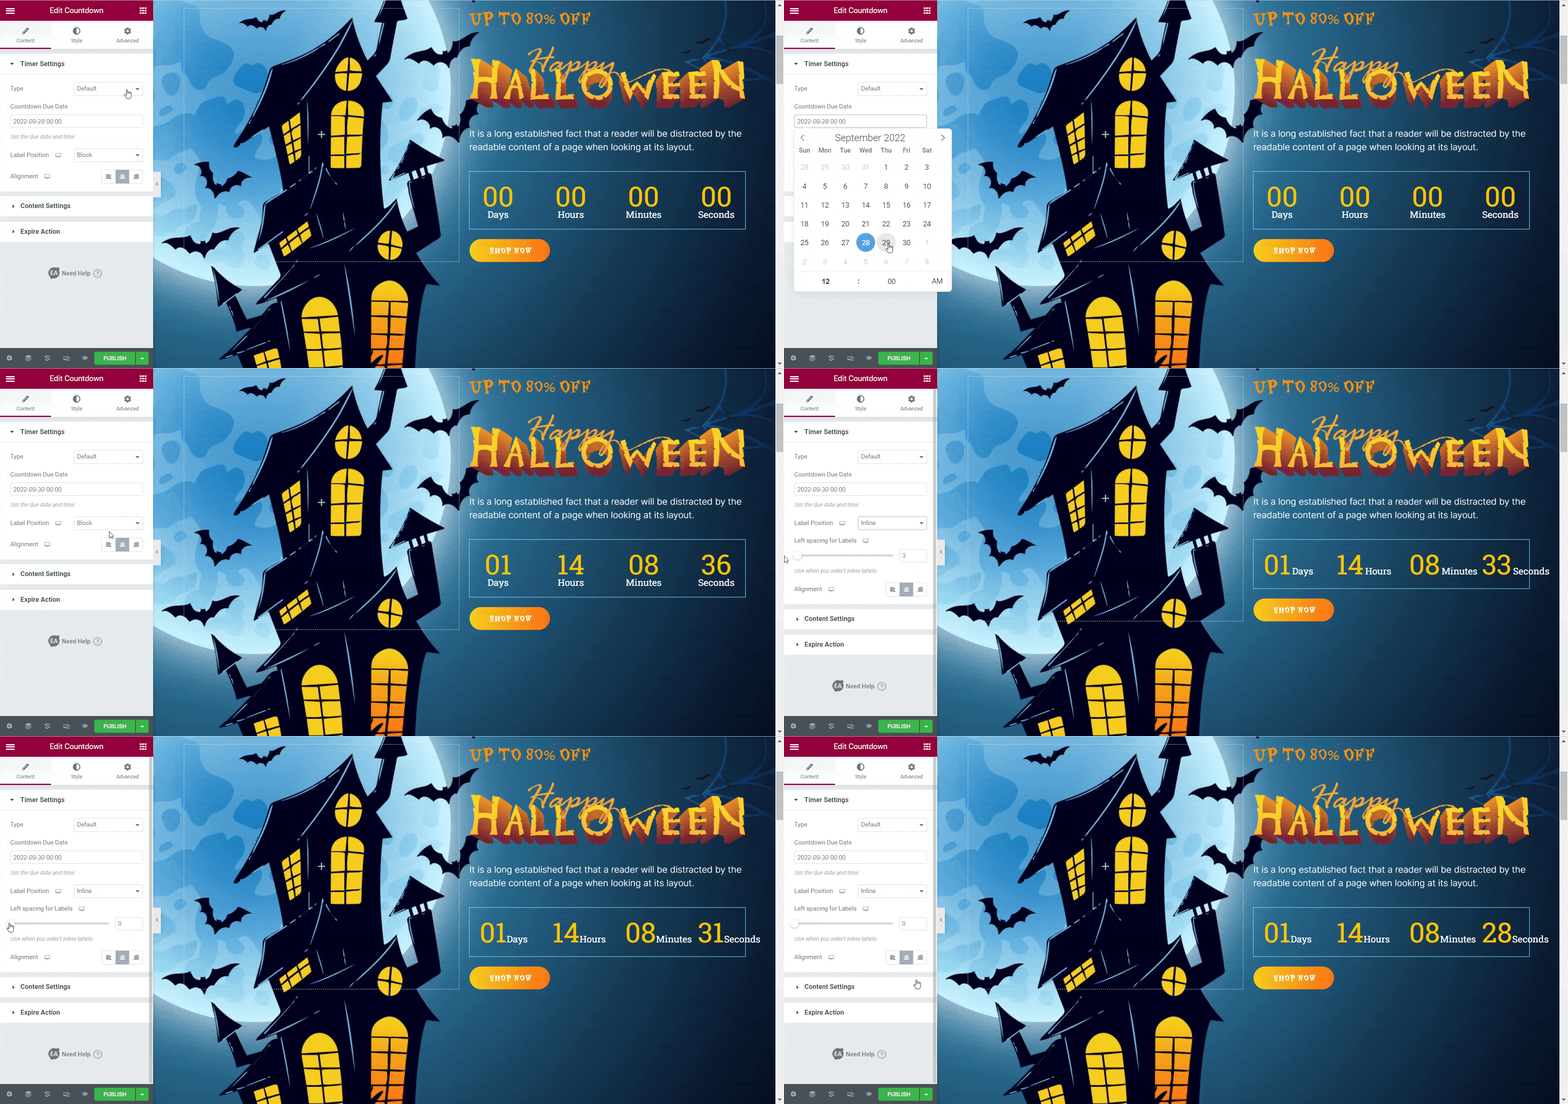
From the ‘Timer Settings’, you can choose the timer type as ‘Default’ or ‘Evergreen Timer’.
Now, if you choose the ‘Evergreen Timer’ you can set the ‘Hours’, and ‘Minutes’, and enable the ‘Recurring Countdown’ option from below. If you select the ‘Recurring Countdown’ you have to set a time for restarting the countdown again and stoppage time for the evergreen timer from the ‘Restart After (In Hours)’ option and ‘Recurring Countdown End Date’ options.
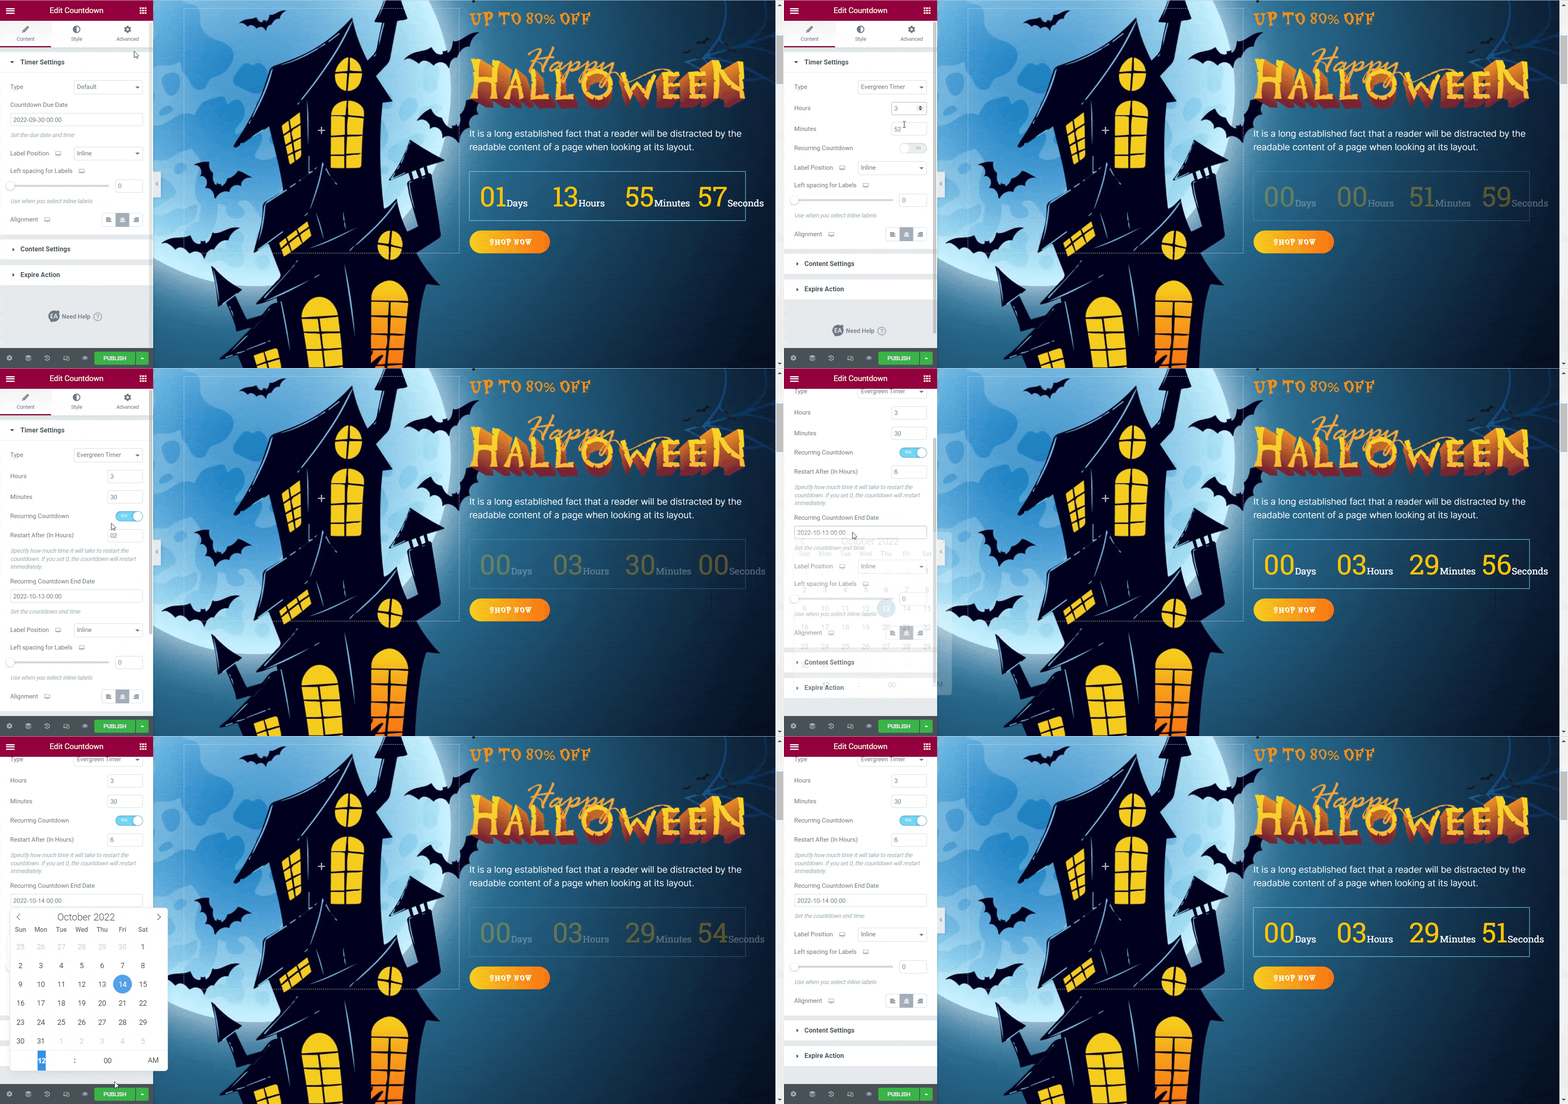
In addition, you can adjust the appearance of your evergreen countdown’s label by selecting either the ‘Block’ option or the ‘Inline’ option from the Label Position settings. You can also choose the alignment of your evergreen countdown from here.
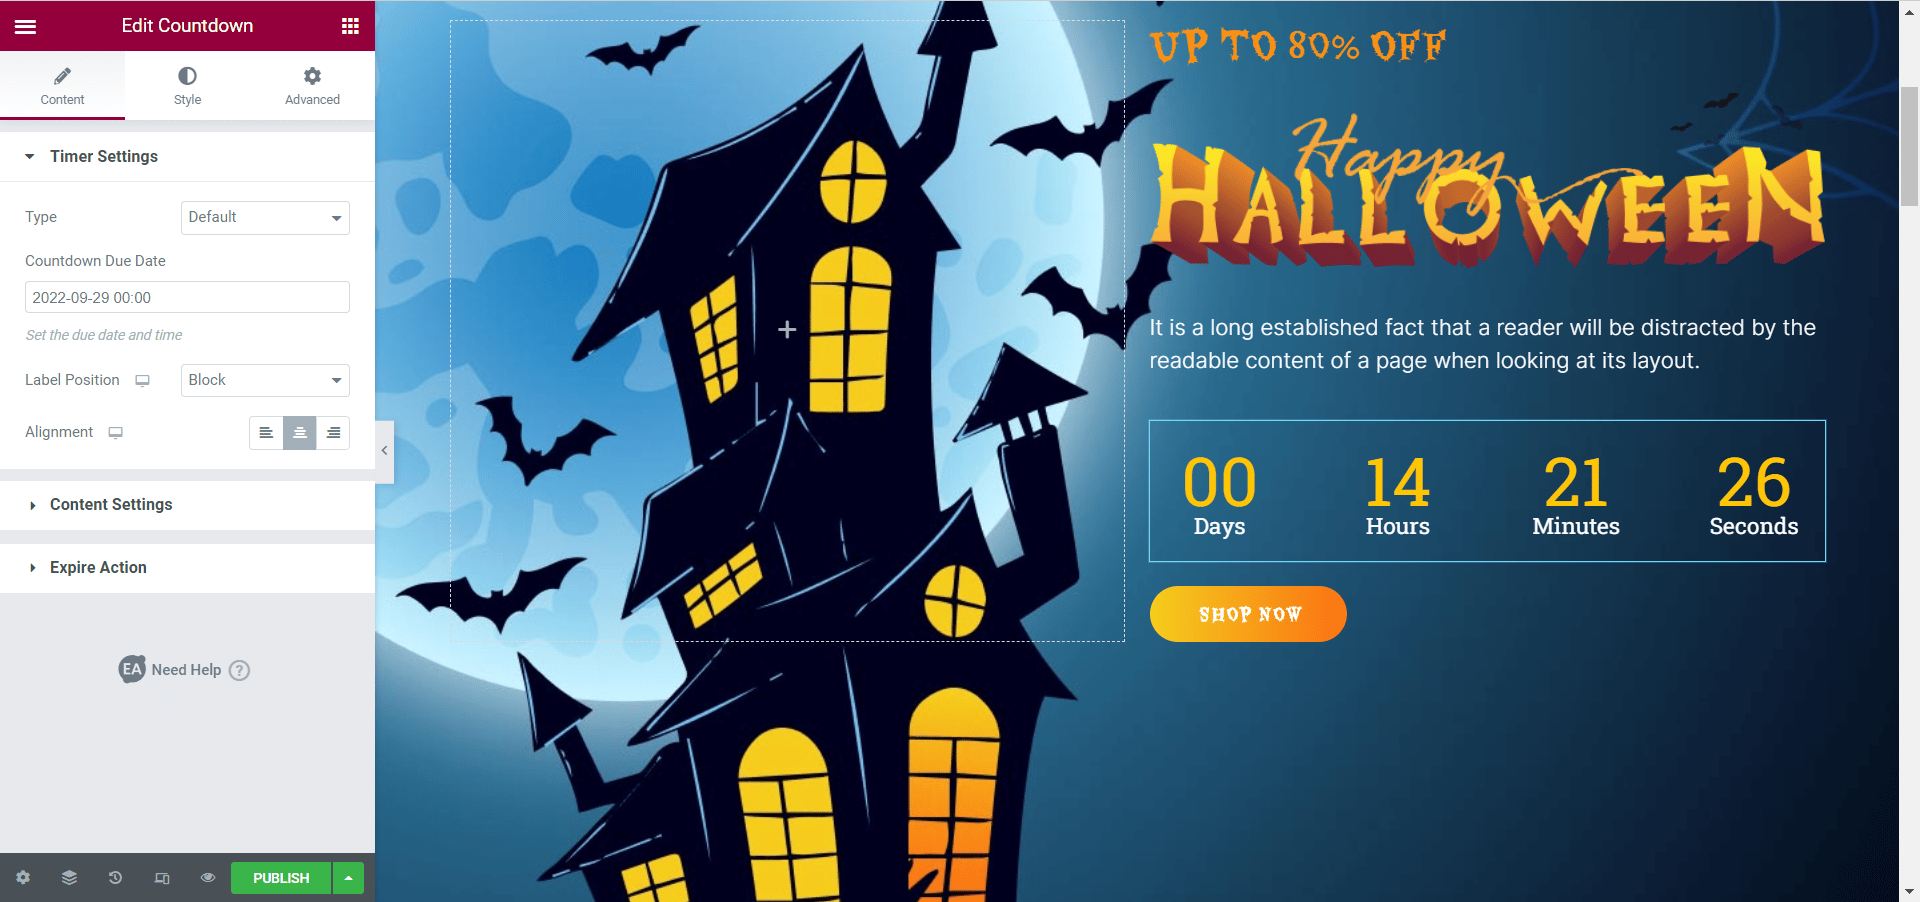
If you choose the ‘Default’ option, you will be able to set your ‘Countdown Due Date’ by choosing a specific date from the drop-down calendar. After that, you have the option to set the appearance of your countdown’s label by selecting either the ‘Block’ option or the ‘Inline’ option from the Label Position settings. You can also choose the alignment of your countdown here.
Content Settings #
From the ‘Content Settings’ you have the option to choose from two different layouts for your EA Countdown. You can choose between the ‘Grid View’ layout and the ‘List View’ layout.
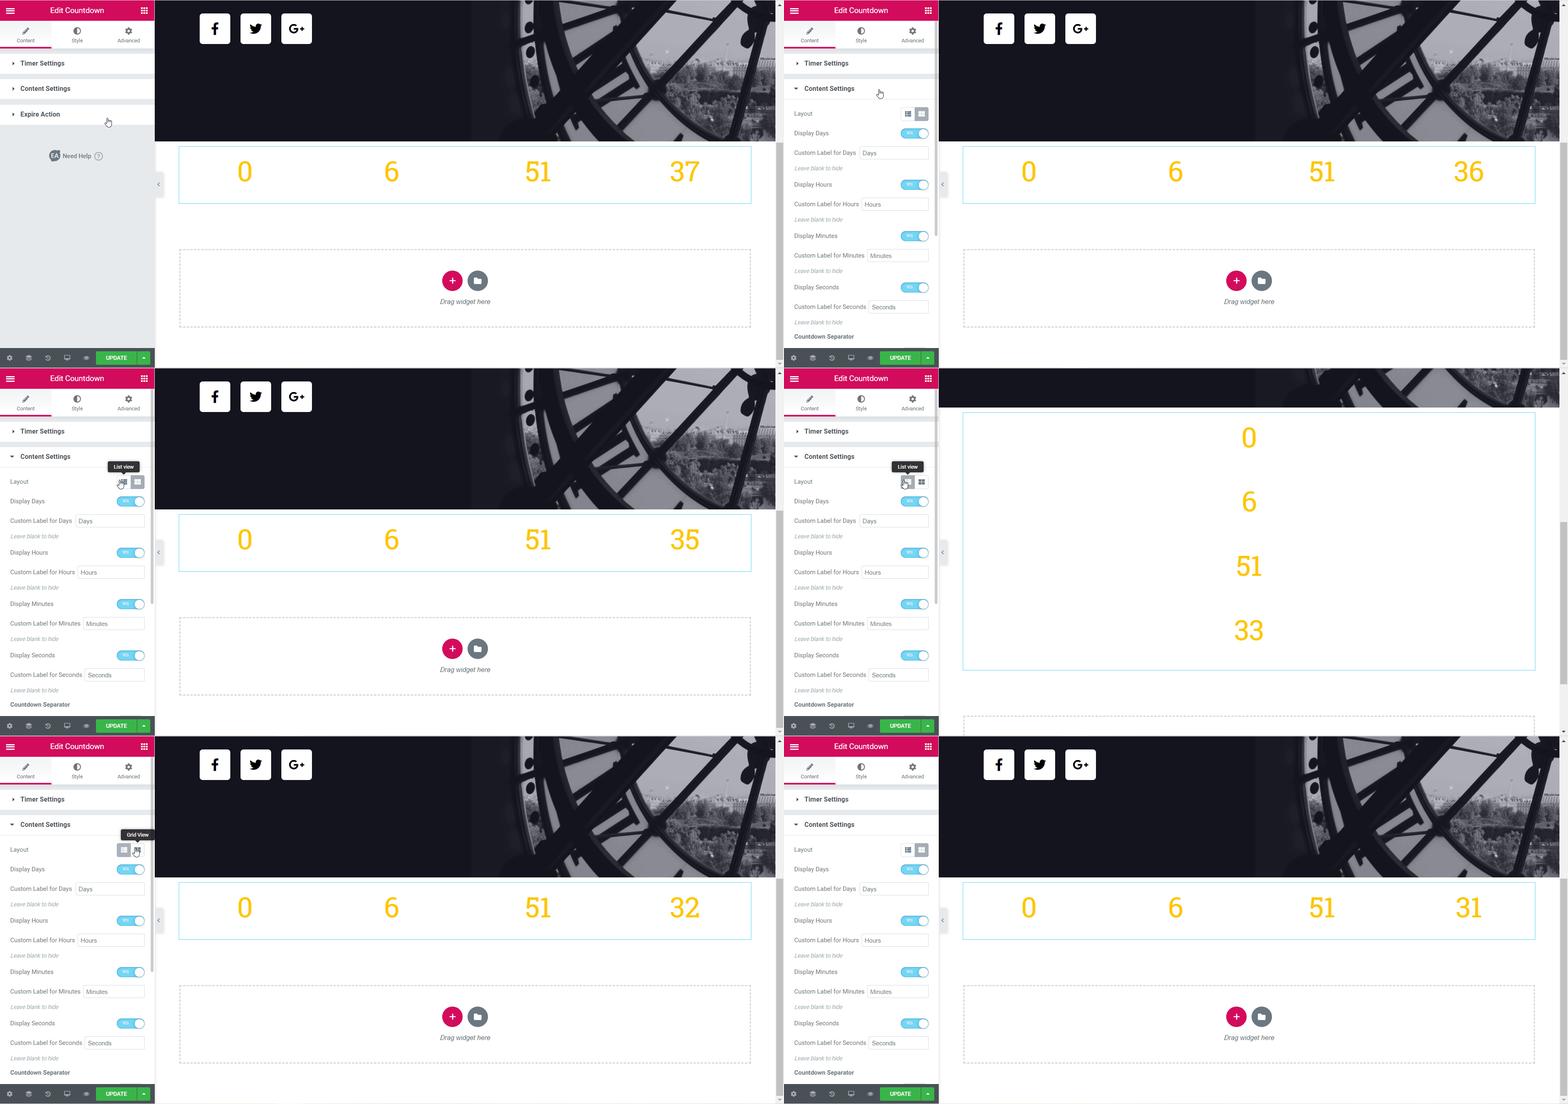
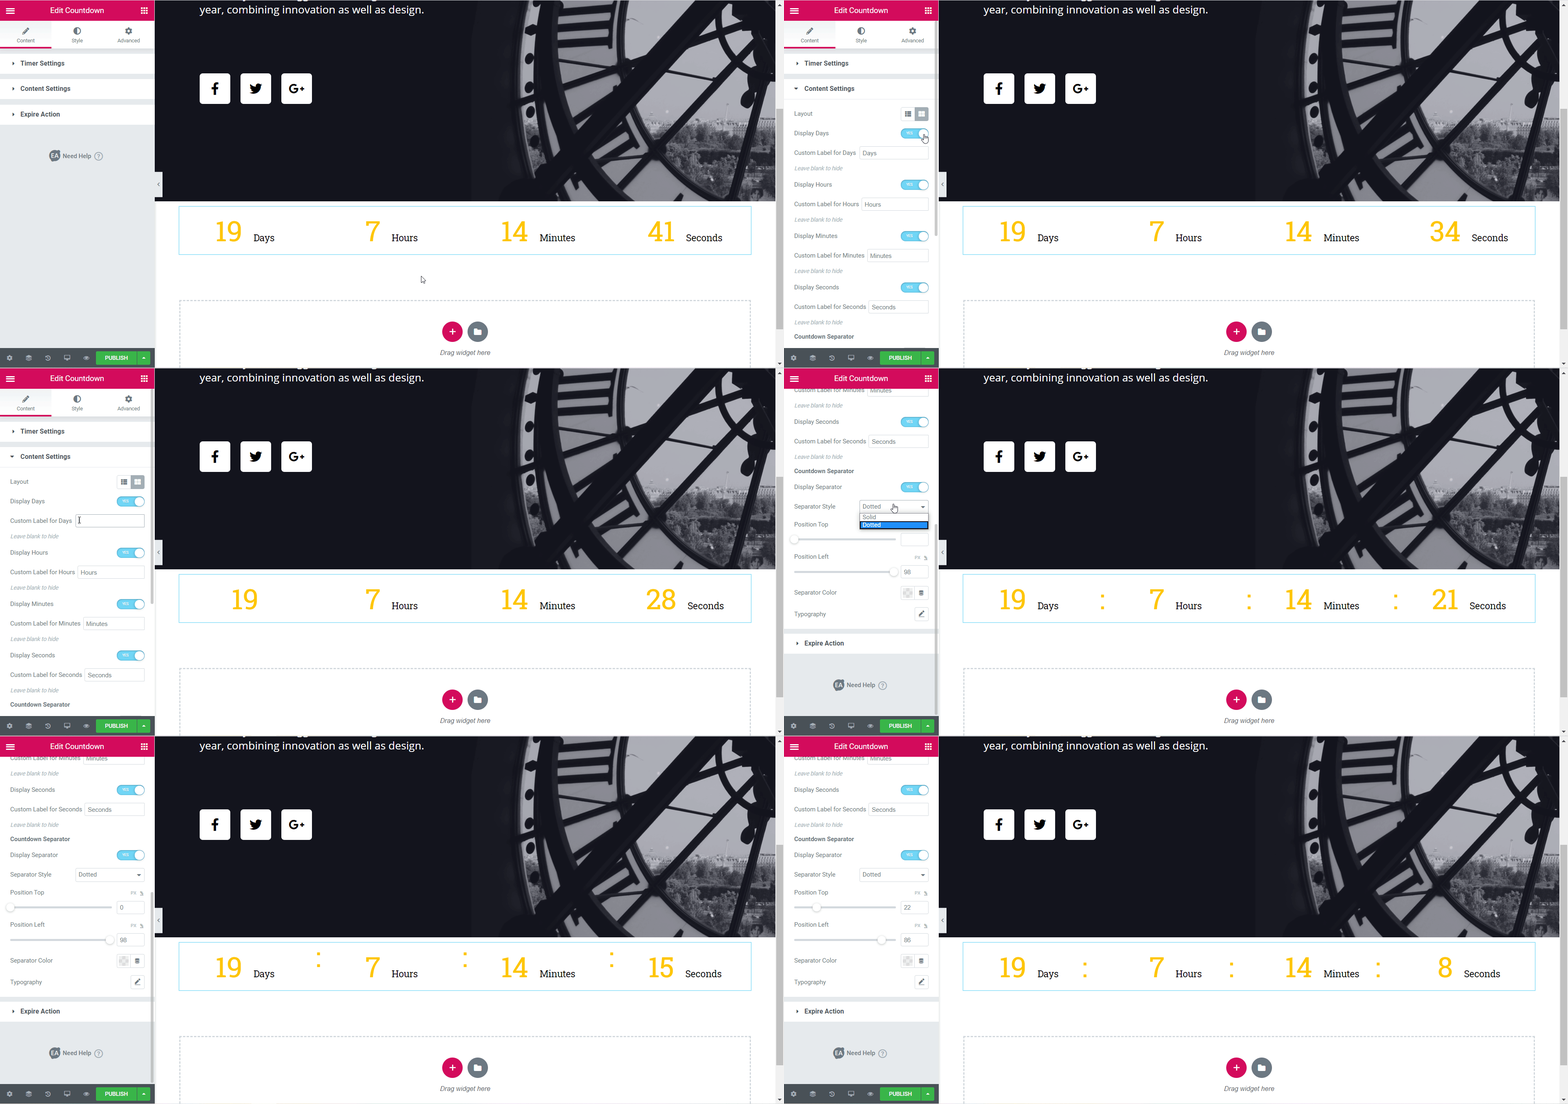
Besides, you can select which labels you want to display. You can also set custom labels here. If you want, you can add a countdown separator and set the positioning for it too.
Expiry Action #
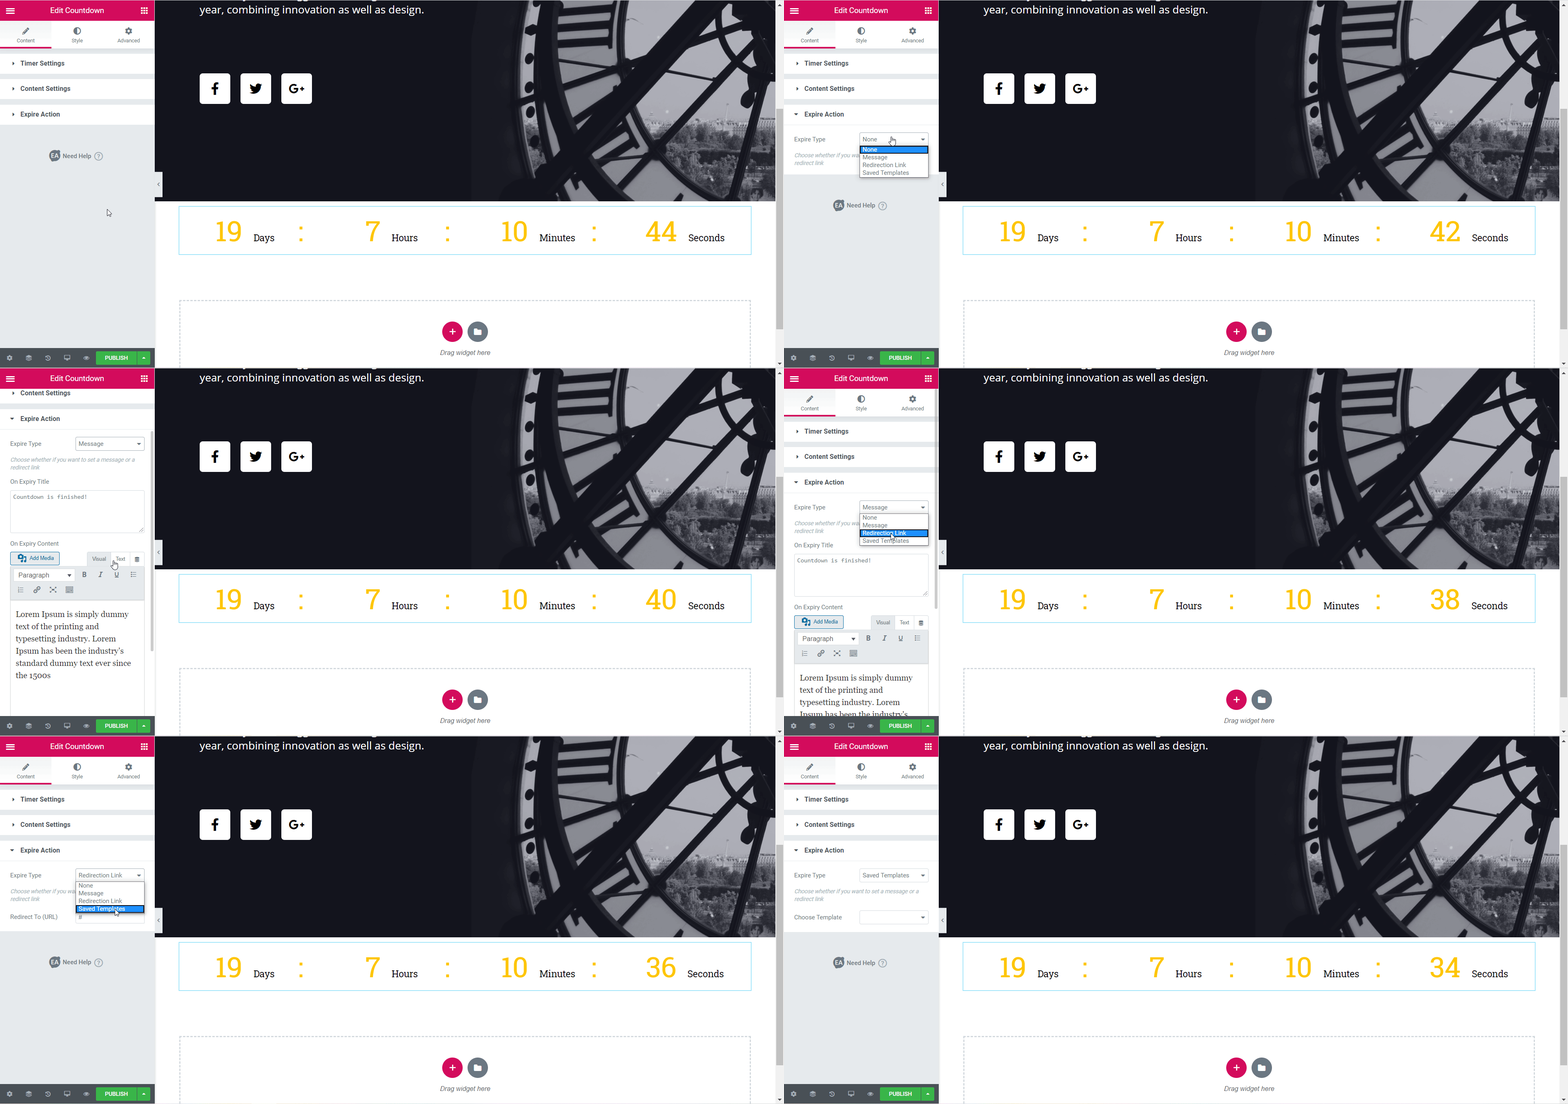
From the Expiry Action you can choose the expiry type for your countdown. You can choose to display a personalized message, or redirect your visitors to a different page or even add any saved template if you have them.
How to Style EA Countdown #
To style your EA Countdown click on the ‘Style’ tab and play around with the settings there.
Countdown Styles #
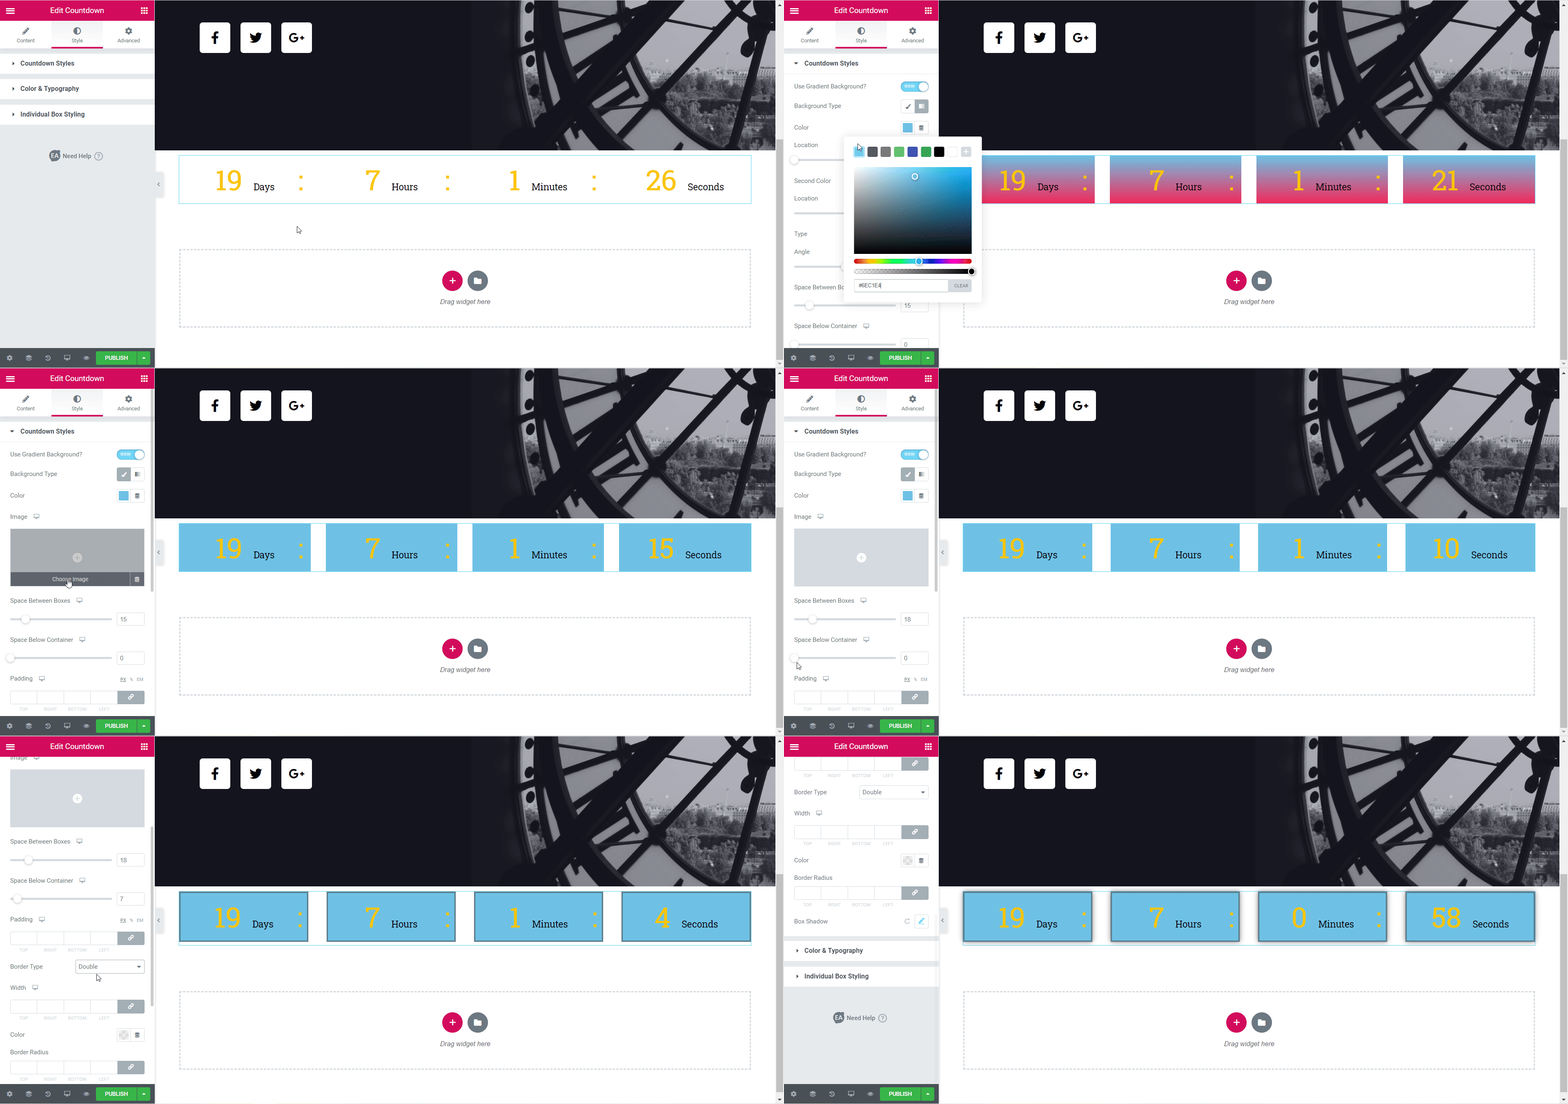
From here, you can customize the look of your countdown by enabling a gradient background, or simply sticking to a solid color background if that’s your preference. If you want you can also add an image as your countdown background.
Besides, you can tweak the space between the boxes in your countdown, adjust the space below the countdown container, and change the margin and padding. Moreover, you can add a border type and set the border radius, and also add a box shadow as well
Others #
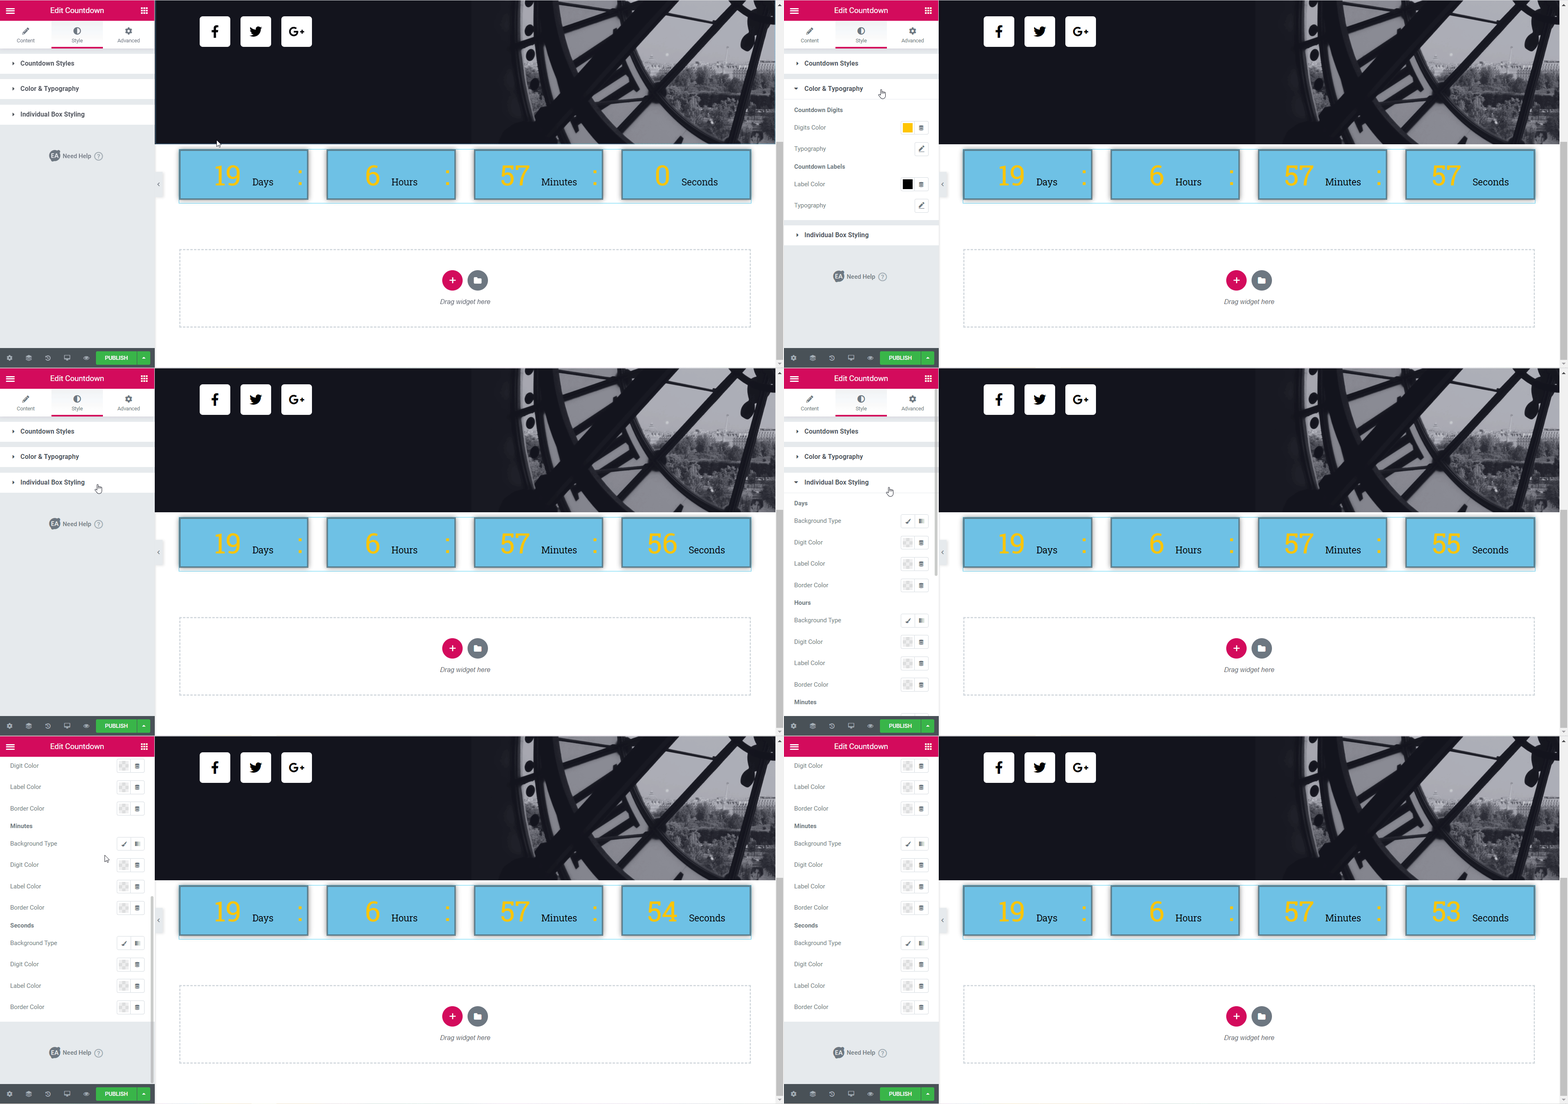
You can set countdown digit colors and the countdown typography colors from the ‘Colors & Typography’ section. You can also change the font size and font type from these settings.
From the ‘Individual Box Styling’ section you can set the background color, digit color, and label color for each individual box in your countdown. Play around with these settings until you find the right look for your EA Countdown.
Final Outcome #
By following these basic steps and changing these settings, you can create an eye-catching countdown for your Coming Soon pages or Product Launch pages with EA Countdown.
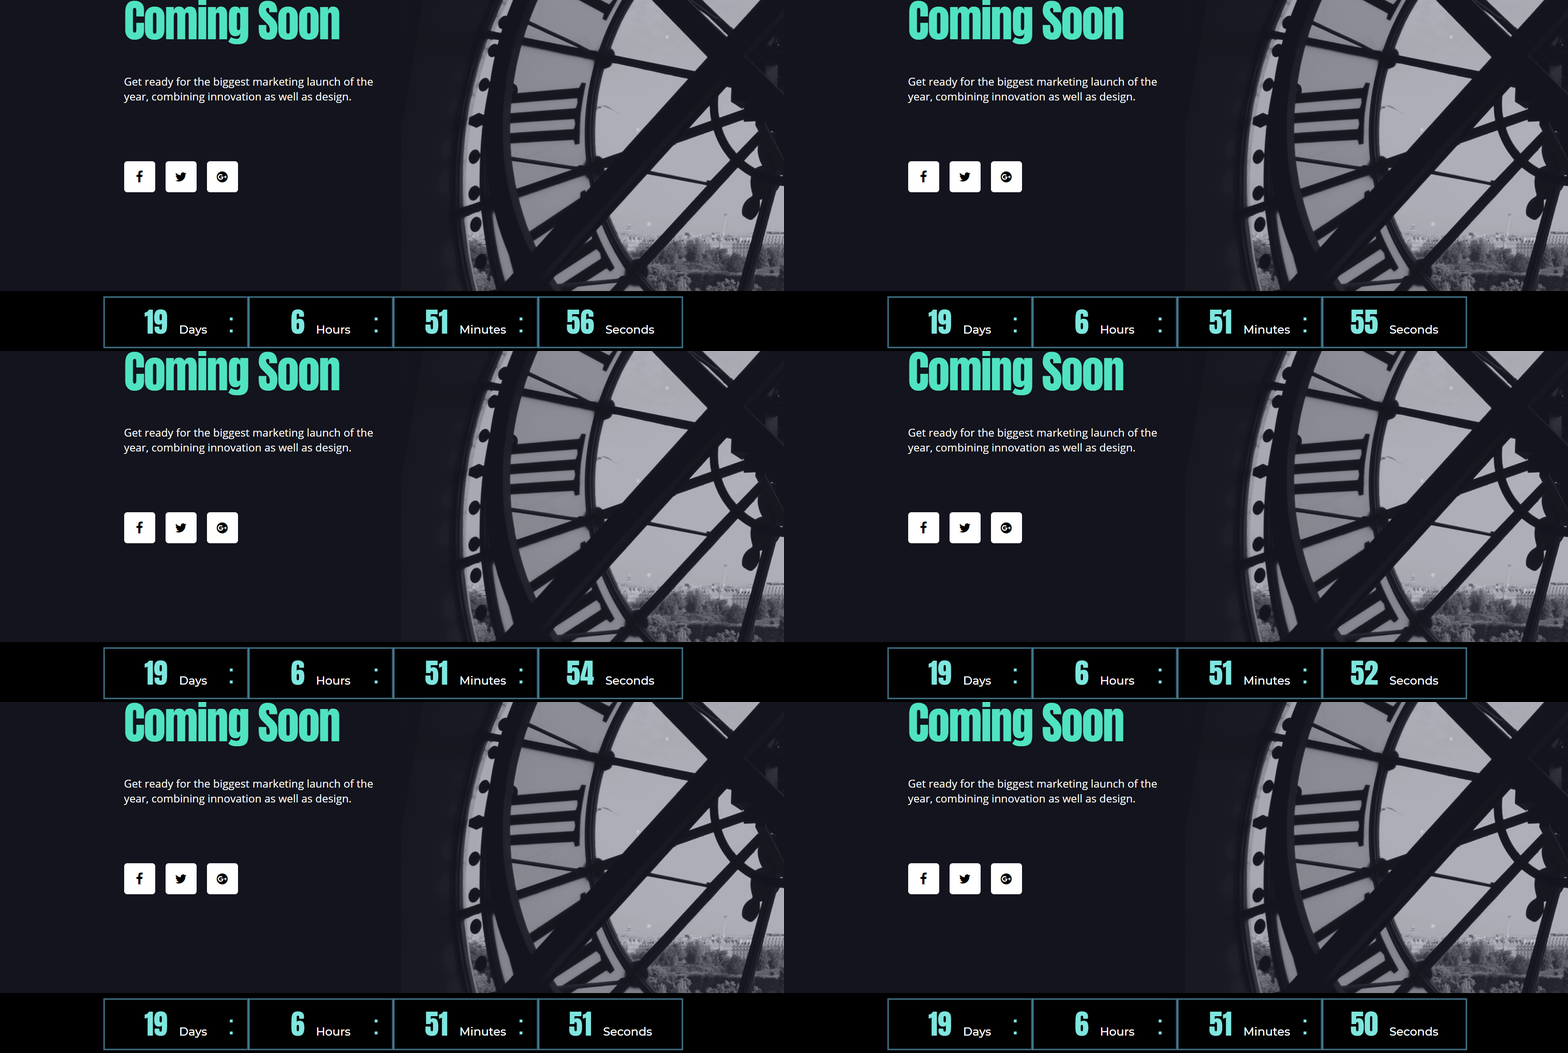
By using EA Countdown, this is how you can create a stunning countdown to get your visitors excited and increase your conversion in the process.
If you require any help, feel free to contact our support for further assistance.


