How to Configure EA Particles #
EA Particles lets you display interactive atoms and place them in your Elementor section with plenty of impressive effects & theme sources. With Essential Addons, now you can make your website unique & engaging. As a result, this will immediately grab the attention of your visitors.
How to Activate EA Particles #
To use particles effects, go to your WordPress dashboard & navigate to WP-ADMIN -> Essential Addons. Under the ‘Extensions‘ tab, you will find the Particles Extension. By default, it is set to be activated.

How to Edit a Section #
Edit Section #
To edit any section, go to your page and click on ‘Edit with Elementor‘ option. Then click on the ‘: : :’ icon of the section you want to modify, then the menu will appear. Simply click on ‘Edit Section‘.

Choose Background Type #
To configure ‘EA Particles‘ in full effect, you must have a Background on your section. After you are done with the previous step, the ‘Section’ bar will appear and it has a total of 3 tabs: Layout, Style & Advanced.
Switch to the ‘Style‘ tab to add a Background Type & configure the settings. You can simply just play around with the settings to get your desired output.
You can also switch to the ‘Advanced‘ tab to add Padding, Margin & more to the Background you have chosen.

How to Configure EA Particles Settings #
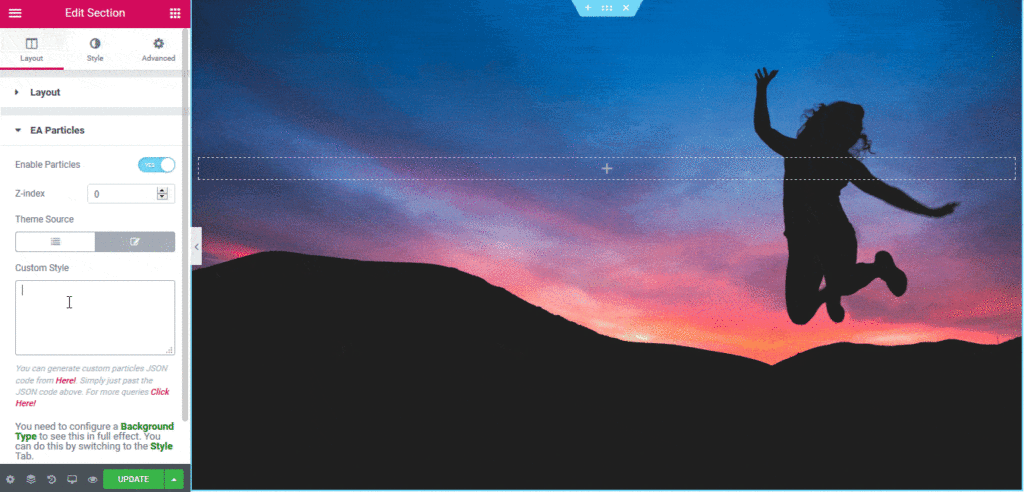
From the ‘Layout’ tab of your section, you will find the ‘EA Particles‘ Extension. To enable it, simply turn on the toggle. Then you would view the configuration settings for the Particles Extension.
In case your elements overlap, you can also increase or decrease the Z-index value from this section. You have two Theme sources to choose from. By default, it is set to the ‘Default’ theme source. You can add your ‘Custom’ theme source as well.

Default Theme Source #
You can use the drop-down menu ‘Preset Themes‘ to choose your preferred theme and see them in full effect in real time. You can easily hover your mouse or click on the particles to check how your preferred Particles Theme is working.

Custom Theme Source
If you choose ‘Custom Theme Source’, you can add your own custom Particles JSON code in the ‘Custom Style’ field.
You can also click on the link which is provided right below the ‘Custom Style’ field. The link will redirect to this site.
First, go to that website to generate the custom Particles JSON code. From there, you can choose your preferred theme and play around with the styling section to get your desired Particles.

After you are done with the configuration and styling, simply click on ‘Download current config (json)’ and save it.

Then open the custom Particles JSON file with a text editor (you can even use Notepad for this as well) and simply just copy the whole thing. This is how the JSON file would look like this:

Then go back to the ‘Edit Section‘ of Elementor and paste the code in the ‘Custom Style’ field. You would then be able to view your custom code working in full effect.

Opacity & Move Speed #
After setting the presets, you can adjust the ‘Opacity’ and ‘Move Speed’ of your particles by dragging the pointer of both the options left and right. Left indicates lower opacity and move speed, whereas right is vice versa.
Final Outcome #
By following the basic steps and a bit more modifying, you can style your Particles as per your preference.

This is how you can easily display attractive & interactive atoms on your WordPress website using EA Particles.
Getting Stuck? Feel free to contact our support team for further assistance.


