Essential Addons offers compatibility with the ever-so-popular WPML – WordPress Multilingual Translation Plugin. It allows you to translate your amazing websites built with Essential Addons for Elementor to any language you want. Follow these steps below to translate your Essential Addons content with WPML:
How To Configure WPML Plugin Settings #
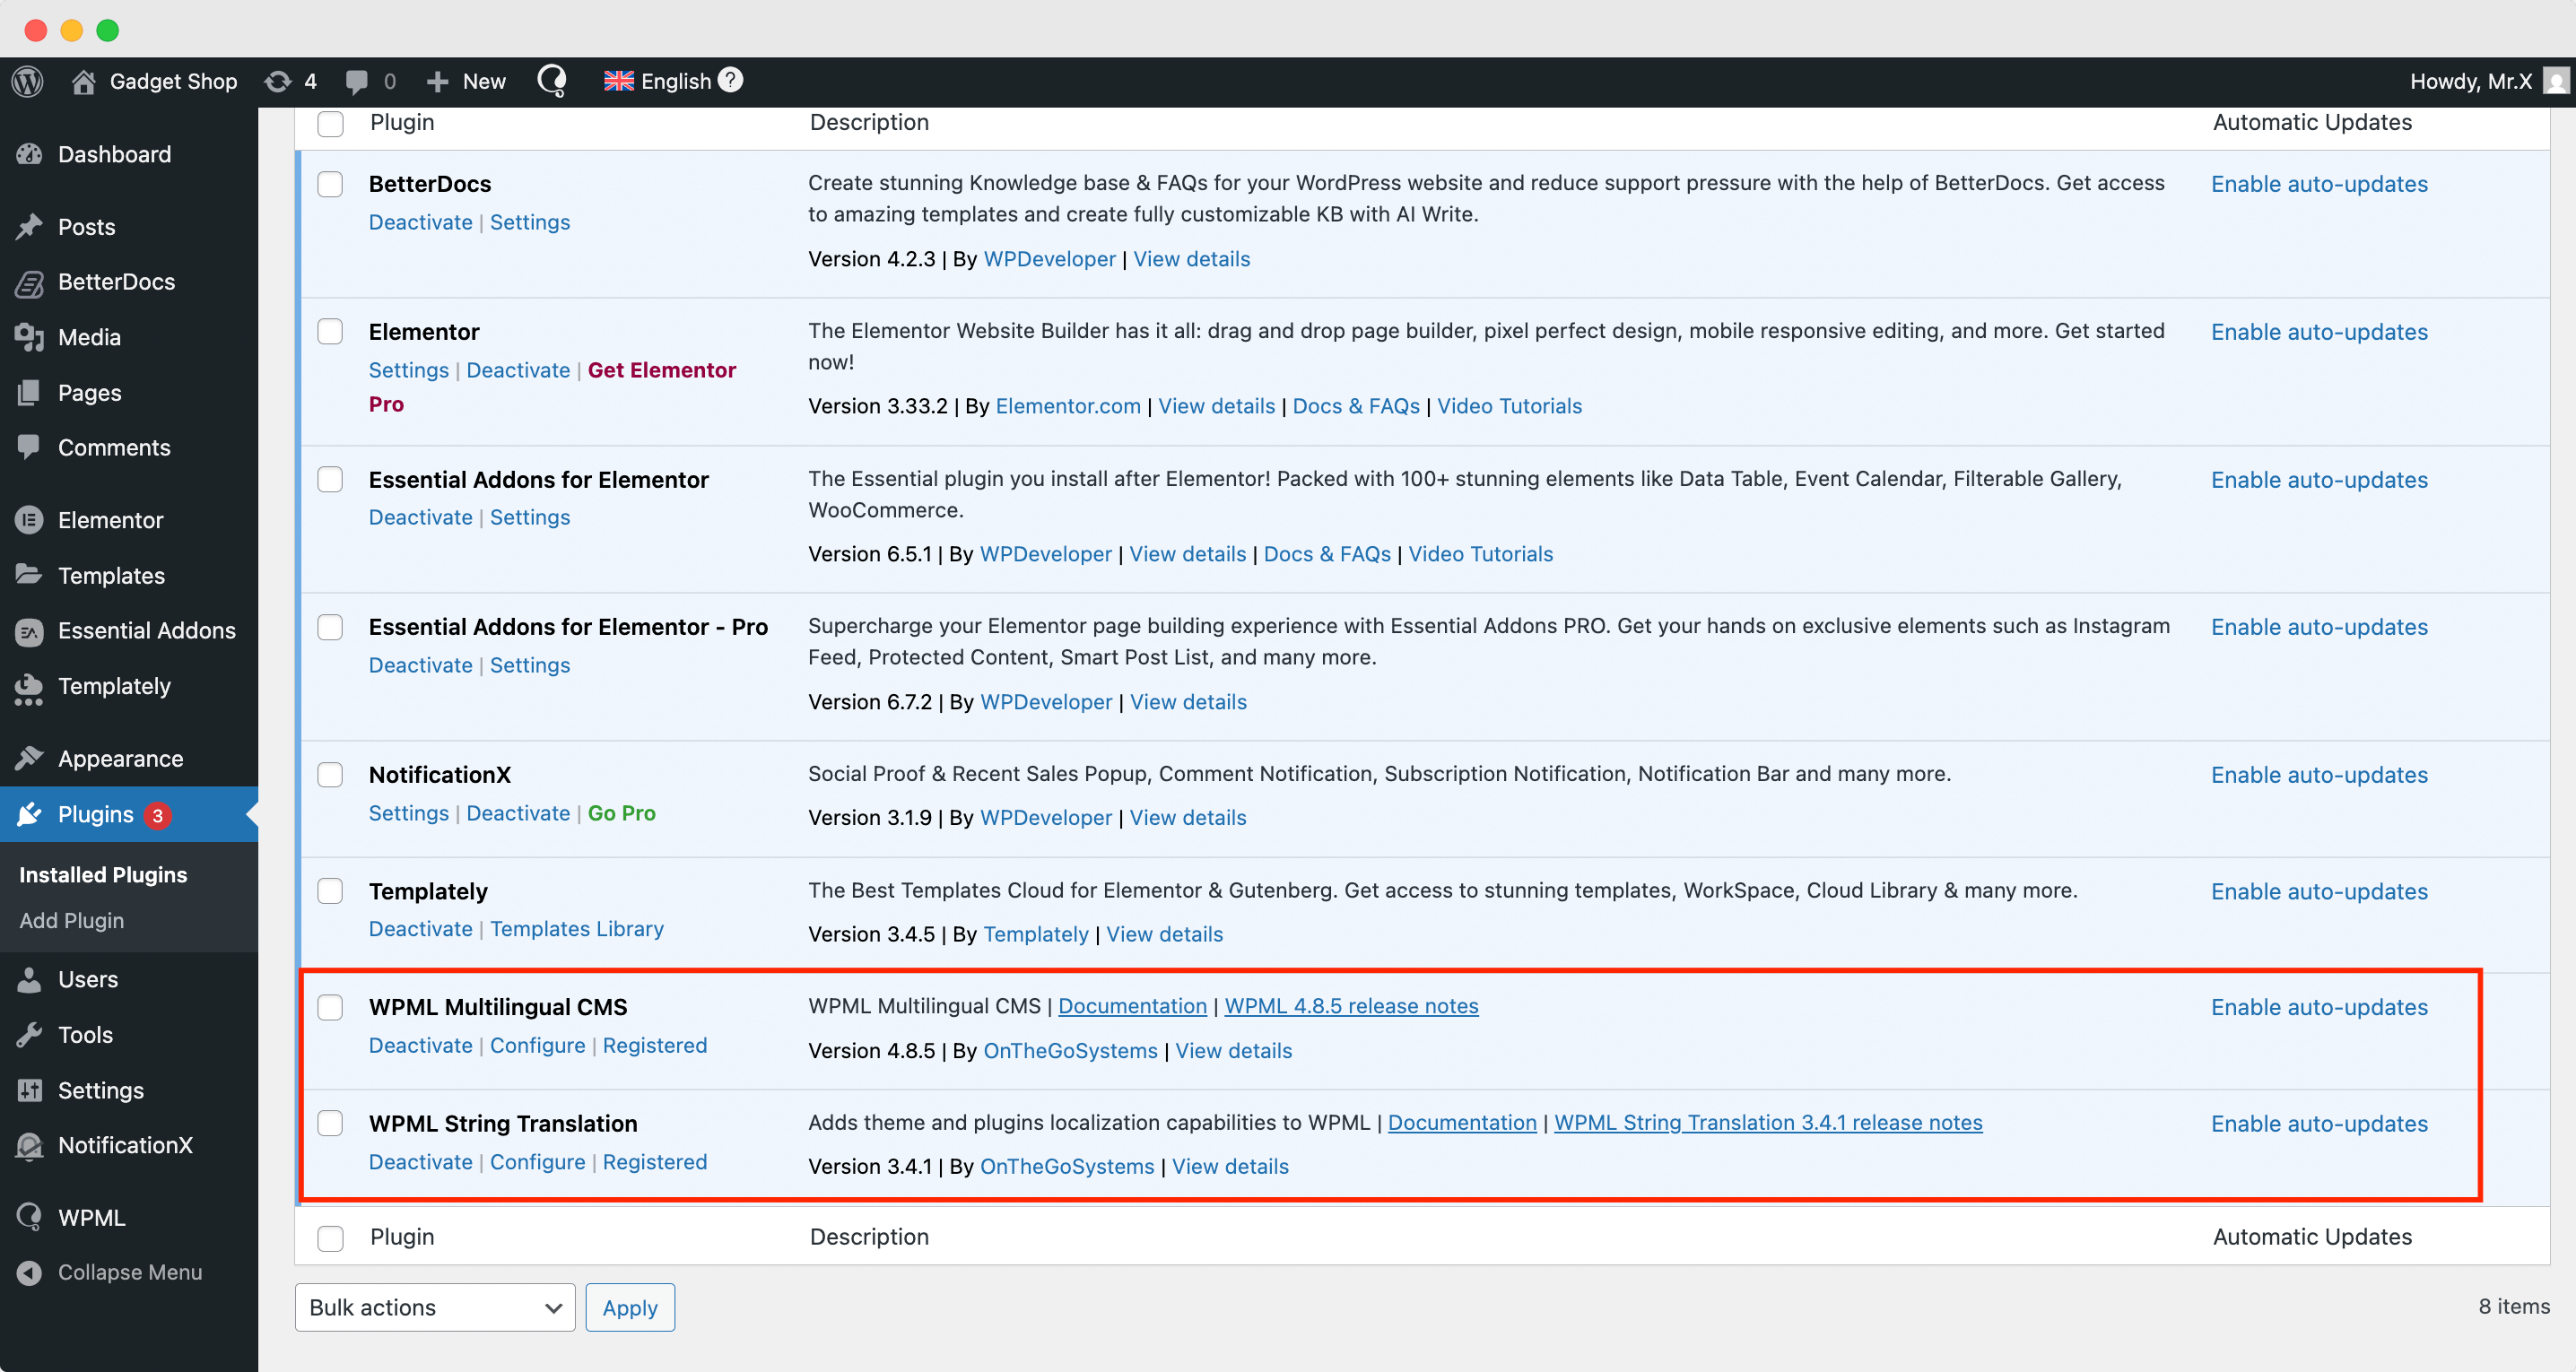
To translate Essential Addons for Elementor pages with WPML, make sure that you have installed & activated the following plugins on your WordPress site: WPML Multilingual CMS and WPML String Translation. For more information, you can check out this WPML doc to configure it on your WordPress site.
After installing these plugins, go to ‘WPML’ → ‘Setup’ from the dashboard and select the current language and the language you want to translate your single docs. You can change it later anytime.

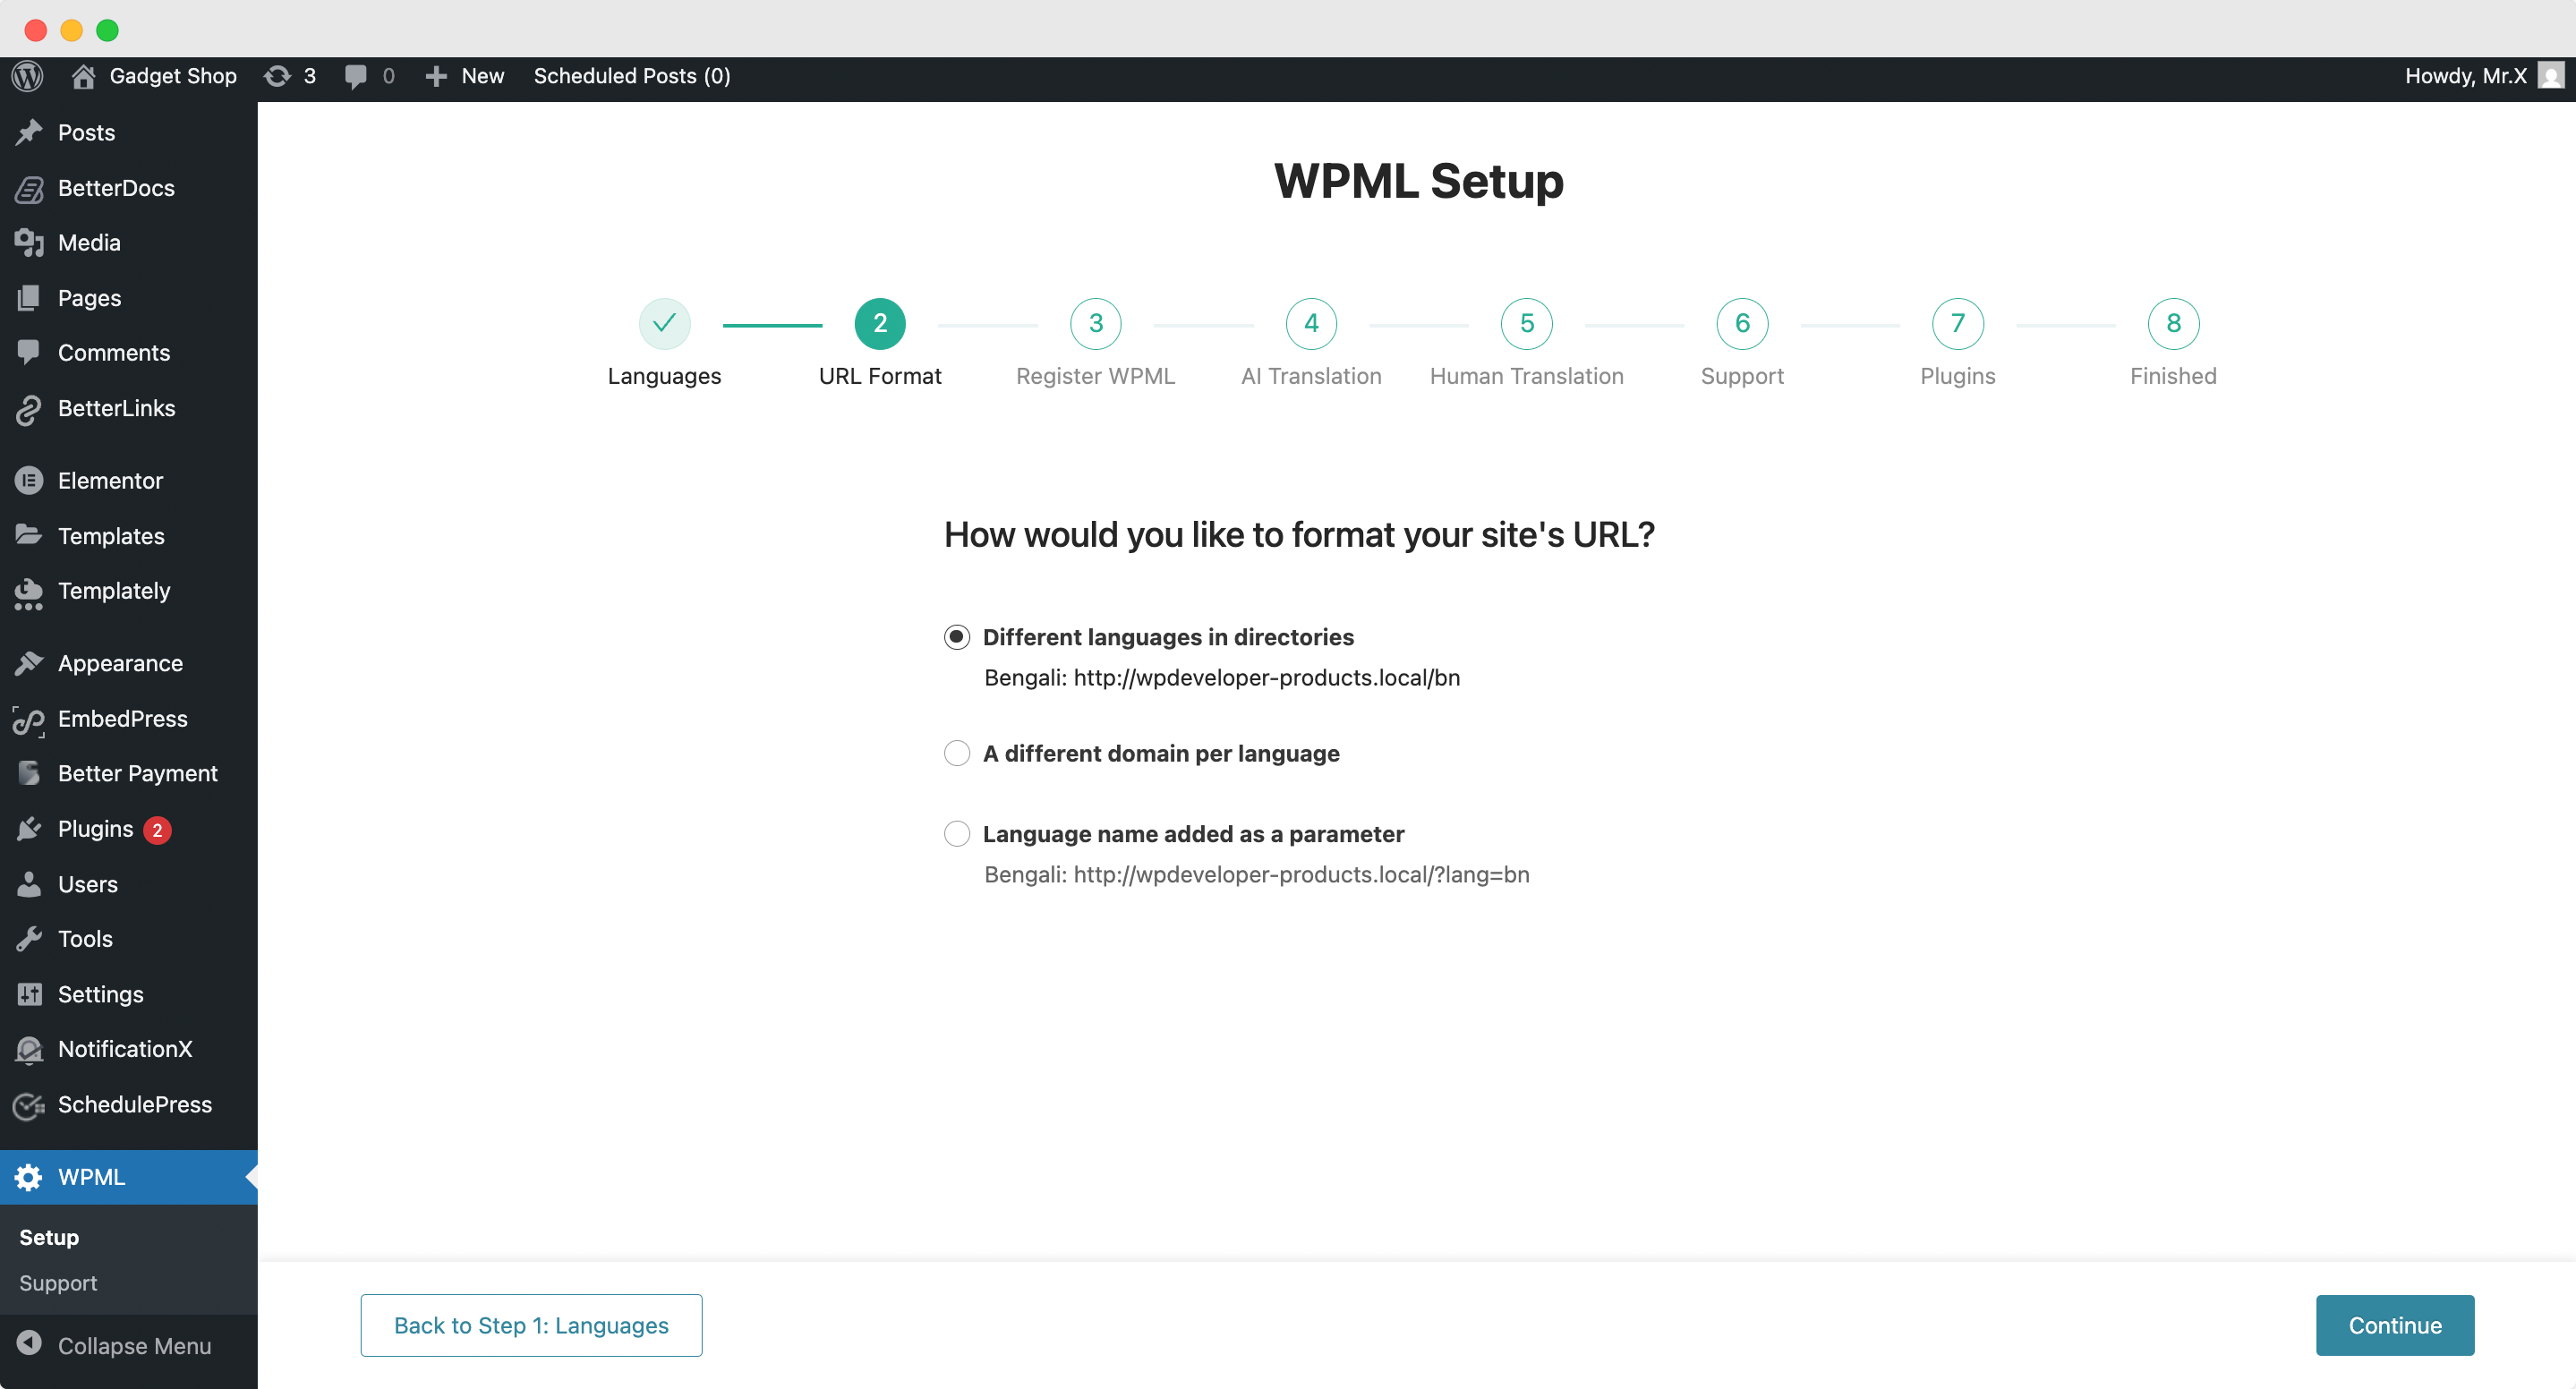
In the following ‘URL Format’ stage, select how you would like to format the URL. You can go for different languages in directories, a different domain per language or a language name added as a parameter.
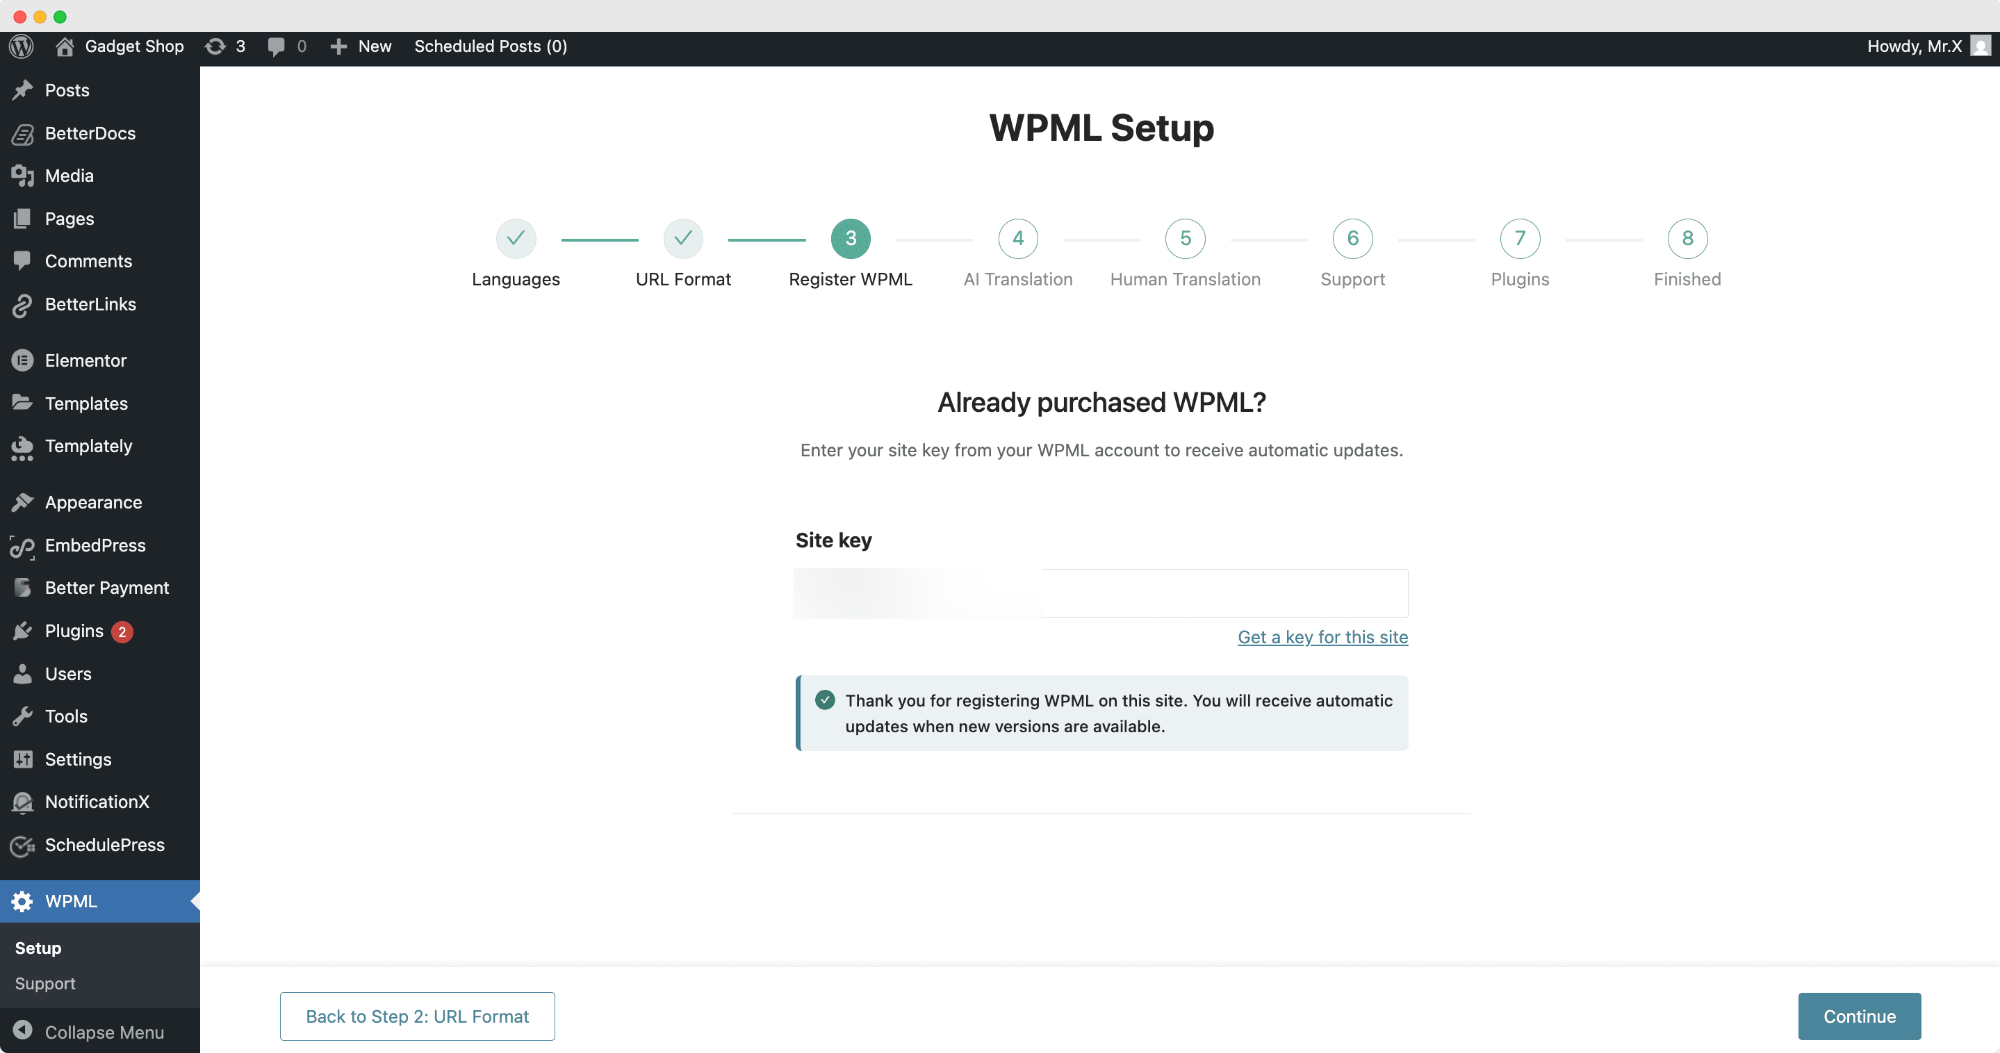
Next, add your site key in the designated field from the ‘Register WPML’ step of the WPML Setup wizard.
Next, navigate to the AI Translations section. In this panel, you can define the context and target audience for your translation settings. Begin by entering the name of your product, service, or website. Then provide a brief description of the website. Finally, choose the Target Audience you want the translations to be tailored for.

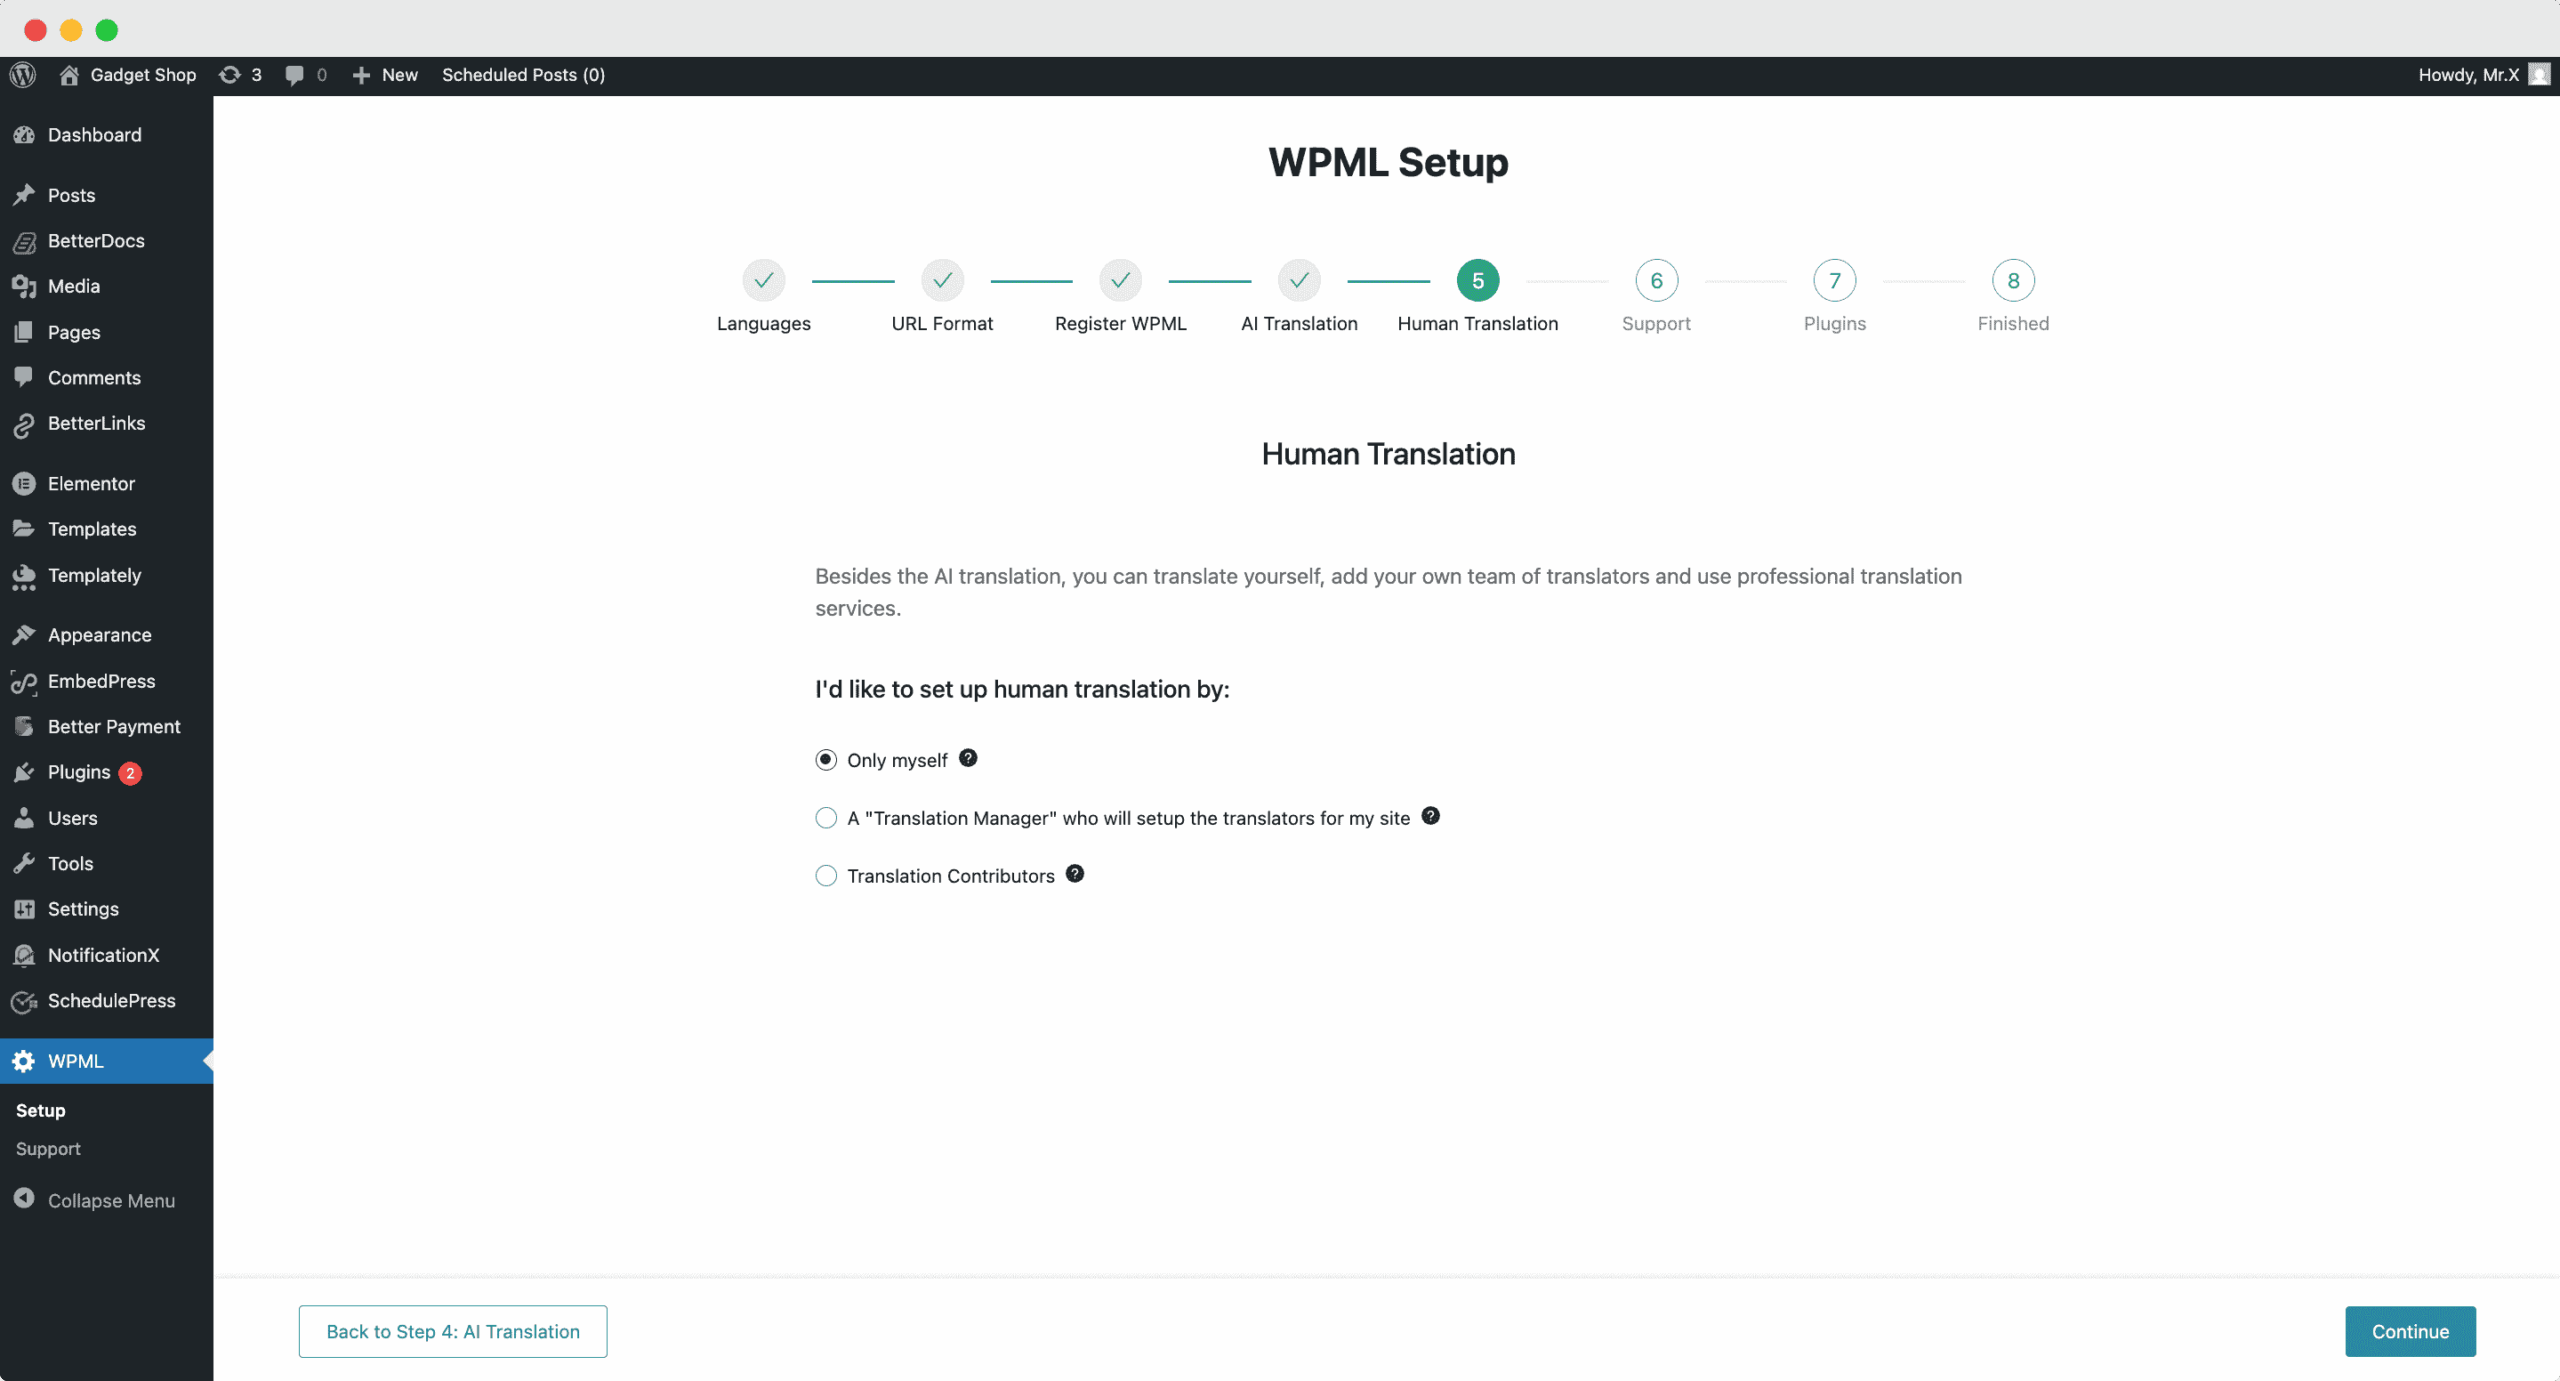
In addition to AI translation, you can also opt for Human Translation. From this section, simply choose how you want to configure your human translation settings and proceed with the setup.
To receive faster support and compatibility notifications, you can enable the option to share theme and plugin information when needed.
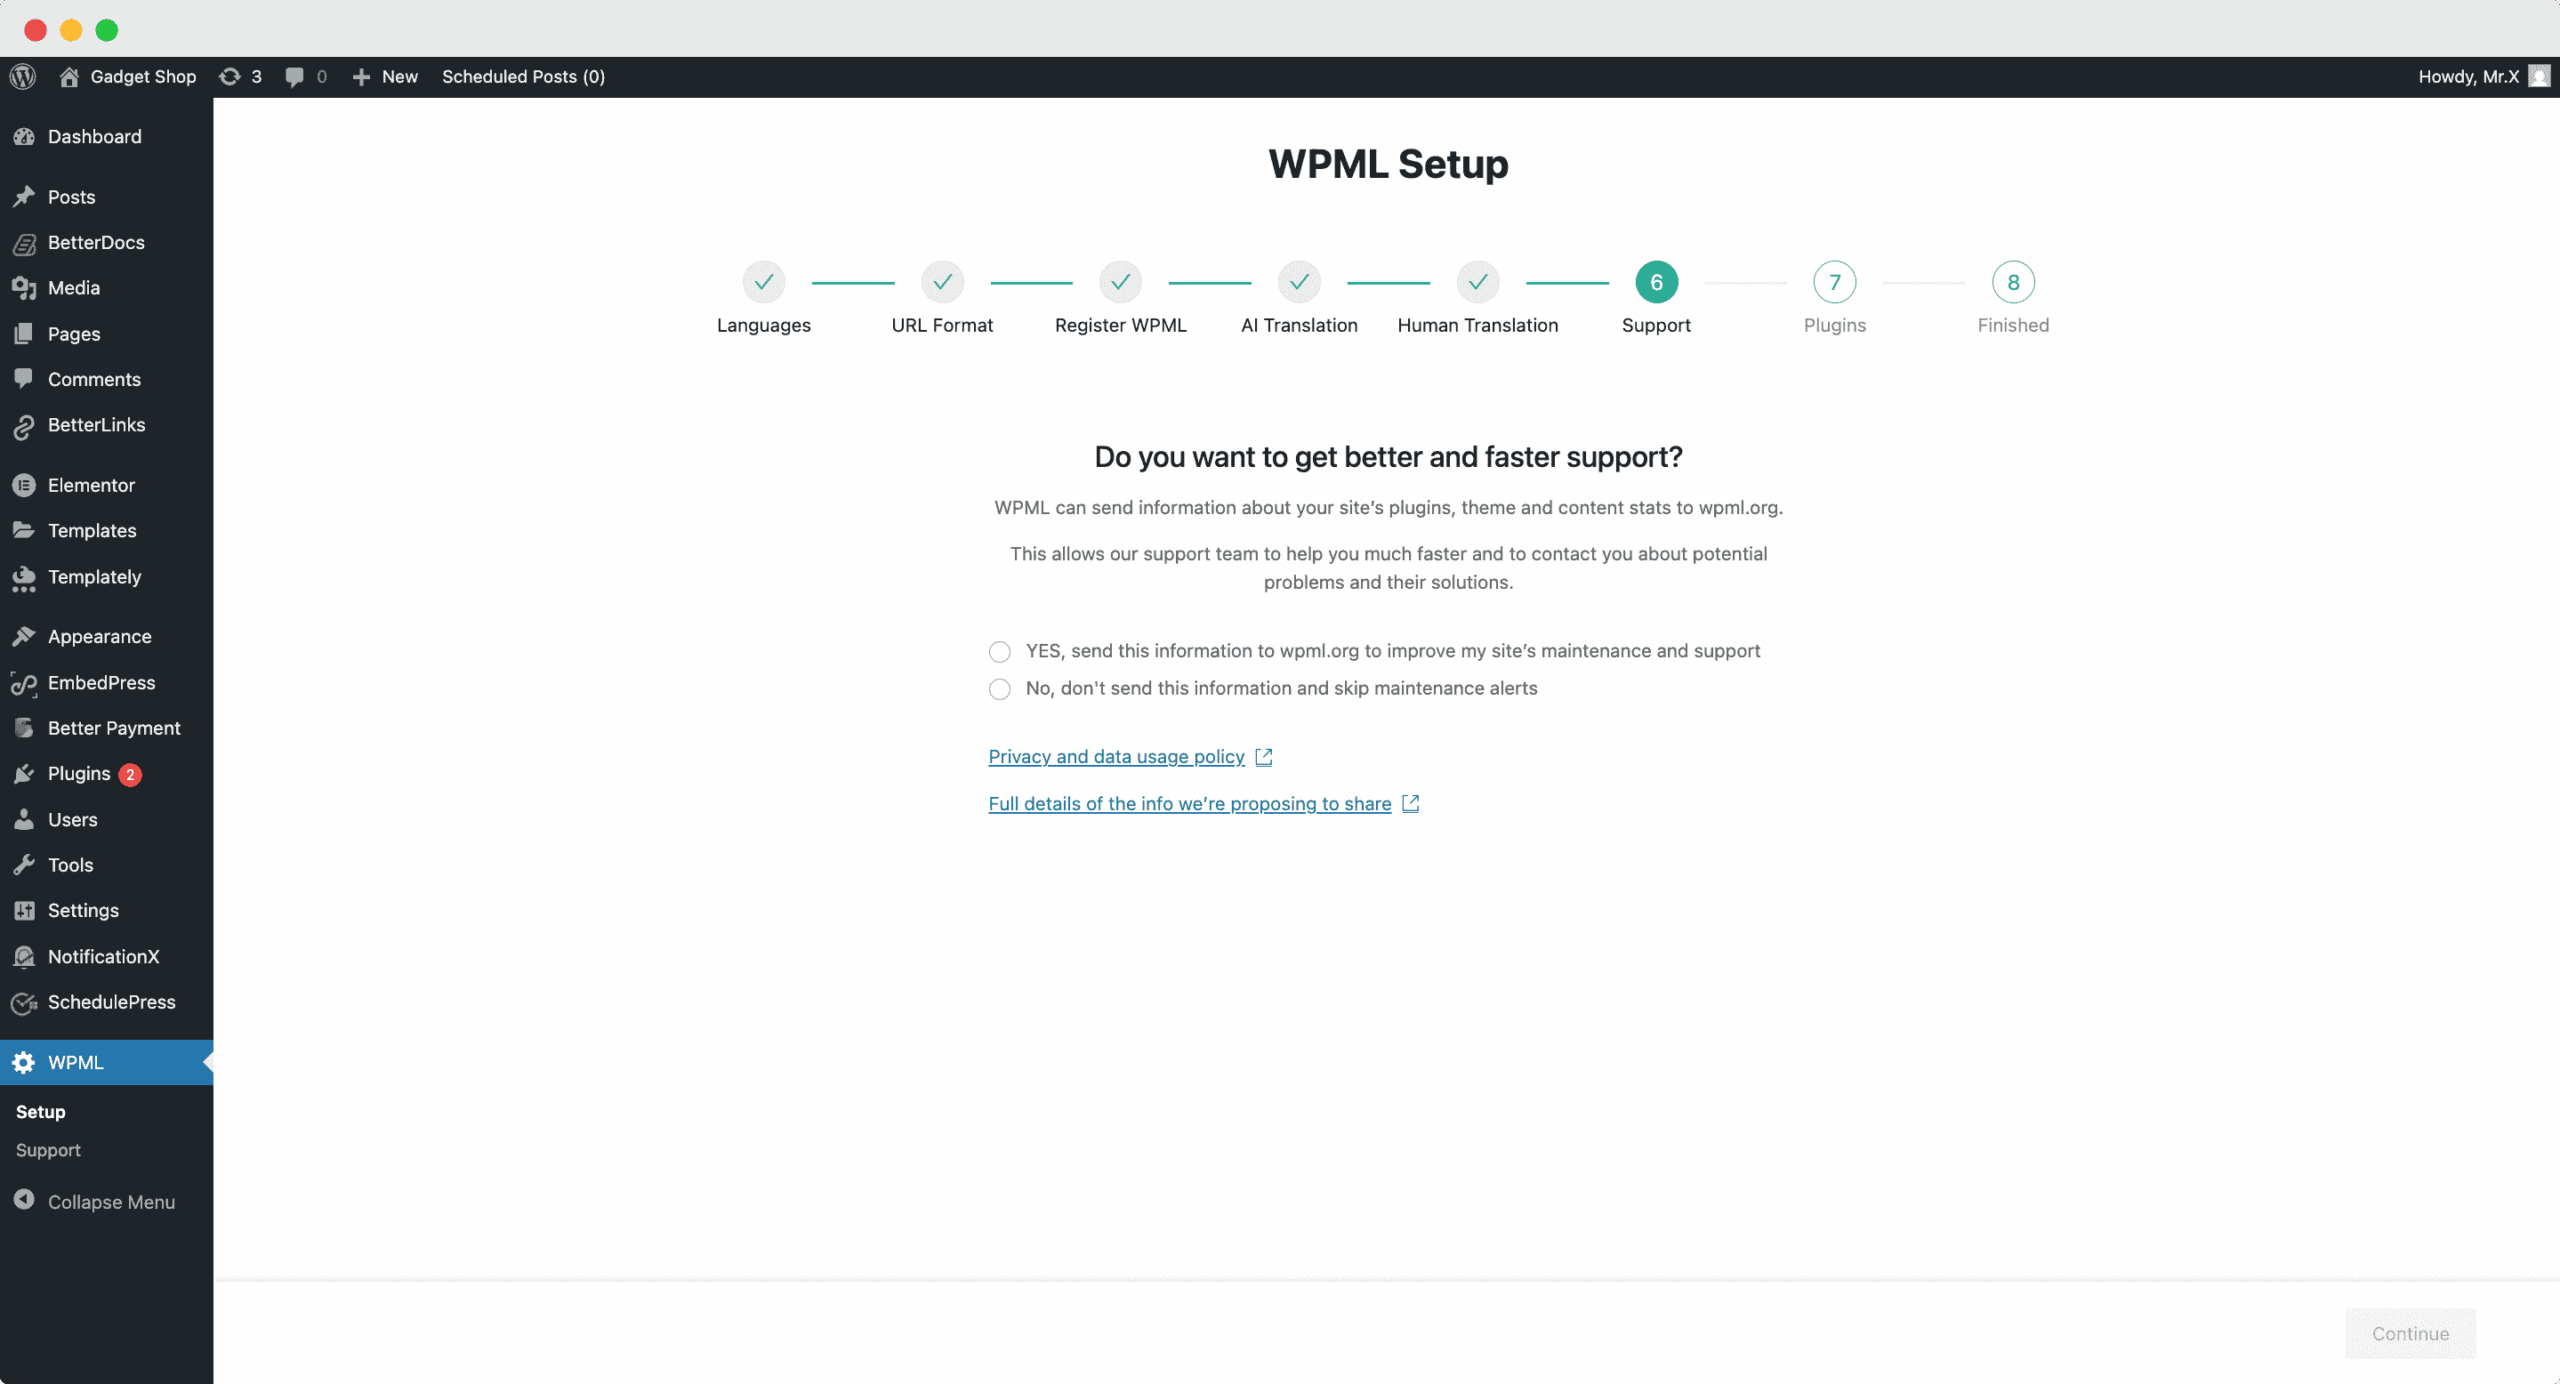
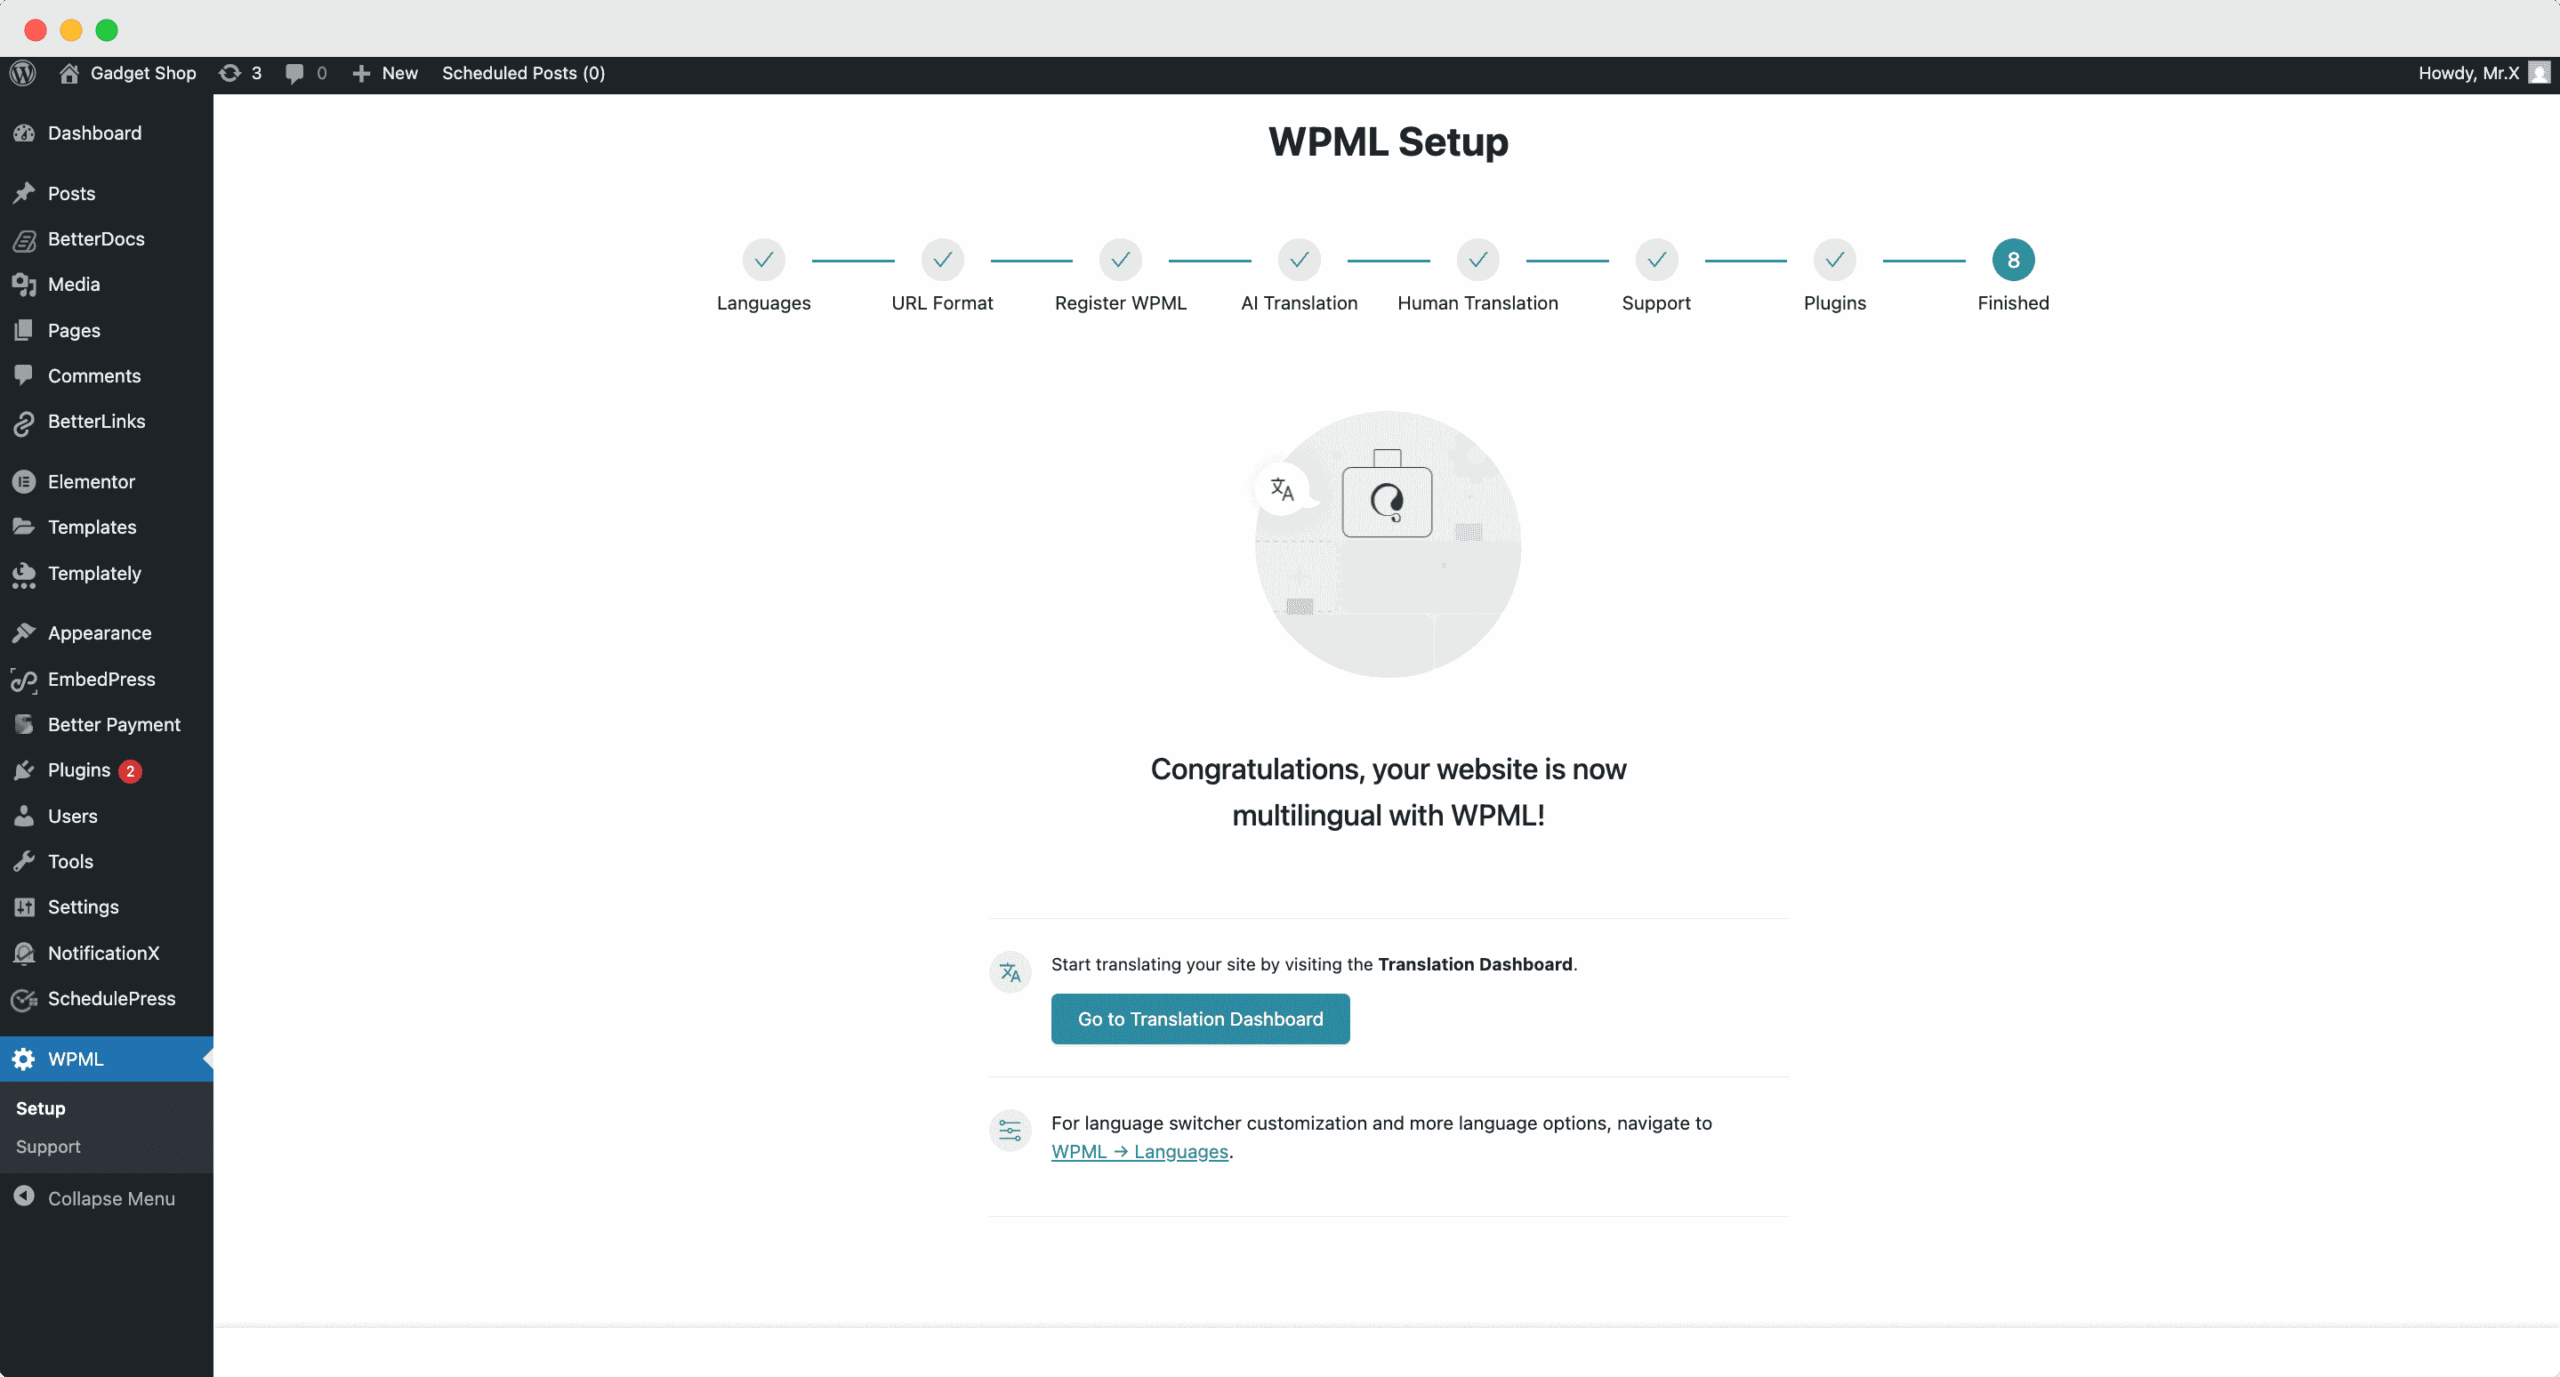
In the last two onboarding steps, the WPML plugin will be ready for use on your WordPress website.
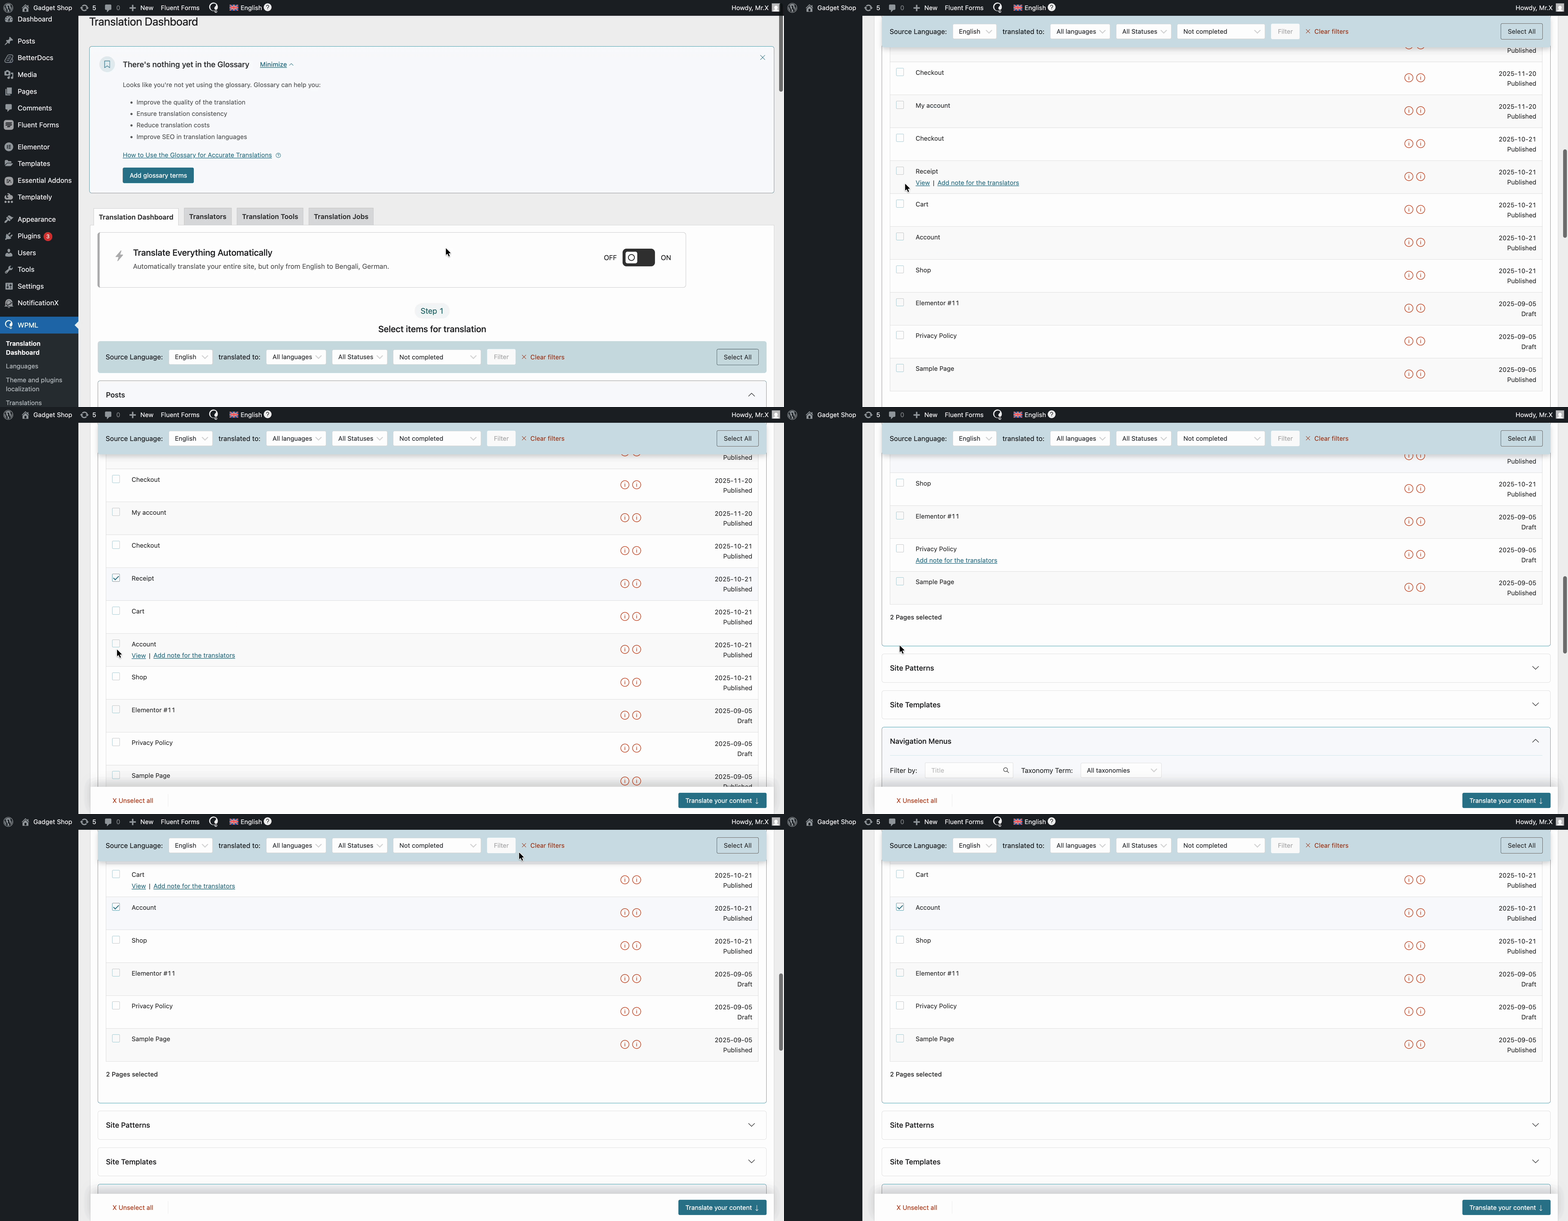
Now, to enable translation for your Elementor site pages, go to ‘WPML’ → ‘Translation Dashboard’ and from there select the page you want to translate.
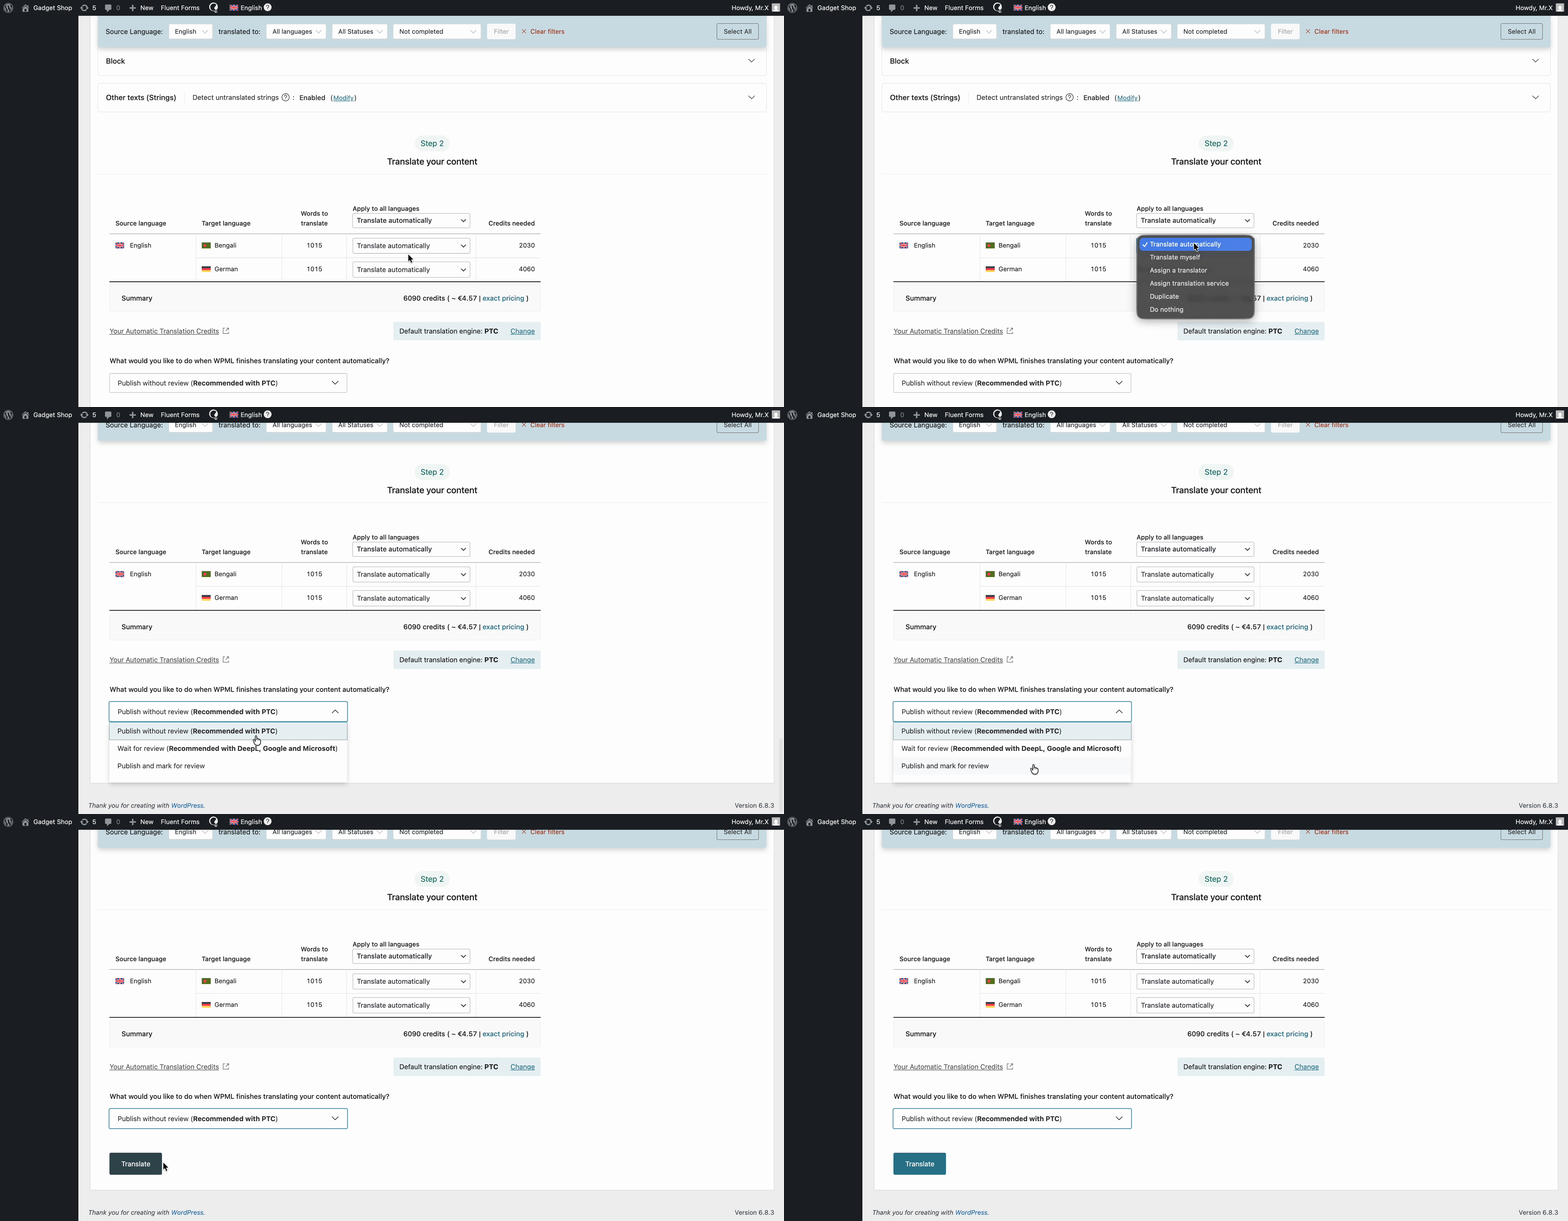
Now, click on ‘Translate Your Content’ and from there ‘, Apply to All Languages’ dropdown select ‘Translate Automatically’. Afterward, from the ‘What would you like to do when WPML finishes translating your content automatically?’ select your preferred option and then click on the ‘Translate’ button and WPML will translate documents automatically.
How To Configure Translate Language Manually in WPML #
First of all, make sure that your page/post is built with Essential Addons for Elementor.

Now, go to your WordPress Dashboard and open up your desired Posts/Pages, depending on which you want to translate. Alongside your Pages/Posts you will see a ‘+’ icon that will allow you to add translated versions for each language that you have specified for your site. Simply go ahead and click the ‘+’ icon for the language you want to edit.

How To Translate Essential Addons For Elementor Pages #
If you are redirected to the default Editor, you will see ‘Translate this Document’, where you can select the language and it will redirect you to the Advanced Translation settings. There, you can add translation manually or generate it automatically.
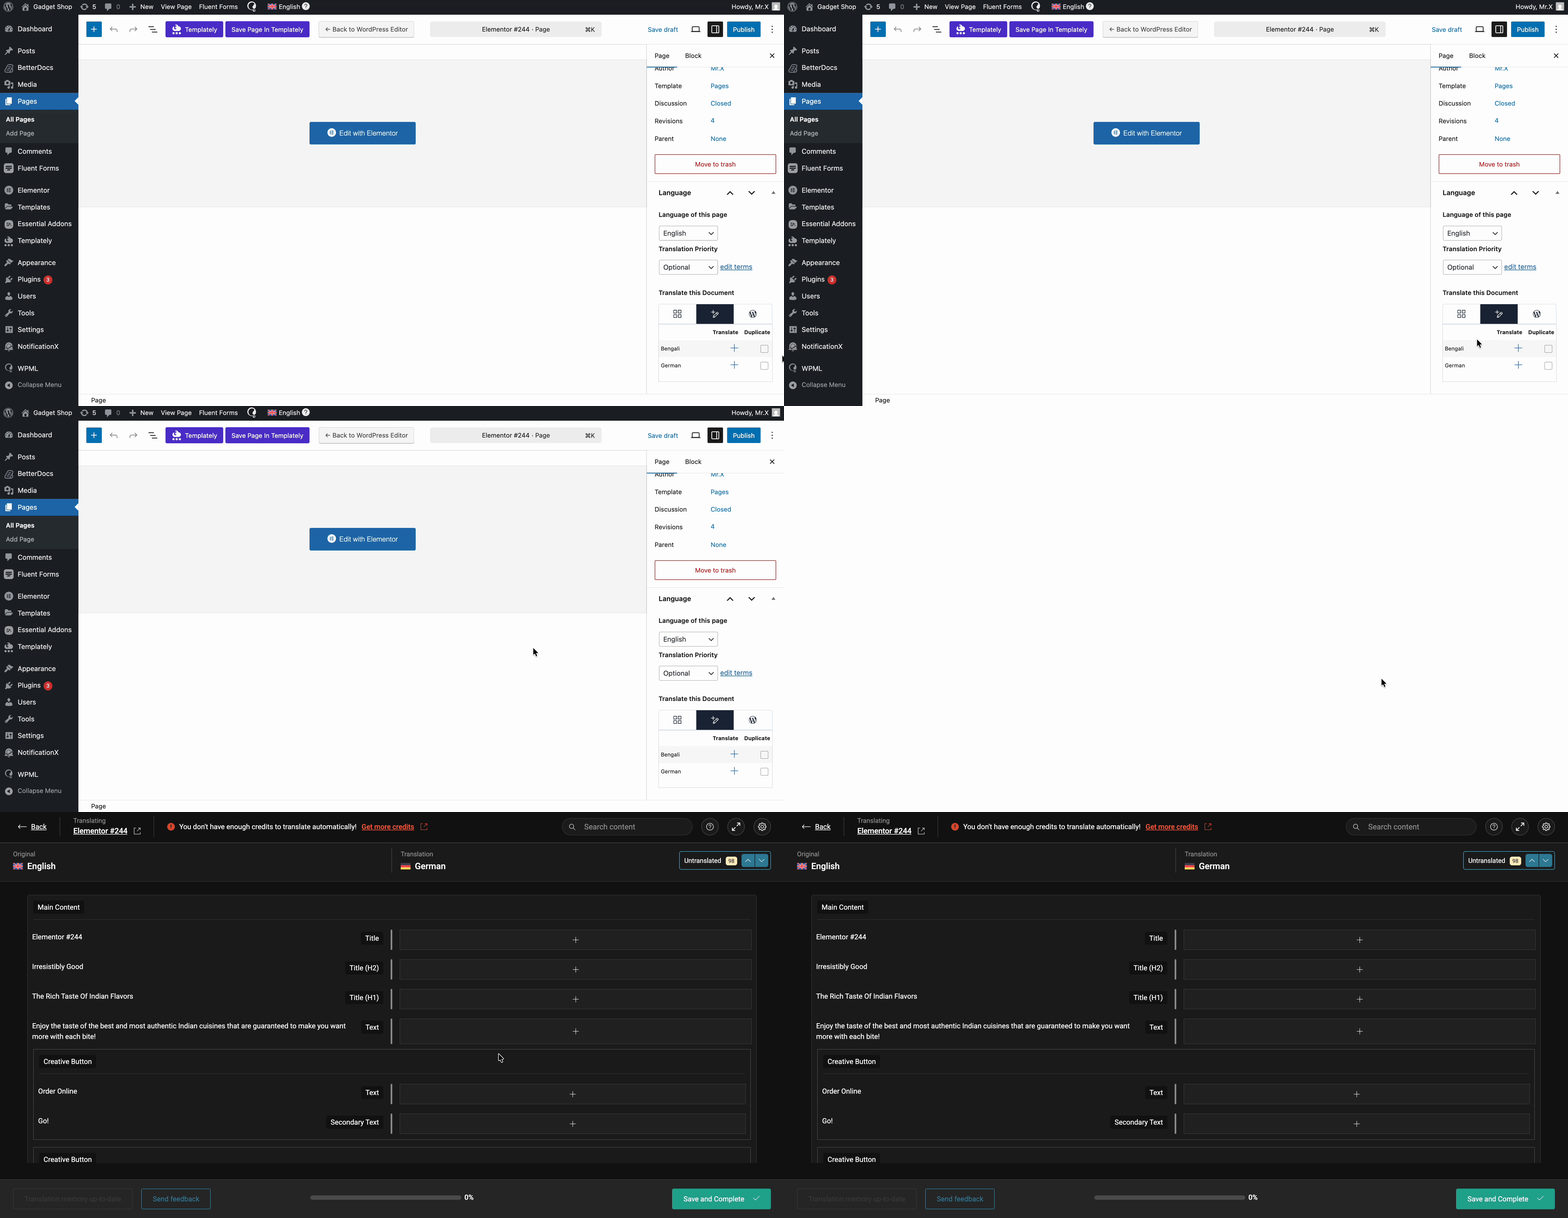
How To Translate Essential Addons For Elementor Pages #
In the Advanced Translation Editor interface, you will see all the texts available for translation. Here, you can add translations for Essential Addons content as you need. This is what you would see before adding your translations:
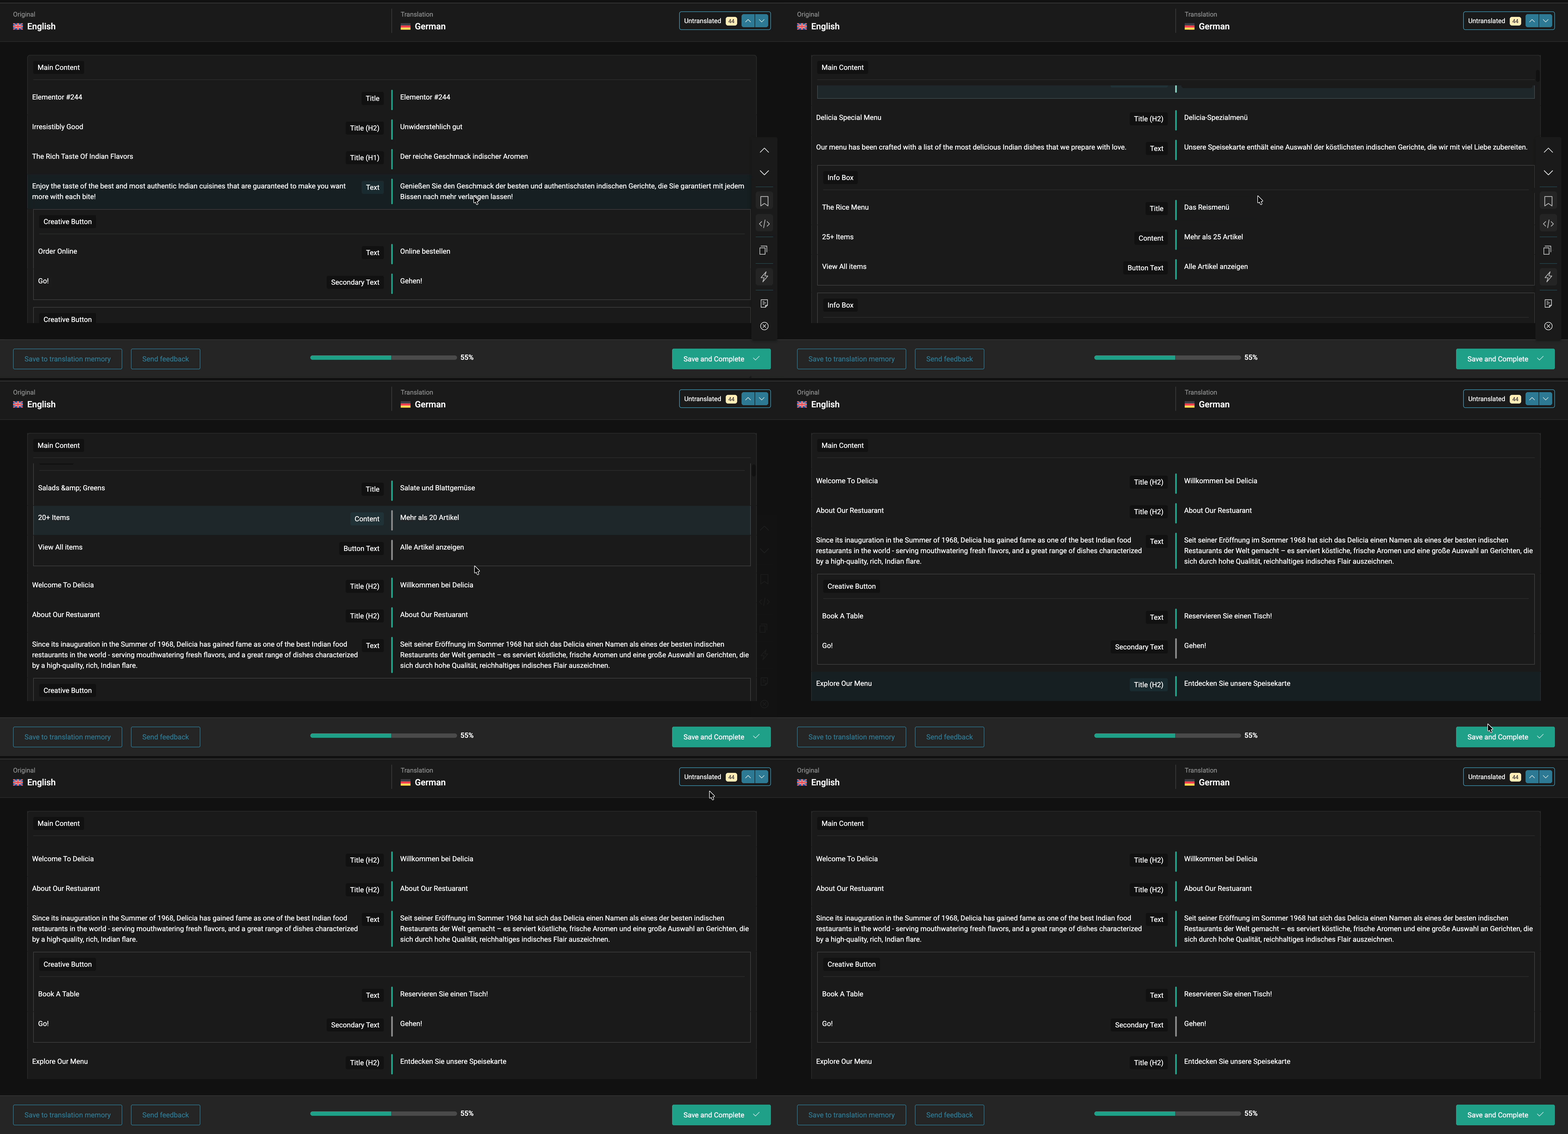
Simply go ahead and translate the Strings into your chosen language. Translate the text automatically where needed. Hit the ‘Save and complete’ button to save the changes. Don’t forget to click on the ‘Complete Translation’ button to make these changes effective.
How To Translate Essential Addons Plugin Strings With WPML String Translation? #
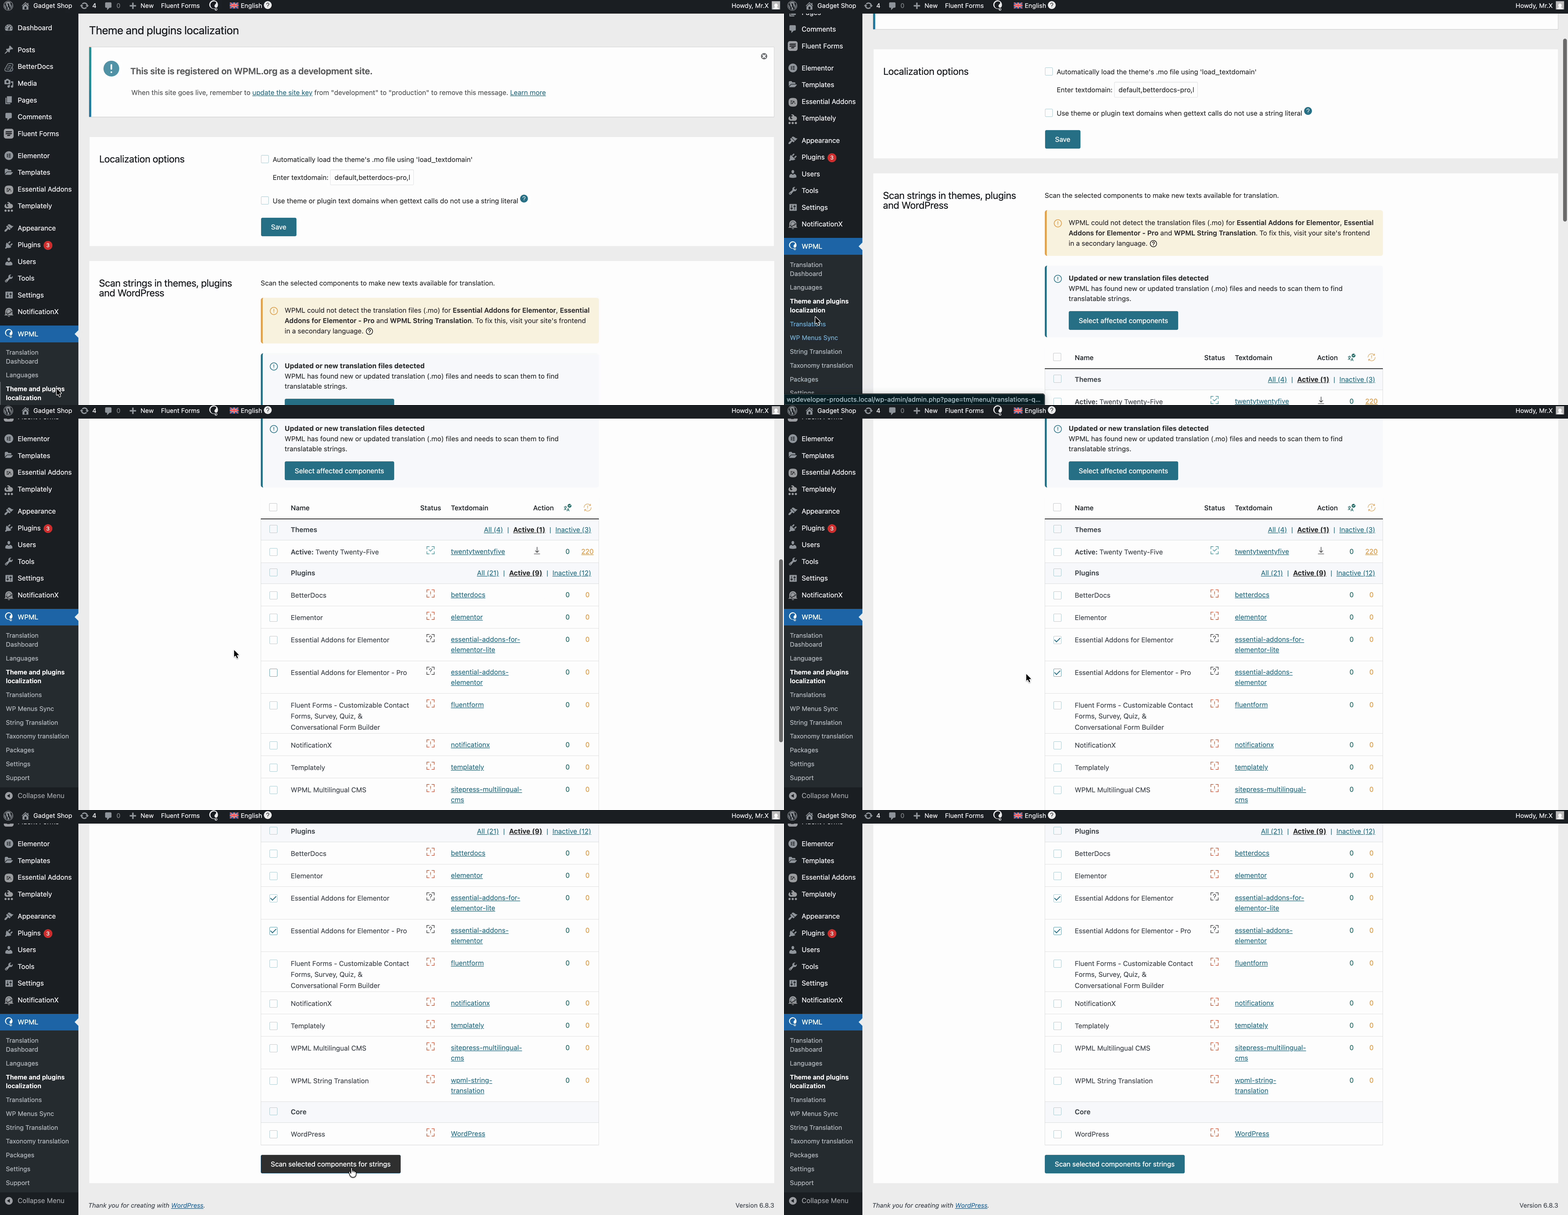
If you want to translate your Essential Addons for Elementor plugin strings, you can use the ‘String Translation’ feature with WPML. Navigate to ‘WPML’ → ‘Theme and plugins localization’ from your WordPress dashboard. Then scroll down to the ‘Strings in plugin’ section and click on the checkboxes for ‘Essential Addons for Elementor’ and ‘Essential Addons for Elementor – PRO’. Please wait while plugin strings are being scanned.
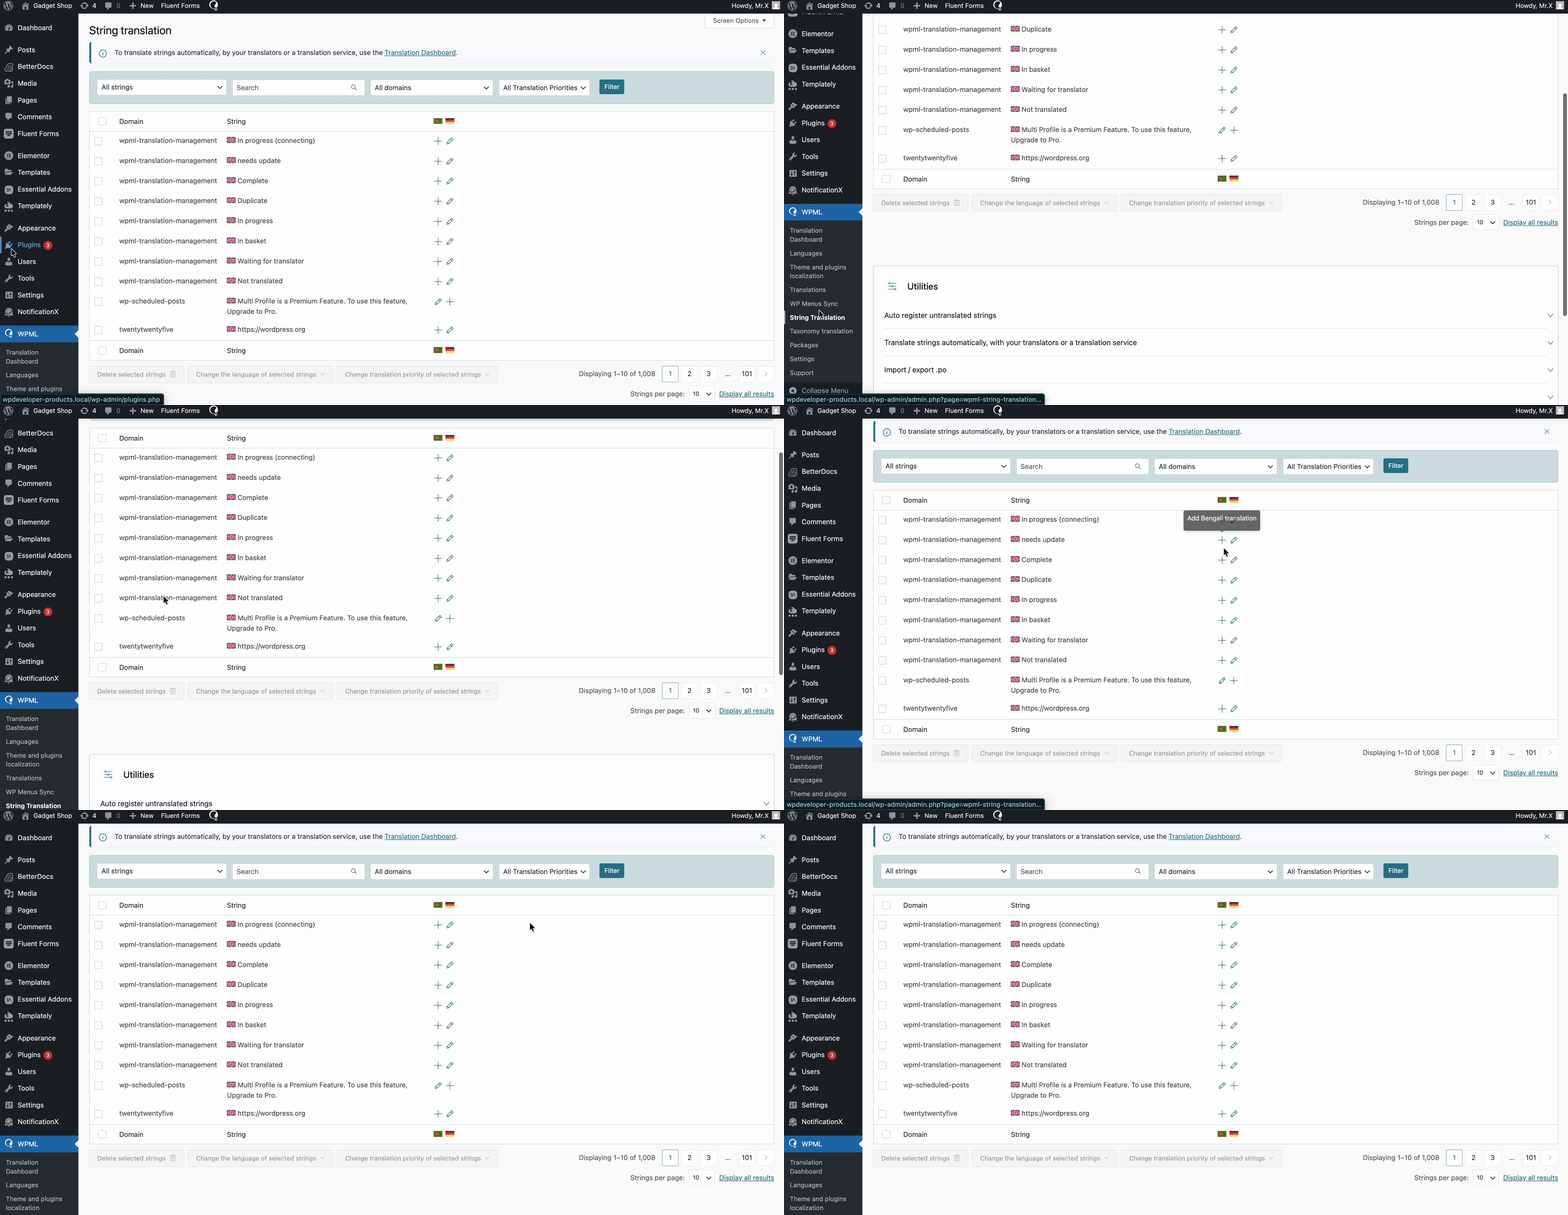
Afterwards, head over to WPML→ String Translation. From here, you can add translations for selected strings by clicking on the ‘+’ icon as shown below.
Final Outcome #
After you have finished translating in your chosen language, this is how your page/post is going to appear on your Elementor site for that particular language:

This is how you can easily build Multilingual websites with Essential Addons for Elementor and WPML. If you would like to know more about translating sites that use Elementor page builder, WPML has this detailed guide to assist you.
Getting Stuck? Feel free to contact our Dedicated Support Team for further assistance.


