How to Configure and Style Advanced Google Map
EA Advanced Google Map gives you the freedom to choose your preferred Google Map type, configure it, control the settings, set your desired theme, style it and most importantly, helps you display Google Map on your website.
How to Insert Google Map API Key #
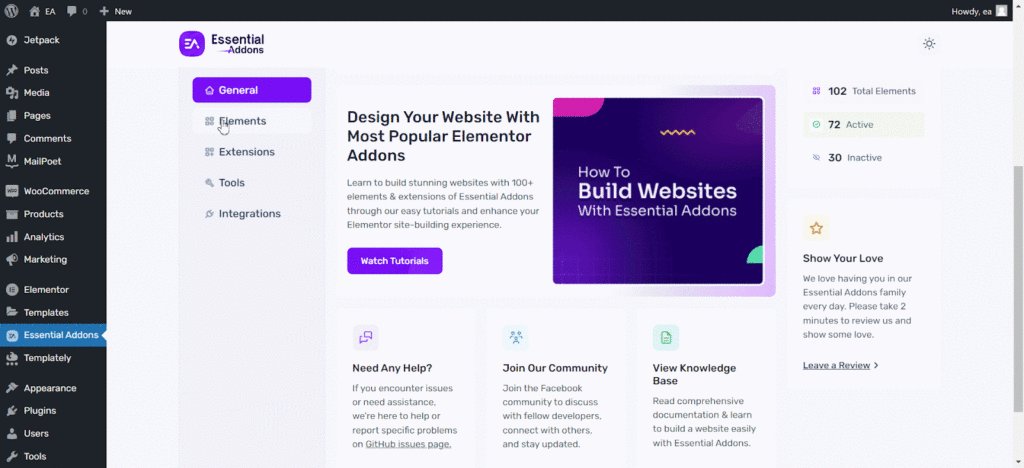
To use Essential Addons element, go to your WordPress Dashboard. Then navigate to WordPress Dashboard > Essential Addons. From the ‘Elements’ tab, you will find the ‘Advanced Google Map’ option.

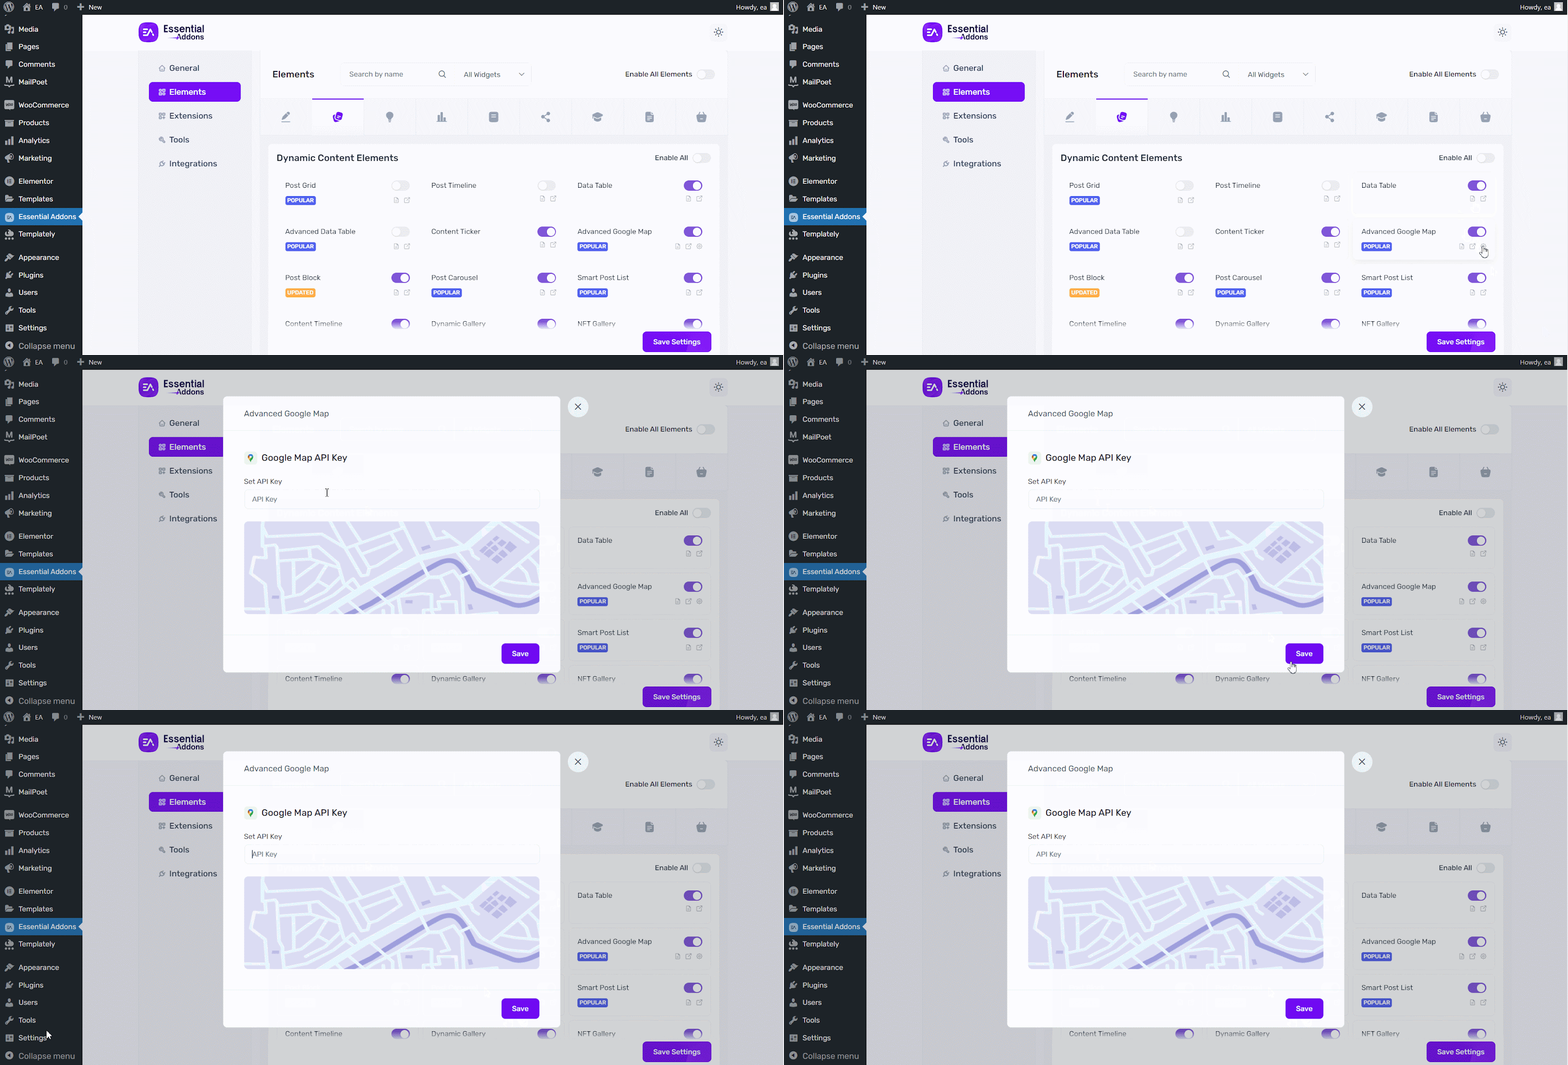
Simply click on ‘Settings’ and insert your Google Map API Key in there. After you are done, make sure to click on ‘Save Settings’ option.

If you do not have Google Map API key, you can check out this documentation to learn how to get map API key.
How to Activate Advanced Google Map #
You can find the ‘EA Google Map‘ element from the Search option under the ‘ELEMENTS‘ tab. Simply just Drag & Drop the ‘EA Google Map’ into the ‘Drag widget here‘ or the ‘+’ section.

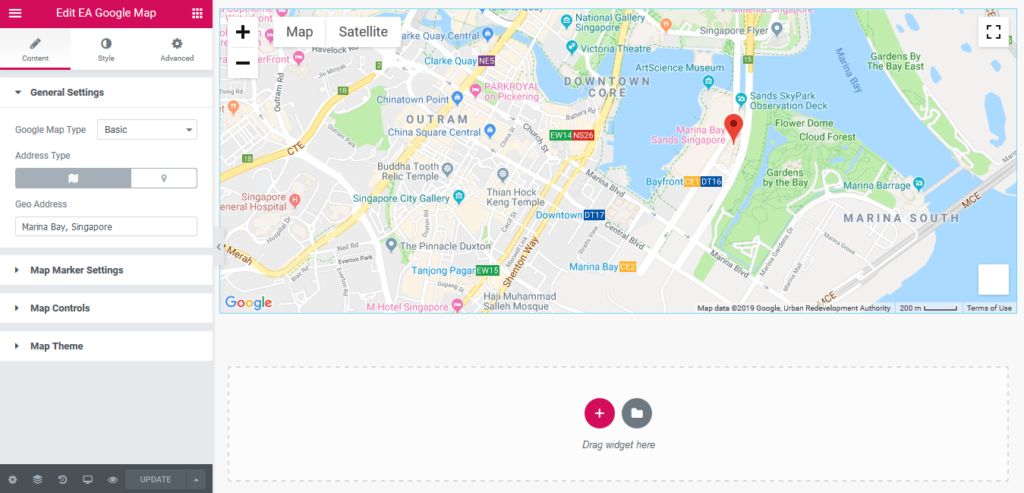
After you are successfully done with step 1, this is how the element is going to look like:

How to Configure the Google Map Type #
Under the ‘Content’ tab, you will find the ‘General Settings’ section. From you can choose your preferred Google Map Type and add the location.
General Settings #
You can use the dropdown menu to choose your preferred Google Map type of the 8 given. By default, it is set to ‘Basic’. You can change the ‘Address’ type from here. You can either add your physical location or add the ‘Coordinates’.

For ‘Multiple Marker’, you need to insert the ‘Latitude’ and ‘Longitude’ of the location. This is will be used as the ‘Focal’ location for this purpose.

Multiple Marker Configuration #
For ‘Multiple Marker’ Google Map type, you need to configure this ‘Map Marker’ settings. This lets you add multiple locations which will be shown in the map.
Simply just add a location by inserting its Latitude, Longitude, Title & Content. You can change the ‘Icon Color’ from this section as well.
To add more locations, simply click on ‘ + Add Item’ button.

This is how Multiple Marker looks like how you are done with its configuration.

Click to See Live Demo #
Routes Coordinate Settings #
If you choose ‘With Routes’ as your Map type, you will need to configure the Routes Coordinate Settings.
You can set the coordinates of ‘Origin’ and ‘Destination’ from ‘Routes Coordinate Settings’. Besides, you can use the dropdown menu to choose ‘Travel Mode’ as well.

How to Configure Map Controls & Theme #
You can control the Map you are working on and change its theme layout from the ‘Map Controls’ & ‘Map Theme’ sections.
4.1. Map Controls #
From ‘Map Control’ section, you can increase or decrease the ‘Zoom Level’. You can also use the toggles to enable or disable the followings: Street View Controls, Map Type Control, Zoom Control and many more.

Map Theme #
You can choose your preferred ‘Theme Source’ from out these 3 options: Google Standard, Snazzy Maps & Custom.
Under each tab, you can easily use the drop-down menu to choose your preferred theme. From ‘Custom Styles’, you can import your personalized theme as well.

How to Style Advanced Google Map #
Switch to the ‘Style’ tab to style all the features of Advanced Google Map.
General Style #
From the ‘General Style’’ section, you change the width & height of your Google Map. You can also modify the ‘Margin’ settings from this section as well.

Final Result #
By following the basic steps and a bit more modifying, you can style your Advanced Google Map as per your preference.
Map with Multiple Markers: #

Map with Panorama View: #

This is how you can easily design a beautiful-looking Promo Content on your website using EA Advanced Google Map.
Getting stuck? Feel to Contact Our Support for further assistance.


