EA Woo Account Dashboard widget from Essential Addons has limitless options to customize the account page of your WooCommerce store to elevate user experience. A well-designed and informative account page can help customers easily access valuable information about their account activities and stay synced to your store.
Follow this step-by-step guide to customize a WooCommerce Account Dashboard page on your WordPress site with Essential Addons for Elementor.
How To Set WooCommerce My Account Page? #
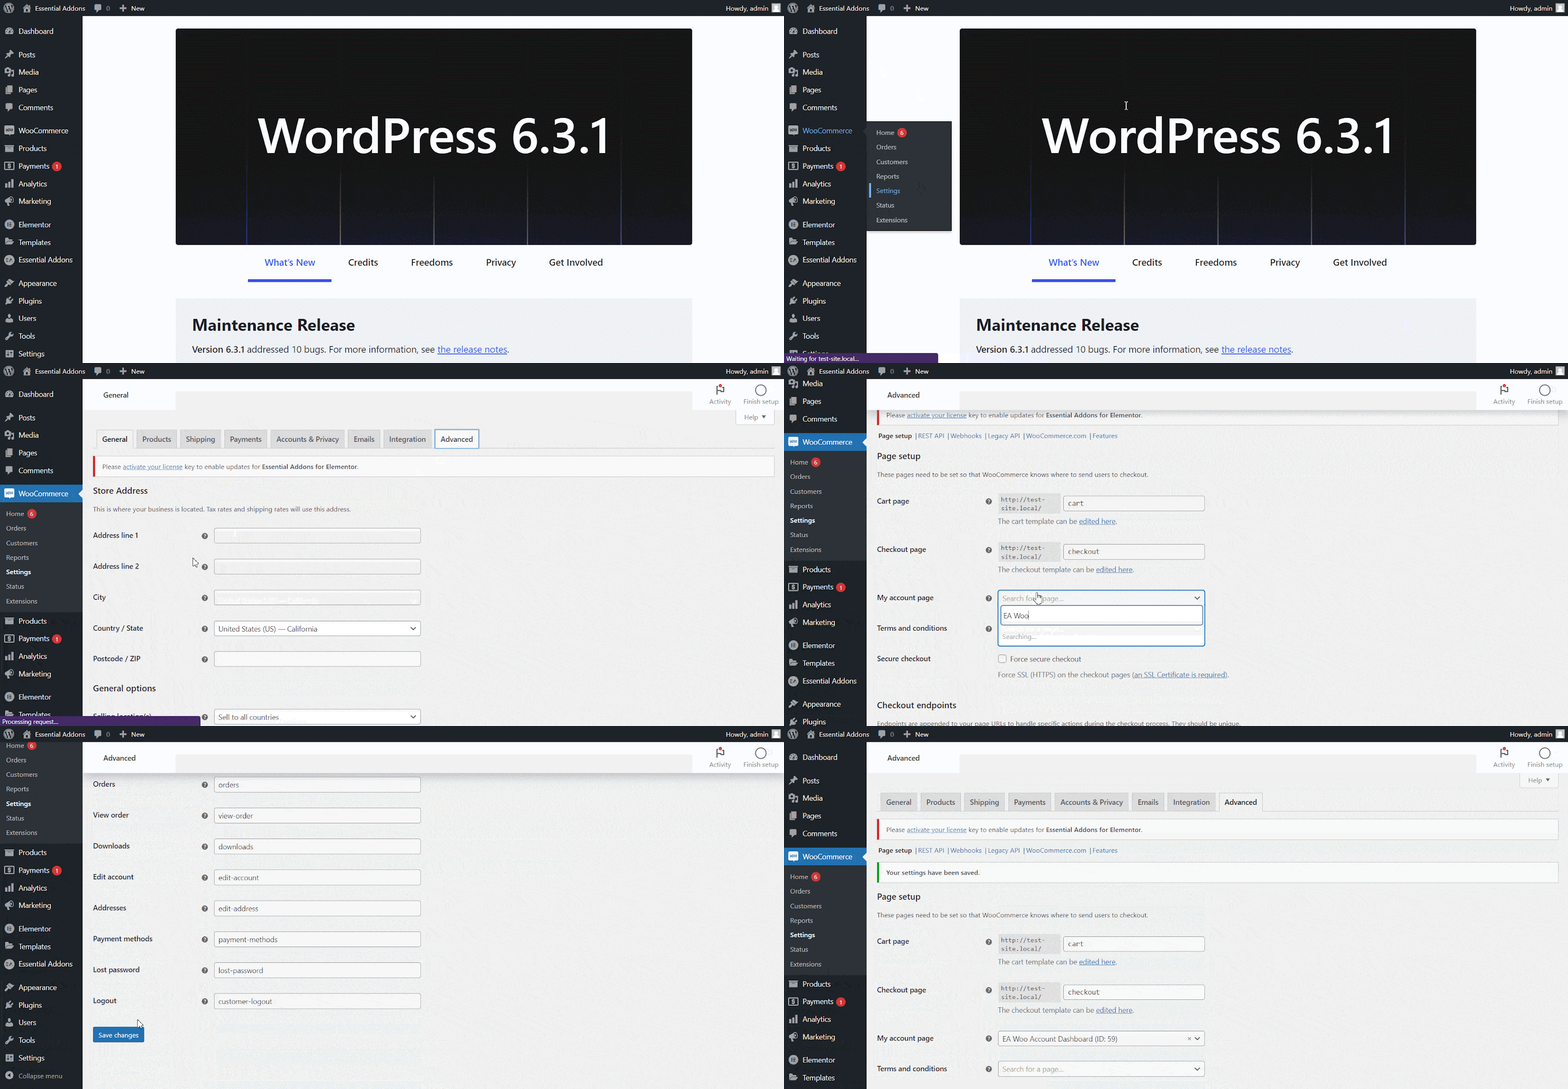
To customize a separate page with the EA Woo Account Dashboard widget and make that the default ‘My Account Page,’ you need to set the new account page location from WooCommerce.
Navigate to ‘WooCommerce → Settings → Advanced’. From the Page Setup section, type your target page name in the ‘My account page’ and then drop down to save changes. For tutorial purposes, we created a new page called ‘EA Woo Account Dashboard’ and set it as the default page.

How To Activate EA Woo Account Dashboard? #
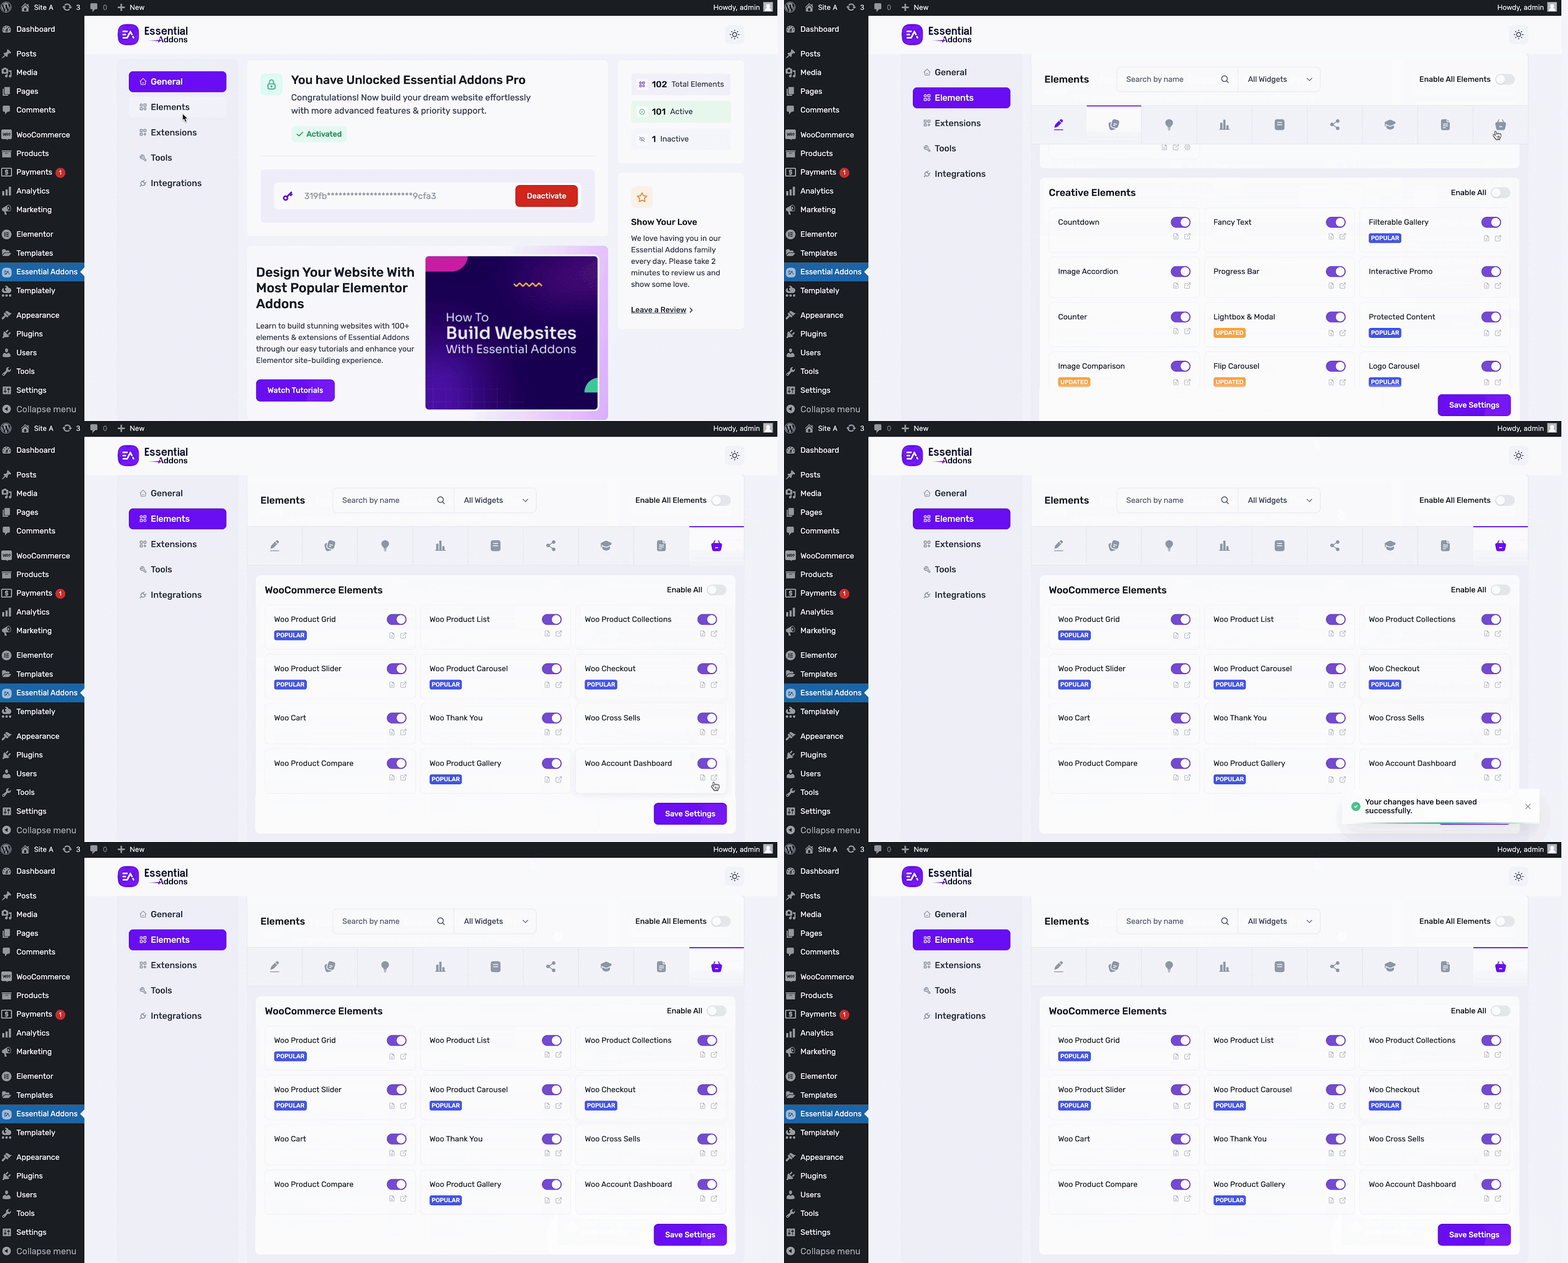
EA Woo Account Dashboard comes automatically enabled once you install and activate Essential Addons on your website. As it’s a premium widget, you also need to install and activate Essential Addons PRO.
If you don’t have the EA Woo Account Dashboard widget enabled, activate it by going to the Elements tab in Essential Addons from the WordPress dashboard. Then, go to the ‘WooCommerce Elements’ section and toggle the ‘Woo Account Dashboard’ to enable it. Then, hit the ‘Save Changes’ button.

How To Add EA Woo Account Dashboard? #
To use this Essential Addons element, open your preferred page in Elementor, and search for the ‘EA Woo Account Dashboard’ element from the search option under the ‘Elements‘ tab. Drag & drop the widget onto the page or the ‘+’ section.

How To Configure The Content Settings? #
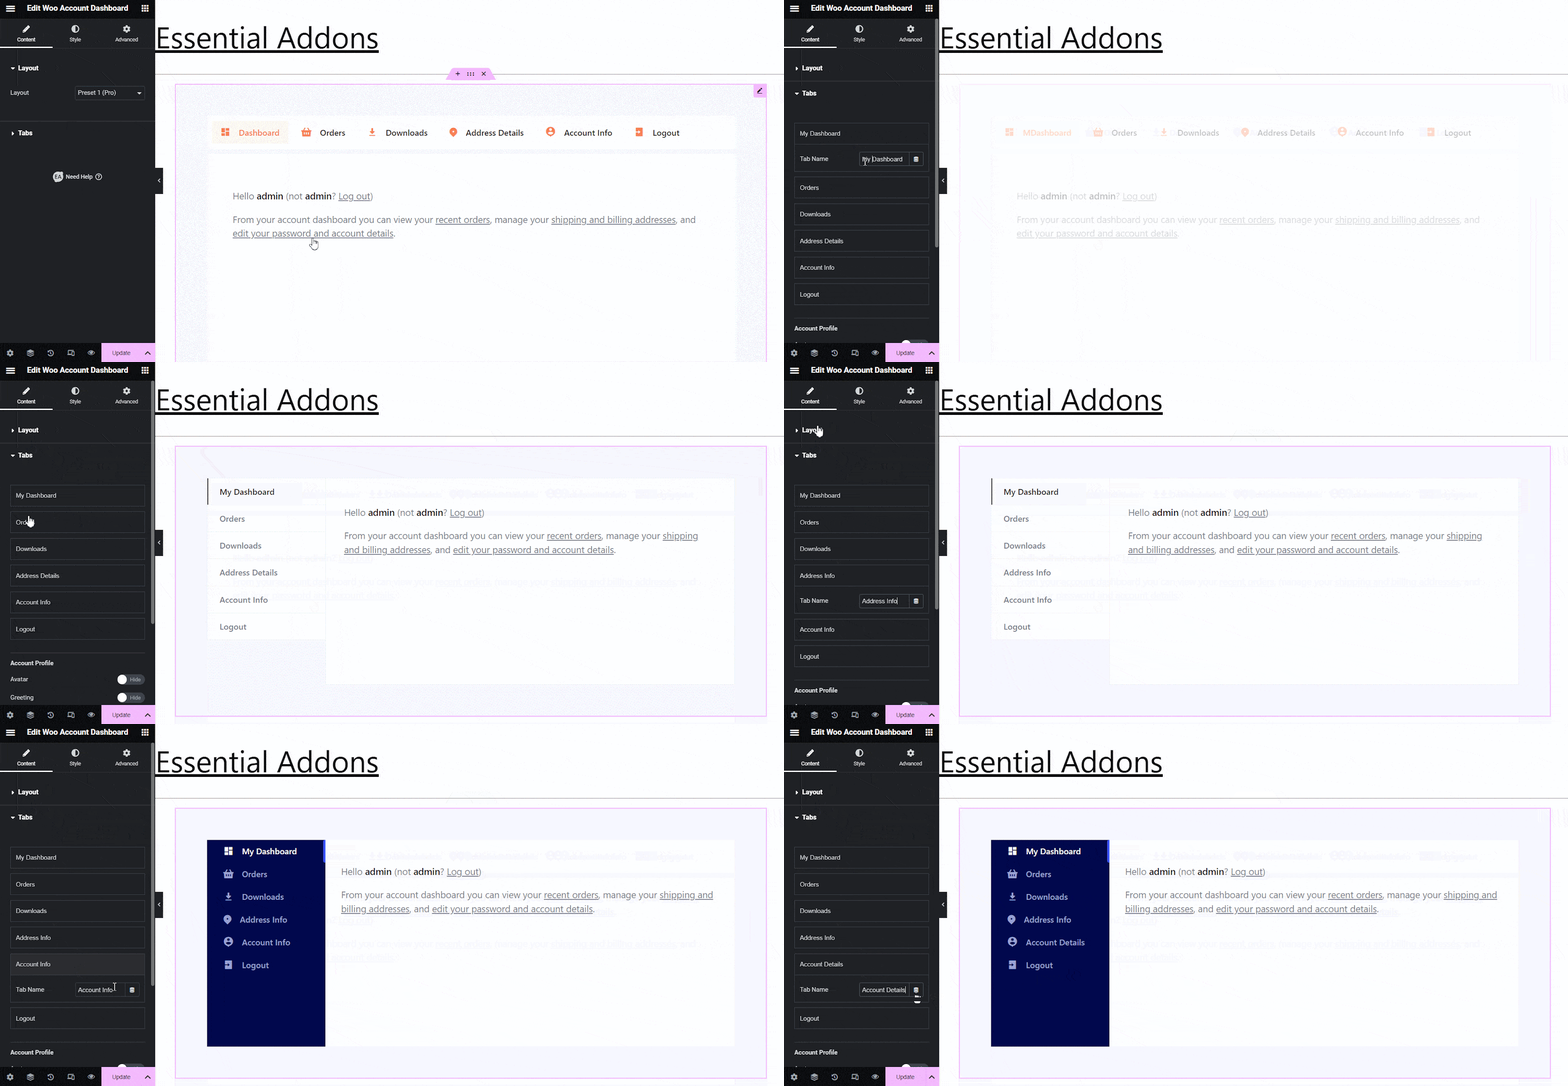
Under the ‘Content’ tab, you will be able to customize the ‘Dashboard,’ ‘Orders,’ ‘Downloads,’ ‘Addresses,’ ‘Account Details,’ and ‘Logout’ tabs.
Woo Account Dashboard Tabs #
This widget comes with six tabs, and each one has separate functionalities. The ‘My Dashboard’ welcomes you with a message and describes what you can do with navigations. On the ‘Orders’ tab, you can see the details of all orders with action buttons, and the ‘Downloads’ tab offers downloadable items for your products.

You can customize your billing and shipping addresses on the ‘Address Info’ tab and change your account details on the ‘Account’ tab, including passwords. The ‘Logout’ tab works as a button and is intended for logged-in users to sign out.
Layout Presets #
Under the General settings, you can enable or disable the thank you message. We have 3 available presets for you to choose from.

Tab Customization #
You can customize the tabs of each preset and change the name as you need, so it reflects the content tone of your WooCommerce store and brand image. For that, you just need to click the ‘Tabs’ button, and you will find the editable tabs’ names.

Account Profile #
Along with the tabs, you have options to display your account profile information with each preset. With a toggle button, you can choose to display your account Name, Avatar, and Greeting Text. Plus, you can also edit the greeting text as you want to see it.

How To Style Your Woo Account Dashboard? #
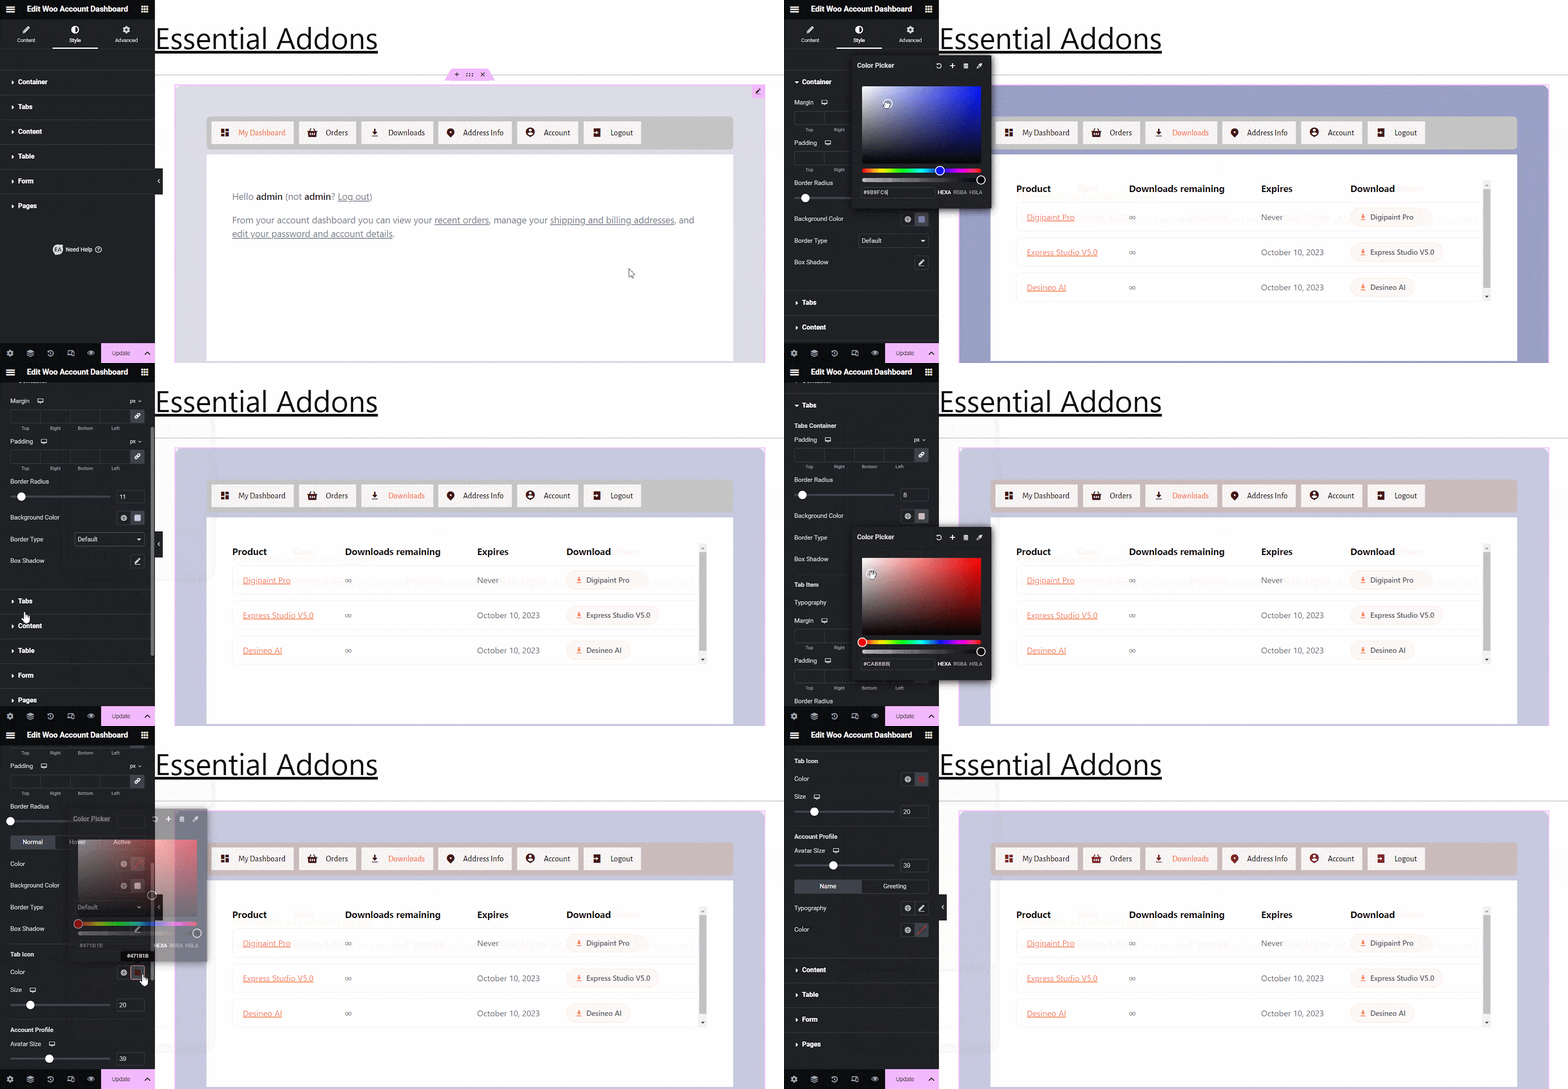
To customize your Woo Account Dashboard with colour, text, alignment and other adjustments, you need to go to the ‘Style’ tab. Here, you can make your widget’s Container, Tabs, Content, Table, Form, and Pages sections more eye-catching to the users to elevate their experience in your store.

Advanced Options #
The ‘Advanced’ tab comes with further Layout customization options, a few EA extensions, Motion Effects choices, Responsive Controls, Background effects, and more. You can explore these options and make necessary changes as you need to give your widget a further polished look.

Final Outcome #
After doing all the customization and designs, publish your page. Here’s how it will look to the users or visitors.

Getting stuck? Feel free to contact our support for further assistance and join our Facebook community for the latest updates.


