The EA Woo Thank You widget from Essential Addons serves as a way to express gratitude to customers for their purchase and create a positive impression. When a customer completes a purchase, the EA Woo Thank You Widget allows the store owner to display a personalized thank you message on the order confirmation page.
Follow this step-by-step guide to add a WooCommerce Thank You Page to your WordPress site with Essential Addons for Elementor.
How To Set Up A WooCommerce Checkout Page? #
To get started, first, you need to create a new page or use the default Woo Checkout page. If you have created a new page, make sure to make it a checkout page from WooCommerce settings. For tutorial purposes, we have created a new page called EA Woo Thank You.

Note: You can see that our newly created page is already a checkout page because we have modified it from the settings. You can use the WooCommerce default checkout page as well.
Now if you have created a new page, navigate to the WooCommerce → Settings

Click on the ‘Advanced’ tab and go to the ‘Checkout Dropdown’. Select the dropdown and simply paste your page name or page code.

Now we have to enable a Payment Method. On the same page, go to the ‘Payment’ tab and select the options that suit your needs.

How To Add A Product To The Cart From The Shop Page? #
Now we have to add single or multiple products from our shop page if we hadn’t before. Simply click on the page and add it.

We are now ready to explore the EA Thank You widget from Essential Addons.
How To Activate EA Woo Thank You? #
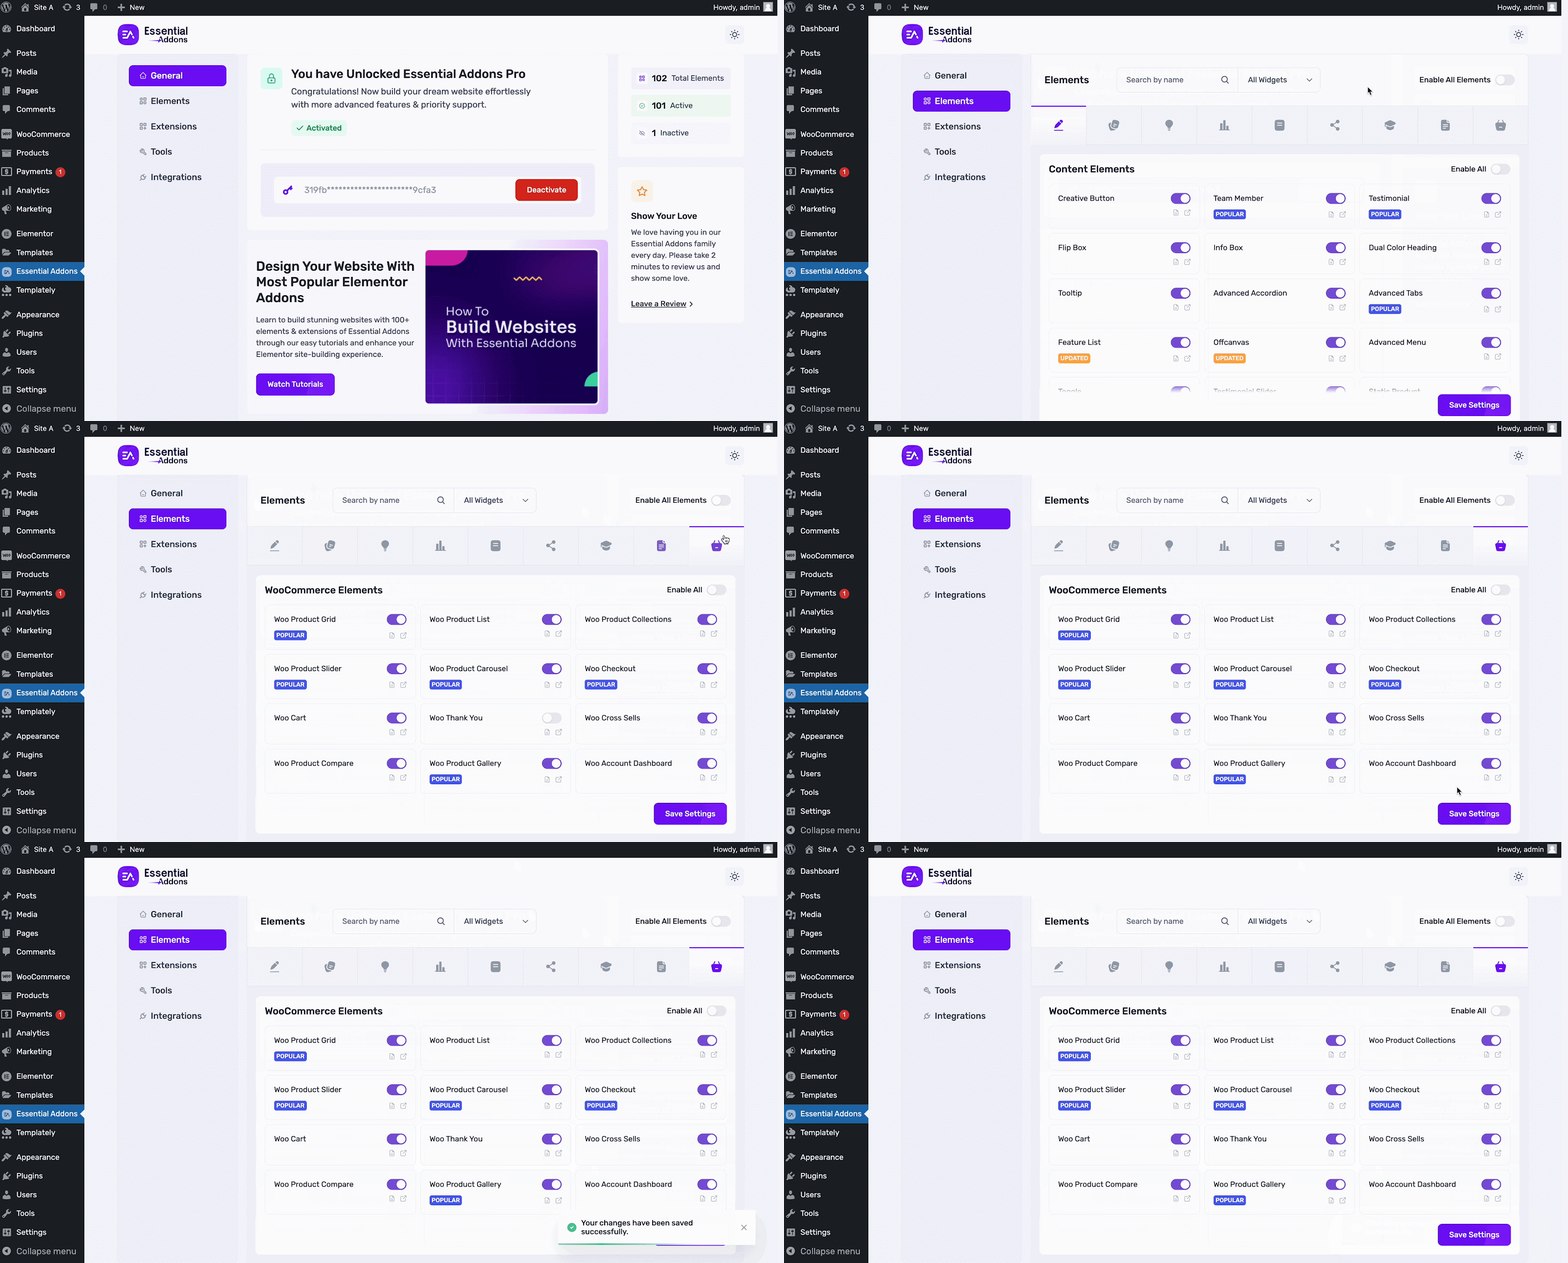
To use this Essential Addons Woo Thank You widget, you need to enable this widget first if you have not yet. To do that, go to the ‘Elements’ tab in Essential Addons from the WordPress dashboard. Now, go to the ‘WooCommerce Elements’ section and toggle the ‘Woo Thank You’ widget to enable it. Then, hit the ‘Save Changes’ button.

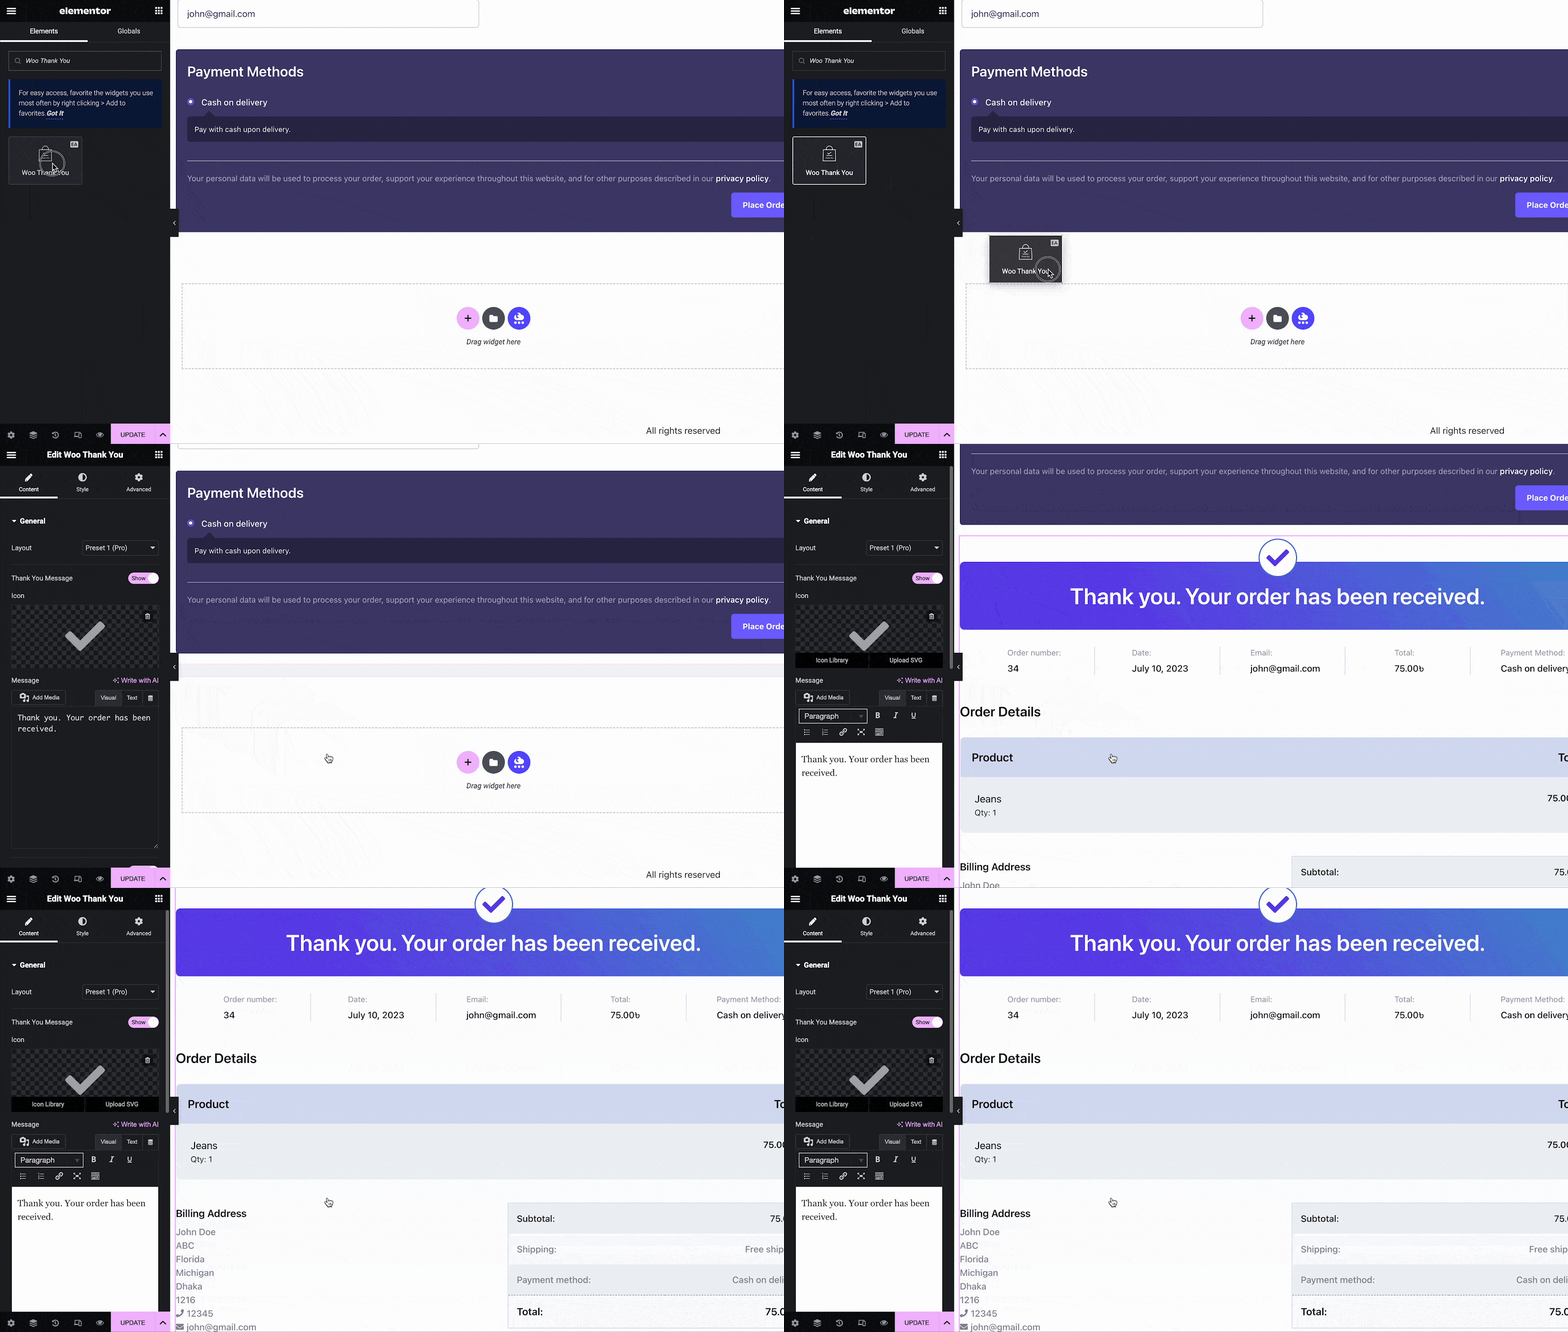
Now, open the ‘Product Order’ page in Elementor and find the ‘EA Woo Thank You’ element from the Search option under the ‘Elements‘ tab. Simply just Drag & Drop the ‘EA Woo Thank You’ into the ‘Drag widget here‘ or the ‘+’ section.

How To Configure The Content Settings? #
Under the ‘Content’ tab, you will be able to configure ‘Order Overview’, ‘Order Details’, ‘Billing Address’ & much more.
General Settings #
Under the General settings, you can enable or disable the thank you message. We have 3 available presets for you to choose from.

You can also customize your thank you message any way you like. Also, you will have the option to enable or disable the Order Overview, Order Details, Order Summary, and much more options easily.

Order Overview Settings #
Here you will have multiple options to customize your Order Number, Date, Email, Label, Payment Method, etc.

Order Details Settings #
Under order details you can enable or disable your title along with the label text. You can also customize your Product Label and Total Label. Easily enable or disable the ‘Name’, ‘Quantity’, ‘Meta Data’, and much more.

Billing Address & Shipping Address #
Under the ‘Billing Address’ and ‘Shipping Address’ you can add Title, Label, Mobile No, Email Address, and other necessary information easily.
You can easily enable or disable the shipping address title and customize the address label as per your preference.

How To Style EA Woo Thank You? #
EA Woo Thank You has numerous styling options to make your thank you message more appealing. Switch to the ‘Style’ tab to style all the features of the EA Woo Thank You and get your desired result.
Thank You Message & Order Overview #
Under the ‘Thank You Message’ tab you can customize the overall outlook of your message. Effortlessly customize the icon Size and Area with proper positioning. Also, you will have the option to pick any color palette that suits your website theme. For proper positioning, customize your Border Type, Border Radius, Margin, Padding, and much more.

From the ‘Order Overview’ option, you can modify your Container, Background Type, Border Type, Label Values, and much more without any coding at all.

Order Details And Billing Address #
From the ‘Order Details’ dropdown, you will have the option to change the Color, Border Type, Table Heading, Item Details, Product Name, etc with ease.

Shipping Address And Order Summary #
Click on the ‘Shipping Address’ and from the dropdown you can customize the Typography, Margin, Padding, Title, Color, and much more without any complexity.

From ‘Order Summary’ easily tweak your Label & Value typography with suitable Color and Background type.

You may customize your Essential Addons Woo Thank You widget to your liking by following the basic steps and tweaking them a little.

With the EA Woo Thank You Widget, you can show a nice thank you message and give important information to customers who have just bought something from your store.
Getting stuck? Feel free to contact our support for further assistance and join our Facebook community for the latest updates.


