
With the EA Woo Product Tabs widget, you can showcase your WooCommerce product’s description, additional information, and reviews in a clean, fully customizable tabbed layout on the single product page. This Elementor widget helps you organize product details in a way that’s easy to browse and styled to match your store, for free.
Note: Before starting with the Essential Addons Woo Product Tabs, you have to install & activate WooCommerce plugin on your WordPress dashboard & list products on your online store.
Also, install and activate Templately, as we’ll be using Templately’s Theme Builder to do this. Follow the step-by-step guidelines below to configure the Essential Addons Woo Product Tabs widget in Elementor.
Step 1: Activate EA Woo Product Tabs #
First, you need to activate the Essential Addons Woo Product Tabs widget. To do so, navigate to ‘Essential Addons’ → ‘Elements’ from your admin dashboard.
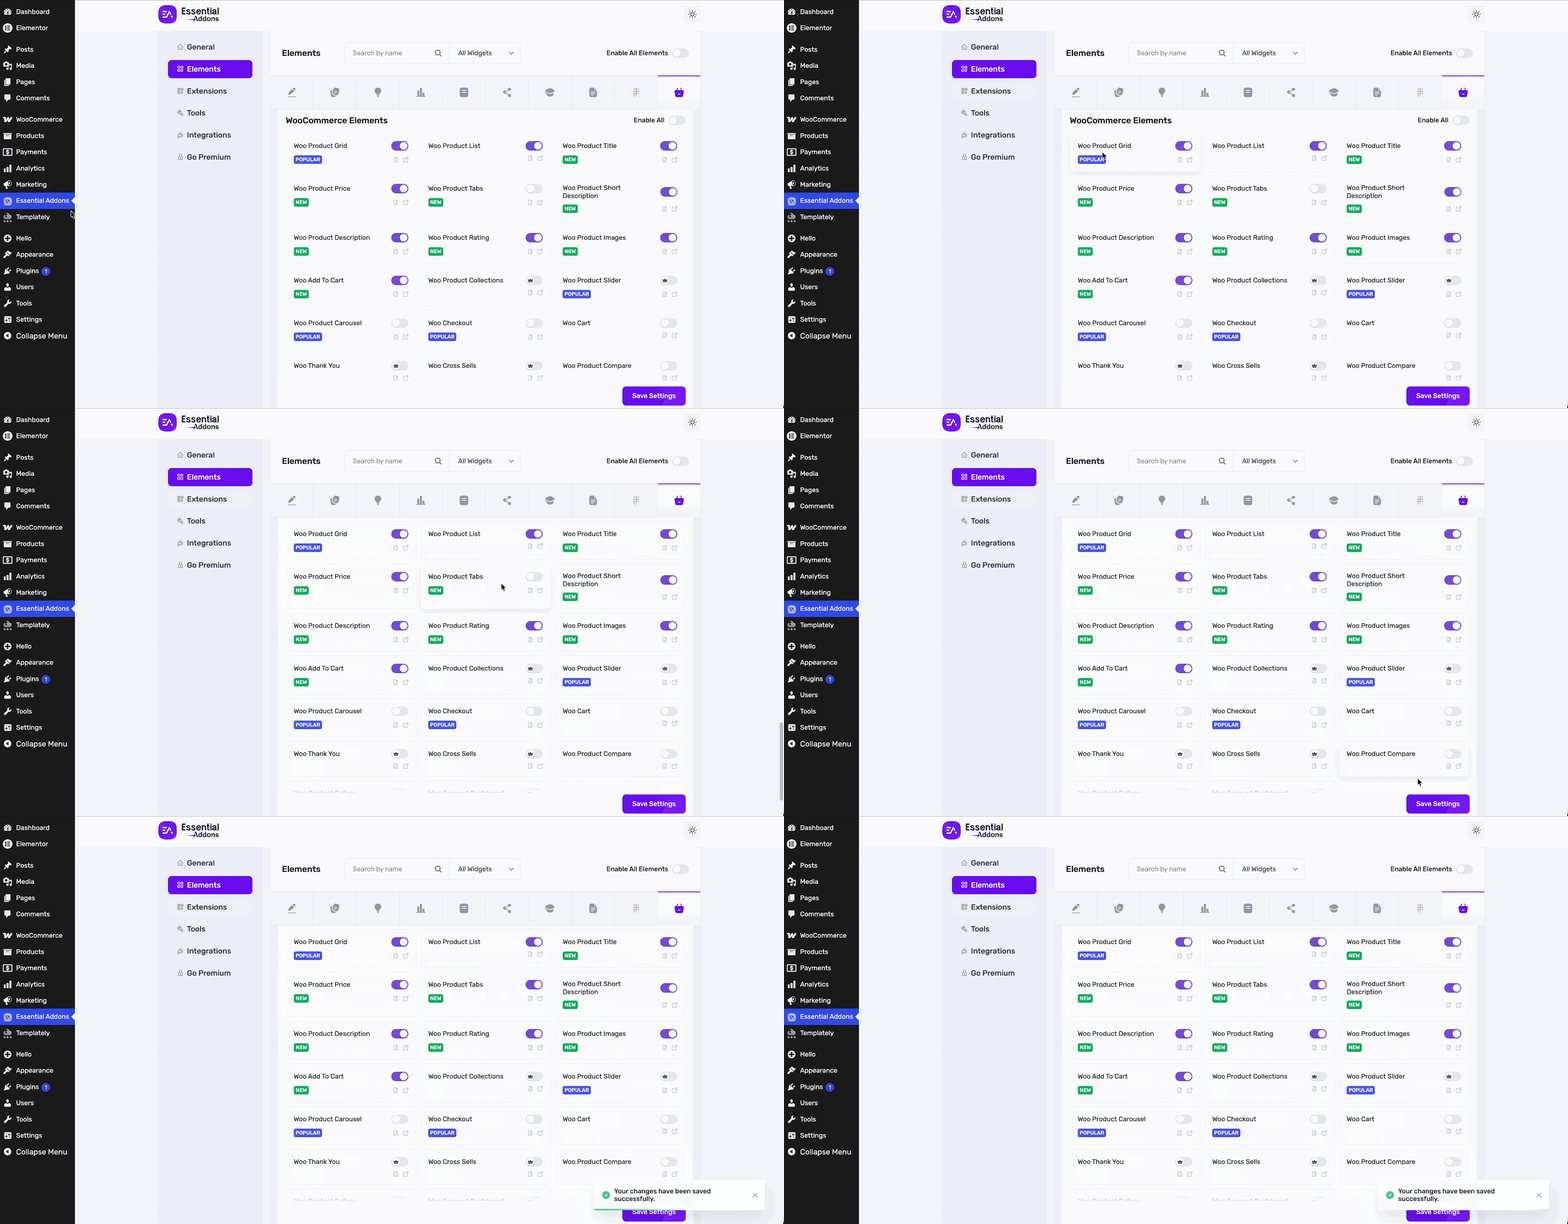
Then, scroll to the WooCommerce Elements section and turn on the toggle to enable the ‘Woo Product Tabs’ widget. Click ‘Save Settings’ to activate it instantly.
Step 2: Create a New Single Product Template with Templately Theme Builder #
Navigate to Templately from the sidebar, then go to ‘Theme Builder’ → ‘Add New Template’ to create a new product template.
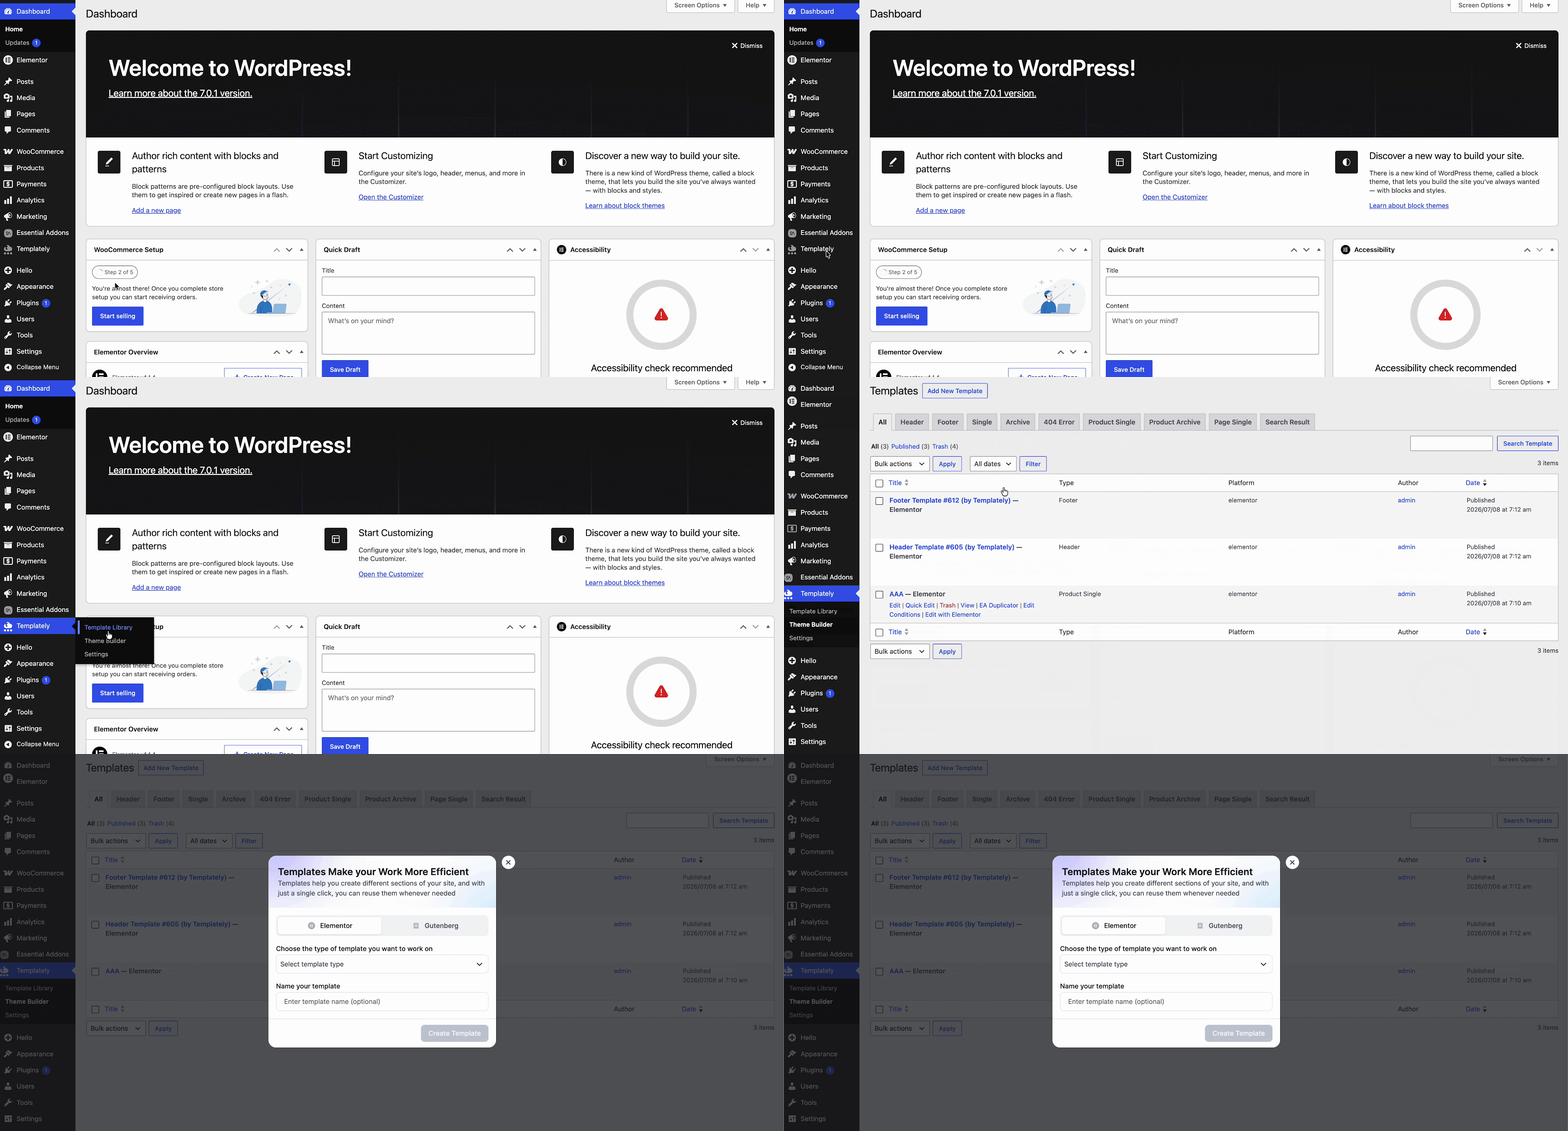
A pop-up will appear. Choose the ‘Elementor’ editor, select ‘Product Single’ as the template type, give your template a name, and click ‘Create Template.’
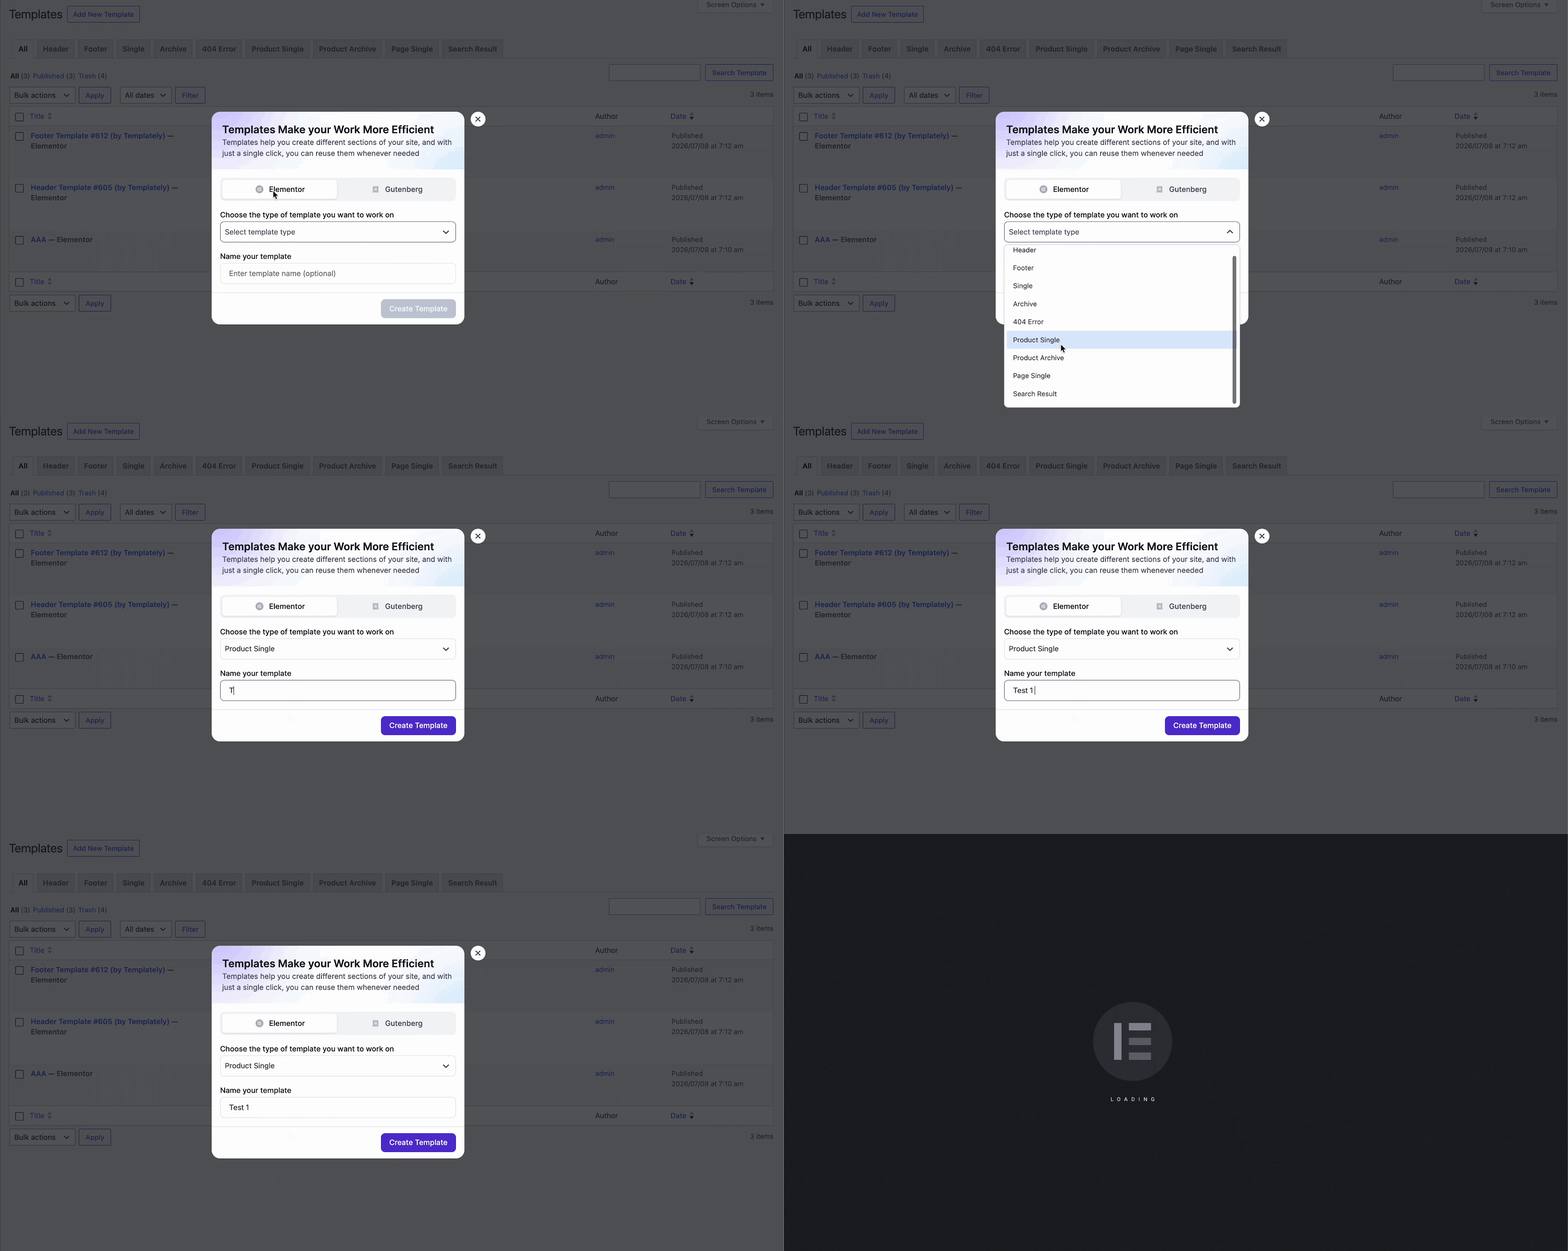
Once your template is set up, drag and drop the ‘Woo Product Tabs’ widget onto the canvas and position it below the main product details. Publish the template for the ‘Single Product Page.’
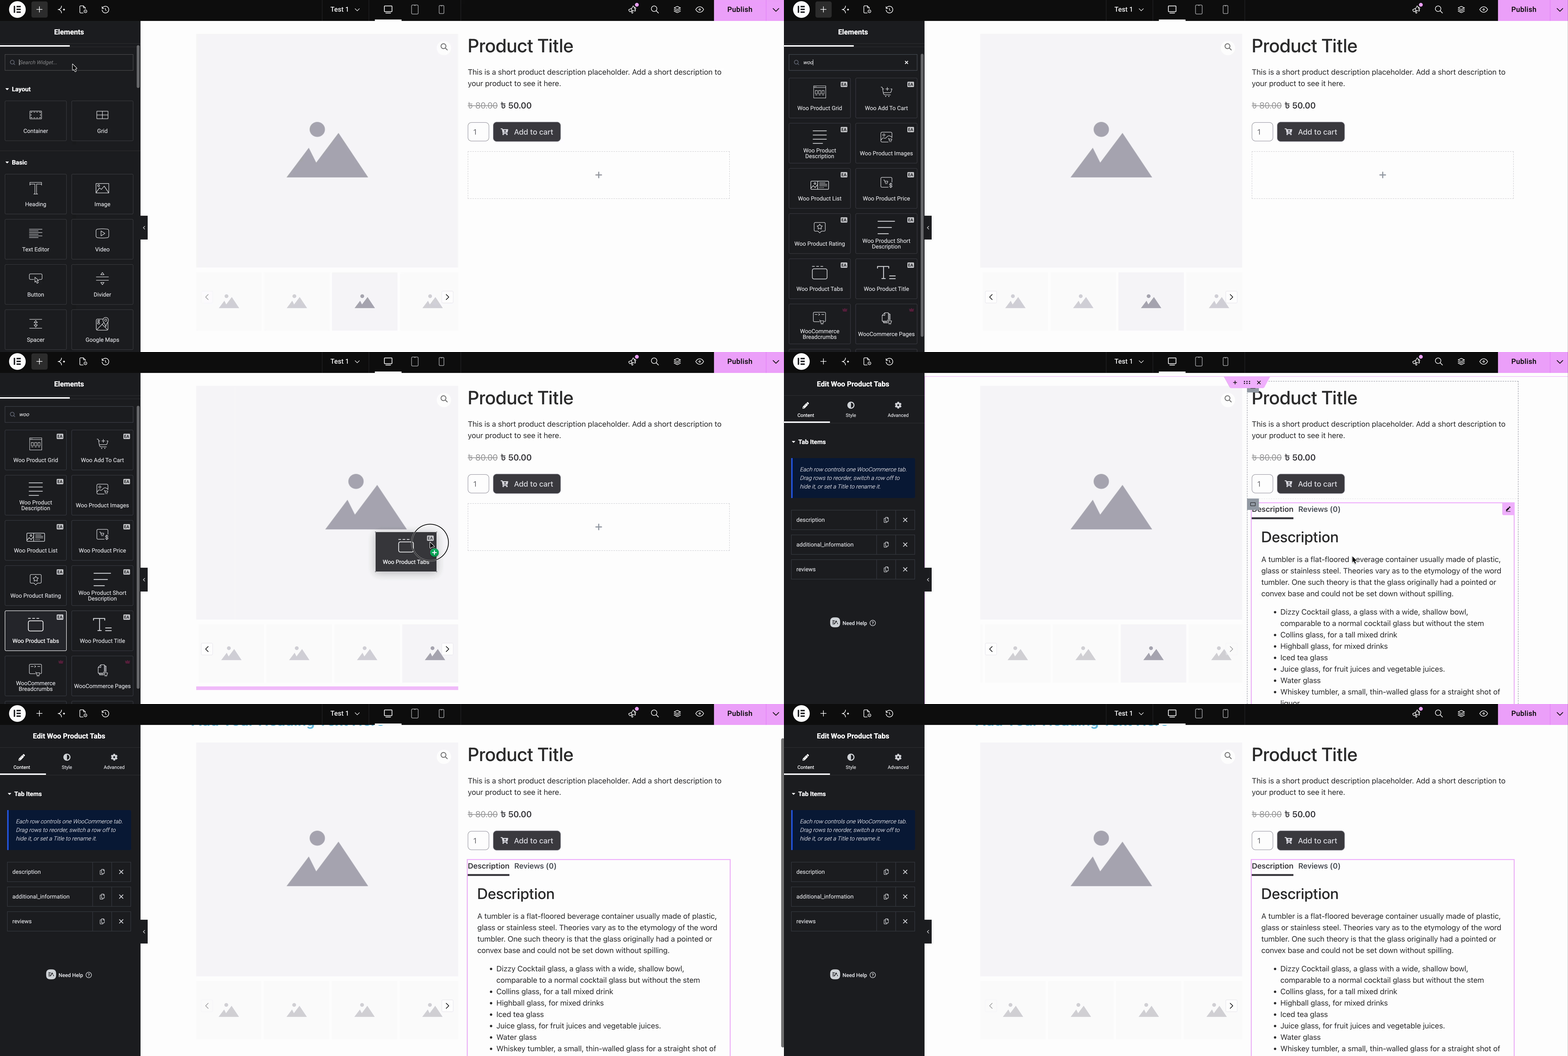
Once you’re done, the tabs section will be visible on the single product page along with the other elements included in the template.
Step 3: Configure Woo Product Tabs on a Single WooCommerce Product Page #
After creating the product template, move on to the style and configuration part. The widget consists of three configuration sections: ‘General,’ ‘Style,’ and ‘Advanced.’
Content #
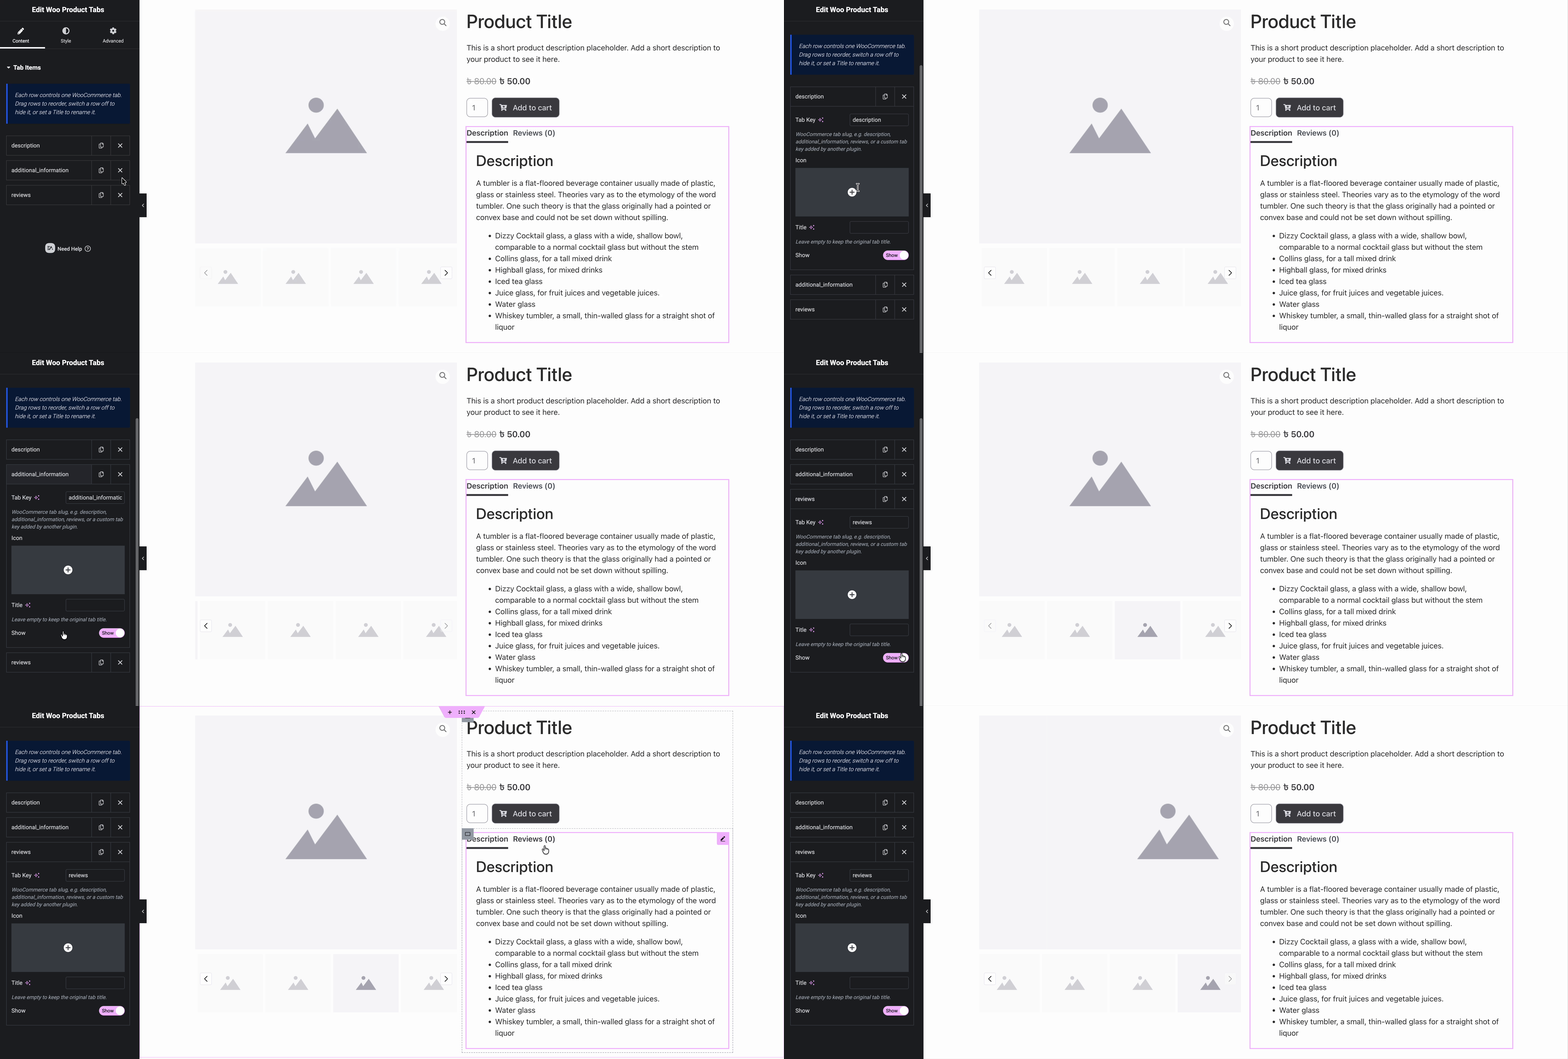
Under the ‘Content’ tab, you can choose which tabs to display: Description, Additional Information, Reviews, and toggle each on or off individually. You can also rename tab labels the way you prefer.
Style #
Under the ‘Style’ tab, expand the ‘Tabs’ section to customize the appearance of your tab navigation buttons (e.g., Description, Reviews). You can set the Typography for the tab labels, and control the Border Radius individually for each corner (Top, Right, Bottom, Left) in px, with a link icon to sync all sides at once.
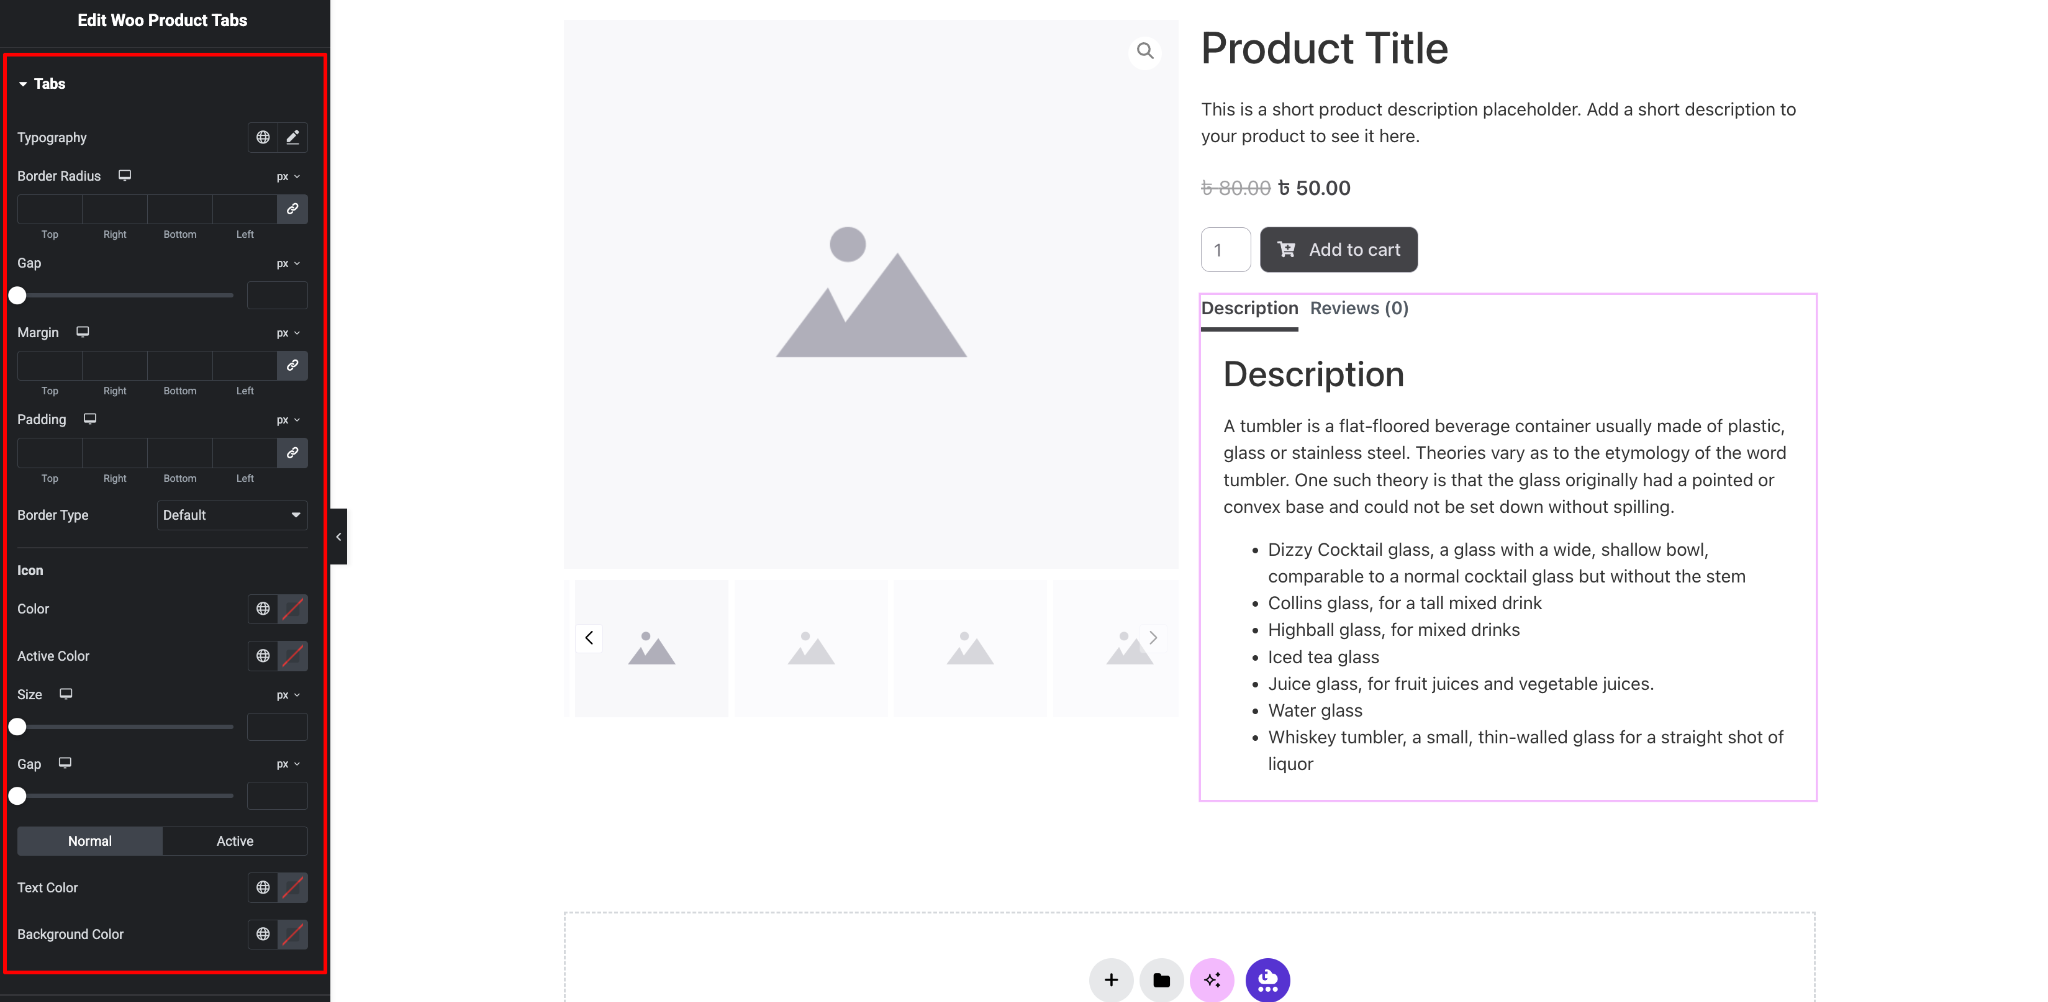
Adjust the Gap between tabs using the slider or by entering a px value directly. Margin and Padding are also fully customizable per side (Top, Right, Bottom, Left), letting you fine-tune the spacing around and within each tab. You can choose a Border Type from the dropdown (Default, or other border styles) to style the tab’s outline.
If you’re using icons alongside your tab labels, the Icon subsection lets you set the Color for inactive tabs and a separate Active Color for the currently selected tab, along with Size and Gap (spacing between the icon and label text), both adjustable via slider or px input.
Then expand the ‘Panel’ section to customize the appearance of your tab content area (the area displaying the Description, Additional Information, or Reviews text once a tab is selected). You can set the Background Color for the content panel, along with the Typography and Text Color for the content inside it.
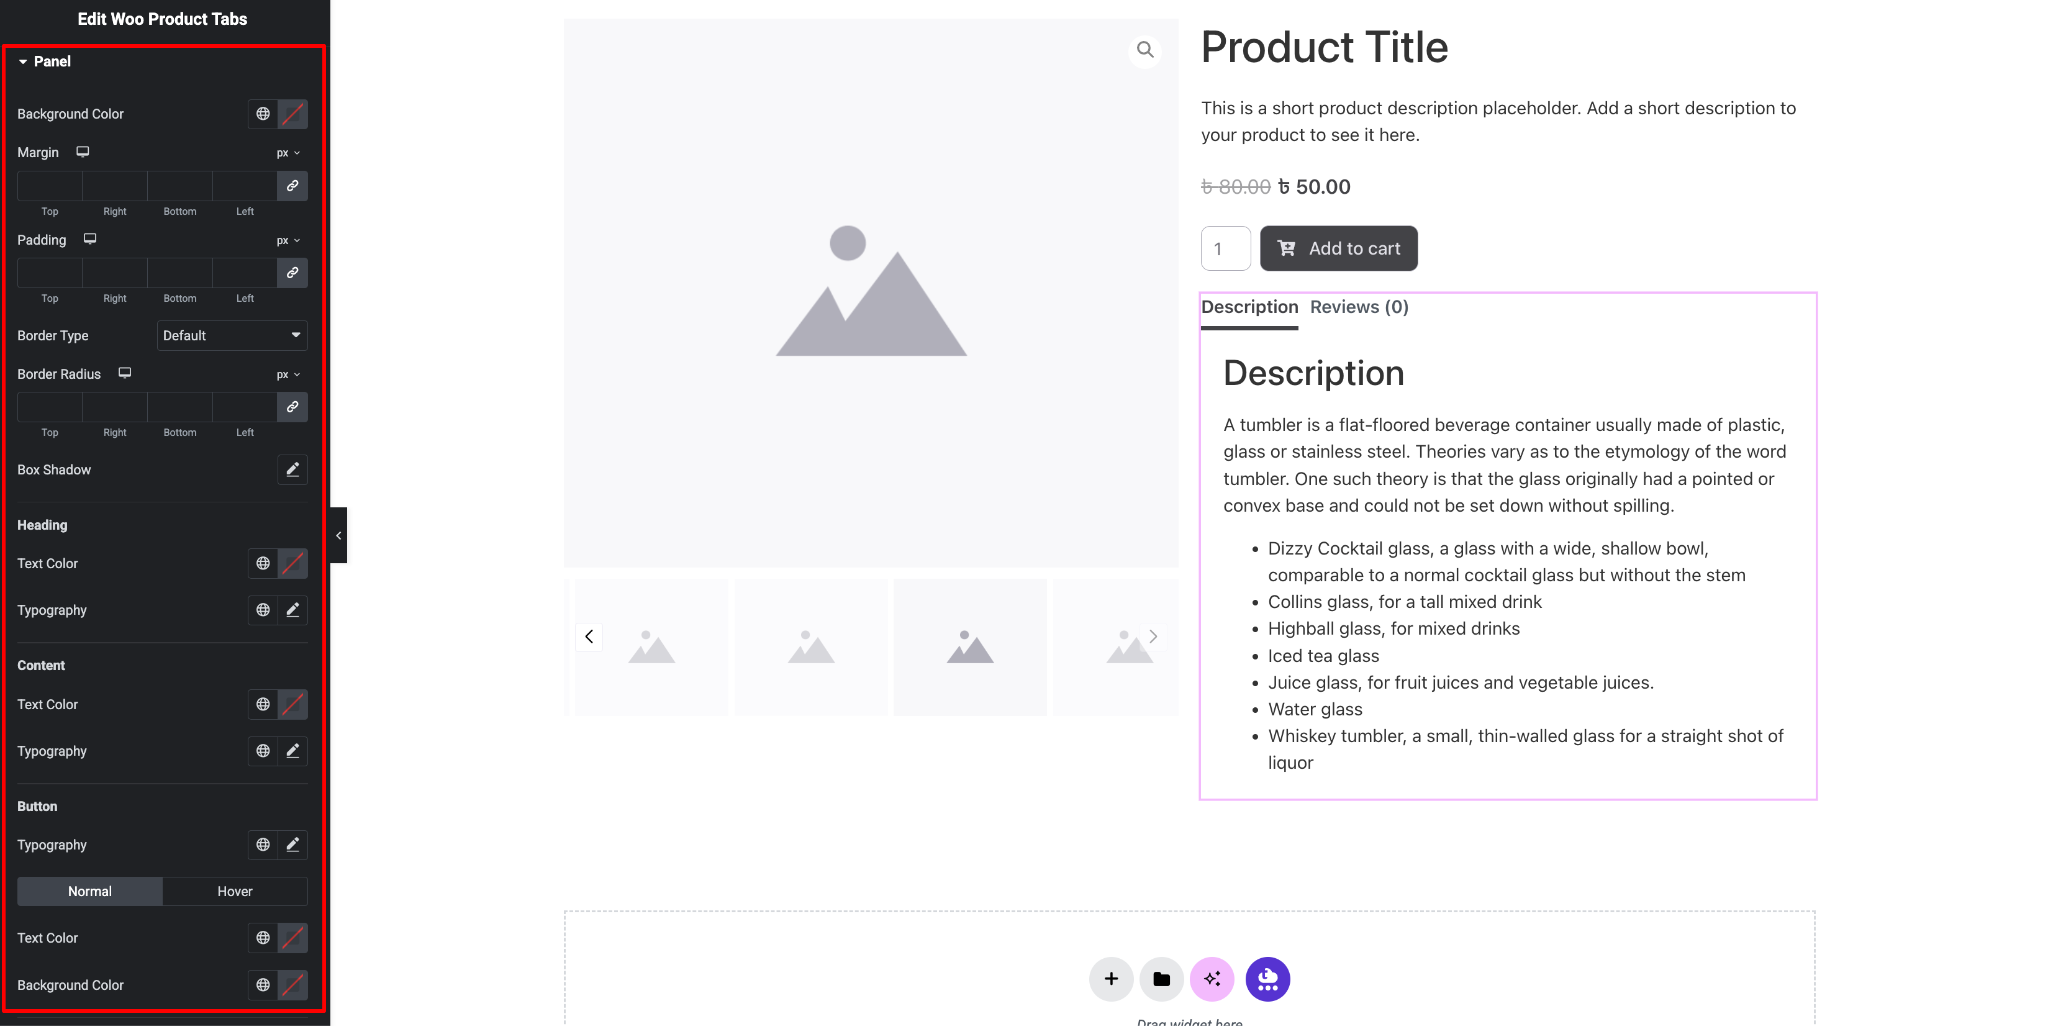
Adjust the Padding for the panel using individual Top, Right, Bottom, and Left values in px, with a link icon to apply the same value across all sides at once. You can also set the Border Type from the dropdown to style the outline of the content area, along with Border Width and Border Color.
Border Radius can be customized per corner (Top, Right, Bottom, Left) in px, letting you round the panel’s edges to match your tab navigation styling. Finally, a Box Shadow option lets you add depth to the content panel, with controls for horizontal/vertical offset, blur, spread, and color.
Advanced #
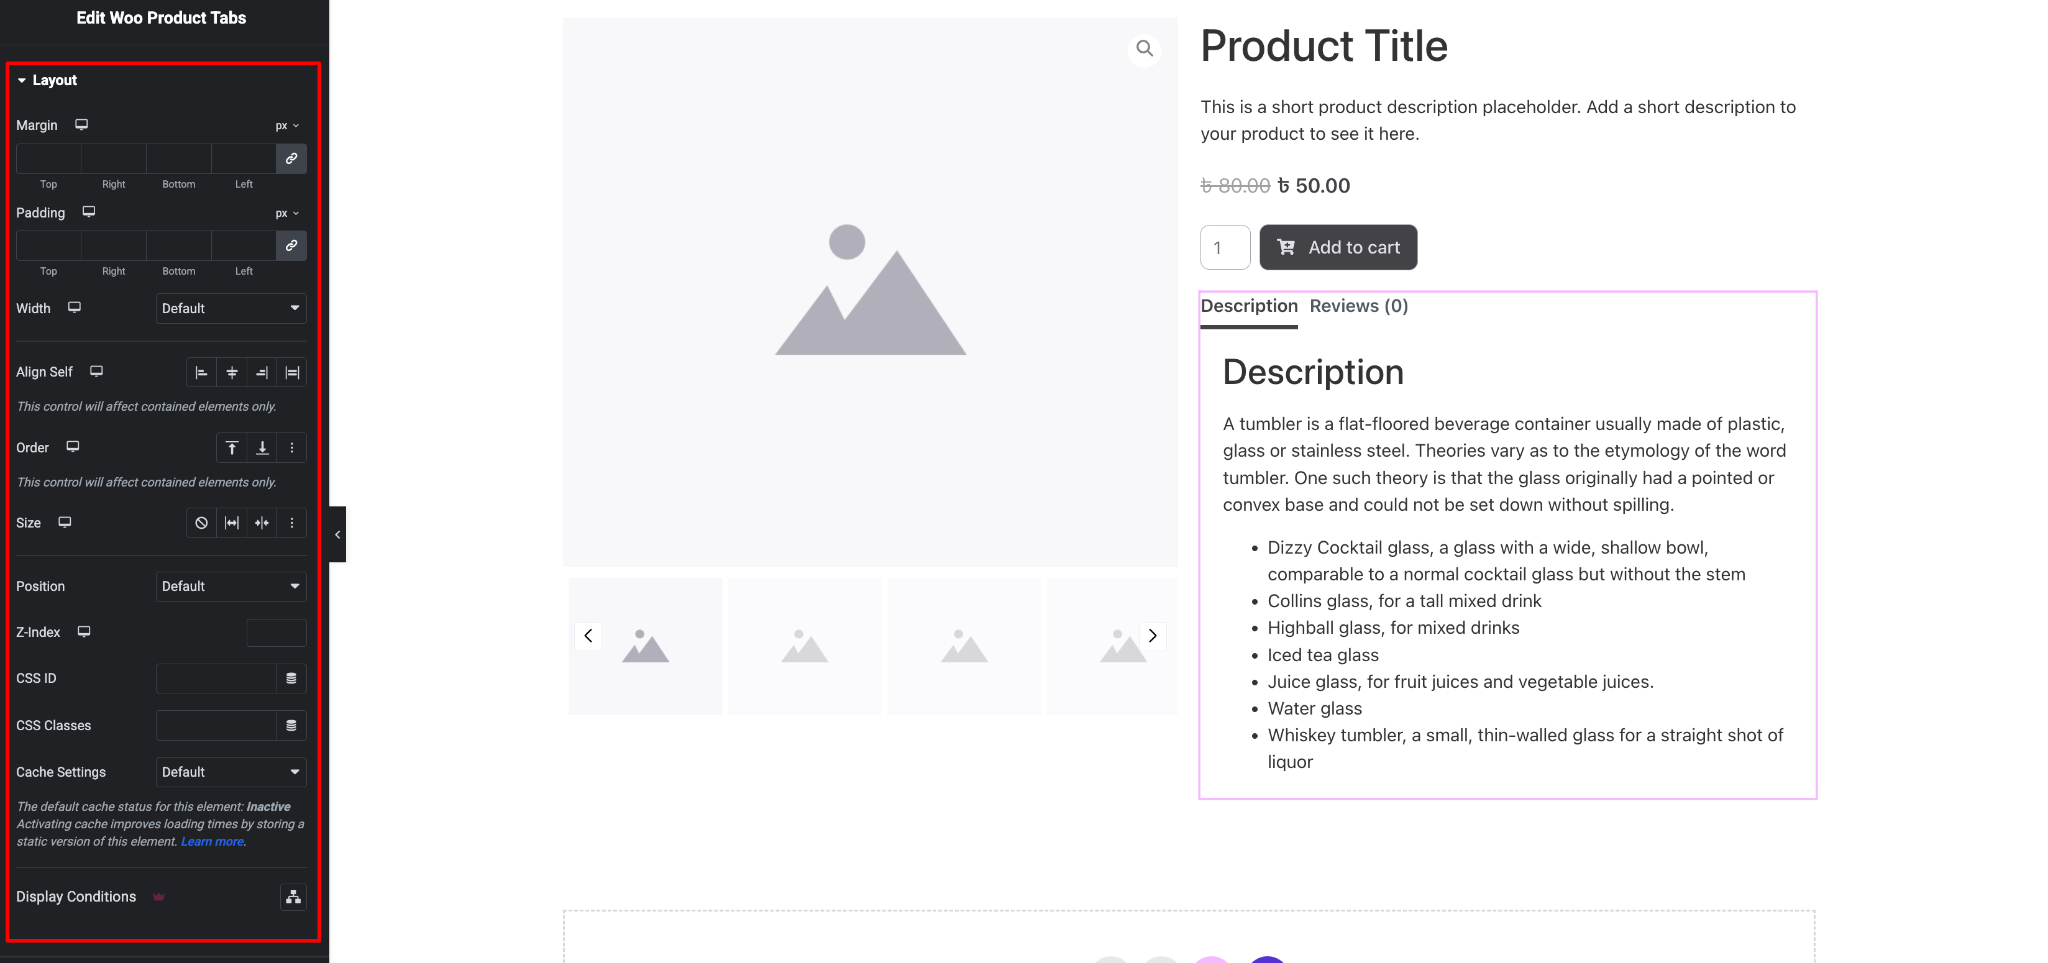
From the ‘Advanced’ tab, you can fine-tune the appearance further with margin, padding, border, and responsive visibility settings, letting you adjust how the product tabs looks across desktop, tablet, and mobile.
Final Outcome #
By following these simple steps, you can add and style the EA Woo Product Tabs widget on your single product page in Elementor, giving customers an organized, easy-to-navigate view of your product details.
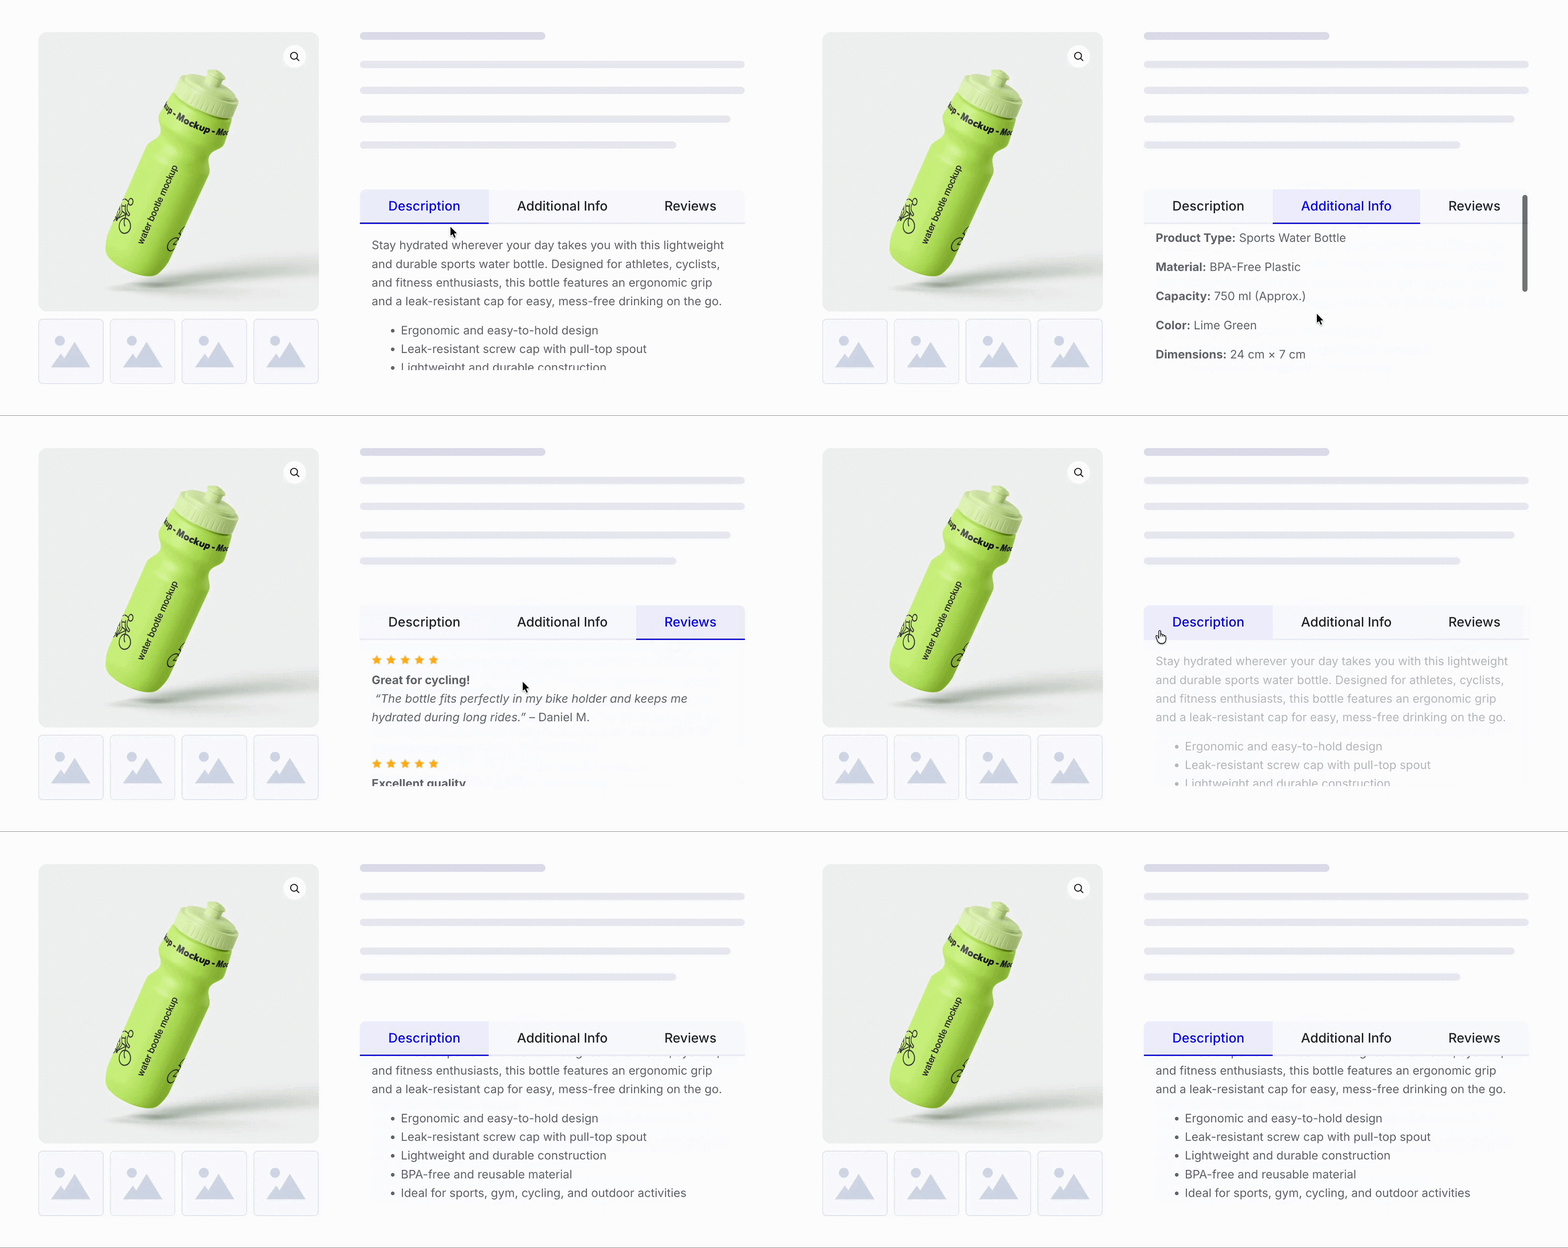
This is how you can easily set up and design the EA Woo Product Tabs widget in Elementor.
Got stuck? Feel free to contact our support for further assistance.