
EA Woo Product Title lets you design your WooCommerce product title and allows you to create a customizable and eye-catching product title on your WooCommerce store. Let us follow the step-by-step guide below to learn how to use this WooCommerce element.
Note: Before you start configuring the Essential Addons Woo Product Title widget, ensure you have the WooCommerce plugin and a full-site edit-available theme or plugin installed & activated on your site. We are using Templately here for free FSE access.
How to Activate the EA Woo Product Title? #
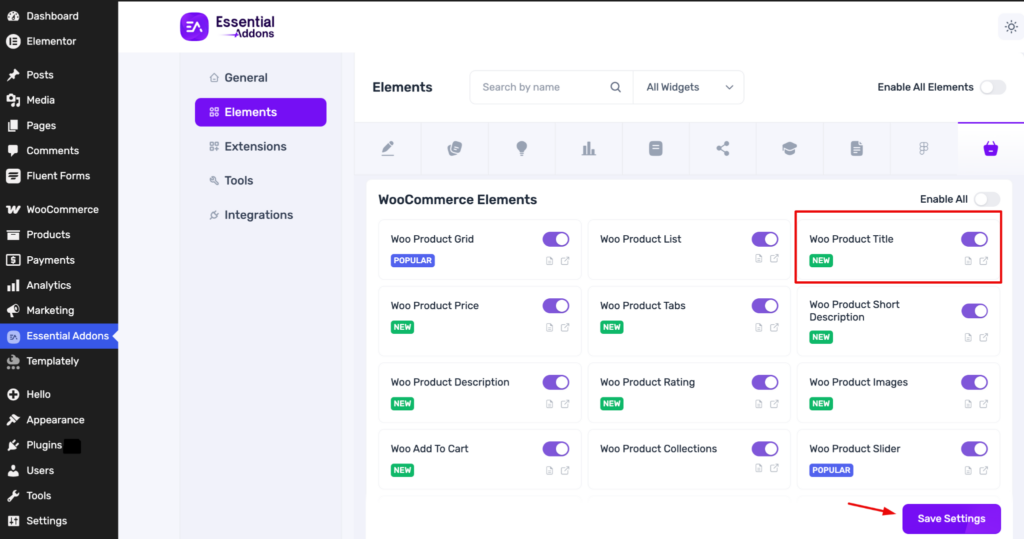
To activate the EA Woo Product Title, navigate to ‘Essential Addons’ → ‘Elements’ and select the ‘WooCommerce Elements‘ tab from the admin dashboard. Then, toggle it on to enable the ‘Woo Product Title’ element. The element will be enabled instantly once you hit the ‘Save Settings’ button.
How to Add EA Woo Product Title Widget in Single Product Page? #
To configure Woo Product Title in Essential Addons for Elementor, you will need to have full site edit functionality in your WordPress site through a plugin or theme to edit a single product page template. We are using the Templately Theme Builder for FSE.
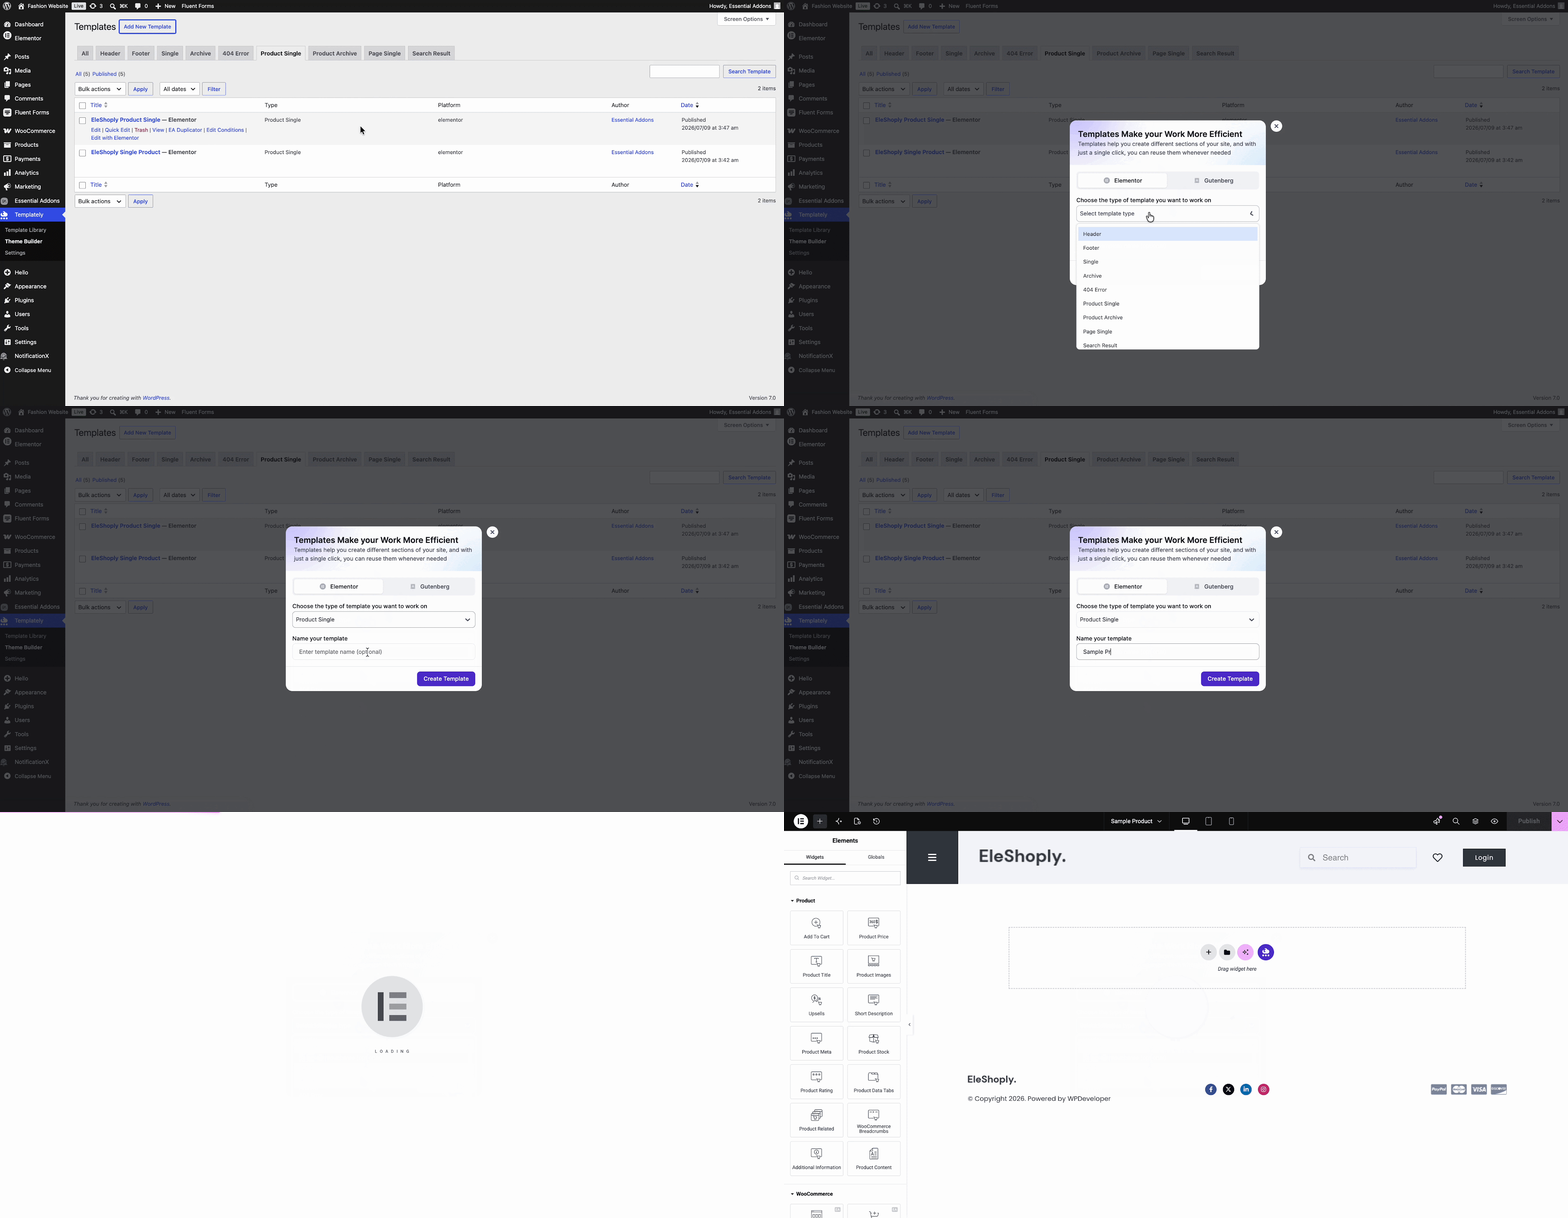
Navigate to Templately → Theme Builder in the WordPress dashboard menu, click on the ‘Add New Template’ button, select ‘Elementor’, then choose the template ‘Product Single’ from the dropdown, add a template name, and hit the ‘Create Template’ button. Your product single-page template will be created on the Templately theme builder.
How to Configure EA Woo Product Title in Essential Addons? #
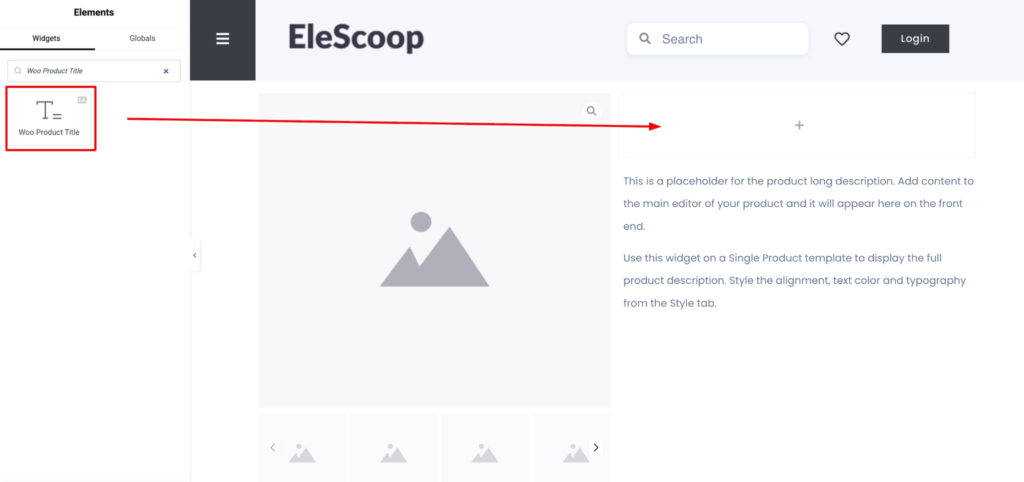
On the template page, first add the widgets you want to showcase on your Woo Product Page. Here, for example, Woo Product Image and Woo Product Description are already added. Then, click on the ‘+’ icon and search ‘Woo Product Title’ in the directory and drag and drop the widget to the page section.
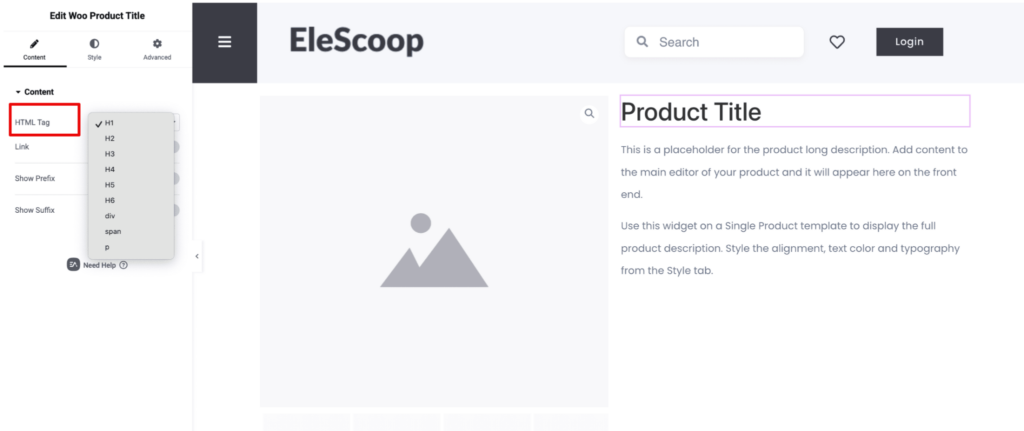
Now, you can configure the product title from the Content tab.
Choose the appropriate HTML heading tag for your product title, such as H1, H2, H3, etc. to maintain a clear page structure and improve content hierarchy.
You can also enable the Link toggle to make the product title clickable and direct visitors to the corresponding product page.
Enable the Prefix toggle to add custom text before the product title, such as a product category or label, and use the Suffix toggle to add additional text after the title, such as an edition, type, or promotional message.
How to Style the Woo Product Title #
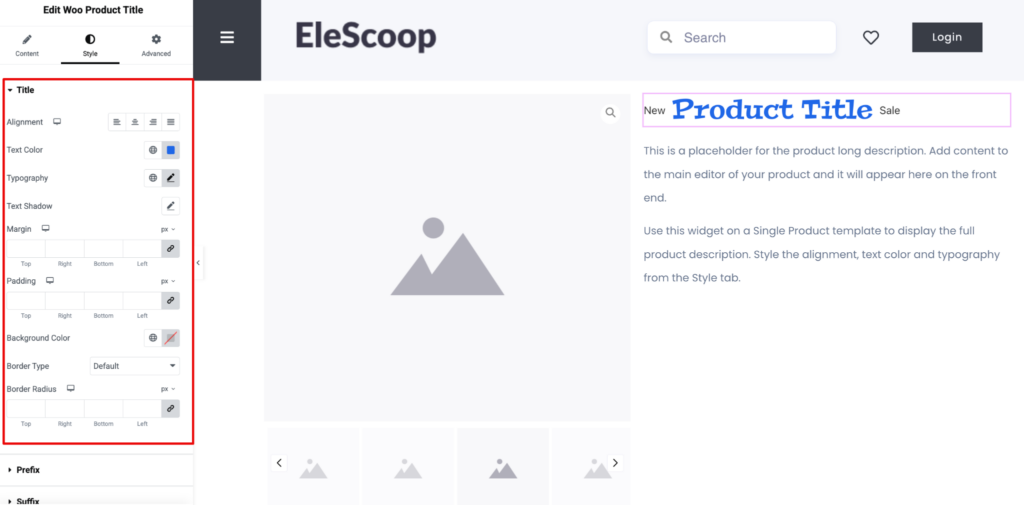
Once you have configured the title for your product page, it is time to style it. Click the ‘Style’ tab to customize the Title. Select the alignment, add different text colors, choose typography, or add different background colors based on your brand preferences. You can also customize the prefix and suffix in the same way.
After configuring and styling the EA Woo Product Title widget on the single product template, it is now time to make it live and introduce the page to WordPress as the default Single Product page.
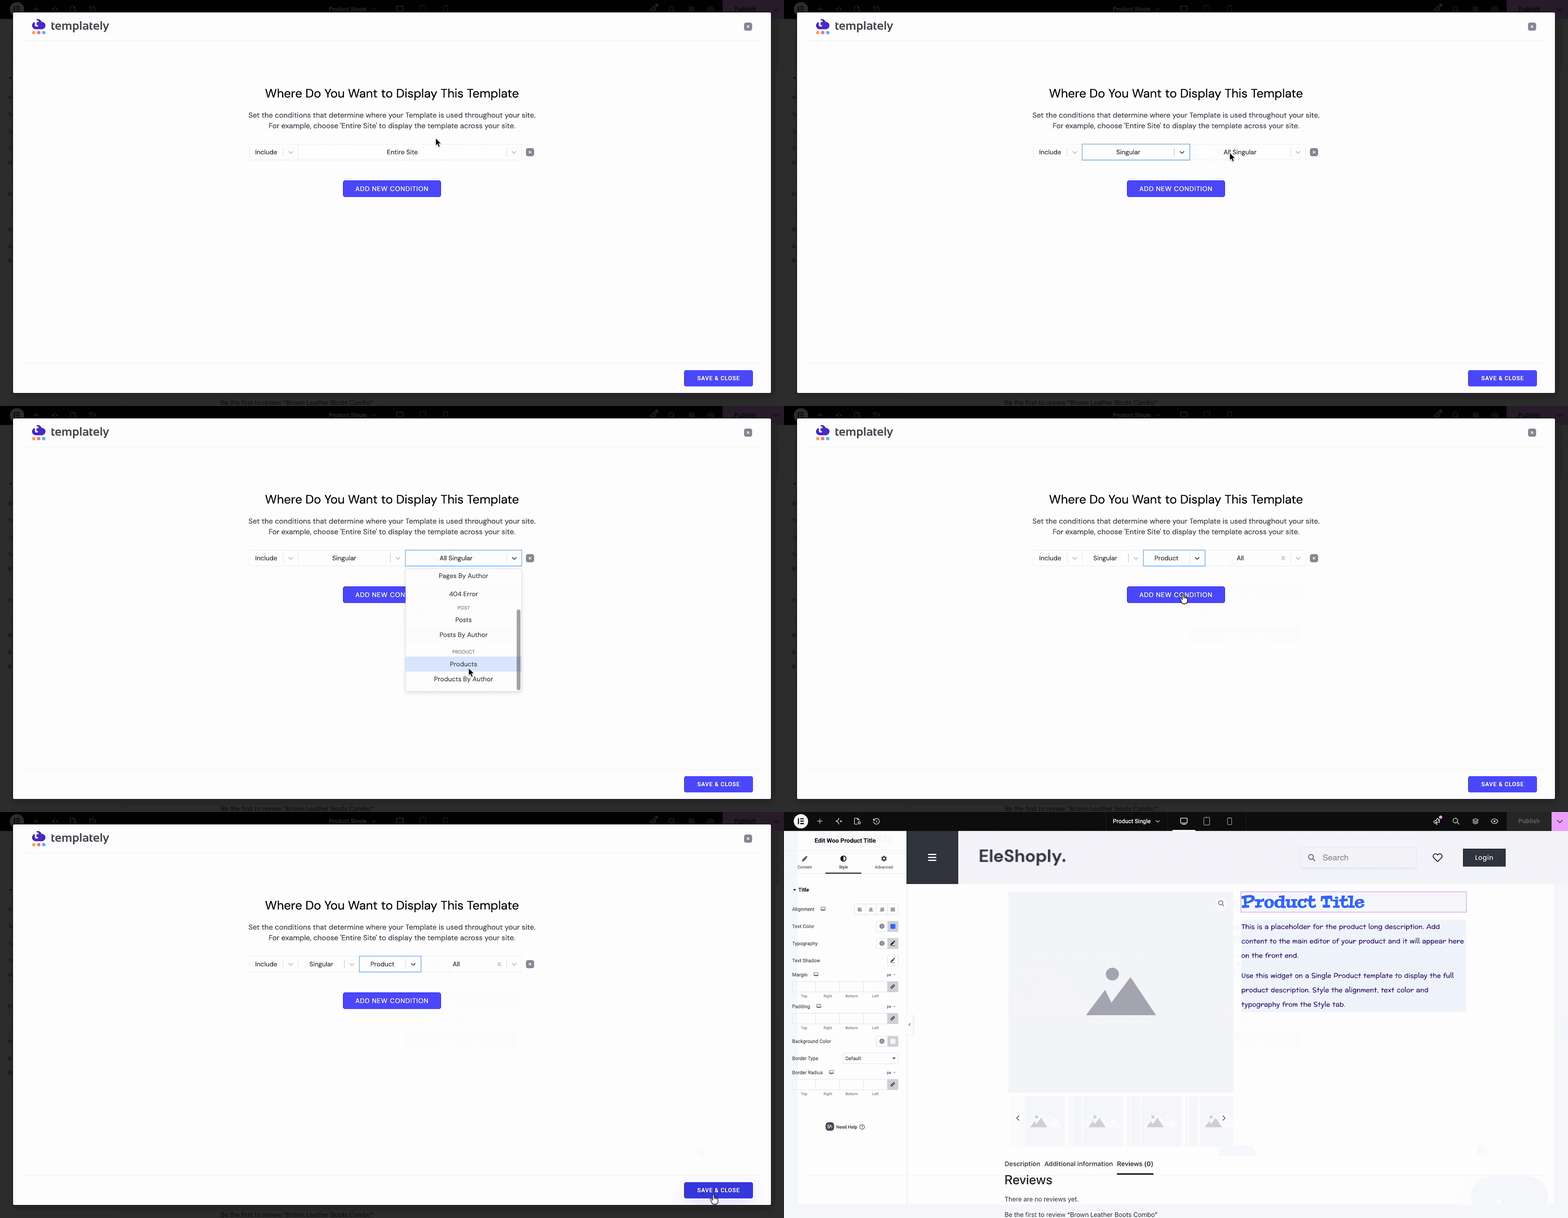
Hit the ‘Publish’ button and click on the ‘Add New Condition’ button to configure this page as the default single product template page. Set the condition in this order: including ⮕ singular ⮕ product ⮕ all. After setting the condition, hit the ‘Save & Close’ button.
Final Outcome #
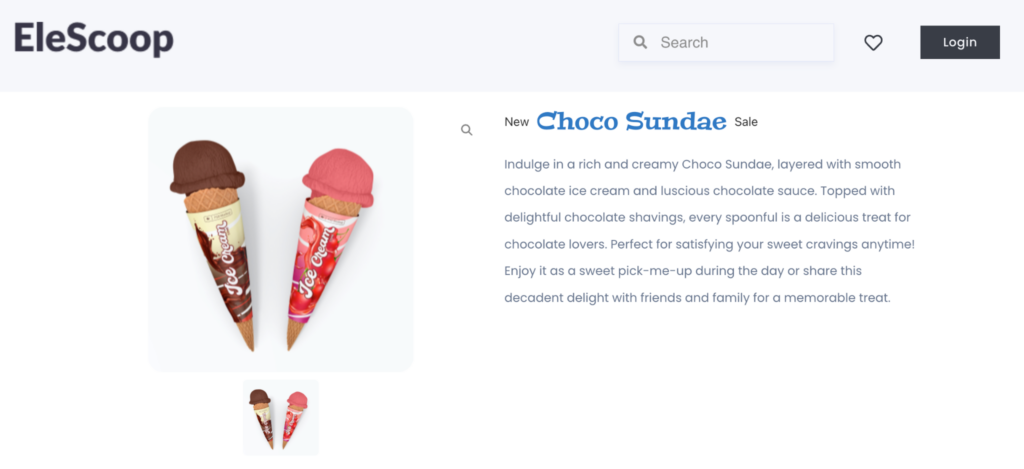
This is how easily you can add and configure EA Woo Product Title and display product titles based on your brand guidelines to boost your WooCommerce store conversions.
Still Stuck! Contact our support team for further assistance.